Table of Contents
Advertisement
Advertisement
Table of Contents

Related Manuals for Siemens SOMATOM Emotion


Summary of Contents for Siemens SOMATOM Emotion
- Page 1 SOMATOM Emotion Quick Guide syngo CT VC50 siemens-healthineers.com...
- Page 3 SOMATOM Emotion Quick Guide syngo CT VC50...
- Page 4 Legend Indicates a hint Is used to provide information on how to avoid operating errors or information emphasizing important details Indicates the solution of a problem Is used to provide troubleshooting information or answers to frequently asked questions Indicates a list item Indicates a prerequisite Is used for a condition that has to be fulfilled before starting a particular operation Indicates a one-step operation...
- Page 5 WARNING consists of the following elements: • Information about the nature of a hazardous situation • Consequences of not avoiding a hazardous situation • Methods of avoiding a hazardous situation syngo CT VC50 SOMATOM Emotion | Print No. HC-C2-025.626.01.01.02...
- Page 6 Legend Quick Guide Print No. HC-C2-025.626.01.01.02...
-
Page 7: Table Of Contents
5.2 Planning the examination range 5.3 Selecting an API recording 5.4 Acquiring tomograms 5.5 Reconstructing axial images 5.6 Generating 3D reconstructions Completing a scan 6 Reviewing images Viewing images 6.2 Windowing images syngo CT VC50 SOMATOM Emotion | Print No. HC-C2-025.626.01.01.02... - Page 8 Table of contents 6.3 Zooming images in and out 6.4 Panning images 6.5 Evaluating gray values 6.6 Measuring distances 6.7 Measuring angles 6.8 Saving images 7 3D postprocessing Loading images Optimizing the image orientation 7.3 Viewing the slice of interest 7.4 Creating oblique views Generating a series of parallel images 8 Documenting and reporting...
-
Page 9: Introduction
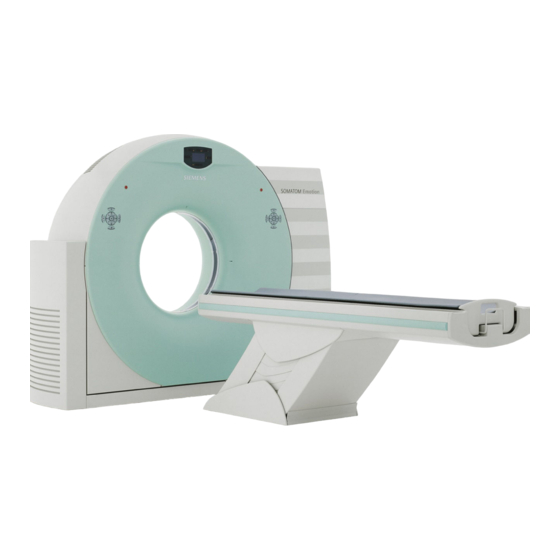
(1) Acquisition system: gantry and patient table (2) Console: computers, input units, monitor, control box, etc. SOMATOM Emotion can be operated in the x-ray department of a hospital or doctor’s office. The CT system must be operated in rooms that are designated for medical use. -
Page 10: Intended Use
(N Engl J Med 2011; 365:395-409) and subsequent literature, for further information. Authorized users SOMATOM Emotion must be used by persons with the necessary specialist knowledge, for example, doctors, trained radiologists, or trained technologists, after appropriate application training. United States Federal law restricts this device for sale by or on the order of a physician (21 CFR 801.109(b)(1)). -
Page 11: Additional Information On Pediatric Imaging
Read the user documentation carefully and observe the instructions. This applies especially to guidelines that deal with function tests, mechanical safety and radiation protection. syngo CT VC50 SOMATOM Emotion | Print No. HC-C2-025.626.01.01.02... - Page 12 1 Introduction CAUTION Not observing the Instructions for Use of the system, system options and accessories! Injury of the patient. ◆ Always use the Instructions for Use in conjunction with the Instructions for Use of the particular units used. ◆...
-
Page 13: User Documentation
Includes the latest product As printed information. The following documents are only valid for the stated software version and in conjunction with the latest Release Notes: • Instructions for Use • Online Help syngo CT VC50 SOMATOM Emotion | Print No. HC-C2-025.626.01.01.02... -
Page 14: About The Quick Guide
Always store manuals in an easily accessible location in the vicinity of the system. About the Quick Guide The Quick Guide describes the use of the SOMATOM Emotion computed tomography system and its operating software. The description is limited to basic operating steps only. -
Page 15: Safety Instructions
Press an EMERGENCY OFF key if the system does not respond to the STOP keys in any hazardous situation. ◆ Shut down the system immediately if system malfunctions are detected and notify the Customer Service at Siemens Healthineers. syngo CT VC50 SOMATOM Emotion |... - Page 16 Electric shock ◆ Never open the monitor. ◆ Contact, and leave all repairs to, the Customer Service at Siemens Healthineers. ◆ Never place cups, glasses or other vessels containing liquid on or near the monitor, in case of accidental spillage. ◆...
- Page 17 Injury of the patient or damage to the equipment, or both. ◆ Do not open or remove the cover of the equipment nor install third-party software. syngo CT VC50 SOMATOM Emotion | Print No. HC-C2-025.626.01.01.02...
- Page 18 1 Introduction Quick Guide Print No. HC-C2-025.626.01.01.02...
-
Page 19: In Case Of Emergency
Wait for approximately 1 minute after power switch off. Release the EMERGENCY OFF key provided by the customer. Switch the system on again. Perform the usual checkup procedure to calibrate the system. syngo CT VC50 SOMATOM Emotion | Print No. HC-C2-025.626.01.01.02... -
Page 20: Restarting After Power Failure
2 In case of emergency Country-specific regulations must be observed. Restarting after power failure If the power failure occurs, you can restart your system after power recovery. ✓ A power failure has occurred. Switch the power switch off. Wait for approximately 1 minute after power recovery. Switch the system on again. - Page 21 Press the lever towards the end of the table top and pull the table top out of the gantry. Before you continue work on the system, you must lock the table top back into its original position. syngo CT VC50 SOMATOM Emotion | Print No. HC-C2-025.626.01.01.02...
- Page 22 2 In case of emergency Quick Guide Print No. HC-C2-025.626.01.01.02...
-
Page 23: Starting Up The System
Starting up the system Press the power switch at the Line Connection Box (LCB). The gantry and patient table are ready for operation. Press the on button at the uninterruptible power supply (UPS). syngo CT VC50 SOMATOM Emotion | Print No. HC-C2-025.626.01.01.02... - Page 24 3 Starting up the system The computer starts automatically when the UPS is switched on. Do not switch on the computer directly. Booting runs in the following phases: • Start-up of the operating system syngo • Start-up of syngo , the Examination task card and the After starting up Checkup dialog box appear.
- Page 25 The checkup has then to be performed as soon as possible. • For the purpose of viewing and evaluating images only, you can turn on/off a syngo Workplace computer individually. syngo CT VC50 SOMATOM Emotion | Print No. HC-C2-025.626.01.01.02...
- Page 26 3 Starting up the system Quick Guide Print No. HC-C2-025.626.01.01.02...
-
Page 27: Preparing An Examination
Exam. In case of emergency, you can click Emergency instead of Exam. All mandatory fields will be filled automatically with dummy attributes, which must be corrected later. syngo CT VC50 SOMATOM Emotion | Print No. HC-C2-025.626.01.01.02... -
Page 28: Selecting A Scan Protocol
Selecting a scan protocol A scan protocol predefines examination steps. Scan protocols are the building blocks to set up the examination procedure. Siemens Healthineers provides you with a large set of scan protocols that cover most of your routine CT examinations. - Page 29 Click the button that represents the correct patient position (for example, Head First - Supine). Click OK. The scan protocol is loaded into Chronicle. Chronicle is a list of examination steps. It controls the entire examination procedure. syngo CT VC50 SOMATOM Emotion | Print No. HC-C2-025.626.01.01.02...
-
Page 30: Positioning A Patient
4 Preparing an examination Chronicle (1) White arrow: the examination step to be executed (2) Selected examination step (3) Scan step number • You can specify the API (Automatic Patient Instruction) language for an examination in the API Language box. •... - Page 31 Use the four table adjustment keys to move the patient into the gantry opening. Turn on the laser light marker to visualize the gantry isocenter and the radiation exposure plane. syngo CT VC50 SOMATOM Emotion | Print No. HC-C2-025.626.01.01.02...
- Page 32 4 Preparing an examination CAUTION Looking into laser beam with optical instruments! Loss of sight possible. ◆ Do not look directly into the laser beam. Adjust the table height so that the body part to be examed is vertically as near to the gantry isocenter as possible. Aligh the radiation exposure plane at the body position where you want to start a scan by fine-tuning the horizontal table position.
- Page 33 • Keep an eye on the patient in case of any injury while moving the table. • Prevent crushing of infusion lines, respiratory tubes, and catheters while moving the table. syngo CT VC50 SOMATOM Emotion | Print No. HC-C2-025.626.01.01.02...
- Page 34 4 Preparing an examination Quick Guide Print No. HC-C2-025.626.01.01.02...
-
Page 35: Performing An Examination
In Chronicle, select the Topogram entry and check the topogram parameters on the Routine sub-task card. Click Load. The topogram parameters are confirmed. The Press START message is displayed next to the Topogram entry. syngo CT VC50 SOMATOM Emotion | Print No. HC-C2-025.626.01.01.02... - Page 36 5 Performing an examination On the control box, press the Start key. Radiation starts. The topogram is displayed in the upper-left segment (topo segment) of the Examination task card. The topogram is used to plan the ranges for scanning and reconstructing tomograms.
-
Page 37: Planning The Examination Range
To change the scan length, click the upper or lower handle of the range and move the handle to the required position. syngo CT VC50 SOMATOM Emotion | Print No. HC-C2-025.626.01.01.02... -
Page 38: Selecting An Api Recording
5 Performing an examination To change the field of view (FoV), cick the left or right handle of the range and move the handle to the required position. Selecting an API recording The API (Automatic Patient Instruction) function plays recorded instructions automatically to guide a patient through an examination. -
Page 39: Acquiring Tomograms
Tomograms are used for diagnosis, typically in either spiral or sequence scan mode. In Chronicle, select a tomo entry (for example, AbdRoutine) and check corresponding examination parameters on sub-task cards. Click Load. syngo CT VC50 SOMATOM Emotion | Print No. HC-C2-025.626.01.01.02... - Page 40 5 Performing an examination The scan parameters are confirmed. The Press MOVE message is displayed next to the AbdRoutine entry. On the control box, press the Move key until the table stops. On the control box, press the Start key when a ring around the key blinks in green.
-
Page 41: Reconstructing Axial Images
AbdRoutine), right-click a recon icon and choose Add Recon Job. In the tomo segment, place the mouse pointer close to the segment border, click and drag down. The FoV box appears. syngo CT VC50 SOMATOM Emotion | Print No. HC-C2-025.626.01.01.02... -
Page 42: Generating 3D Reconstructions
5 Performing an examination Adapt the recon range in the topo or tomo segment by clicking and dragging the handles that are displayed around the graphic range objects. Edit other parameters on the Recon sub-task card, if necessary. • Slice: the image width •... - Page 43 In the Recon axis list, select the axis for 3D recon (for example, coronal). The first segment (in the coronal view) is marked as the FoV segment; coronal images will be reconstructed. syngo CT VC50 SOMATOM Emotion | Print No. HC-C2-025.626.01.01.02...
- Page 44 5 Performing an examination FoV segment (coronal view) (1) FoV object (2) FoV size Adapt the recon range in the 3D recon segments by clicking and dragging the handles that are displayed around the graphic range objects. Edit other parameters on the Recon sub-task card. For example, in the Type box, you can specify if MPR or MIP images will be reconstructed.
-
Page 45: Completing A Scan
Click the Close current patient icon on the lower-left side of the Examination task card. If the E-logbook is configured, modify the examination information fields in the sub-task card area and click OK. syngo CT VC50 SOMATOM Emotion | Print No. HC-C2-025.626.01.01.02... - Page 46 5 Performing an examination Click Yes. All images of the patient are closed and removed from the Examination task card. All images are saved in the database. Quick Guide Print No. HC-C2-025.626.01.01.02...
-
Page 47: Reviewing Images
Click the Viewing task card and then choose Patient > Browser from the main menu. In Patient Browser, double-click a series of images to load them into the Viewing task card. Use the scroll bar for image navigation. syngo CT VC50 SOMATOM Emotion | Print No. HC-C2-025.626.01.01.02... -
Page 48: Windowing Images
6 Reviewing images – or – To change the viewing layout, click a layout icon (for example 16:1) on the View tab. Windowing images You can change both image contrast and brightness. This is called windowing. The window values are displayed in the image. •... -
Page 49: Somatom Emotion | Syngo Ct Vc50
Click an image with the wheel button and drag the mouse left or right. The contrast changes. – or – Click an image with the wheel button and drag the mouse up or down. The brightness changes. syngo CT VC50 SOMATOM Emotion | Print No. HC-C2-025.626.01.01.02... -
Page 50: Zooming Images In And Out
6 Reviewing images • You can apply windowing to multiple selected images. Use the Ctrl key to select non-consecutive images. Use the Shift key to select consecutive group of images. • To restore the original window values, choose Image > Home Window from the main menu. -
Page 51: Panning Images
Use the Shift key to select consecutive group of images. Panning images If parts of the zoomed images extend beyond the image segment, click the Zoom/Pan icon on the Image tab. syngo CT VC50 SOMATOM Emotion | Print No. HC-C2-025.626.01.01.02... - Page 52 6 Reviewing images Place the mouse pointer in the center part of the image. The mouse pointer changes the shape. Click the image and drag the mouse up, down, right, or left. The image moves accordingly. To deactivate the Zoom/Pan function of the left mouse button, deselect the Zoom/Pan icon.
-
Page 53: Evaluating Gray Values
The evaluation results are displayed in the image. • To change the type of results, right-click the Circle icon to call up Properties. • To delete the circle, click it and press the Del key. syngo CT VC50 SOMATOM Emotion | Print No. HC-C2-025.626.01.01.02... -
Page 54: Measuring Distances
6 Reviewing images Measuring distances CAUTION The evaluation of distances, angles and ROIs in 3D (VRT or SSD) and projection (plain-film X-ray or fluoroscopic) images can be inaccurate! Wrong measurement results and wrong diagnosis. ◆ Do not use uncalibrated projection images to make critical measurements. -
Page 55: Measuring Angles
A line is drawn. Draw the second ray using the same method. An angle is displayed in degrees. syngo CT VC50 SOMATOM Emotion | Print No. HC-C2-025.626.01.01.02... -
Page 56: Saving Images
6 Reviewing images Saving images In the Viewing task card, select the images you want to save. To select several images, press the Ctrl key and click images for non-consecutive selection or press the Shift key to select consecutive group of images. Quick Guide Print No. - Page 57 From the main menu, choose Patient > Save As. The Save As dialog box opens. Click Save images in new series and enter the new series name. Click OK. The selected images are saved as a new series. syngo CT VC50 SOMATOM Emotion | Print No. HC-C2-025.626.01.01.02...
- Page 58 6 Reviewing images Quick Guide Print No. HC-C2-025.626.01.01.02...
-
Page 59: Postprocessing
In the Patient Browser, double-click a series of images to load them into the 3D task card. The images are displayed as multiplanar reconstructions (MPR) on the 3D task card: syngo CT VC50 SOMATOM Emotion | Print No. HC-C2-025.626.01.01.02... - Page 60 7 3D postprocessing 3D segments (1) Sagittal view (2) Coronal view (3) Axial view Colored reference lines in the image indicate the position of the other two slice planes. Quick Guide Print No. HC-C2-025.626.01.01.02...
-
Page 61: Optimizing The Image Orientation
The selected segment is marked with a thicker border. On the Orientation tab, click the desired orientation (for example, Head to Feet). The corresponding anatomical view is updated (changed from sagittal to axial view). syngo CT VC50 SOMATOM Emotion | Print No. HC-C2-025.626.01.01.02... -
Page 62: Viewing The Slice Of Interest
7 3D postprocessing To return to the standard view, click the Default Orientation icon. Viewing the slice of interest By moving through the views, you can find the slice of interest. ◆ Select a reference line and drag it to the desired position. In the following example, drag the axial reference line in the sagittal view. -
Page 63: Creating Oblique Views
The corresponding slice plane (for example, the axial view) is updated. Creating oblique views Click the Free Mode icon. Place the mouse pointer close to the end of a reference line. The mouse pointer changes the shape. syngo CT VC50 SOMATOM Emotion | Print No. HC-C2-025.626.01.01.02... - Page 64 7 3D postprocessing Rotate the line around the center point. In the following example, rotate the axial reference line in the sagittal view. The corresponding slice plane (for example, the axial view) is updated. Dashed lines indicate planes that are not perpendicular to the view that is displayed.
-
Page 65: Generating A Series Of Parallel Images
The 3D Parallel Ranges dialog box opens. The following is displayed on the screen: • In the reference image: horizontal range (yellow) • In the lower-right segment: center image of the range syngo CT VC50 SOMATOM Emotion | Print No. HC-C2-025.626.01.01.02... - Page 66 7 3D postprocessing To adapt the distance between the images while keeping the number of images unchanged, click the Constant Number of Images icon in the 3D Parallel Ranges dialog box. Specify the number of images. – or – To adapt the number of the images while keeping the distance of the images unchanged, deselect the Constant Number of Images icon in the 3D Parallel Ranges dialog box.
- Page 67 To move the range, place the mouse pointer on the center point of the range. The mouse pointer changes the shape. Click the center point of the range and drag it to the new position. syngo CT VC50 SOMATOM Emotion | Print No. HC-C2-025.626.01.01.02...
- Page 68 7 3D postprocessing – or – To tilt the range, place the mouse pointer on the center line of the not the center point). The mouse pointer changes the shape. range ( Click the line and drag the mouse pointer up or down to rotate the line around the center point.
- Page 69 3D Parallel Ranges dialog box. You will be prompted to save the image series. To assign a specific name to the reconstructed image series, click Save As. The image series is stored to the database. syngo CT VC50 SOMATOM Emotion | Print No. HC-C2-025.626.01.01.02...
- Page 70 7 3D postprocessing Quick Guide Print No. HC-C2-025.626.01.01.02...
-
Page 71: Documenting And Reporting
In Patient Browser, double-click a series of images to load them into the Filming task card. Click the border of one film sheet to select all the images it contains. syngo CT VC50 SOMATOM Emotion | Print No. HC-C2-025.626.01.01.02... - Page 72 8 Documenting and reporting – or – Double-click the border and select all the film sheets with all images of one film job. To deselect all images, click outside the film sheet. On the Layout tab, click the desired sheet layout (example: 2x2). Quick Guide Print No.
-
Page 73: Storing Data On Dvd
All film sheets are transferred to the camera. Storing data on DVD You can store your data to approved media, such as CD or DVD. Insert the DVD into the drive. syngo CT VC50 SOMATOM Emotion | Print No. HC-C2-025.626.01.01.02... - Page 74 8 Documenting and reporting In Patient Browser, select a series of data you want to store. From the menu, choose Transfer > Export to. The Export To dialog box opens. Select DVD-Writer from the list, and click Export. Quick Guide Print No.
-
Page 75: Transferring Data Via Usb Device
CDs and DVDs are not suitable for long-term storage. • Only use medical grade CDs and DVDs. Medical grade CDs and DVDs are available through your Siemens Healthineers Representative. Transferring data via USB device You can use an external USB device for easy data transfer between two systems. - Page 76 8 Documenting and reporting In Patient Browser, select the data you want to export. From the main menu, choose Transfer > Export to Off-line. The Export to Off-line dialog box opens. In the Export to Off-line dialog box, select the desired entries from the lists, and click OK.
-
Page 77: Networking
Networking If your system is connected to a network, you can send data to other workstations via the network. In Patient Browser, select the data you want to transfer via network. syngo CT VC50 SOMATOM Emotion | Print No. HC-C2-025.626.01.01.02... - Page 78 8 Documenting and reporting Click Transfer > Send to. The Send To dialog box opens. In the Send To dialog box, select the desired network node from the list and click Send. The data is sent to the selected network node. Quick Guide Print No.
-
Page 79: Deleting Data
In the Delete Confirmation dialog box, click Yes to confirm. The selected series is deleted from the database. You can only delete patient data if no other application is accessing the same data. syngo CT VC50 SOMATOM Emotion | Print No. HC-C2-025.626.01.01.02... - Page 80 8 Documenting and reporting Quick Guide Print No. HC-C2-025.626.01.01.02...
-
Page 81: Shutting Down The System
Shutdown of the scan system ✓ Before you can shut down the system, you should exit all examinations and applications. Fom the main menu, choose System > End. The End Session dialog box is displayed. syngo CT VC50 SOMATOM Emotion | Print No. HC-C2-025.626.01.01.02... - Page 82 9 Shutting down the system Click Shutdown System, and confirm with Yes. A dialog box is displayed if applications are still active. A similar dialog is displayed when a patient examination is still running. Click Yes. All applications will be closed. The system will continue to shut down.
- Page 83 If the entire system is running and you do not need the gantry any longer, you can shut down the gantry only. The rest of the system will remain in operating state. syngo CT VC50 SOMATOM Emotion | Print No. HC-C2-025.626.01.01.02...
- Page 84 9 Shutting down the system Quick Guide Print No. HC-C2-025.626.01.01.02...
-
Page 85: Glossary
Imposed graphic line in an image referring to another view or anatomical point. For example, in each image segment of the 3D task card, the position and orientation of the two other segments are indicated with color-coded reference lines. syngo CT VC50 SOMATOM Emotion | Print No. HC-C2-025.626.01.01.02... - Page 86 Pause,Tomogram. The scans included are preset with specific parameter settings. Scan protocols are available for different body regions, for example, head and abdomen. Predefined scan protocols are provided by Siemens Healthineers or you can create your own. Scan range Volume to be covered by the scan.
-
Page 87: Index
USB 75 viewing viewing layout 47 film sheet 71 filming images 71 windowing 48 gray values 53 loading: images 59 measuring angle 55 measuring distances 54 moving: reference lines 61 syngo CT VC50 SOMATOM Emotion | Print No. HC-C2-025.626.01.01.02... - Page 88 This page has been intentionally left blank. Quick Guide Print No. HC-C2-025.626.01.01.02...
- Page 89 This page has been intentionally left blank. syngo CT VC50 SOMATOM Emotion | Print No. HC-C2-025.626.01.01.02...
- Page 90 This page has been intentionally left blank. Quick Guide Print No. HC-C2-025.626.01.01.02...
- Page 92 278 Zhou Zhu Road 91052 Erlangen 201318 Shanghai Germany P.R. China Phone: +49 9131 84-0 siemens-healthineers.com Published by Siemens Shanghai Medical Equipment Ltd. / Print No. HC-C2-025.626.01.01.02 / © Siemens Shanghai Medical Equipment Ltd., 2019 Date of first issue: 2019-05...
Need help?
Do you have a question about the SOMATOM Emotion and is the answer not in the manual?
Questions and answers