
Subscribe to Our Youtube Channel
Related Manuals for Fisher & Paykel ACTIVESMART RF500QNUB1


Summary of Contents for Fisher & Paykel ACTIVESMART RF500QNUB1
- Page 1 ACTIVESMART™ REFRIGERATOR CONTEMPORARY QUAD DOOR REFRIGERATOR FREEZER ICE & WATER RF500QNUB1, RF500QNUX1 QUAD DOOR REFRIGERATOR FREEZER NON-ICE & WATER RF500QNB1, RF500QNX1 INSTALLATION GUIDE NZ AU UK IE EU SG...
-
Page 3: Table Of Contents
CONTENTS Safety and warnings ActiveSmart™ Refrigerator Supplied parts Before installation Product dimensions Cabinetry dimensions Unpacking and moving your appliance Water connection Flushing the water filter Positioning your refrigerator Complete installation Final checklist Registration To register your product visit our website: fisherpaykel.com/register... -
Page 5: Safety And Warnings
SAFETY AND WARNINGS Electrical WARNING! This appliance must be installed in accordance with the installation Electric Shock Hazard instructions before use. To allow disconnection of the appliance from the supply after installation, incorporate a Failure to follow this advise may result in switch in the fixed wiring in accordance with the wiring rules. -
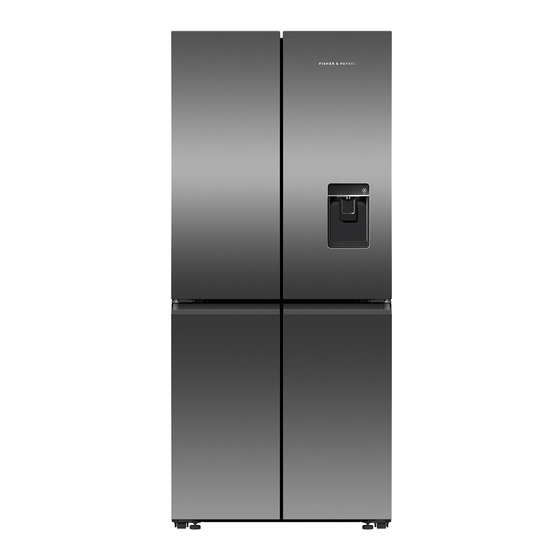
Page 6: Activesmart™ Refrigerator
ACTIVESMART™ REFRIGERATOR Quad Door Fridge, 500L, Quad Door Fridge, 500L, Ice & Water Non-ice & Water Contemporary Contemporary RF500QNUB1, RF500QNUX1 RF500QNB1, RF500QNX1... -
Page 7: Supplied Parts
SUPPLIED PARTS BEFORE INSTALLATION MISCELLANEOUS ITEMS PACK Please follow the installation steps below to ensure your appliance operates correctly. Before installation Power Install your appliance where the plug is easily accessible. Connect your refrigerator to a separate power point. Avoid sharing the power point with other appliances. -
Page 8: Product Dimensions
PRODUCT DIMENSIONS PRODUCT DIMENSIONS PLAN A Overall height of product 1790 - 1799 B Overall width of product C Overall depth of product D Depth with door open – from rear of fridge – 90° rotation 1030 E Depth with door open – from flush with door – 90° rotation F Height to top of chassis 1754 G Height to top of housing... -
Page 9: Cabinetry Dimensions
CABINETRY DIMENSIONS CUTOUT CLEARANCES Flush with refrigerator chassis Flush with refrigerator chassis Flush with refrigerator door – full door rotation Flush with refrigerator door – full door rotation Flush with refrigerator door – 90° door rotation Flush with refrigerator door – 90° door rotation CABINETRY DIMENSIONS (incl. -
Page 10: Unpacking And Moving Your Appliance
UNPACKING AND MOVING YOUR APPLIANCE Check that your appliance is the correct model as per your order. Follow the steps below to move your appliance to the install location. Be careful when tilting the appliance forward/backward. Tape the door shut to prevent opening while moving the appliance. -
Page 11: Water Connection
WATER CONNECTION Ensure the refrigerator is not plugged Insert one end of the water hose into into a power supply. Locate the isolation the other end of hose connector as far tap for cold water connection (tee and as possible. tap fitting not supplied). -
Page 12: Flushing The Water Filter
FLUSHING THE WATER FILTER ICE & WATER MODELS AUTOMATIC ICE MODELS To flush through the water dispenser: To turn your ice maker on press The light above the button Press the water dispenser pad to dispense 1L will illuminate. of water. Wait for 3 minutes before dispensing again. -
Page 13: Positioning Your Refrigerator
POSITIONING YOUR REFRIGERATOR Your Fisher & Paykel ActiveSmart™ refrigerator is fitted with front and rear rollers to allow What to do if your product is unstable you to easily move your refrigerator forward and backward. Avoid moving your refrigerator sideways to prevent damaging the rollers or the floor covering surface. Your refrigerator will arrive with the front feet wound up to assist with moving the product into its final location. -
Page 14: Complete Installation
COMPLETE INSTALLATION FINAL CHECKLIST Before placing food in the fresh food or freezer compartments TO BE COMPLETED BY THE INSTALLER Remove all internal packaging. Clean the inside of the appliance with a mix of warm water and a small amount of liquid Ensure that: detergent. - Page 16 FISHERPAYKEL.COM © Fisher & Paykel Appliances 2022. All rights reserved. The models shown in this guide may not be available in all markets and are subject to change at any time. The product specifications in this guide apply to the specific products and models described at the date of issue.
Need help?
Do you have a question about the ACTIVESMART RF500QNUB1 and is the answer not in the manual?
Questions and answers