
Related Manuals for Fisher & Paykel ACTIVESMART RF500QNUB1


Summary of Contents for Fisher & Paykel ACTIVESMART RF500QNUB1
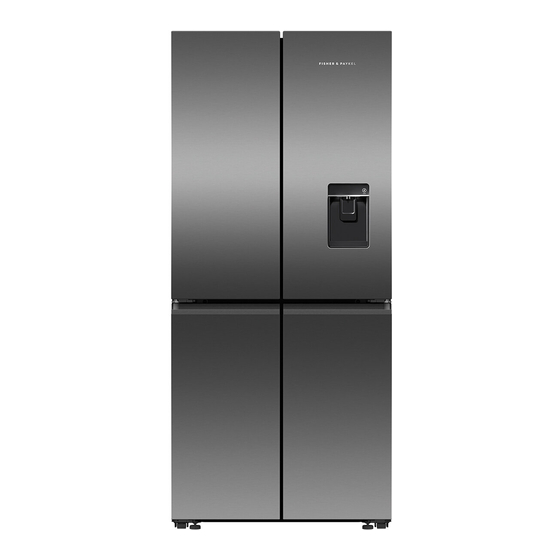
- Page 1 ACTIVESMART™ FREESTANDING REFRIGERATOR CONTEMPORARY QUAD DOOR REFRIGERATOR FREEZER ICE & WATER RF500QNUB1, RF500QNUX1 QUAD DOOR REFRIGERATOR FREEZER NON-ICE & WATER RF500QNB1, RF500QNX1 USER GUIDE NZ AU...
-
Page 3: Table Of Contents
CONTENTS Safety and warnings Before you begin Using the control panel Storage features Using your appliances Temperature control Door alarms Alarm mute Key mute Key lock Sabbath mode Features Water dispenser* Dispenser lock Shelves Humidity Control Lid Wi-Fi connection Cleaning and care Foodcare Moving or storing your appliance User warnings and sounds... -
Page 4: Safety And Warnings
SAFETY AND WARNINGS WARNING! Electric Shock Hazard Failure to do so can result in death, electric shock, fire or injury to persons. • Read and follow the safety and warnings outlined in this user guide before operating this appliance. WARNING! This appliance contains flammable refrigerant isobutane (R600a). - Page 5 SAFETY AND WARNINGS READ AND SAVE THIS GUIDE WARNING! Read entire manual. Failure to follow all guides and rules could cause personal injury or property damage. When using this appliance, always exercise basic safety precautions including the following: General Use This refrigerating appliance is not intended to be used as a built-in appliance. This product has been designed for use in a normal domestic (residential) environment.
- Page 6 SAFETY AND WARNINGS Repair or replace immediately all electric service cords that have become frayed or otherwise damaged. Do not use a cord that shows cracks or abrasion along its length or at either the plug or appliance end. If the power supply cord is damaged, it must only be replaced by your Fisher & Paykel trained and supported service technician because special purpose tools are required.
- Page 7 SAFETY AND WARNINGS Disposal Extreme care must be taken when disposing of your old appliance to avoid hazards: The flammable refrigerant gas must be safely removed by a qualified service technician. The thermal insulation foam in this appliance may contain flammable insulation blowing gases, any exposed foam may be highly flammable and must be carefully treated during disposal.
- Page 8 SAFETY AND WARNINGS WARNING! To reduce the risk associated with choking: DO NOT allow children under 3 years of age to have access to small parts during the installation of the water filter. Ice making Avoid contact with the moving parts of the ice maker ejector mechanism, and do not place your fingers on the automatic ice- making mechanism while the appliance is in operation.
-
Page 9: Before You Begin
BEFORE YOU BEGIN Ensure the installer has completed the final checklist in the installation guide. Read this guide, taking special note of the safety and warnings section. Remove all packaging and dispose of it responsibly. Recycle items that you can. Refrigerator compartment Refrigerator features 1 Shelving... -
Page 10: Using The Control Panel
USING THE CONTROL PANEL RF500QNUB1, RF500QNUX1 models RF500QNB1, RF500QNX1 models Wi-Fi illuminates when functionality is activated. Illuminates to indicate that the keys on the control panel are locked. When the door is closed the display is automatically locked. Illuminates when the water filter needs replacing. IIluminates to indicate that Sabbath mode is activated. -
Page 11: Storage Features
STORAGE FEATURES REFRIGERATOR Humidity control compartment Lids create a humid microclimate by reducing dry air going into the bins. The specially designed groves retain condensation, keeping humidity high and reduce dripping onto the produce below. Cantilever glass shelving Heat-treated safety glass Can be removed and positioned at heights to suit your storage requirements. -
Page 12: Using Your Appliances
USING YOUR APPLIANCES Temperature control When you turn your refrigerator on for the first time, the cooling system will automatically cool all compartments to their set temperatures within 2-3 hours. The internal control panel enables you to change and control the temperature of all compartments accurately and independently. -
Page 13: Door Alarms
USING YOUR APPLIANCE Door alarms If the refrigerator compartment door is left open, the alarm will beep after 90 seconds, if the freezer door is left open the alarm will beep after 60 seconds. If either of the doors remains open, subsequent beeps will sound every 30 seconds for five minutes. Alarm mute To activate/deactivate , press... -
Page 14: Sabbath Mode
USING YOUR APPLIANCE Sabbath mode , alarms, lights and displays are deactivated for 80 hours. SABBATH MODE Once in Sabbath mode: The interior light will not turn on when you open the refrigerator. The door alarms will not operate. The display will not illuminate, except the Sabbath mode icon. The internal and external control panels will not operate. -
Page 15: Features
USING YOUR APPLIANCE Features Fast Freeze boosts freezing speed by dropping to its coldest temperature for 12 hours, FAST FREEZE helping retain freshness, texture and taste during the freezing process. To activate, press on the internal display. light will illuminate. FAST FREEZE To deactivate before the 12 hours has elapsed, press... - Page 16 USING YOUR APPLIANCE Bottle Chill rapidly chills your beverages in the freezer for a set time of 15 minutes. BOTTLE CHILL Depending on bottle size, you may need to return it to the freezer and reset. To activate, press on the control panel. light will illuminate.
- Page 17 USING YOUR APPLIANCE IceOn/Off activates automatic ice - this is only available in the freezer compartment. ICE ON/OFF Your ice maker is designed to automatically dispense ice into the ice storage bin below until it detects the bin is full. The more ice you use, the more it makes. Before first use the automatic ice systems needs to be flushed.
- Page 18 USING YOUR APPLIANCE Information about your ice maker Your automatic ice maker will produce approximately eight cubes of ice every 3 – 4 hours, depending on the freezer compartment temperature and the number of door openings. The ice cube tray will fill with water. When cubes are frozen, they will be ejected from the ice tray into the ice storage bin.
-
Page 19: Water Dispenser
USING YOUR APPLIANCE Water dispenser* Dispenser lock button Locks/unlocks the water dispenser. The LED above the lock and LED light button will illuminate when dispenser is locked. Bottle Chill indicator Icon will illuminate when is activated and BOTTLE CHILL flashes when the beverage is ready. Filter change indicator Icon will illuminate when water filter requires changing. -
Page 20: Dispenser Lock
USING YOUR APPLIANCE Dispenser lock is located on the external display and can be activated to prevent DISPENSER LOCK water from being dispensed. This is useful when you are cleaning the external display or when there are small children around. To activate/deactivate , press DISPENSER LOCK for four seconds. - Page 21 USING YOUR APPLIANCE Flushing the water filter Before you start using the Ice & Water function, complete the flushing steps to ensure optimum performance of your water filter. To flush through the water dispenser Press the water dispenser pad to dispense 1L of water.
-
Page 22: Shelves
USING YOUR APPLIANCE Shelves The two full-width cantilever glass shelves are removable and can be repositioned in your refrigerator. The fixed glass shelf can be removed, but not repositioned. Refer to ‘Cleaning and care’ for details on how to remove glass shelves. Humidity Control Lid The Humidity Control Lid is fitted to the fruit and vegetable bin of your refrigerator and provides a humid microclimate to extend the storage times of fruit and vegetables. -
Page 23: Wi-Fi Connection
WI-FI CONNECTION Your appliance may be connected to your home wireless network and operated remotely using the app. Getting started Ensure your home Wi-Fi network is turned on. You will be given step by step guidance on your mobile device. It may take up to 10 minutes to connect your appliance. -
Page 24: Cleaning And Care
CLEANING AND CARE Exterior Clean all surfaces with liquid dishwashing detergent dissolved in warm water and a soft cloth. Rinse with clean water and dry with a clean, lint-free cloth. Do not use any abrasive stainless steel cleaners, glass cleaners, solvents or scourer pads as these will damage the door surface. - Page 25 CLEANING AND CARE External display and water dispenser (Water-dispensing models only) Activate the to prevent DISPENSER LOCK water from dispensing when cleaning, refer ‘Dipenser lock’ section for details. Clean the pad and external display with a damp, soft lint-free cloth. Drip tray (Water-dispensing models only) Remove the drip tray from the dispenser panel.
- Page 26 CLEANING AND CARE Glass shelf To remove Lift the shelf up vertically. The Humidity Control Lid is attached to the shelf and will be removed together. Slide the shelf towards you. As you pull the shelf towards you, tilt the front downwards and lower until it is vertical.
- Page 27 CLEANING AND CARE Cantilever glass shelves To remove Holding the front and back edge of the shelf firmly, push the shelf up vertically to dislodge from back support lugs. Slide the shelf towards you. To replace Slide shelf into the compartment. Holding the front and back edge of the shelf firmly, push the shelf down to secure to back support lugs.
- Page 28 CLEANING AND CARE Mid bins and humidity control compartment To remove Remove food from the bin. Pull the bin out to full extension. Lift up the bin to dislodge. Push the slides back into the compartment. How to replace Extend the slide out from the refrigerator. Place the bin on top of the runners.
- Page 29 CLEANING AND CARE Bottom bins & trays To remove Remove food from the tray or bin. Lift the tray/bin up at the front and pull out over the ledge. How to replace Line up the tray/bin in position and push the bin back over the ledge.
-
Page 30: Foodcare
FOODCARE For best food care Store only high-quality, fresh food in your refrigerator. Store perishable foods in the refrigerator immediately after purchase. Storing at room temperature increases the rate of deterioration and can allow harmful microbial growth. Foods such as meat, poultry and seafood should be well wrapped or sealed in suitable packaging to prevent dehydration, colour deterioration, loss of flavour, and transfer of odour. - Page 31 FOODCARE Items stored in your freezer We recommend cooling carbonated beverages only when the BOTTLE CHILL function is active. Do not store carbonated drinks without this function in the freezer. Failure to remove beverages could lead to freezing liquid and the likelihood of bottle/can explosion.
-
Page 32: Moving Or Storing Your Appliance
MOVING OR STORING YOUR APPLIANCE If your refrigerator is turned off for any reason, wait 10 minutes before turning it back on. This will allow the refrigeration system pressures to equalise before restarting. Moving your refrigerator Turn off the refrigerator and unplug from the power point. -
Page 33: User Warnings And Sounds
USER WARNINGS AND SOUNDS Faults Count the number of beeps made when the refrigerator compartment door is opened. Record the number and sequence of temperature lights displayed on the internal control panel and contact a Fisher & Paykel trained and supported service technician in order to repair the fault. -
Page 34: Troubleshooting
TROUBLESHOOTING If there is a problem with your refrigerator, please check the following points before contacting your local Fisher & Paykel trained and supported service technician or the Customer Care Centre. Product parts and accessories can be purchased through Fisher & Paykel Customer Care Centre or online at fisherpaykel.com (this service is available to selected markets only). - Page 35 TROUBLESHOOTING All models PROBLEM POSSIBLE CAUSES WHAT TO DO Unfamiliar noises Cabinet not stable or level. Refer to your Installation guide or ‘User warnings and sounds’. Freezer is defrosting. Water in the Condensation is formed by A small amount of condensation vegetable bin the water produced by fruit is beneficial for fruit and...
- Page 36 TROUBLESHOOTING Ice & Water models only PROBLEM POSSIBLE CAUSES WHAT TO DO Automatic ice Ice maker has not been turned on. Switch on ice maker. maker does Bin is in the wrong way or there Place bin so scoop is in the front not work is no bin in place.
- Page 37 TROUBLESHOOTING Ice & Water models only PROBLEM POSSIBLE CAUSES WHAT TO DO Ice build up Freezer door not closing tightly. Arrange items in freezer so door inside freezer can close tightly. compartment Check and clean door gasket seal. Ice maker Normal ice maker operation.
-
Page 38: Manufacturer's Warranty
MANUFACTURER’S WARRANTY For details of your Manufacturer’s Warranty and contacts for servicing, please refer to your separate ‘Service & Warranty’ book provided with your refrigerator. This product has been designed for use in a normal domestic (residential environment). This product is not designed for any commercial use. Any commercial use by the customer will affect this products Manufacturer’s Warranty. -
Page 39: European Directive 2012/19/Eu On Waste Electrical And Electronic Equipment (Weee)
EUROPEAN DIRECTIVE 2012/19/EU ON WASTE ELECTRICAL AND ELECTRONIC EQUIPMENT (WEEE) GB This appliance is marked according to the European directive 2012/19/EU on Waste Electrical and Electronic Equipment (WEEE). By ensuring this product is disposed of correctly, you will help prevent potential negative consequences for the environment and human health, which could otherwise be caused by inappropriate handling of this product. - Page 40 FISHERPAYKEL.COM © Fisher & Paykel Appliances 2022. All rights reserved. The models shown in this guide may not be available in all markets and are subject to change at any time. The product specifications in this guide apply to the specific products and models described at the date of issue.
Need help?
Do you have a question about the ACTIVESMART RF500QNUB1 and is the answer not in the manual?
Questions and answers