Table of Contents
Advertisement
Available languages
Available languages
Quick Links
TOOLS REQUIRED
Claw hammer
Safety goggles
Power drill
Measuring tape
Caulk/sealant
Keyhole saw
Installation
1
PREPARING FOR INSTALLATION
NOTE: Before installation, make
sure all parts are present. Compare
parts with the Hardware Included list.
If any part is missing or damaged, do
not attempt to install the product.
□ Determine the desired mounting location,
and mark the wall where the unit will be
installed.
NOTE: For secure installation, the
unit must be mounted to at least one
wall stud.
4
INSTALLING THE CABINET
□ For wall stud installation, insert #12 x 3 in. screws with
washers into the stud locations (not included).
□ For drywall installation, drill holes at the appropriate
locations and insert toggle bolts with washers (not included).
□ For concrete wall installation, drill 1/4 in. holes at the
appropriate locations and insert #12 wall anchors, followed
by #12 x 3 in. screws (not included).
5
INSTALLING THE HARDWARE
□ Attach the handle (AA) and knobs (BB)
to the door on the vanity with short
screws (CC) and to the drawers on the
vanity with long screws (DD).
Phillips screwdriver
Wall hardware
Level
2
CUTTING THE OPENING FOR
PLUMBING FIXTURES
NOTE: This step applies to vanity
cabinets with full back panels only.
□ Locate and mark plumbing on the back panel.
□ Drill a pilot hole through the back panel.
□ Use a keyhole saw to cut an opening for the
plumbing fixtures.
AA
BB
Use and Care Guide
HARDWARE INCLUDED
AA - Handle
BB - Knob
KHG30D x 4 KHW30D x 4 KHG30D x 2 KHG30D x 6
KHG36D x 4 KHW36D x 4 KHG36D x 2 KHG36D x 6
KHW30D x 1 KHW30D x 3
KHW36D x 1 KHW36D x 3
3
CC
DD
Please contact 1-888-774-8062 for further assistance.
Item #0000 000 000
Item #0000 000 000
Item #0000 000 000
Item #0000 000 000
Item #0000 000 000
Model #KHW30D
Model #KHW36D
Model #KHG30D
Model #KHG36D
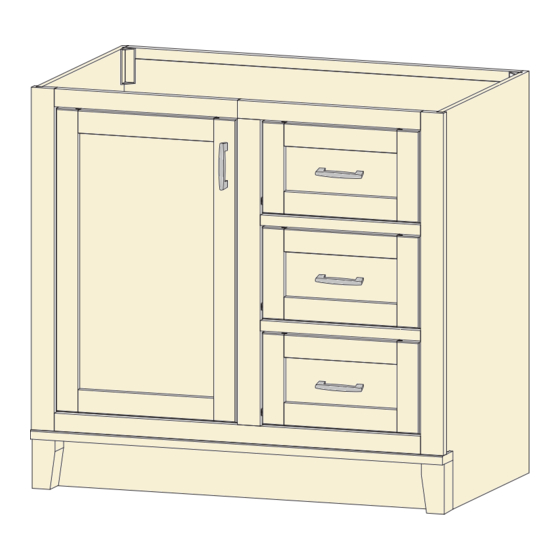
Vanity Combo
CC - Short
DD - Long
Screw
Screw
POSITIONING THE
CABINET
□ Move the cabinet into
place, and use wood
shims to level the
cabinet against the wall.
CC
DD
BB
HOMEDEPOT.COM
Advertisement
Table of Contents

Related Manuals for Glacier bay KHG30D


Summary of Contents for Glacier bay KHG30D
- Page 1 Power drill Measuring tape Wall hardware KHG30D x 4 KHW30D x 4 KHG30D x 2 KHG30D x 6 KHG36D x 4 KHW36D x 4 KHG36D x 2 KHG36D x 6 KHW30D x 1 KHW30D x 3 KHW36D x 1 KHW36D x 3...
- Page 2 Installation (continued) REMOVING THE DRAWER □ Press release levers in opposite directions while pulling drawer out of the vanity. Press Press upward downward RE-INSTALLING THE DRAWER NOTE: Drawer should install smoothly; however, there may be minor resistance when the drawer is approximately half to two-thirds installed. This is normal. □...
- Page 3 Taladro Cinta métrica Herraje de pared KHG30D x 4 KHW30D x 4 KHG30D x 2 KHG30D x 6 KHG36D x 4 KHW36D x 4 KHG36D x 2 KHG36D x 6 KHW30D x 1 KHW30D x 3 KHW36D x 1 KHW36D x 3...
- Page 4 Instalación (continuado) EXTRACCIÓN DEL CAJÓN □ Presiona las palancas de desbloqueo en direcciones opuestas mientras sacas el cajón del gabinete. Presiona Presiona hacia arriba hacia abajo INSTALACIÓN DEL CAJÓN NOTA: El cajón debe instalarse suavemente aunque puede existir una pequeña resistencia cuando la instalación haya llegado aproximadamente a la mitad o a los dos tercios.
Need help?
Do you have a question about the KHG30D and is the answer not in the manual?
Questions and answers