Table of Contents
Advertisement
Available languages
Available languages
Quick Links
Horus Plus Series
User Manual
Bedienungsanleitung
PWUP-LI060H1-AZ01B
Használati útmutató
PWUP-LI080H1-AZ01B
Ръководство на потребителя
PWUP-LI100H1-AZ01B
Korisničko uputstvo
PWUP-LI150H1-AZ01B
Manual de utilizare
PWUP-LI200H1-AZ01B
Before using this product, carefully read all product documentation and retain it for future reference.
641.34.22.1
Advertisement
Table of Contents

Related Manuals for Njoy Horus Plus Series


Summary of Contents for Njoy Horus Plus Series
- Page 1 Horus Plus Series User Manual Bedienungsanleitung PWUP-LI060H1-AZ01B Használati útmutató PWUP-LI080H1-AZ01B Ръководство на потребителя PWUP-LI100H1-AZ01B Korisničko uputstvo PWUP-LI150H1-AZ01B Manual de utilizare PWUP-LI200H1-AZ01B Before using this product, carefully read all product documentation and retain it for future reference. 641.34.22.1...
- Page 2 Thank you for purchasing our products! Please read this manual before using the product. nJoy is a brand of power and backup protection products that create solutions for multiple levels of environment complexity, residential to industrial. This UPS will protect your electronic equipment from physical damage and will provide emergency battery backup power to prevent data loss in the event of power problems.
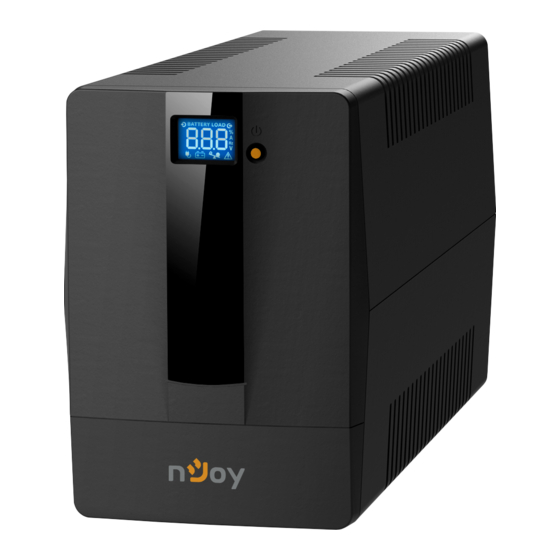
- Page 3 Package Contents UPS Unit User Manual USB Cable Power Cord Warranty Card Product Overview Front View Touch screen LCD panel Power switch...
- Page 4 Back View 600 / 800 1000 1500 / 2000 Battery backup outlets RJ-11 surges protection AC input (+RJ45 - Horus Plus 1000, Circuit breaker 1500, 2000) USB port...
- Page 5 Touch screen LCD Display UPS Mode LCD Display Description When UPS is ON, it will enter this UPS Power mode for 4 seconds LCD information will be displayedin the following order when LCD is touched: AC Mode 1. Output voltage 2.
-
Page 6: Installation
UPS Mode LCD Display Description When overload Overload occurs, alarm will in Battery beep every 0.5 Mode seconds. icon will flash NOTE: If backlight shuts off, you may activate it by touching the screen. Installation The UPS can protect your equipment from all power problems such as surge, blackouts, brownouts and line noise. - Page 7 Positioning For optimal ventilation of the UPS, please place it 15cm distance from any wall or object. Connecting your equipment and first usage Step 1. Connect the UPS to a grounded AC power outlet. Step 2. Please turn ON the ON/OFF switch and charge the battery at least 6 hours for a full load before you start to use the UPS.
- Page 8 Step 4. Connect the phone/network/internet cables to the RJ11/RJ45 outlet. Step 5. For optimal computer system protection, install the UPS monitoring software from https://www. power-software-download.com/viewpower.html to fully manage the UPS. CAUTION Do NOT plug LASER Do NOT plug any PRINTERS into any SURGE STRIPS into of the outlets.
-
Page 9: Auto Restart
General Specifications ǘ Automatic voltage regulation Regulates the input voltage and eliminates the problems created by under-voltage or over-voltage fluctuations. It also protects against spikes and surges that comprise over 80% of power problems. ǘ Auto restart The UPS will restart automatically and will start charging the batteries once the electricity is back on. - Page 10 Important Safety Warnings Place the UPS indoors in an area that has adequate airflow and no excessive dust. Do NOT allow the UPS to be exposed to moisture, rain, excessive heat or direct sunlight. The use of the UPS is NOT recommended in life support applications where failure of this equipment can reasonably be expected or when its safety or effectiveness could be affected significally.
-
Page 11: Fault Code Table
Fault Code Table UPS Mode LCD Display Description Output Short Disconnect short-circuited Circuit loads and restart UPS. Disconnect all output loads Overload fault and restart the UPS again. Call for service Overcharge immediately. Bad or severe- ly discharged Please replace the battery. battery High output Call for service... -
Page 12: Troubles And Solutions
Troubles and solutions Problem Possible Cause Solutions The UPS is not Press the power switch again switched on. to turn on the UPS. Nothing is displayed on Battery voltage Charge the battery at least LCD panel. is too low. 6 hours. Battery fault. - Page 13 Disposal of Old Electrical & Electronic Equipment (Applicable in the European Union and other European countries with separate collection systems) This symbol on the product or on its packaging indicates that this product shall not be treated as household waste. Instead it shall be handed over to the applicable collection point for the recycling of electrical and electronic equipment.
-
Page 14: Conținutul Pachetului
Conținutul pachetului Unitatea UPS Manual de utilizare Cablu USB Cablu de alimentare Certificat de garanție Prezentarea produsului Vedere din fața Ecran LCD cu touch screen Buton Pornit/ Oprit... - Page 15 Vedere din spate 600 / 800 1000 1500 / 2000 Prize pentru alimentarea RJ11 - protecție linie telefonica echipamentelor (+RJ45 - Horus Plus 1000, 1500, Alimentare UPS 2000) Intrerupator circuit (siguranța) Port USB...
- Page 16 Afisaj LCD Mod UPS Descriere Afisaj LCD Cand UPS-ul este UPS Pornit pornit va intra in acest mod pentru 4 secunde. Informațiile vor fi afi- sate pe LCD la atingere in urmatoarea ordine: Modul AC 1. Tensiunea la iesire 2. Tensiunea la intrare Cand AVR-ul 3.
- Page 17 Mod UPS Descriere Afisaj LCD Supra- Cand apare sarcina suprasarcina, alarma in Modul va suna la fiecare 0.5 Baterie secunde. icoana va palpai. NOTA: Daca lumina de fundal se stinge, o puteți activa prin atingerea ecranului. Instalarea UPS-ul va poate proteja echipamentul de toate problemele legate de tensiunea electrica cum ar fi: supra-sarcina, fluctuații de tensiune, caderi de tensiune si zgomotul de pe rețea.
- Page 18 Poziționare Pentru o ventilație optima a UPS-ului, va rugam sa il plasați la 15 cm distanța de orice perete sau obiect Conectarea echipamentelor si prima folosire Pasul 1. Conectați UPS-ul la o priza cu impamantare. Pasul 2. Apasați butonul de pornire astfel incat sa fie in modul ON si lasați bateria la incarcat cel puțin 6 ore inainte de a folosi UPS-ul.
- Page 19 Pasul 4. Conectați cablul liniei telefonice/cablul de rețea (internet) la mufa corespunzatoare a UPS-ului (RJ11/RJ45). Pasul 5. Pentru o protecție optima a sistemului instalați software-ul de monitorizare de la urmatorul link: https://www.power- software-download.com/viewpower.html ATENȚIE NU conectați NU conectați alte imprimante laser la ACCESORII CU PROTECȚIE la niciuna din prizele...
- Page 20 Specificații generale ǘ Reglaj automat al tensiunii AVR-ul este proiectat pentru a mentine un nivel constant de tensiune. Acesta va elimina varfurile de inalta sau joasa tensiune produse de compania de electricitate care pot afecta sau chiar deteriora electronicele tale. ǘ...
- Page 21 Instrucțiuni de siguranța Poziționati UPS-ul intr-un loc aerisit si lipsit de praf. NU permiteți ca UPS-ul sa fie expus la ploaie, umiditate, caldura excesiva sau direct in razele so- lare. NU este recomandata folosirea UPS-ului impreuna cu echipamente de susținere a vieții. Intotdeauna deconectați UPS-ul de la rețeaua de electricitate inainte de schimbarea bateriei.
- Page 22 Tabel de erori Mod UPS Descriere Afisaj ecran Deconectați echipamen- Scurtcircuit la tele electronice care iesire genereaza scurtcircuit si reporniți UPS-ul. Deconectați toate Supraincarcare aparatele conectate si restartați UPS-ul. Supraincarcare Sunați la service imediat. baterie Baterie de- fecta sau foarte Schimbați bateria.
- Page 23 Probleme si soluții Problema Soluții Cauza Posibila UPS-ul nu este Reporniți UPS-ul apasand pornit. butonul de pornire. LED-ul nu Baterie descar- Incarcați bateria cel puțin 6 este aprins. cata. ore. Baterie defecta. Inlocuiți bateria. UPS-ul Cablu de ramane alimentare este Verificați prezența tensiunii permanent scos din priza...
- Page 24 Dezafectarea echipamentelor electrice si electronice vechi (Se aplica pentru ţarile membre ale Uniunii Europene si pentru alte țari europene cu sisteme de colectare separata). Acest simbol aplicat pe produs sau pe ambalajul acestuia indica faptul ca acest produs nu trebuie tratat ca pe un deseu menajer. El trebuie predat punctelor de reciclare a echipamentelor electrice si electronice.
- Page 25 Memo...
-
Page 26: Eu Declaration Of Conformity
We, manufacturer / importer DAI-TECH SRL 28 Popa Sapca 300057, Timisoara Romania declare that the products UPS Horus Plus Series: PWUP-LI060H1-AZ01B, PWUP-LI080H1-AZ01B, PWUP-LI100H1-AZ01B, PWUP-LI150H1-AZ01B, PWUP-LI200H1-AZ01B are in conformity with (EC conformity marking) Tested with the listed standards, the above mentioned products were found... - Page 27 Noi, in calitate de producator / importator DAI-TECH SRL 28 Popa Sapca 300057, Timisoara Romania declaram ca urmatoarele produse UPS Horus Plus Series: PWUP-LI060H1-AZ01B, PWUP-LI080H1-AZ01B, PWUP-LI100H1-AZ01B, PWUP-LI150H1-AZ01B, PWUP-LI200H1-AZ01B sunt conforme cu (simbolul de conformitate europeana) Testate in standardele acceptate, produsele menționate sunt conforme cu...
Need help?
Do you have a question about the Horus Plus Series and is the answer not in the manual?
Questions and answers