Table of Contents
Advertisement
Advertisement
Table of Contents

Related Manuals for BIGTREETECH EBB36 CAN V1.1


Summary of Contents for BIGTREETECH EBB36 CAN V1.1
- Page 1 BIGTREETECH BIGTREETECH EBB36 CAN V1.1 User Manual 1 / 22...
-
Page 2: Table Of Contents
4 Klipper ..............13 4.1 Firmware Compilation ..........13 4.2 Firmware Update .............14 4.3 CANBus Configuration ..........18 4.3.1 Work with BIGTREETECH U2C ........18 4.3.2 Work with BIGTREETECH RPI-CAN HAT ......19 4.4 Klipper Configuration ..........20 5 Cautions ..............21 6 FAQ ..............22 2 / 22... -
Page 3: Revision History
BIGTREETECH Revision History Revision Description Date 01.00 First Draft 2022/05/16 Correct the wrong mark of 01.01 the heater cartridge port on 2022/05/21 the pin diagram. 01.02 Add precautions for hotend 2022/05/25 when DFU updates firmware 01.03 More detailed pin Instruction... -
Page 4: Product Introduction
BIGTREETECH 1 Product Introduction BIGTREETECH EBB36 CAN V1.1 is a nozzle adapter board made by the 3D printing team of Shenzhen BIQU Technology Co., Ltd. for a 36 stepper motor extruder. It can communicate via a USB or CAN, which greatly simplifies wiring. -
Page 5: Product Parameters
13. Support CAN bus connection, which has long data transmission, strong anti- noise ability, strong real-time performance and high reliability. 1.2 Product Parameters 1. Product Size: 51.5 x 37mm, for further details please read: BIGTREETECH EBB36 CAN V1.1-SIZE.pdf 2. Installation Dimensions: Hole Spacing 43.85mm, M3 Screw Hole x 2 3. -
Page 6: Product Size
BIGTREETECH 1.4 Product Size 6 / 22... -
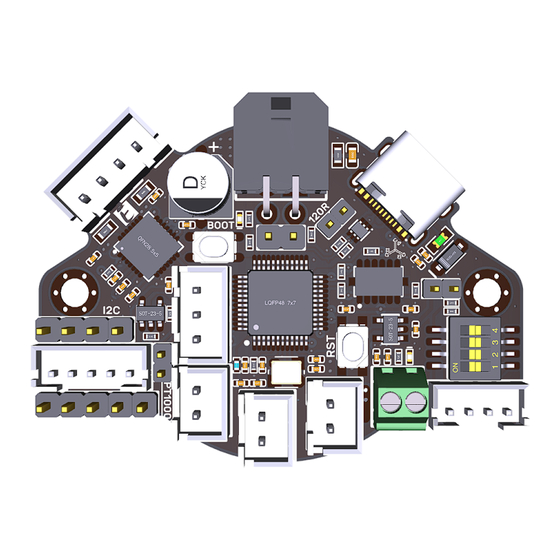
Page 7: Peripheral Interface
BIGTREETECH 2 Peripheral Interface 2.1 Pin Instruction 7 / 22... -
Page 8: Introduction Of Interface
BIGTREETECH 3 Introduction of Interface 3.1 USB Power Supply After the motherboard is powered on, the yellow-green LED1 lights will light up, indicating a normal power supply. The VUSB on the right side of the board is the power selection terminal. Only when using USB to supply power to the motherboard or need to supply power through USB, do you need to use the jumper cap to connect VUSB. -
Page 9: 100K Ntc Or Pt1000 Settings
BIGTREETECH 3.2 100K NTC or PT1000 Settings 1. Version without 31865: No need to plug a jumper cap when using a 100K NTC thermistor, and TH0's pull-up resistor value is 4.7K. When using PT1000, you need to use the jumper cap to short the two pins, as shown below picture. At this time, TH0's pull-up resistor value is 2.2K... - Page 10 BIGTREETECH 10 / 22...
-
Page 11: Bl-Touch Wiring
BIGTREETECH 3.3 BL-Touch Wiring 3.4 Filament Runout Detection Wiring 11 / 22... -
Page 12: Rgb Wiring
BIGTREETECH 3.5 RGB Wiring 12 / 22... -
Page 13: Klipper
BIGTREETECH 4 Klipper 4.1 Firmware Compilation 1. After connecting to the Raspberry Pi via SSH, type the below sentences at the command line: cd ~/klipper/ make menuconfig Compile the firmware with the following configuration (if the following options are not available, please update the Klipper source to the latest version). -
Page 14: Firmware Update
BIGTREETECH 3. Enter make to compile the firmware. The 'klipper.bin' firmware that we need will be generated on the home/pi/klipper/out folder of the Raspberry Pi when completed. The firmware is on the left side of SSH software, users can download it directly to the computer. - Page 15 System memory area refer to the datasheet of STM32G0B1CB (https://www.st.com/resource/en/datasheet/stm32g0b1cb.pdf) PA2 is used for the hotend MOSFET in EBB36 CAN V1.1 and EBB42 CAN V1.1, The high level in the DFU mode change the hotend into heating state. Therefore,...
- Page 16 BIGTREETECH 2. Press and hold the Boot button, then click the RST button to enter DFU mode. 3. Click the "Refresh" button in the STM32CubeProgrammer until the Port changes from "No DFU d..." to "USB1", then click "Connect" to connect the chip.
- Page 17 BIGTREETECH 4. After the connection is successful, "Connect" will change into "Disconnect", and then click "Download", after the download is completed, a pop-up window of "File download complete" will appear, indicating that the burning is successful. 17 / 22...
-
Page 18: Canbus Configuration
BIGTREETECH 4.3 CANBus Configuration 4.3.1 Work with BIGTREETECH U2C Type the following command sudo nano /etc/network/interfaces.d/can0 in the SSH terminal and execute: auto can0 iface can0 can static bitrate 250000 up ifconfig $IFACE txqueuelen 1024 Set the speed for CANBus at 250K(must be the same as the speed set in the... -
Page 19: Work With Bigtreetech Rpi-Can Hat
BIGTREETECH 4.3.2 Work with BIGTREETECH RPI-CAN HAT Type and run the following command sudo nano /boot/config.txt, and added below contents on file config.txt. dtparam=spi=on dtoverlay=mcp2515-can0,oscillator=12000000,interrupt=25,spimaxfrequency=1000000 After modification, save(Ctrl + S)and exist(Ctrl + X), type sudo reboot reboot Raspberry Pi. Type and run commands... -
Page 20: Klipper Configuration
BIGTREETECH hardware is powered on and wired correctly, then run the following command: ~/klippy-env/bin/python ~/klipper/scripts/canbus_query.py can0 If detected an uninitialized CAN device, the above command will report the device's canbus_uuid: Found canbus_uuid=0e0d81e4210c If Klipper operates well and is connected to the device, then it won't report the canbus_uuid, which is normal. -
Page 21: Cautions
BIGTREETECH 3. Add the motherboard's configuration to the file "printer.cfg". [include sample-bigtreetech-ebb-canbus-v1.1.cfg] 4. Revise the ID number of the configuration files as the actual ID of the motherboard (USB serial or CANBus). 5. Configure the specific functions of the module as instructed below: https://www.klipper3d.org/Overview.html... -
Page 22: Faq
BIGTREETECH 6 FAQ Q: What's the maximum current for the heater cartridge and fan interface? A: The maximum output current of the heater cartridge interface: 5A. The maximum output current of the fan interface: 1A. The total current for the heater cartridge, driver and fan needs to be less than 6A.
Need help?
Do you have a question about the EBB36 CAN V1.1 and is the answer not in the manual?
Questions and answers