
Related Manuals for BIGTREETECH OCTOPUS - PRO


Summary of Contents for BIGTREETECH OCTOPUS - PRO
- Page 1 BIGTREETECH OCTOPUS - PRO USER GUIDE October 18 2021 Version 01.02 Produced by BIGTREETECH...
-
Page 2: Table Of Contents
Produced by BIGTREETECH TABLE OF CONTENTS Table of Contents ........................1 Document Change History ......................2 Introduction to BIGTREETECH Octopus-PRO V1.0 ............3 Octopus-pro motherboard features ................3 Octopus-pro motherboard parameters ................6 Motherboard wiring......................8 Power wiring ........................8 Automatic power down wiring .................. -
Page 3: Document Change History
Produced by BIGTREETECH DOCUMENT CHANGE HISTORY VERSION CHANGES RELEASE DATE 01.00 Initial release 01/10/21 01.01 Included the klipper config for the 429 variant 12/10/21 01.02 Various updates to pictures and wording correcting pin 18/10/21 numbers. -
Page 4: Introduction To Bigtreetech Octopus-Pro V1.0
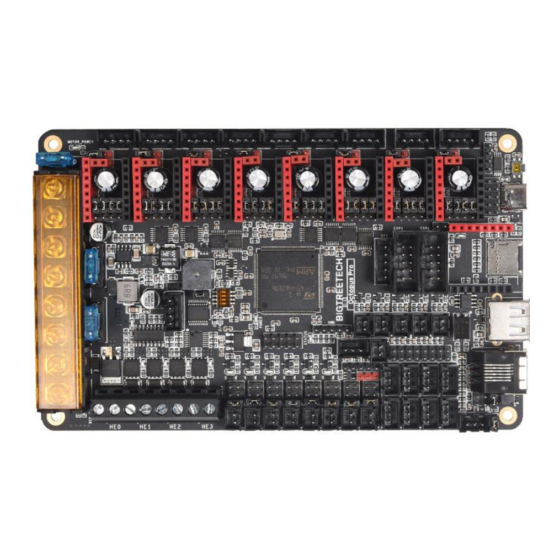
1 INTRODUCTION TO BIGTREETECH OCTOPUS- PRO V1.0 The BIGTREETECH Octopus-pro V1.0 is a powerful and feature rich, 3D printer motherboard that supports up to 8 60V stepper drivers with 9 stepper driver outputs in total. It is designed and manufactured by the 3D printing team of Shenzhen Bigtree Technology Co. - Page 5 10. Includes USB-C interface which supports an emulated serial port that allows printing via USB. 11. Supports all versions of BIGTREETECH TFT screens and LCD12864 screens. 12. Supports multiple languages such as English and Simplified Chinese and can easily switch between different languages (when using the BTT TFT).
- Page 6 Produced by BIGTREETECH 17. Provides two stepper outputs, connected in parallel, to the Z driver allowing for a parallel, dual Z axis drive. 18. Supports firmware update via DFU mode. This is where the firmware is sent to the board directly from the PC and does not require a bootloader however this method is not recommended for novice users as discussed later in this document.
-
Page 7: Octopus-Pro Motherboard Parameters
MOTOR4, MOTOR5, MOTOR6, MOTOR7 9. Temperature sensor interfaces: TB, T0, T1, T2, T3. 10. Display interfaces: BIGTREETECH TFT touch screen, LCD12864, LCD2004, etc. 11. PC communication interfaces: USB Type-C with configurable BAUD. 12. Expansion interfaces: Filament runout, power loss detection, automatic power down, BL Touch and many others. - Page 8 Produced by BIGTREETECH...
-
Page 9: Motherboard Wiring
Produced by BIGTREETECH 2 MOTHERBOARD WIRING Note: The octopus-pro packs a ton of features which necessitates many components and connectors. Given the component and connector density it was not possible to include the silk screen for connector labels on the top. We recommend that you snap a picture of the bottom of the board before starting the installation so that you have a label reference on hand. -
Page 10: Automatic Power Down Wiring
2.2 A UTOMATIC POWER DOWN WIRING When using the BIGTREETECH Relay V1.2 module, the wiring can be performed as shown in the figure below. Note: Since power will still be supplied to the Relay 1.2 module after it has cut power to the motherboard, it is extremely dangerous to touch the it while the printer is still connected to mains. -
Page 11: Power Loss Recovery Module Wiring
Produced by BIGTREETECH 2.4 P OWER LOSS RECOVERY MODULE WIRING When using the BIGTREETECH mini UPS, wire it to the motherboard as shown in the figure below. As always, never perform any work on the motherboard with power applied. -
Page 12: Rgb Led Wiring
Produced by BIGTREETECH 2.5 RGB LED WIRING When using the motherboard with RGB LEDs you should wire them as shown in the image below. The exact pinout of the connector can be found on the silkscreen on the underside of the motherboard. -
Page 13: Probe Port Wiring
Produced by BIGTREETECH 2.7 P ROBE PORT WIRING The probe port has been provided to allow users to interface bed probes directly to the motherboard without the need for a BAT85 diode to act as a protection against high voltages. The probe signal pin connects to an internal optocoupler that in turn triggers the pin connected to the microcontroller. - Page 14 Produced by BIGTREETECH Refer to Section 4.2 for further information on how to configure the voltage used by the probe port.
-
Page 15: Stepper Driver Operational Modes
Produced by BIGTREETECH 3 STEPPER DRIVER OPERATIONAL MODES 3.1 S DIR MODE If you are using drivers that do not support configuration over a serial port then you will need to operate them in step/dir mode and set the jumpers beneath the stepper driver according to the microstepping you desire. -
Page 16: Spi Mode
Produced by BIGTREETECH 3.3 SPI M When using a driver in SPI mode, connect the jumpers beneath that driver as shown in the image below. -
Page 17: Motherboard Jumper Settings
Produced by BIGTREETECH 4 MOTHERBOARD JUMPER SETTINGS 4.1 M OTOR POWER SELECTION JUMPERS Each motor driver on the octopus pro can have the voltage used by it configured via a jumper. Note: Before powering your octopus pro, always double check the driver voltage jumpers to ensure that the correct voltage is being routed to each driver. - Page 18 Produced by BIGTREETECH All of the fan outputs and the proximity sensor input can individually have the voltage supplied by their pin header selected by configuring the jumpers associated with each header. Configure the jumpers as below to select 24V (note that all are shown in the same configuration even though they can be individually configured).
-
Page 19: Stallguard Jumper Settings
Produced by BIGTREETECH 4.3 S TALLGUARD JUMPER SETTINGS The “diag” jumpers which are used to connect the diagnostic output pin to the endstop inputs for drivers which support the stallguard feature (TMC2209/TMC2226, etc…) can be found in the location shown in the image below. -
Page 20: Pt100/Pt1000 Dip Switches
Produced by BIGTREETECH 4.5 PT100/PT1000 DIP S WITCHES The PT100 amplifier supports 2,3 and 4 wire connections to the board. However, the DIP switch needs to be configured for the setup that you are using. You can find the DIP switch in the location shown in the image below. Note that the DIP switch has switch numbers and the “on”... - Page 21 Produced by BIGTREETECH If you are using a three-wire arrangement, then you will also need to make a small adjustment to an SMD resistor on the board. The image below shows the factory default resistor setting in the blue box (2/4 wire arrangement). Using a 3 wire arrangement will require you to move the resistor from the blue box into the red box and then to leave the pads in the blue box unpopulated.
-
Page 22: Motherboard Physical Specifications
Produced by BIGTREETECH 5 MOTHERBOARD PHYSICAL SPECIFICATIONS 5.1 M OTHERBOARD SIZE 5.2 M OTHERBOARD CONNECTORS... -
Page 23: Motherboard Pins
Produced by BIGTREETECH 5.3 M OTHERBOARD PINS The image below is a snippet taken from the PINS.pdf document. For better viewability please consult the PINS.pdf document. -
Page 24: Communicating With The Motherboard
Produced by BIGTREETECH 6 COMMUNICATING WITH THE MOTHERBOARD After connecting the motherboard to a computer via a USB cable, the driver will be automatically installed (windows, linux and macos). Upon installation of the driver the motherboard should automatically enumerate as a virtual serial device which can be used for data transfer. -
Page 25: Motherboard Firmware Support
Produced by BIGTREETECH 7 MOTHERBOARD FIRMWARE SUPPORT Marlin, Klipper and RRF (429 variant) all support the Octopus Pro. You can compile and configure you firmware variant of choice according to the methods specified by the developers of that firmware. In time, configuration files for different firmware distributions... - Page 26 Produced by BIGTREETECH The 429 variant of the board makes use of a different frequency crystal oscillator (8MHz) and therefore the klipper configuration needs to be adjusted slightly as show in in the image below.
-
Page 27: Precautions
Produced by BIGTREETECH 8 PRECAUTIONS The precautions listed in this section should not be overlooked. They have been included as reminders to prevent damage to your motherboard. 1. Never work on the motherboard with power applied. 2. Always double check all jumpers and wiring before applying power. Improper jumpers or wiring can cause damage to the motherboard and possibly even peripherals that it interfaces with. -
Page 28: Thank You From Bigtreetech
Produced by BIGTREETECH 9 A THANK YOU FROM BIGTREETECH If you encounter problems when using the Octopus, please contact BIGTREETECH and we will be glad to assist. You can find our latest support contact details at our website: https://www.bigtree-tech.com/. If you have any comments or suggestions on this or any of our other products then please reach out to us via our support channels and we will be glad to take your thoughts into consideration. -
Page 29: Appendices
Produced by BIGTREETECH APPENDICES A1. COMMON DRIVER JUMPER TABLES These tables are provided as a convenience to the user. Since we cannot speak on behalf of the manufacturer of your drivers it is recommended that you still find the datasheet for your drivers and reference the pin settings required for the microstepping factor that you desire. - Page 30 Produced by BIGTREETECH...
Need help?
Do you have a question about the OCTOPUS - PRO and is the answer not in the manual?
Questions and answers