
Subscribe to Our Youtube Channel
Related Manuals for AEG SCT91800S0


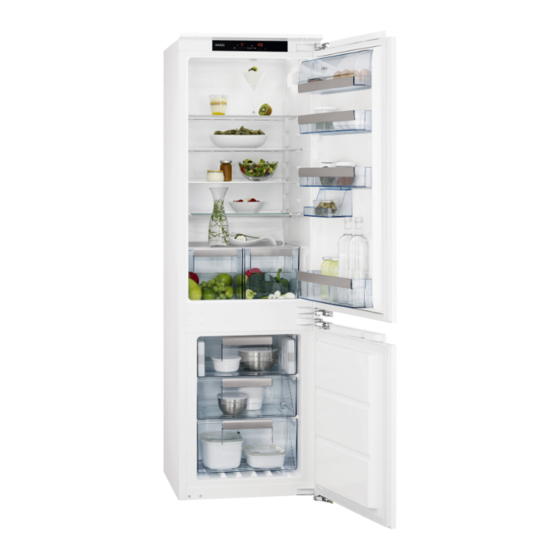
Summary of Contents for AEG SCT91800S0
- Page 1 User Manual SCT91800S0 Fridge Freezer Notice d'utilisation Réfrigérateur/congélateur Istruzioni per l’uso Frigo-Congelatore...
-
Page 2: Table Of Contents
10. TECHNICAL INFORMATION................22 FOR PERFECT RESULTS Thank you for choosing this AEG product. We have created it to give you impeccable performance for many years, with innovative technologies that help make life simpler features you might not find on ordinary appliances. Please spend a few minutes reading to get the very best from it. -
Page 3: Safety Information
ENGLISH SAFETY INFORMATION Before the installation and use of the appliance, carefully read the supplied instructions. The manufacturer is not responsible if an incorrect installation and use causes injuries and damages. Always keep the instructions with the appliance for future reference. -
Page 4: Safety Instructions
Do not use water spray and steam to clean the • appliance. Clean the appliance with a moist soft cloth. Only use • neutral detergents. Do not use abrasive products, abrasive cleaning pads, solvents or metal objects. Do not store explosive substances such as aerosol •... - Page 5 ENGLISH 2.3 Use • Before maintenance, deactivate the appliance and disconnect the mains WARNING! plug from the mains socket. Risk of injury, burns, • This appliance contains hydrocarbons electrical shock or fire. in the cooling unit. Only a qualified person must do the maintenance and •...
-
Page 6: Operation
3. OPERATION 3.1 Control Panel Appliance ON/OFF button Freezer Temperature warmer button Fridge Temperature colder button Display Fridge Temperature warmer button It is possible to change predefined sound of buttons to a loudly one by Mode pressing together Mode and... - Page 7 ENGLISH 3.4 Switching off the fridge a certain length of time or when a reminder is needed in order not to forget 1. Press Mode until the corresponding the bottles placed in the freezer for fast icon appears. cooling. The fridge OFF indicator and the fridge 1.
- Page 8 The buzzer switches off. Empty the fridge The freezer temperature indicator shows compartment before turning the highest temperature reached for a the Holiday mode on. few seconds, then displays the set temperature again. 1. Press the Mode button until the Holiday indicator icon appears.
-
Page 9: Daily Use
ENGLISH 4. DAILY USE 4.1 Cleaning the interior In the event of accidental defrosting, for example due Before using the appliance for the first to a power failure, if the time, wash the interior and all internal power has been off for accessories with lukewarm water and longer that the value shown some neutral soap so as to remove the... - Page 10 4.6 Ice-cube production 4.10 Positioning the sliding This appliance is equipped with one or more trays for the production of ice- 1. Lift the shelf with the sliding box cubes. upwards and out of the holders in the door.
-
Page 11: Hints And Tips
ENGLISH temperature recovering after door opening or when the ambient temperature is high. It is possible to switch on the device manually when needed (refer to DynamicAir mode). The DynamicAir device stops when the door is open and restarts immediately after the door closing. -
Page 12: Care And Cleaning
5.5 Hints for freezing • water ices, if consumed immediately after removal from the freezer To help you make the most of the compartment, can possibly cause the freezing process, here are some skin to be freeze burnt; important hints: •... -
Page 13: Troubleshooting
ENGLISH 6.4 Defrosting the freezer The equipment has to be cleaned regularly: The freezer compartment is frost free. 1. Clean the inside and accessories with This means that there is no build up of lukewarm water and some neutral frost when it is in operation, neither on soap. - Page 14 7.1 What to do if... Problem Possible cause Solution The appliance does not op- The appliance is switched Switch on the appliance. erate. off. The mains plug is not con- Connect the mains plug to the nected to the mains socket mains socket correctly.
- Page 15 ENGLISH Problem Possible cause Solution The compressor does not This is normal, no error has The compressor starts after a start immediately after occurred. period of time. pressing the COOLMATIC, or after changing the tem- perature. Water flows inside the refrig- The water outlet is clog- Clean the water outlet.
-
Page 16: Installation
7.3 Replacing the lamp If the advice does not lead to the desired result, call the The appliance is equipped with a longlife nearest brand-mark service. LED interior light. Only service is allowed to replace the 7.2 Closing the door lighting device. - Page 17 ENGLISH 8.4 Ventilation requirements The airflow behind the appliance must be sufficient. min. 5 cm 200 cm min. 200 cm 5. Tighten the lower pin on the opposite site. 6. Install the spacer. 7. Install the door. 8. Tighten the upper pin. 8.5 Door reversibility WARNING! Before carrying out any...
- Page 18 8.6 Installing the appliance The lower hinge cover (in the accessories bag) makes sure that the CAUTION! distance between the appliance and Make sure that the mains the kitchen furniture is correct. cable can move freely. Make sure that the clearance between the appliance and the 1.
- Page 19 ENGLISH 9. Attach the covers (C, D) to the lugs 14. Tighten the screws of the part (G) and the hinge holes. again. 15. Attach the part (H) to the part (G). 16. Disconnect the parts (Ha), (Hb), (Hc) and (Hd). 10.
- Page 20 8 mm 19. Open the appliance door and the 23. Place the small square on the guide kitchen furniture door at an angle of again and fix it with the screws 90°. supplied. 20. Insert the small square (Hb) into 24.
-
Page 21: Noises
ENGLISH 9. NOISES There are some sounds during normal running (compressor, refrigerant circulation). HISSS! BRRR SSSRRR! SSSRRR! HISSS! HISSS! -
Page 22: Technical Information
CRACK! CRACK! BLUBB! BLUBB! 10. TECHNICAL INFORMATION 10.1 Technical data Dimensions of the recess Height 1780 Width Depth Rising time Hours Voltage Volts 230 - 240 Frequency The technical information are situated in internal side of the appliance and in the the rating plate, on the external or energy label. - Page 23 10. CARACTÉRISTIQUES TECHNIQUES..............45 POUR DES RÉSULTATS PARFAITS Merci d'avoir choisi ce produit AEG. Nous l'avons conçu pour qu'il vous offre des performances irréprochables pour longtemps, en intégrant des technologies innovantes qui vous simplifient la vie grâce à des caractéristiques que vous ne trouverez pas forcément sur des appareils ordinaires.
-
Page 24: Consignes De Sécurité
CONSIGNES DE SÉCURITÉ Avant d'installer et d'utiliser cet appareil, lisez soigneusement les instructions fournies. Le fabricant ne peut être tenu pour responsable des dommages et blessures liés à une mauvaise installation ou utilisation. Conservez toujours cette notice avec votre appareil pour vous y référer ultérieurement. -
Page 25: Instructions De Sécurité
FRANÇAIS N'endommagez pas le circuit frigorifique. • N'utilisez pas d'appareils électriques à l'intérieur des • compartiments de conservation des aliments de l'appareil, sauf s'ils sont du type recommandé par le fabricant. Ne pulvérisez pas d'eau ni de vapeur pour nettoyer •... - Page 26 Si ce n'est pas le cas, • Ne stockez jamais de gaz ou de contactez un électricien. liquide inflammable dans l'appareil. • Utilisez toujours une prise de courant • Ne placez pas de produits de sécurité correctement installée.
-
Page 27: Fonctionnement
FRANÇAIS • Le circuit frigorifique et les matériaux informations sur la marche à suivre d'isolation de cet appareil préservent pour mettre l'appareil au rebut. la couche d'ozone. • N'endommagez pas la partie du • La mousse isolante contient un gaz circuit de réfrigération située à... - Page 28 Les indicateurs de température indiquent L'indicateur Réfrigérateur OFF clignote. la température programmée par défaut. 2. Appuyez sur la touche OK pour Pour réinitialiser l'alarme, reportez-vous confirmer. au paragraphe « Alarme haute Le voyant OFF du réfrigérateur s'éteint. température ».
- Page 29 FRANÇAIS Le minuteur indique pendant quelques L'alarme s'éteint. secondes la valeur programmée L'indicateur de température/voyant du (30 minutes). thermostat du congélateur affiche 2. Appuyez sur la touche de diminution pendant quelques secondes la de la température ou sur la touche température la plus élevée atteinte, puis d'augmentation de la température affiche à...
-
Page 30: Utilisation Quotidienne
3.12 Mode Holiday L'indicateur FROSTMATIC s'affiche. La fonction FROSTMATIC se Cette fonction vous permet de laisser le désactive automatiquement compartiment réfrigérateur vide et fermé au bout de 52 heures. Pour pendant une longue période sans désactiver la fonction avant formation de mauvaises odeurs. - Page 31 FRANÇAIS les denrées fraîches à congeler dans Les petites portions peuvent même être le compartiment congélateur. cuites sans décongélation préalable : la 2. Placez les denrées fraîches à cuisson sera cependant un peu plus congeler dans le compartiment longue. FROSTMATIC. 4.5 Indicateur de température Le processus de congélation dure 24 heures : vous ne devez ajouter aucun...
- Page 32 être positionnées dans un tiroir dans la paroi arrière du comme vous le souhaitez. compartiment réfrigérateur. Pour exploiter au mieux l'espace, vous Le filtre purifie l'air en éliminant les pouvez placer les demi-clayettes avant odeurs des aliments du compartiment (A) sous les clayettes arrière.
-
Page 33: Conseils
FRANÇAIS 5. CONSEILS 5.1 Bruits normaux de • placez correctement les aliments pour que l'air puisse circuler librement fonctionnement autour Les bruits suivants sont normaux lorsque 5.4 Conseils pour la l'appareil est en cours de fonctionnement : réfrigération • Un léger gargouillis lorsque le liquide Conseil utiles : réfrigérant est pompé. -
Page 34: Entretien Et Nettoyage
5.6 Conseils pour le stockage • Préparez la nourriture en petits paquets pour une congélation rapide des aliments surgelés et uniforme, adaptés à l'importance de la consommation ; Pour obtenir les meilleures performances • Enveloppez les aliments dans des... - Page 35 FRANÇAIS L'appareil doit être nettoyé forme pas pendant que l’appareil est en régulièrement : fonctionnement, que ce soit sur les parois internes ou sur les aliments. 1. Nettoyez l'intérieur et les accessoires avec de l'eau tiède et un détergent L'absence de givre est due à la doux.
-
Page 36: Cas D'anomalie De Fonctionnement
7. EN CAS D'ANOMALIE DE FONCTIONNEMENT AVERTISSEMENT! Reportez-vous aux chapitres concernant la sécurité. 7.1 En cas d'anomalie de fonctionnement ... Problème Cause probable Solution L'appareil ne fonctionne pas L'appareil est à l'arrêt. Mettez l'appareil en marche. du tout. La fiche du câble d'alimen-... - Page 37 FRANÇAIS Problème Cause probable Solution La porte n'est pas fermée Reportez-vous au chapitre correctement. « Fermeture de la porte ». La fonction FROSTMATIC Consultez le paragraphe est activée. « Fonction FROSTMATIC ». La fonction COOLMATIC Consultez le paragraphe est activée. «...
-
Page 38: Installation
Problème Cause probable Solution La température à l'intérieur Le thermostat n'est pas ré- Augmentez/réduisez la tem- de l'appareil est trop basse/ glé correctement. pérature. élevée. La porte n'est pas fermée Reportez-vous au chapitre correctement. « Fermeture de la porte ». - Page 39 FRANÇAIS doit être placé dans le tiroir avant la mise en fonction de l'appareil. Classe Température ambiante clima- 1. Ouvrez le tiroir. tique 2. Sortez le filtre du sac plastique. 3. Installez le filtre dans le tiroir. +16 °C à +32 °C 4.
- Page 40 ATTENTION! Faites une dernière Pour effectuer les opérations vérification pour vous suivantes, il est conseillé de assurer que : se faire aider par une autre • Toutes les vis sont bien personne pour maintenir serrées. fermement les portes de •...
- Page 41 FRANÇAIS Assurez-vous que l'écart entre l'appareil et le meuble est de 4 mm. 6. Ouvrez la porte. Mettez en place le cache de la charnière inférieure. 4 mm 2. Installez l'appareil dans son emplacement. 44 mm 3. Poussez l'appareil dans la direction indiquée par les flèches (1) jusqu'à...
- Page 42 9. Fixez les protections (C, D) sur les 14. Serrez de nouveau les vis de la ergots et dans les trous des pièce (G). charnières. 15. Fixez la pièce (H) à la pièce (G). 16. Détachez les pièces (Ha), (Hb), (Hc) et (Hd).
- Page 43 FRANÇAIS 8 mm 19. Ouvrez la porte de l'appareil et la 23. Placez de nouveau le petit carré sur porte du meuble de cuisine à un le guide et attachez-le avec les vis angle de 90°. prévues à cet effet. 20.
-
Page 44: Bruits
• La porte s'ouvre et se ferme correctement. 9. BRUITS L'appareil émet certains bruits pendant son fonctionnement (compresseur, circuit frigorifique). HISSS! BRRR SSSRRR! SSSRRR! HISSS! HISSS! -
Page 45: Caractéristiques Techniques
FRANÇAIS CRACK! CRACK! BLUBB! BLUBB! 10. CARACTÉRISTIQUES TECHNIQUES 10.1 Caractéristiques techniques Dimensions de la niche d'encastre- ment Hauteur 1780 Largeur Profondeur Autonomie de fonctionnement Heures Voltage 230 - 240 Fréquence Les caractéristiques techniques figurent côté intérieur ou extérieur de l'appareil sur la plaque signalétique située sur le et sur l'étiquette énergétique. - Page 46 10. DATI TECNICI....................... 68 PER RISULTATI PERFETTI Grazie per aver scelto di acquistare questo prodotto AEG. Lo abbiamo creato per fornirvi prestazioni impeccabili per molti anni, grazie a tecnologie innovative che vi semplificheranno la vita - funzioni che non troverete sulle normali apparecchiature.
-
Page 47: Informazioni Per La Sicurezza
ITALIANO INFORMAZIONI PER LA SICUREZZA Leggere attentamente le istruzioni fornite prima di installare e utilizzare l'apparecchiatura. Il produttore non è responsabile se un'installazione ed un uso non corretto dell'apparecchiatura provocano lesioni e danni. Tenere sempre le istruzioni a portata di mano come riferimento futuro. -
Page 48: Istruzioni Di Sicurezza
Non danneggiare il circuito refrigerante. • Non utilizzare apparecchiature elettriche all'interno • dei comparti di conservazione degli alimenti, ad eccezione di quelli consigliati dal costruttore. Non nebulizzare acqua né utilizzare vapore per pulire • l'apparecchiatura. Pulire l'apparecchiatura con un panno inumidito e •... - Page 49 ITALIANO a quelli dell'impianto. In caso • Non conservare gas e liquidi contrario, contattare un elettricista. infiammabili nell'apparecchiatura. • Utilizzare sempre una presa elettrica • Non appoggiare o tenere liquidi o con contatto di protezione materiali infiammabili, né oggetti correttamente installata. facilmente incendiabili •...
-
Page 50: Uso Dell'apparecchio
• Il circuito refrigerante e i materiali di come smaltire correttamente isolamento di questa apparecchiatura l'apparecchiatura. rispettano l'ozono. • Non danneggiare i componenti • La schiuma isolante contiene gas dell'unità refrigerante che si trovano infiammabili. Contattare le autorità vicino allo scambiatore di calore. - Page 51 ITALIANO 3.6 Regolazione della Per resettare l'allarme, fare riferimento alla sezione "Allarme di alta temperatura temperatura". Impostare la temperatura del frigorifero Per selezionare una temperatura diversa, e del congelatore premendo i regolatori fare riferimento alla sezione della temperatura. "Regolazione della temperatura". Temperature predefinite impostate: Se "dEMo"...
- Page 52 Tasto temperatura più • spia di allarme lampeggiante calda. • segnale acustico Al termine del conto alla rovescia la spia Al ripristino delle condizioni normali MinuteMinder lampeggia e viene (porta chiusa), l'allarme si interrompe. emesso un segnale acustico. Premere Durante l'allarme, il segnale acustico può...
-
Page 53: Utilizzo Quotidiano
ITALIANO 3.13 Funzione FROSTMATIC 3.14 Funzione DYNAMICAIR La funzione FROSTMATIC accelera il 1. Premere Mode finché non appare congelamento di alimenti freschi e, al l'icona corrispondente. tempo stesso, protegge gli alimenti già La spia DYNAMICAIR lampeggia. conservati da riscaldamenti indesiderati. 2. - Page 54 4.6 Produzione di cubetti di In caso di sbrinamento ghiaccio accidentale, per esempio a causa di un'interruzione Questa apparecchiatura è dotata di una dell'alimentazione elettrica, o più vaschette per la produzione di se l'alimentazione manca cubetti di ghiaccio. per un periodo superiore al...
-
Page 55: Consigli E Suggerimenti Utili
ITALIANO 4.10 Posizionamento della 4.12 DynamicAir scatola scorrevole Il vano frigorifero è dotato di un dispositivo che consente un rapido 1. Sollevare il ripiano con la parte raffreddamento degli alimenti e una superiore della scatola rivolta verso temperatura più uniforme nello l'alto ed estrarla dalle guide. - Page 56 (fenomeno fisico • Frutta e verdura: devono essere pulite naturale e non pericoloso). accuratamente e poste negli appositi • Un lieve scatto dal regolatore della cassetti. temperatura quando il compressore si • Burro e formaggio: devono essere accende e si spegne.
-
Page 57: Pulizia E Cura
ITALIANO 5.6 Consigli per la • non aprire frequentemente la porta e limitare il più possibile i tempi di conservazione dei surgelati apertura; • una volta scongelati, gli alimenti si Per ottenere risultati ottimali è deteriorano rapidamente e non consigliabile: possono essere ricongelati;... -
Page 58: Risoluzione Dei Problemi
ATTENZIONE! fuoriesca sugli alimenti. Se l'apparecchiatura rimane accesa, farla controllare periodicamente per evitare che gli alimenti si deteriorino in caso di interruzione della corrente elettrica. 6.6 Sostituzione del filtro a carbone Il filtro dell'aria è un materiale di consumo e 6.4 Sbrinamento del... - Page 59 ITALIANO 7.1 Cosa fare se... Problema Causa possibile Soluzione L'apparecchiatura non fun- L'apparecchiatura è spen- Accendere l’apparecchiatura. ziona. La spina non è inserita cor- Inserire correttamente la spina rettamente nella presa di nella presa di alimentazione. alimentazione. Assenza di tensione nella Collegare alla presa di alimen- presa di alimentazione.
- Page 60 Problema Causa possibile Soluzione Il compressore non si avvia Ciò è normale, non si è Il compressore si avvia dopo immediatamente dopo verificato alcun errore. un certo periodo di tempo. avere premuto il tasto FROSTMATIC, oppure dopo avere cambiato la tempera- tura.
-
Page 61: Installazione
ITALIANO Problema Causa possibile Soluzione La temperatura degli ali- Prima di introdurre gli alimen- menti è troppo alta. ti, lasciarli raffreddare a tem- peratura ambiente. Sono stati introdotti molti Introdurre gli alimenti un poco alimenti contemporanea- alla volta. mente. La porta viene aperta fre- Aprire la porta solo se neces- quentemente. - Page 62 In alcuni modelli potrebbero verificarsi delle anomalie se non si rispettano le temperature indicate. Il corretto funzionamento può essere garantito solo nel rispetto delle temperature indicate. In caso di dubbi sul luogo di installazione dell'apparecchiatura, contattare il venditore, il nostro Centro di Assistenza o il rivenditore più...
- Page 63 ITALIANO Eseguire un controllo finale per accertarsi che: • Tutte le viti siano serrate. • La guarnizione magnetica aderisca all’apparecchiatura. • La porta si apra e si chiuda correttamente. Se la temperatura ambiente è bassa (ad esempio in inverno), è possibile che la guarnizione non aderisca perfettamente all'apparecchiatura.
- Page 64 Accertarsi che lo spazio fra l'apparecchiatura e il mobile sia di 4 6. Aprire la porta. Applicare il copricerniera inferiore. 4 mm 2. Installare l'apparecchiatura nella nicchia. 3. Spingere l'apparecchiatura 44 mm seguendo il senso delle frecce (1) finché la mascherina superiore si arresta contro il mobile della cucina.
- Page 65 ITALIANO 9. Applicare i cappucci (C, D) ai 14. Serrare nuovamente le viti della parte coprigiunti e ai fori delle cerniere. (G). 15. Fissare la parte (H) alla parte (G). 16. Staccare le parti (Ha), (Hb), (Hc) e (Hd). 10. Installare la griglia di sfiato (B). 17.
- Page 66 8 mm 19. Aprire la porta dell'apparecchiatura e 23. Riapplicare il quadratino sulla guida l'anta del mobile da cucina con e fissarlo con le viti in dotazione. un'angolazione di 90°. 24. Allineare l'anta del mobile da cucina 20. Inserire il quadratino (Hb) nella guida e la porta dell'apparecchiatura (Ha).
-
Page 67: Rumori
ITALIANO 9. RUMORI Durante l'uso, alcuni rumori di funzionamento (come quelli del compressore o del circuito refrigerante) sono da considerarsi normali. HISSS! BRRR SSSRRR! SSSRRR! HISSS! HISSS! -
Page 68: Dati Tecnici
BLUBB! BLUBB! CRACK! CRACK! 10. DATI TECNICI 10.1 Dati tecnici Dimensioni nicchia di incasso Altezza 1780 Larghezza Profondità Tempo di risalita Tensione Volt 230 - 240 Frequenza I dati tecnici sono riportati sulla targhetta interno dell'apparecchiatura e dei dati applicata sul lato esterno o sull'etichetta dei valori energetici. - Page 69 ITALIANO...
- Page 70 www.aeg.com...
- Page 71 ITALIANO...
- Page 72 www.aeg.com/shop...
Need help?
Do you have a question about the SCT91800S0 and is the answer not in the manual?
Questions and answers