Table of Contents
Advertisement
Available languages
Available languages
Quick Links
Advertisement
Chapters
Table of Contents

Related Manuals for AEG SCT91800S0


Summary of Contents for AEG SCT91800S0
- Page 1 EN User manual SCT91800S0 IT Istruzioni per l’uso...
-
Page 2: Table Of Contents
8. NOISES ..............22 FOR PERFECT RESULTS Thank you for choosing this AEG product. We have created it to give you impeccable performance for many years, with innovative technologies that help make life simpler –... -
Page 3: Safety Instructions
ENGLISH SAFETY INSTRUCTIONS In the interest of your safety and to en- 1.2 General safety sure the correct use, before installing WARNING! and first using the appliance, read this user manual carefully, including its hints and warnings. To avoid unnecessary mis- Keep ventilation openings, in the appli- takes and accidents, it is important to ance enclosure or in the built-in struc-... - Page 4 WARNING! • Appliance's manufacturers storage Any electrical component (power recommendations should be strictly cord, plug, compressor) must be adhered to. Refer to relevant instruc- replaced by a certified service tions. agent or qualified service per- • Do not place carbonated or fizzy sonnel to avoid hazard.
-
Page 5: Control Panel
ENGLISH • The appliance must not be located ozone layer, in either its refriger- close to radiators or cookers. ant circuit or insulation materials. The appliance shall not be dis- • Make sure that the mains plug is ac- carded together with the urban cessible after the installation of the ap- refuse and rubbish. - Page 6 Alarm indicator Press the fridge temperature regula- tor. Child Lock function Minute Minder function Press the Mode button until the cor- DYNAMICAIR function responding icon appears. The Fridge Off indicator flashes. 2.2 Switching on Press the OK button to confirm.
- Page 7 ENGLISH The Timer start to flash (min). The alarm indicator continue to flash At the end of the countdown the Minute until the normal conditions are re- Minder indicator flashes and an audible stored. alarm sounds: When the alarm has returned the alarm indicator goes off.
-
Page 8: Daily Use
To switch on the function: Press the OK button to confirm. Press the Mode button until the cor- The FROSTMATIC indicator goes responding icon appears. off. The Holiday indicator flashes. The function switches off by se- lecting a different freezer set The fridge temperature indicator temperature. - Page 9 ENGLISH The maximum amount of food that can 3.4 Thawing be frozen in 24 hours is specified on the Deep-frozen or frozen food, prior to be- rating plate, a label located on the in- ing used, can be thawed in the refrigera- side of the appliance.
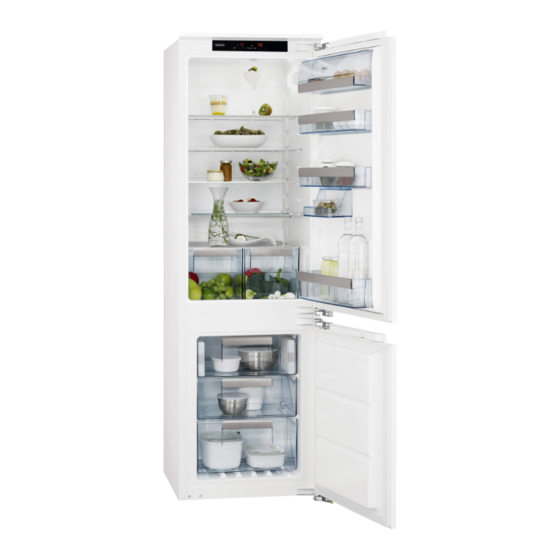
- Page 10 10 www.aeg.com 3.8 Movable shelves The walls of the refrigerator are equip- ped with a series of supports so that the shelves can be positioned as desired. For better use of space, the front half- shelves can be placed under the rear ones.
-
Page 11: Helpful Hints And Tips
ENGLISH 3.12 DynamicAir The refrigerator compartment is equip- ped with a device that allows for rapid cooling of foods and more uniform tem- perature in the compartment. This device activates by itself when nee- ded, for example for a quick tempera- ture recovering after door opening or when the ambient temperature is high. -
Page 12: Care And Cleaning
12 www.aeg.com 4.4 Hints for freezing • water ices, if consumed immediately after removal from the freezer com- To help you make the most of the freez- partment, can possibly cause the skin ing process, here are some important to be freeze burnt;... - Page 13 ENGLISH that the outer casing of this appliance is New active air filters can be purchased only cleaned with warm water with a little from your local dealer. washing-up liquid added. Refer to "Installation of the carbon air fil- After cleaning, reconnect the equipment ter"...
-
Page 14: What To Do If
14 www.aeg.com 6. WHAT TO DO IF… WARNING! Before troubleshooting, discon- nect the mains plug from the mains socket. Only a qualified electrician or competent person must do the troubleshooting that is not in this manual. Problem Possible cause Solution... - Page 15 ENGLISH Problem Possible cause Solution The compressor This is normal, no error The compressor starts af- does not start imme- has occurred. ter a period of time. diately after press- ing the FROSTMAT- IC or COOLMATIC button, or after changing the tem- perature.
-
Page 16: Installation
16 www.aeg.com Problem Possible cause Solution dEMo appears on The appliance is in dem- Keep pressed approxi- the Display. onstration mode (dEMo). mately 10 sec. the OK but- ton since a long sound of buzzer is heard and the Display shut off for a short while: appliance start works regularly. - Page 17 ENGLISH 7.3 Installation of the CLEANAIR CONTROL Filter TheCLEANAIR CONTROL Filter is an ac- tive carbon filter which absorbs bad odors maintain the best flavour and aro- ma for all foodstuffs without risk of odor cross contamination. On delivery the carbon filter is in a plas- tic bag to preserve performance.
- Page 18 18 www.aeg.com • Loosen and remove the lower pin. On the opposite side: • Tighten the lower pin. • Install the lower door. • Tighten the middle hinge. • Install the spacer. • Install the upper door. • Tighten the upper pin.
- Page 19 ENGLISH Install the appliance in the niche. Push the appliance in the direction of the arrow (1) until the upper gap cover stops against the kitchen furniture. Push the appliance in the direction of the arrow (2) against the cupboard on the opposite side of the hinge.
- Page 20 20 www.aeg.com Remove the correct part from the hinge cover (E). Make sure to remove the part DX, in the case of right hinge, SX in opposite case. Attach the covers (C, D) to the lugs and the hinge holes.
- Page 21 ENGLISH Disconnect the parts (Ha), (Hb), (Hc) and (Hd). Install the part (Ha) on the inner side of ca. 50 mm the kitchen furniture door. 90° 21 mm 90° ca. 50 mm 21 mm Push the part (Hc) on the part (Ha). Open the appliance door and the kitchen furniture door at an angle of 8 mm...
-
Page 22: Noises
22 www.aeg.com Remove the brackets and mark a dis- tance of 8 mm from the outer edge of 8 mm the door where the nail must be fitted (K). Place the small square on the guide again and fix it with the screws sup- plied. - Page 23 ENGLISH HISSS! BRRR SSSRRR! SSSRRR! HISSS! HISSS! BLUBB! CRACK! CRACK! BLUBB!
- Page 24 24 www.aeg.com Dimension of the recess Height 1780 mm Width 560 mm Depth 560 mm Rising Time 21 h Voltage 230-240 V Frequency 50 Hz A cavity depth of 560 mm is recommen- The technical information are situated in ded for the appliance. If the cavity depth...
- Page 25 8. RUMORI ..............47 PER RISULTATI PERFETTI Grazie per aver scelto di acquistare questo prodotto AEG. Lo abbiamo creato per fornirvi prestazioni impeccabili per molti anni, grazie a tecnologie innovative che vi semplificheranno la vita - funzioni che non troverete sui normali elettrodomestici.
-
Page 26: Istruzioni Di Sicurezza
26 www.aeg.com ISTRUZIONI DI SICUREZZA Per garantire un impiego corretto e sicu- minare l'apparecchio sostituito, per ro dell'apparecchio, prima dell'installa- evitare che diventi una trappola mor- zione e del primo utilizzo leggere con at- tale per i bambini. tenzione il libretto istruzioni, inclusi i suggerimenti e le avvertenze. - Page 27 ITALIANO AVVERTENZA! posteriore (per le apparecchiature di Tutti i componenti elettrici (cavo tipo no-frost) di alimentazione, spina, com- • Gli alimenti congelati non devono es- pressore) devono essere sostituiti sere ricongelati una volta scongelati. da un tecnico certificato o da •...
-
Page 28: Pannello Dei Comandi
28 www.aeg.com • Attorno all'apparecchio vi deve essere • Gli interventi di assistenza devono es- un'adeguata circolazione dell'aria, al- sere eseguiti esclusivamente da tecni- trimenti si può surriscaldare. Per otte- ci autorizzati e utilizzando solo ricambi nere una ventilazione sufficiente se- originali. - Page 29 ITALIANO Indicatore della temperatura e timer 2.4 Spegnimento del del frigorifero frigorifero Indicatore OFF frigorifero Per spegnere il frigorifero: FunzioneCOOLMATIC Premere il tasto Mode finché non Funzione Holiday appare l'icona corrispondente. FunzioneFROSTMATIC L'indicatore di frigorifero spento e Indicatore della temperatura del l'indicatore dello scomparto frigo congelatore lampeggiano.
- Page 30 30 www.aeg.com Dopo un'interruzione di corrente 2.8 Funzione Sicurezza la temperatura impostata rimane Bambini in memoria. Per evitare che i tasti vengano premuti accidentalmente, selezionare la funzione 2.7 Funzione Minute Minder Sicurezza Bambini. La funzione Minute Minder deve essere Per attivare la funzione:...
- Page 31 ITALIANO • La spia di allarme lampeggia L'indicatore della temperatura del frigorifero visualizza la temperatura • Segnale acustico impostata. Al ripristino delle condizioni normali (sportello chiuso), l'allarme si interrom- Premere il tasto OK per confermare. Viene visualizzato l'indicatore Holi- Durante l'allarme, il segnale acustico day.
-
Page 32: Utilizzo Quotidiano
32 www.aeg.com Premere il tasto OK per confermare. Se la funzione è attivata automa- ticamente, la spia DYNAMICAIR La spia DYNAMICAIR si spegne. viene visualizzata (fare riferimen- to a "Utilizzo quotidiano"). L'attivazione della funzione DY- NAMICAIR aumenta il consumo di energia. - Page 33 ITALIANO 3.5 Produzione di cubetti di vaschette quindi inserirle nel vano con- gelatore. ghiaccio Non usare strumenti metallici per Questo apparecchio è equipaggiato con rimuovere le vaschette dal con- una o più vaschette per la produzione di gelatore. cubetti di ghiaccio. Riempire d'acqua le 3.6 Spia della temperatura Questa apparecchiatura viene venduta anche in Francia.
- Page 34 34 www.aeg.com 3.10 Posizionamento della scatola scorrevole La scatola scorrevole può essere inserita a diverse altezze. Per regolare l'altezza, procedere come segue: sollevare il ripiano con la parte supe- riore della scatola rivolta verso l'alto ed estrarla dalle guide togliere le staffe di fissaggio dalla...
-
Page 35: Consigli E Suggerimenti Utili
ITALIANO 4. CONSIGLI E SUGGERIMENTI UTILI 4.1 Consigli per il risparmio Bottiglie: con il tappo ben chiuso, pos- sono essere riposte sulla mensola porta- energetico bottiglie. Non conservare nel frigorifero banane, • Non aprire frequentemente la porta e patate, cipolle o aglio se non sono con- non lasciarla aperta più... -
Page 36: Pulizia E Cura
36 www.aeg.com mestico deve essere il più breve possi- • Una volta scongelati, gli alimenti si de- bile; teriorano rapidamente e non possono essere ricongelati; • Non aprire frequentemente la porta e limitare il più possibile i tempi di aper- •... -
Page 37: Cosa Fare Se
ITALIANO 5.3 Sbrinamento del vano frigorifero Durante l'uso normale, la brina viene eli- minata automaticamente dall'evaporato- re del vano frigorifero ogni volta che il motocompressore si arresta. L'acqua di sbrinamento giunge attraverso un foro di scarico in un apposito recipiente po- sto sul retro dell'apparecchiatura, sopra il motocompressore, dove evapora È... - Page 38 38 www.aeg.com Problema Possibile causa Soluzione L'apparecchiatura L'apparecchiatura è spen- Accendere l’apparecchia- non funziona. La tura. lampadina non si ac- cende. La spina non è inserita Inserire correttamente la correttamente nella presa spina nella presa di ali- di alimentazione. mentazione.
- Page 39 ITALIANO Problema Possibile causa Soluzione Sul pannello poste- Durante lo sbrinamento Non si tratta di un'anoma- riore del frigorifero automatico, la brina che lia. scorre acqua. si forma sul pannello po- steriore si scioglie. All'interno del frigo- Lo scarico dell'acqua è Pulire lo scarico dell'acqua.
-
Page 40: Installazione
40 www.aeg.com Problema Possibile causa Soluzione dEMo appare sul di- L'apparecchiatura è in Tenere il tasto OK premu- splay. modalità dimostrazione to per circa 10 sec., finché (dEMo). non si sente un suono pro- lungato ed il display si spe-... - Page 41 ITALIANO 7.3 Installazione del filtro CLEANAIR CONTROL Il filtroCLEANAIR CONTROL è un filtro al carbone attivo che assorbe i cattivi odori e permette a tutti gli alimenti conservati di mantenere le proprie proprietà orga- nolettiche senza il rischio di contamina- zione di odori.
- Page 42 42 www.aeg.com • Allentare la cerniera centrale. • Rimuovere la porta inferiore. • Allentare e rimuovere il perno inferio- Sul lato opposto: • Serrare il perno inferiore. • Installare la porta inferiore. • Serrare la cerniera centrale. • Installare il distanziatore.
- Page 43 ITALIANO Se necessario, tagliare la striscia sigil- lante adesiva e applicarla come illustra- to in figura. Installare l'apparecchiatura nella nic- chia. Spingere l'apparecchiatura in direzione della freccia (1) finché la mascherina superiore si arresta contro il mobile da cucina. Spingere l'apparecchiatura in direzione della freccia (2) contro il mobile sul lato opposto rispetto alla cerniera.
- Page 44 44 www.aeg.com Fissare l'apparecchiatura nella nicchia con 4 viti. Rimuovere la parte appropriata del co- pricerniera (E). Accertarsi di rimuovere la parte DESTRA per la cerniera di de- stra, o la parte SINISTRA per quella di sinistra. Applicare i cappucci (C, D) a coprigiun- ti e fori delle cerniere.
- Page 45 ITALIANO Collegare l'apparecchiatura lateral- mente alla parete laterale del mobile da cucina: Allentare le viti della parte (G) e spostare la parte (G) sino alla pare- te laterale del mobile. Serrare nuovamente le viti della parte (G). Fissare la parte (H) alla parte (G). Staccare le parti (Ha), (Hb), (Hc) e (Hd).
- Page 46 46 www.aeg.com Spingere la parte (Hc) sulla parte (Ha). Aprire la porta dell'apparecchiatura e l'anta del mobile da cucina con un'an- 8 mm golazione di 90°. Inserire il quadratino (Hb) nella guida (Ha). Unire la porta dell'apparecchiatura alla porta del mobile e marcare i fori.
-
Page 47: Rumori
ITALIANO Riapplicare il quadratino sulla guida e fissarlo con le viti in dotazione. Allineare lo sportello del mobile da cu- cina con quello dell'apparecchiatura regolando la parte (Hb). Premere la parte (Hd) sulla parte (Hb). Eseguire un controllo finale per accer- tarsi che: •... - Page 48 48 www.aeg.com SSSRRR! SSSRRR! HISSS! HISSS! CRACK! CRACK! BLUBB! BLUBB!
- Page 49 ITALIANO Dimensioni della rien- tranza Altezza 1780 mm Larghezza 560 mm Profondità 560 mm Tempo di risalita 21 ore Tensione 230 - 240 V Frequenza 50 Hz Si consiglia di mantenere una profondità I dati tecnici sono riportati sulla targhet- di 560 mm per la cavità...
- Page 50 50 www.aeg.com...
- Page 51 ITALIANO...
- Page 52 www.aeg.com/shop...
Need help?
Do you have a question about the SCT91800S0 and is the answer not in the manual?
Questions and answers