Electrolux LXB1AE13W0 User Manual
Hide thumbs
Also See for LXB1AE13W0:
- User manual (80 pages) ,
- User manual (80 pages) ,
- User manual (80 pages)
Table of Contents
Advertisement
Quick Links
Advertisement
Table of Contents

Related Manuals for Electrolux LXB1AE13W0


Summary of Contents for Electrolux LXB1AE13W0
- Page 1 LXB1AE13W0 Refrigerator User Manual...
-
Page 2: Table Of Contents
12. ENVIRONMENTAL CONCERNS..............16 WE’RE THINKING OF YOU Thank you for purchasing an Electrolux appliance. You’ve chosen a product that brings with it decades of professional experience and innovation. Ingenious and stylish, it has been designed with you in mind. So whenever you use it, you can be safe in the knowledge that you’ll get great results every time. - Page 3 ENGLISH of incorrect installation or usage. Always keep the instructions in a safe and accessible location for future reference. 1.1 Children and vulnerable people safety This appliance can be used by children aged from 8 • years and above and persons with reduced physical, sensory or mental capabilities or lack of experience and knowledge if they have been given supervision or instruction concerning the use of the appliance in a...
-
Page 4: Safety Instructions
– with food and accessible drainage systems; store raw meat and fish in suitable containers in the – refrigerator, so that it is not in contact with or drip onto other food. - Page 5 ENGLISH supply. This is to allow the oil to flow • Do not pull the mains cable to back in the compressor. disconnect the appliance. Always pull • Before carrying out any operations on the mains plug. the appliance (e.g. reversing the 2.3 Use door), remove the plug from the power socket.
-
Page 6: Installation
Please note that some of these spare 2.5 Care and cleaning parts are only available to professional repairers, and that not all... - Page 7 ENGLISH 3.1 Dimensions Overall dimensions ¹ Overall space required in use ³ 1165 ¹ the height, width and depth of the ³ the height, width and depth of the appliance without the handle appliance including the handle, plus the space necessary for free circulation of the cooling air, plus the space necessary Space required in use ²...
- Page 8 To ensure appliance's best functionality, If you have any doubts you should not install the appliance in the regarding where to install the nearby of the heat source (oven, stoves, appliance, please turn to the radiators, cookers or hobs) or in a place vendor, to our customer with direct sunlight.
- Page 9 ENGLISH 4. Lift the top cover and place it on a soft surface. 5. Unscrew the 4 screws that connect the upper hinge. Put the upper hinge in a safe place together with the screws. 1. Tilt the appliance carefully on a soft foam packaging or similar material to avoid any damage to the back of the appliance and the floor.
-
Page 10: Operation
14. Screw the remaining 2 screws on the top side of the appliance with no hinge. 15. Place the top cover on the appliance Install the door equipment. and tighten the screws on the back. Wait at least 4 hours before connecting the appliance to the power supply. -
Page 11: Hints And Tips
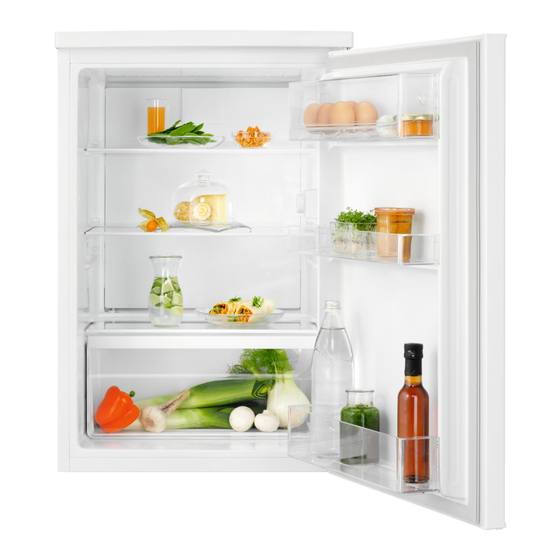
ENGLISH that the shelves can be positioned as desired. 3. Lift the left side of the shelf and To ensure correct air circulation, do not move the remove it. To put the shelf back in: glass shelf above the vegetable drawer. 1. -
Page 12: Care And Cleaning
6.3 Hints for food refrigeration • Butter and cheese: place in an airtight container or wrap in an aluminium foil • Fresh food compartment is the one or a polythene bag to exclude as much air as possible. marked (on the rating plate) with •... - Page 13 ENGLISH 8.1 What to do if... Problem Possible cause Solution The appliance does not The appliance is switched Switch on the appliance. operate. off. The mains plug is not con‐ Connect the mains plug to nected to the mains socket the mains socket correctly.
- Page 14 Problem Possible cause Solution Appliance is fully loaded Set a higher temperature. and is set to the lowest Refer to "Operation" chap‐ temperature. ter. Temperature set in the ap‐ Set a higher temperature. pliance is too low and the Refer to "Operation"...
-
Page 15: Noises
ENGLISH 8.3 Closing the door If the advice does not lead to the desired result, call the 1. Clean the door gaskets. nearest Authorized Service 2. If necessary, adjust the door. Refer Centre. to "Installation" chapter. 3. If necessary, replace the defective 8.2 Replacing the lamp door gaskets. -
Page 16: Information For Test Institutes
See the link detailed information about the energy label. 11. INFORMATION FOR TEST INSTITUTES Installation and preparation of the clearances shall be as stated in this User appliance for any EcoDesign verification Manual at Chapter 3. Please contact the shall be compliant with EN 62552. - Page 20 www.electrolux.com/shop...
Need help?
Do you have a question about the LXB1AE13W0 and is the answer not in the manual?
Questions and answers