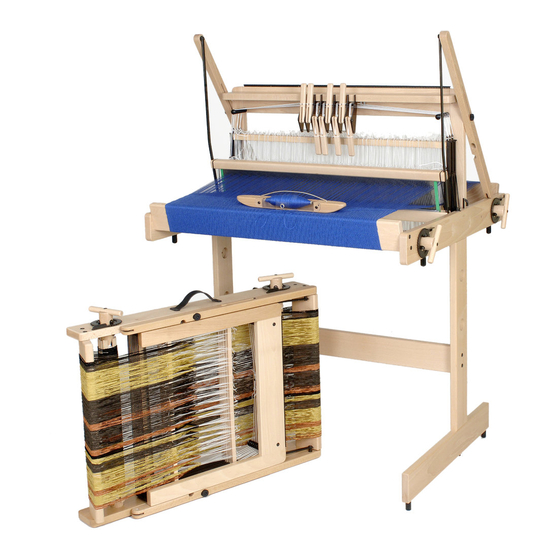
Louet Jane Instructions For Assembly
Hide thumbs
Also See for Jane:
- Instructions for assembly (16 pages) ,
- Installation manual ,
- Manual (29 pages)
Advertisement
Quick Links
Jane
Instructions for assembly
Instructions for Assembly ..............................................................................2
Folding the Jane Loom ................................................................................12
Tips and tricks .............................................................................................13
Troubleshooting ..........................................................................................14
Version: Jane-V8-EN
Advertisement

Subscribe to Our Youtube Channel
Related Manuals for Louet Jane


Summary of Contents for Louet Jane
- Page 1 Jane Instructions for assembly Instructions for Assembly ................2 Folding the Jane Loom ................12 Tips and tricks .....................13 Troubleshooting ..................14 Version: Jane-V8-EN...
- Page 3 Welcome to Your New Jane Loom We know you’re going to love your new Jane! Louët is dedicated to bringing you the most comfortable and enjoyable weaving experience. This manual provides you with step-by-step assembly instructions, as well as some commonly asked questions about usage.
-
Page 4: Instructions For Assembly
Instructions for Assembly After you have taken the loom out of the box, remove the cardboard buffers and wrapped paper. Open the hardware box which contains (Louët part number): 1. 2 beam handles (HL0076) 2. 4 buffers (BZ0084) 3. 2 black star knobs (BZ0085) 4. - Page 5 Turn the loom so that the bottom is up, and tap in the four dowels with a rubber coating using a rubber mallet. You will know you have reached the bottom of the holes when the sound changes when hammering. Turn the loom back onto its buffers and unfold it while you lifting the front slightly.
- Page 6 Use the 5 x 50 mm screws to attach the shelf with the toggles onto the loom. Use the two 4 x 35 mm screws to attach the handles onto the warp and cloth beams. Screw 8 of the 4x15mm screws into the holes of the clothbeam and the warpbeam, so that their heads level with the surface of the...
- Page 7 Create a half hitch in the texsolv cord and insert the apron bars, for a total of 3 times. The apron bars are marked where the cord loops should be positioned. Tighten the half-hitch-loops by pulling on the apron bar. After ensuring the cords at both sides of the loops have even tension, mark the middle of the...
- Page 8 Slip a bundle of heddles onto one of these incomplete shafts and untie the bundle. Count the number of heddles that you will need on a shaft and cut them apart, using a pair of sharp scissors. Insert the bars of another shaft through the separated bundle and move the heddles from the first shaft bars.
- Page 9 Press the ends of the shaft bars onto the bottom of the shaft sides as shown in the picture. Assemble all eight shafts the same way. On each shaft, cut the loops that connect the heddles. Make a knot at one end of each elastic cord at about 1 cm (5/8 inch).
- Page 10 Jane, which has a carrying handle. The 70 cm Jane does not have such a handle because it is too wide to comfortably carry the loom in that way. The 70 cm Jane can best be carried by turning it 90 degrees and hold it using the cross bar of the castle.
- Page 11 A shaft cord has to be attached to the toggles. Start with the toggle for the eighth shaft; when the loom is in the upside down position shown in the picture, it is the one at the left. Take a nylon cord in the middle and thread it through the hole of the toggle.
- Page 12 Both ends of the cord have to go between the pair of rollers that line up with the first toggle. Lead the ends of the cord to both sides in a way so that they are not twisted. Lead the elastic cord of the shaft over the rollers at the top (normally the bottom) of the loom.
- Page 13 Attach the cord to the eye of the sides of a shaft. Use the knot shown in the picture, created as follows: insert the cord from the inside, where the eye has a sharp edge, and wrap the tail around the notch, tucking the cord so that it crosses on the outside.
- Page 14 Again, lead the cord ends to both sides, as before. The picture shows how one cord end runs in front of the pair of rollers used by the cord installed previously. Continue this procedure for each shaft. After you have connected all shafts with their toggles, the cords will form the pattern shown in the picture.
- Page 15 Using the pilot holes, screw the four buffers onto the side of the loom (indicated by red arrows in the picture). When folded, Jane can stand on this side.
-
Page 16: Folding The Jane Loom
Before you fold the loom again, you have to pull all the toggles down, so all shafts are lifted. If there is a warp on the Jane, you have to release the tension by taking the ratchet out of the ratchet wheel on the cloth beam. -
Page 17: Tips And Tricks
Maintenance The Jane requires no special maintenance. However, we do recommend checking the tightness of the screws of the frame after the first couple of months. This is particularly important when the loom is standing in a dry... -
Page 18: Troubleshooting
Troubleshooting The shed is too small Possible cause: • The fabric has to be advanced. The handles are hard to lift Possible causes: • The tension of the warp is too high. • The fabric needs to be advanced. • You left the lease sticks in the warp between the shafts and the back beam.
Need help?
Do you have a question about the Jane and is the answer not in the manual?
Questions and answers