Advertisement
Quick Links
Advertisement

Subscribe to Our Youtube Channel
Related Manuals for GrillSmith CG2066801-GS


Summary of Contents for GrillSmith CG2066801-GS
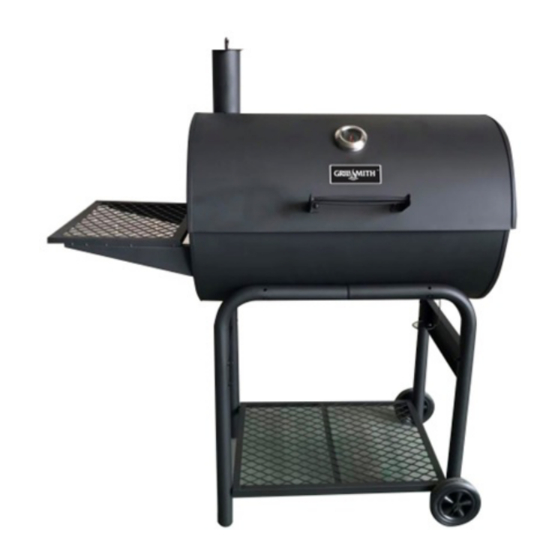
- Page 1 Assembly Instructions & User’s Manual 30" Barrel Grill Item Number: CG2066801-GS Please keep this instruction manual for future reference Customer Service: 1-888-837-1380, 8:00am to 5:00pm, PST Monday thru Friday Email: customerservice@rankam.com (Made in China) Revision 1 – 10/14...
-
Page 2: Table Of Contents
Table of Contents Warnings………………………………………………….….………… 3-4 Exploded View…………………………..…….…………….………..5 Tools, Parts and Hardware………..…………..…………………..6-10 Assembly Instructions…………………………………....11-14 Preparation for use & Lighting instructions…………......15 Operating Instructions………………………………………..……..16-18 Care and Maintenance………………………………………………….18 Warranty Information………………………………......19 Note: Before beginning assembly of product, make sure all parts are present. Compare parts with package content list and hardware contents. -
Page 3: Warnings
Warnings OUTDOOR USE ONLY! Never use grill indoors. Carbon Monoxide poisoning can lead to death. Do not operate grill indoors or in an enclosed space. ⚫Only use this grill on a hard, level, non-combustible, stable surface (concrete, ground, etc.) capable of supporting the weight of the grill. Never use on wooden or other surfaces that could burn. ⚫DO NOT attempt to remove charcoal ash tray while coals are hot. - Page 4 Warnings ⚫ When grilling, grease from meat may drip into the charcoal and cause a grease fire. If this should happen close lid to suffocate the flame. Do not use water to extinguish grease fires. ⚫ Use caution when opening the lid. Keep hands, face and body a safe distance away. Flash flare- ups may occur when air comes into contact with fire or hot coals.
-
Page 5: Exploded View
Exploded View Page 5 of 19... - Page 6 Tools Required Philips Screwdrivers Adjustable Wrench Pliers Some steps may require the assistance of another adult. This symbols will be shown in each procedure for indication of tightening the bolt and nut with tools. Parts List Description Picture Left Leg (Front) Part number: MET-BG0079 1 pc Left Leg (Rear)
- Page 7 Parts List Description Picture Stabilizing Plate Part number: MET-BG0082 2 pcs Wheel Axle Part number: MET-BG0083 1 pc Wheel Part number: PLA-BG0003 2 pcs Grill Body Part number: MET-BG0084 1 pc Side Table Part number: MET-BG0085 1 pc 10 Air Vent Part number: MET-BG0031 2 pcs Smoke Stack...
- Page 8 Parts List Description Picture Thermometer Assembly Part number: THE-BG0002 1 pc 13a: Thermometer - 1 pc 13b: Nut - 1 pc 14 Lid Handle Part number: MET-BG0086 1 pc 15 Grill Lid Assembly Part number: MET-BG0087 1 pc 15a: Grill Lid – 1 pc 15b: Logo Plate -1 pc 16 Warming Rack Part number: MET-BG0039...
- Page 9 Parts List Description Picture 21 Right Leg (Front) Part number: MET-BG0088 1 pc 22 Right Leg (Rear) Part number: MET-BG0089 1 pc Page 9 of 19...
- Page 10 Hardware Description Picture Bolt M6 x 50 12 pcs Bolt M6 x 15 14 pcs Cotter Pin 6 pcs Cap Nut M8 1 pc Lock Nut M6 2 pcs Flange Nut M6 20 pcs Spring 1 pc Lid Handle Insulation Washer 2 pcs Hinge Pin 2 pcs...
- Page 11 Assembly Instructions Step 1: Attach Legs (#1, 2) to Legs (#21, 22) Step 2: Attach Stabilizing Plate (#5) to legs. Hardware A - 8 pcs F - 8 pcs Attach Bottom Rack (#4) to legs. Hardware B - 4 pcs Attach Wheel Axle (#6) &...
- Page 12 Assembly Instructions Step 3: Attach Grill Body (#8) to cart. Hardware A - 4 pcs F - 4 pcs Step 4: Attach Side Table (#9) to Grill Body (#8). Hardware B - 4 pcs F - 4 pcs Attach Air Vent (#10) to both side of Grill Body (#8).
- Page 13 Assembly Instructions Step 5: Attach Smoke Stack (#11) to Grill Lid (#15), then attach Smoke Stack Cover (#12) on Smoke Stack (#11). Hardware B - 2 pcs D - 1 pc G - 1 pc F - 2 pcs Attach Lid Handle (#14) & Thermometer (#13) to Grill Lid (#15), attach Hinge Plate (#19) to both side of Grill Lid (#15)
-
Page 14: Assembly Instructions
Assembly Instructions Step 7: Hang Charcoal Tray Holder (#17) on the Charcoal Tray (#18). Put Cooking Grates (#20) and Charcoal Tray (#18) in grill body. Hang Grease Cup Clip (#3) under the grill body. Step 8: Assembly is completed. Be sure all bolts and nuts are tightened before use. -
Page 15: Preparation For Use & Lighting Instructions
Preparation for use & Lighting instructions BEFORE COOKING FOR THE FIRST TIME Read all safety warnings and instructions carefully before operating your grill. Step 1 Follow the instructions below carefully to build a fire. You may use charcoal and/or wood as fuel in the grill (see “Adding Charcoal/Wood during Cooking”... - Page 16 Operation instructions Step 1 Lightly coat all cooking surfaces of the grill with vegetable oil or vegetable oil spray. Step 2 Follow the instructions below carefully to build a fire. You may use charcoal and/or wood as fuel in the grill (see “Adding Charcoal/Wood During Cooking”...
- Page 17 Operation instructions Step 6 Place food on cooking grid and close grill lid. Always use a meat thermometer to ensure food is fully cooked before removing from grill. Step 7 Allow grill to cool completely, and then follow instructions in the “After-Use Safety” and “Proper Care & Maintenance”...
-
Page 18: Operating Instructions
Operating Instructions Step 3 Stand back at a safe distance and use long cooking tongs to lightly brush aside ashes on hot coals. Use cooking tongs to add charcoal and/or wood to charcoal grates. Be careful to avoid over stirring of ashes as this may cause sparks. -
Page 19: Warranty Information
Warranty Information 1. Manufacturer warrants this Product to be free from defects in workmanship and materials for a period of 90 days from the date of purchase, PROVIDED claims are submitted, in writing, with proof of purchase. 2. If any part of this item fails because of a manufacturing defect within the Limited Warranty Period, Manufacturer offers to replace such part(s) provide that such parts have not been improperly repaired, altered, or tampered with or subject to misuse, abuse or exposed to corrosive conditions.
Need help?
Do you have a question about the CG2066801-GS and is the answer not in the manual?
Questions and answers