Table of Contents
Advertisement
Quick Links
BestScope International Limited
BS-6005
Inverted Metallurgical Microscope
Instruction Manual
This instruction manual is for the Inverted Metallurgical microscope BS-6005 series. To ensure the
safety and obtain optimum performance and to familiarize yourself fully with use of this microscope,
we recommend that you study this manual thoroughly before operating the microscope. Retain this
instruction manual in an easily accessible place near the work desk for future reference.
1
Advertisement
Table of Contents

Related Manuals for BestScope BS-6005


Summary of Contents for BestScope BS-6005
- Page 1 Inverted Metallurgical Microscope Instruction Manual This instruction manual is for the Inverted Metallurgical microscope BS-6005 series. To ensure the safety and obtain optimum performance and to familiarize yourself fully with use of this microscope, we recommend that you study this manual thoroughly before operating the microscope. Retain this...
-
Page 2: Attentions
BestScope International Limited ATTENTIONS Please handle the microscope carefully. • Following the Figure-2 step to move the instrument, make sure the sample is taken away. Use one hand holding ① position, the other hand holding ② position. • If rising microscope’s height with other parts, must keep it in horizontal position, prevent incline and sample slip. - Page 3 BestScope International Limited 10.Don’t open microscope base plate when in use or else exposed electrical element will lead to electric shock. Before replacing the lamp or fuse, please turn off power switch and pull out the plug from the socket.
-
Page 4: Table Of Contents
BestScope International Limited CONTENTS Attentions ........................1 1. Parts Name ............................4 2. Observation Steps ..........................6 3. Operation ............................7 3.1 Main Body ............................7 3.1.1 Turn On Light Source ........................7 3.1.2 Aperture Diaphragm ........................7 3.1.3 Adjustment of Field Diaphragm ....................7 3.1.4 Usage of Filter .......................... -
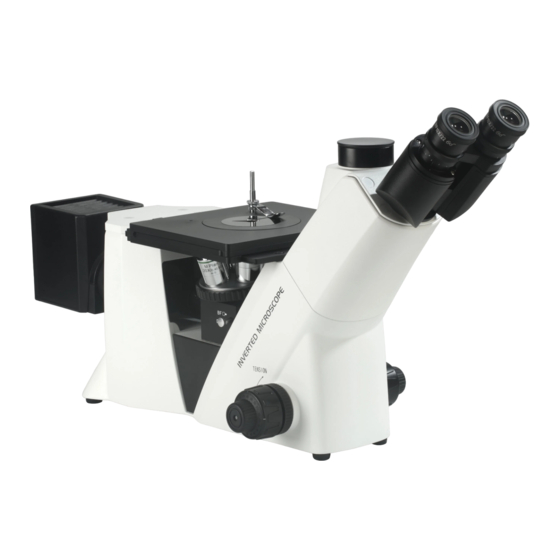
Page 5: Parts Name
BestScope International Limited 1. Parts Name ◎ The following figure only display basic parts, please refer to latest product catalog for other parts. Figure-3 Main Parts Name ① Eyepiece ② Seidentopf Trinocular Head ③ Main Body ④ Nosepiece ⑤ Epi-illumination Unit ⑥... - Page 6 BestScope International Limited Figure-4 Parts Name 1) Lamp House 12) Mechanical Stage 2) Handle 13) Filter Slider 3) Clamp 14) Adjustable Knob for lamp bulb 4) Stage Plate 15) Lamp House Power cable 5) Seidentopf Trinocular Head 16) Power Socket 6)...
-
Page 7: Observation Steps
BestScope International Limited Please read chapter 6 about assembly steps. 2. Observation Steps (In Bright Field) Turn on main power source Place sample Put 10X objective in optical path Focusing sample Adjusting brightness Adjusting interpupilary distance and diopter aperture diaphragm... -
Page 8: Operation
BestScope International Limited 3. Operation 3.1 Main Body 3.1.1 Turn On Light Source Turn potentiometer knob ① to the minimum, turn on power switch to ② position I. Rotating potentiometer knob ① to increase or decrease brightness for good illumination. -
Page 9: Usage Of Filter
BestScope International Limited 3.1.4 Usage of Filter A. Take out the filters and filter slider. B. Insert needed filter into filter slider, following Figure 8 installation drawing Figure-8 Filter Installation / Adjusting lamp house 3.1.5 Adjustment of Lamp Center A. Stir the aperture diaphragm to the biggest. -
Page 10: Observation Tube
BestScope International Limited 3.3 Observation Tube 3.3.1 Adjustment of Interpupillary Distance Figure-10 Figure-11 Adjustment of Interpupillary Distance Adjustment Of Diopter Please adjusting binocular tube to make left and right field coincide completely. Indication point ● is interpupillary distance. 3.3.2 Adjustment of Diopter a.... -
Page 11: Stage
BestScope International Limited 3.4 Stage 3.4.1 Place Sample Place sample on stage round plate, put observation side downwards, fix the sample with clamps to make observation. Figure-13 Placing Sample 3.4.2 Moving Sample a. Mechanical stage can be moved freely at X and Y direction. -
Page 12: Simple Polarizing Observation
BestScope International Limited 3.5 Simple Polarizing Observation ◎ Polarizer and analyzer are only used for polarizing observation, normal observation don’t need them because of low light intensity. A. Insert analyzer slider (A) in corresponding slot, moving into light path(Figure-15). Figure-15 Putting Analyzer Into Optical Path Figure-16 Bright &... -
Page 13: Trouble Shooting
BestScope International Limited 加装机械载物台 4. Trouble Shooting Trouble Causation Solution Optical System Nosepiece not in right location. Readjust nosepiece in right position. Filter slider not in right place. Readjust filter slider. Field incomplete or Analyzer and polarizer slider aren’t illumination irregular. -
Page 14: Installation
BestScope International Limited 5. Installation 5.1 Installation Diagram Figure-17... -
Page 15: Installation Steps
BestScope International Limited 5.2 Installation Steps 5.2.1 Installation /Replacement of Bulb ( Figure-1) WARNING Cut off the power line plug before replace bulb Completely loosening screw on the top of the lamp house, pulling out lamp shade. Loosening bulb pins locking screw, using glove or gauze to hold the bulb and insert fully into the socket. -
Page 16: Installation Of Objective
BestScope International Limited 5.2.4 Installation of Objective First, rise nosepiece gently , removing dust cover, then screw on the lowest power objective from stage’s round hole ①, finally screw on objective from low power to high power with anti-clockwise direction. -
Page 17: Installation Of Lamp House
BestScope International Limited 5.2.6 Installation of Lamp House Make sure the main switch at off mark O when connecting power lines. a ) Take lamp house parts out ①, firmly connecting with main body port. b ) Use allen wrench to tighten two fix screws ②. -
Page 18: Digital Photography System(Optional)
BestScope International Limited 5.2.7.2 Installation of Digital Photography ( Optional ) Firstly, Remove the dust cover, use allen wrench to unscrew the locking screw at trinocular observation tube connector. Next, gently connect SLR digital camera with adaptor. Then connect SLR digital camera with C-mount. - Page 19 BestScope International Limited BestScope International Limited. Add: 4#811, No.26 Financial Street, Shi Jing Shan District, Beijing, China Tel: 010-88747221 Email: info@bestscope.net Website: www.bestscope.net BS-6005 Inverted Metallurgical Microscope...
Need help?
Do you have a question about the BS-6005 and is the answer not in the manual?
Questions and answers