
Related Manuals for Wavetronix SmartSensor HD SS 125


Summary of Contents for Wavetronix SmartSensor HD SS 125
- Page 1 Wavetronix LLC SmartSensor HD SS 125 User’s Manual Version 1.0 January 13, 2006 5314 N. 250 W., Suite 110, Provo, UT 84604, USA (801) 764-0277...
-
Page 2: Table Of Contents
Wavetronix LLC Wavetronix Contact Information ....................2 Copyright / Trademarks ........................2 Product Notifications ........................3 Introduction............................. 5 Unpacking ............................6 Installing the SmartSensor ......................7 Step 1 – Assemble the Mounting Bracket................... 7 Step 2 – Attach the SmartSensor to the Mounting Bracket ............7 Step 3 - Mount SmartSensor on a Pole .................. -
Page 3: Wavetronix Contact Information
Copyright / Trademarks © Copyright 2002 Wavetronix LLC, All rights reserved. SmartSensor, the SmartSensor logo and LaneSmart are trademarks of Wavetronix LLC. SeaLINK is a trademark of Sealevel Systems Inc. All other product or brand names as they appear are trademarks or registered trademarks of their respective holders. -
Page 4: Product Notifications
Wavetronix will void the customer Warranty. Any visible damage to exterior seal labels will void the Warranty. Wavetronix is not liable for any bodily harm or damage caused if unqualified persons attempt service or open the back cover of this unit. Refer all service questions to Wavetronix or an authorized distributor. - Page 5 Wavetronix LLC and safety procedures as they relate to specific locations and installations. Symbol Legend The lightning bolt within an equilateral triangle symbol is intended to alert the user to the risk of electric shock. The exclamation point within an equilateral triangle is intended to alert the user to the...
-
Page 6: Introduction
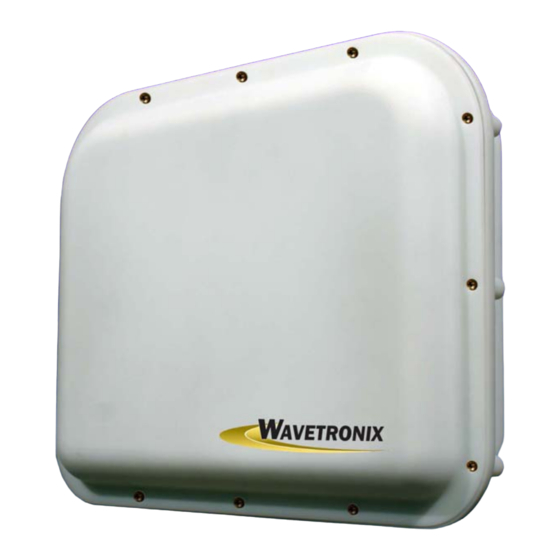
Wavetronix LLC Introduction The Wavetronix SmartSensor HD traffic sensor utilizes the latest technology to collect and deliver traffic statistics. Capable of measuring traffic volume, average speed, individual vehicle speed, lane occupancy and presence, the SmartSensor HD collects information through the use of a 24.125 GHz (K band) operating radio frequency. -
Page 7: Unpacking
If any of these items are missing, note the serial number located on the side of the sensor and contact the Wavetronix support. Additional products may be purchased through your distributor; software and firmware may be obtained through Wavetronix sales. -
Page 8: Installing The Smartsensor
Wavetronix LLC Installing the SmartSensor The installation of the SmartSensor HD is a process that involves five simple steps: (1) Assemble the mounting bracket. (2) Attach the SmartSensor HD to the mounting bracket. (3) Mount the SmartSensor HD to a pole. -
Page 9: Step 3 - Mount Smartsensor On A Pole
Wavetronix LLC Step 3 - Mount SmartSensor HD on a Pole Firmly secure the SmartSensor to a pole or fixed location at a height between 4 and 10 m from the desired monitoring surface. Firmly secure the mounting bracket on a vertical or horizontal pole using the ½... -
Page 10: Step 4 - Connect Smartsensor Cable
Wavetronix LLC Step 4 – Connect SmartSensor Cable The sensor connector as shown in Figure 5 a. is keyed such that it can only fit one way. Attach it to the coupling at the base of the sensor. The cable should be strapped to the pole or run through conduit to reduce the strain on the cable. -
Page 11: Step 5 - Configure The Smartsensor
Wavetronix LLC Step 5 – Configure the SmartSensor HD To confirm the configuration of lanes (detection zones) on the SmartSensor HD connect to the SmartSensor HD through a serial, Internet, or modem connection. To do this you must first install the SmartSensor Manager CE on a pocket PC or laptop; second, connect the SmartSensor HD to your pocket PC or laptop;... -
Page 12: Step 5.2 - Connecting Your Computer To The Smartsensor
Wavetronix LLC Step 5.2 - Connecting Your Computer to the SmartSensor HD There are several ways to connect your computer to the SmartSensor HD as listed below. Step 5.2.1 – Physically Connecting the SmartSensor HD to your Computer Serial Cable – there are two serial options available for connecting to the SmartSensor HD: 1. -
Page 13: Serial Connection
Wavetronix LLC could be a regular POTS analog modem or a wireless modem (GSM, etc.) if service is available in your area. Internet – the SmartSensor HD can be connected to the Internet allowing access to the sensor from anywhere with Internet access. There are two ways to connect the Smart Sensor to the Internet: 1. -
Page 14: Internet Connection
When the connection is completed, the message “Remote connection established!” is displayed and “Disconnect” and “Continue” buttons appear. Pressing “Continue” takes you to a screen that displays a view of the current sensor configuration. Connection failure can occur for various reasons, if failure occurs repeatedly call Wavetronix for assistance. - Page 15 Wavetronix LLC Step 5.2.3 - Using SmartSensor Manager CE’s Lane Configuration Utility After a connection is made to the SmartSensor the home page as shown in Figure 11 appears. To configure lanes click on Lane Setup. Figure 11 The lane setup options window then appears as shown in Figure 12. To start the lane configuration process the Lane Configuration button.
- Page 16 Wavetronix LLC Figure 13 Automatic Configuration That completes the normal installation and configuration process. The remainder of this document explains some of the added features of the SmartSensor Manager software and how it allows you to manually configure lanes, monitor and record traffic data and upgrade your SmartSensor HD...
-
Page 17: Additional Features Of The Smartsensor Manager
Wavetronix LLC Additional Features of SmartSensor Manager CE The SmartSensor Manager is designed to quickly confirm or adjust the configuration of the SmartSensor, tools to verify the performance of the SmartSensor and upgrade the SmartSensor. Manual Configuration The newly activated buttons remain pressed when you click them to enable the drawing function of the button you press. -
Page 18: Data Logs
Wavetronix LLC Data Logs Firmware Upload Appendix SmartSensor Specifications Operating Frequency: 24.125 GHz (K-band) Detection Zones: Up to 10 traffic lanes simultaneously Detection Range: 250 ft Measured Quantities: Speed, occupancy, volume, presence, classification Communications: RS-485 or RS-232 connection Power: 8 watts @ 9-30 VDC Weight: 5 lbs. -
Page 19: Rs-232 Communication Port
Wavetronix LLC Cable Connector Definitions RS-232 Communication Port The RS-232 Communication Port is configured in a 9-pin “D” male connector with the following pin out: RS-232 Pin Out 1: N/C 6. N/C 2: Data from Modem 7. N/C 3: Data to Modem 8.
Need help?
Do you have a question about the SmartSensor HD SS 125 and is the answer not in the manual?
Questions and answers