
Related Manuals for CognitiveTPG Advantage RFID Thermal Printer


Summary of Contents for CognitiveTPG Advantage RFID Thermal Printer
-
Page 1: User Guide
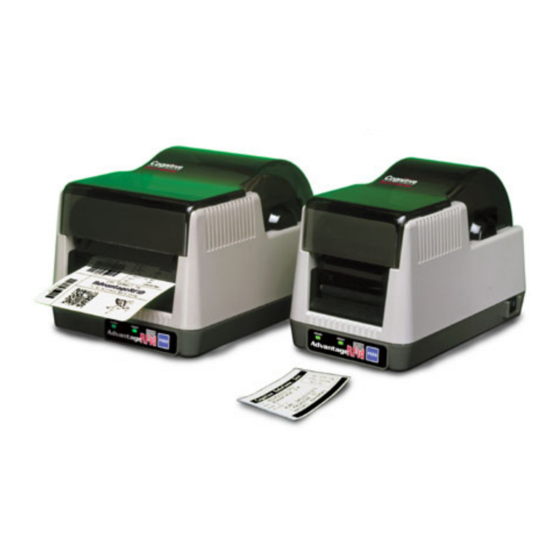
Advantage RFID Thermal Printer HF (13.56 Mhz) User Guide 105-132-01 Rev A *105-132-01*... - Page 2 Cognitive. All program listings in this document are copyrighted and are the property of Cognitive and are provided without warranty. To contact Cognitive: Cognitive Solutions, Inc. 4403 Table Mountain Drive Suite A Golden, CO 80403 E-Mail: info@cognitive.com...
-
Page 3: Table Of Contents
RFID and the Advantage RFID Thermal Printer... 1 What is RFID? ... 1 Active Versus Passive RFID Tags... 2 RFID Frequencies ... 3 Uses for HF RFID... 3 RFID Standards... 3 Drivers and Label Software... 4 Installing Printer Drivers from the Companion CD... 4 Setup... - Page 4 Printing RFID Tags ... 28 RFID Tag Overview... 28 Using Label Software ... 30 Using CPL Programming... 30 Creating a Text File... 30 Stored Formats ... 32 Sample RFID Tag ... 34 Using Third-Party and Proprietary Applications... 34 Maintenance and Calibration ... 35 Maintenance...
- Page 5 Check the Label Format Header Line ... 67 Comment Out Portions of the Nonworking Label Format... 67 Common Issues ... 67 Labels Skipping or Printer Feeding Blank Labels ... 67 READY Light is Red... 68 Setting Up an Ethernet Printer ... 68 Printer Drivers ...
-
Page 6: Rfid And The Advantage Rfid Thermal Printer
(RFID) tag. Using an RFID label, the printer can simultaneously write RFID data and print a barcode label. The printer will also perform either operation independently. The Advantage prints... -
Page 7: Active Versus Passive Rfid Tags
R F I D A N D T H E A D V A N T A G E R F I D P R I N T E R Refer to Figure 1-1, RFID Overview. The RFID tag contains an antenna (A) that allows the tag to receive and respond to radio-frequency queries from an RFID reader. -
Page 8: Rfid Frequencies
RFID tags operate at a specific frequency and both the reader and the tag must be tuned to the same frequency to transfer information. The Advantage RFID Thermal Printer is designed for RFID tags that operate at 13.56 Megahertz. This frequency is referred to as High Frequency, or HF. -
Page 9: Drivers And Label Software
Drivers and Label Software Printer drivers are software tools that translate information from an external system into an acceptable format for the printer. Older DOS- based systems do not require special drivers. Other systems may use a generic text driver to communicate with the printer. The companion CD contains drivers for the Microsoft Windows operating system. - Page 10 S O F T W A R E 4. Click the hyperlink for your operating system. The Welcome window appears. 5. Click Next. The Selecting the Printer window appears. 6. Choose your printer from the Printers: list. 7. Click Next. The Options window appears.
- Page 11 9. Click Finish. The proper files will be copied to your computer and the installation wizard will close. This may take several minutes. The Advantage RFID Thermal Printer driver is now installed and available for use. Copyright © 2004, Cognitive.
-
Page 12: Setup
Setup Setting up the Advantage RFID Thermal Printer is simple. This chapter describes printer requirements, printer controls, loading thermal transfer ribbon and loading print media. The printer self test is also described. Printer Requirements The Advantage RFID Thermal Printer has the following operational requirements. -
Page 13: Controls, Indicators, And Connectors
Controls, Indicators, and Connectors Controls and indicators for the Advantage RFID Thermal Printer are conveniently located on the front panel and right side of the unit. Figure 3-1. Advantage RFID Thermal Printer Front View Device Primary Function A - POWER indicator... -
Page 14: Connecting Power And Cables
Figure 3-2. Advantage RFID Thermal Printer (Rear View) Connections and Power Connector A - Parallel port (optional) B - Serial port (RS232) C - Ethernet connector (optional) D - POWER connector E – Universal Serial Bus (USB) port NOTE: Printer port options are dependent upon printer model. -
Page 15: Releasing The Print Mechanism
Releasing the Print Mechanism Refer to the figure below to release the print mechanism. Figure 3-3. Releasing the Print Mechanism 1. Open the dust cover. 2. Refer to Figure 3-3. Slide the black latches towards the rear of the unit to release the print mechanism. 3. -
Page 16: Loading A Ribbon (Thermal Transfer Only)
S E T U P Loading a Ribbon (Thermal Transfer Only) Refer to the figure below to load thermal transfer ribbon. Figure 3-4. Loading Thermal Transfer Ribbon 1. Release the print mechanism. 2. Unwind a few inches of the new ribbon from the supply core. 3. - Page 17 5. Gently push the flexible arm out and snap the take-up core into place. NOTE: The printer automatically takes up the slack in the ribbon. 6. Lower the print mechanism and press down firmly to secure the latches.
-
Page 18: Loading Print Media
Loading Print Media Refer to the figures and instructions below to load print media. Figure 3-6. Loading Print Media onto the Spindle 1. Release the print mechanism. 2. Lift out the media spindle. 3. Load the media onto the spindle, keeping the black media guide to the right of the media roll. - Page 19 Figure 3-7. Feeding Media Under the Print Mechanism 4. Place the loaded media spindle into the printer with the black guide to the right. 5. Feed the media under the open print mechanism. NOTE: The media spindle should fit securely with the black guide pressed against the media roll.
-
Page 20: Performing The Self Test
1. Press and hold the FEED button. 2. Turn the printer ON while holding the FEED button. 3. Release the FEED button when the self test starts to print. 4. Turn the printer off and then on again to return to normal printing operation. IMPORTANT! After performing the self test, the printer is in hexadecimal dump mode and cannot print normally until you cycle the power. - Page 21 Indicates the status of XON/XOFF handshaking FEEDBACK Shows the status of VARIABLE USER_FEEDBACK DARKNESS Darkness setting of printer. FACT is Factory setting (not user modifiable). VAR is the variable, user modifiable setting. MEDIA ADJUSTMENT Adjusts print contrast on object leading edges for optimum print quality.
- Page 22 TT indicates thermal transfer printing and AUTO indicates automatic print mode switching. In AUTO mode, the printer will check for the presence of a ribbon when it is turned on or when you lower the printhead. If it detects a...
-
Page 23: Printing Standard Labels And Tags
Printing Standard Labels and Tags The Advantage RFID Thermal Printer prints both direct thermal and thermal transfer labels and tags in a host or network environment. The Advantage RFID Thermal Printer also has the capability to program and read RFID tags placed within special media as well as print on certain areas of that media. -
Page 24: Creating A Text File
Creating a Text File Use the following instructions with Windows-based computers. 1. Click Start. 2. Choose Run. 3. In the Open: text box, type command. 4. Click OK. The Command window appears. 5. In the Command window, at the prompt, type edit and press ENTER. - Page 25 6. In the DOS Editor window, type the commands and data to be sent to the printer. NOTE: If you are using a printer with a serial port (COM port), it may be necessary to save the file and print directly from the Command window.
- Page 26 6. At the prompt, type copy filename com1. Replace filename with the file name that you used in step three. Press ENTER. 7. The label prints on the printer. 8. At the prompt, type exit. The Command window closes. Copyright © 2004, Cognitive.
-
Page 27: Sample Label
• You have a basic understanding of Microsoft software and the Windows operating system. • Cognitive printer drivers are installed correctly. • The printer is connected, powered on, and ready to print. NOTE: Examples shown here were created using Microsoft Windows XP and Microsoft Word 2002. - Page 28 L A B E L S A N D T A G S 2. Press CTRL+P or, on the File menu, choose Print. The Print dialog appears. 3. Select a Cognitive printer. 4. Click Close to close the Print dialog. Copyright © 2004, Cognitive.
- Page 29 Setting Label Size Set the printer driver for the label size. 1. On the File menu, click Page Setup. The Page Setup dialog appears. 2. Set all margins to 0. 3. Click the Paper tab. Copyright © 2004, Cognitive.
- Page 30 4. Set the correct width and height for your label. The example shows a 2.4” wide by 1” tall label. 5. Click OK and, if necessary, Fix to reset the margins. The Word document should look similar to the figure below. Copyright ©...
- Page 31 3. Set the height of the barcode by adjusting the font size. Use trial and error to adjust the size correctly. Printing a Label Make sure that the printer is connected to the computer and powered on. Ensure that the media is loaded correctly. Use the following steps to print the label: 1.
-
Page 32: Printing From Proprietary Applications
Printing from Proprietary Applications There are a variety of applications that are industry or function specific. Some of these require a generic text printer driver. Others have built-in printer drivers. Refer to your software documentation or contact the software vendor to determine the appropriate method for printing labels with proprietary software. -
Page 33: Printing Rfid Tags
While tags may differ in appearance and storage capacity, programming the tag properly depends on understanding how the Advantage RFID Thermal Printer writes to and reads from the RFID tag. NOTE: Cognitive highly recommends the use of Cognitive-certified RFID tags with the Advantage RFID Thermal Printer. - Page 34 Figure 5-1. Data Blocks The write tag (WT) command ASCII string is limited to 63 characters. Each WT command ASCII string is limited to a maximum of 63 characters. For a 256 byte RFID tag, a maximum of four WT commands containing 63 characters of data may be used.
-
Page 35: Using Label Software
RFID commands have been added to the CPL programming language. These new commands allow you to read and write data as well as print information on the tag. Commands and data are sent to the printer through a generic text printer driver. The commands prepare the printer to receive the tag, establish print position and characteristics, and terminate printing operation. - Page 36 6. In the DOS Editor window, type the commands and data to be sent to the printer. NOTE: If you are using a printer with a serial port (COM port), it may be necessary to save the file and print directly from the Command window. Refer Stored Formats.
-
Page 37: Stored Formats
9. On the File menu, click Exit. 10. At the prompt, type exit. The Command window closes. Stored Formats Stored formats are tag formats that are saved as a text file. This file can be reused to create tags without having to retype all of the required commands. - Page 38 10. At the prompt, type mode com1 9600,N,8,1. Press ENTER. 11. At the prompt, type copy filename com1. Replace filename with the file name that you used in step three. Press ENTER. 12. The label prints on the printer. Copyright © 2004, Cognitive.
-
Page 39: Sample Rfid Tag
Applications There are a variety of applications that are industry or function specific. Some of these require a generic text printer driver. Others have built-in printer drivers. Refer to your software documentation or contact the software vendor to determine the appropriate method for printing labels with proprietary software. -
Page 40: Maintenance And Calibration
Maintenance and Calibration The Advantage RFID Thermal Printer is designed to provide exceptional service with a minimum of preventive maintenance. Maintenance Printer maintenance should be performed with each media roll. Figure 6-1. Performing Printer Maintenance 1. Open the print mechanism. -
Page 41: Calibration
Third line, feed type will be GAP or BAR depending on the type of label used. On the File menu, choose Print to send this file to the printer. The printer READY light will flash and a label may be ejected. The printer will not print on the label. -
Page 42: Programming
Programming The Advantage RFID Thermal Printer, like other Cognitive printers, is programmable using ASCII commands. Additional commands have been added to support the RFID functionality. This chapter provides an explanation of the new RFID commands used by the Advantage RFID Thermal Printer. -
Page 43: Programming Rules
Programming Rules Use blank spaces exactly as shown in the command descriptions, examples, and syntax. Blank spaces are the delimiters between parameters. Omitting a necessary space may result in incorrect programming or a failure to recognize commands. In CPL-RFID programming, the RFID specific directives are case- sensitive and must be fully spelled-out. -
Page 44: Rfid Command Structure Example
The following listing is an example of RFID command usage. ! 0 100 1200 1 DELIMIT $ RF VAR_CLEAR WT 0 "COGNITIVE SOLUTIONS RFID xxxxxx" WT 16 "PATIENT ID:xxxxxx" RF HOST "RFID TAG WRITTEN" RF ID_GET RT 0 10 "A" 11 RT 16 31 "A"... -
Page 45: Rfid Commands
RFID Commands Use the following commands to program RFID features of the Advantage RDIF printers. Standard Variable Commands Definitions RF ID_GET RF_TYPE RF HOST RF_IDNUM RF VAR_CLEAR RF_BLKSZ RF LOCATION WTLOCK Copyright © 2004, Cognitive. Setup/Debug Commands !RFID ? !RFID CONFIRM !RFID HOST !RFID LEDFLSH !RFID LEDTIME... -
Page 46: Rf Id_Get
Explicit Form RF ID_GET Parameters None Response This command will automatically transmit the detected ‘Tag_ID’s numeric value to the Host Machine via the printer’s serial port. Command Type RFID Standard Command Example To Printer: ! 0 0 0 0 DELIMIT $ RF ID_GET RF HOST "Here the Variables:"... -
Page 47: Rf Host
RF HOST Function This command instructs the Printer to transmit the specified ASCII string to the Host Machine using the serial port. When used in conjunction with the printer "Delimit" command in a label format, certain variable values can also be returned to the host. -
Page 48: Rf Var_Clear
RF VAR_CLEAR Function This command instructs the Printer to clear and reset all of the internal RFID Read-Tag Data- Handler Variables. After executing this command, no ‘RF nn’ Variables are defined Explicit Form RF VAR_CLEAR Parameters None Response None Command Type... - Page 49 RT ss ee “fmt” vv Parameters “fmt” Response No specific response Command Type RFID Standard Command Example To Printer: ! 0 0 0 0 DELIMIT $ RF VAR_CLEAR RT 0 3 "A" 33 RF HOST "$RF 33$" From Printer: 123-1234-123 Copyright ©...
- Page 50 RT 0 3 "A" 33 RF HOST "$RF 33$" From Printer: 123-1234-123 NOTE: In this initial Adv-LX RFID Printer, the Skyetek- M1 Reader/Writer Module limits individual Read or Write transfers to/from the RFID-Tags to 64-bytes maximum. CPL command lines are naturally limited to 256-bytes.
-
Page 51: Wtlock
WTLOCK Function Write and Lock Tag. The command permanently writes data to a tag. As with the WT command, the user is responsible for maintaining the 63 byte requirement. Approximately 15 seconds, with no retries, is required to write lock a full blank tag. NOTE: This command will overwrite any non-locked portion of a tag. - Page 52 Example To Printer: ! 0 100 800 0 DELIMIT $ WTLOCK 0 "123-1234-123" WT 4 "John Q. Public" WT 10 "Medical Mumbo Jumbo" RT 0 3 "A" 33 RF HOST "$RF 33$" From Printer: 123-1234-123 NOTE: Individual Read or Write transfers to/from the RFID-Tags are limited to 64 bytes maximum.
-
Page 53: Rf_Type
Explicit Form $RF_TYPE$ Parameters None Response The printer’s parser will replace any Static or Derived Variables with valued string associated with variable and then attempt to execute the CPL or CPL-RFID command Command Type RFID Standard Command See also... -
Page 54: Rf_Idnum
RF HOST command. Explicit Form $RF_IDNUM$ Parameters None Response The Printer’s parser will replace any Static or Derived Variables with valued string associated with variable and then attempt to execute the CPL or CPL-RFID command. Command Type RFID Standard Command... -
Page 55: Rf_Blksz
Explicit Form $RF_BLKSZ$ Parameters None Response The printer’s parser will replace any Static or Derived Variables with valued string associated with variable and then attempt to execute the CPL or CPL-RFID command. Command Type RFID Variable Command... -
Page 56: Rf Location
RF LOCATION Function This command is defined as "Reference Find", Variable at Location #. The command returns the value that was stored in a printer variable with the RT command where nn is an argument to be specified. Explicit Form... -
Page 57: Rfid
!RFID ? Function This command queries the printer for a summary of the existing printer settings for RFID functionality. Explicit Form !RFID ? Parameters None Response See example below. Command Type RFID Setup/Debug Command Example From Printer: Setup/Config Parameters: Assigned Tag Type:... -
Page 58: Rfid Confirm
Parameters Response In the case of transitioning to the CONFIRM ON state, the Printer will response by transmitting a command Success to the Host Machine. Conversely, in the case of transitioning to the CONFIRM OFF state, the Printer will have no specific response resulting from the execution of this command. -
Page 59: Rfid Host
!RFID HOST Function This command instructs the Printer to transmit the specified ASCII string to the Host Machine using the serial port. When used in conjunction with the printer "Delimit" command in a label format, certain variable values can also be returned to the host. -
Page 60: Rfid Ledflsh
Does NOT flash any LED after CPL- RFID command completions. The LED normally remains OFF during a label- format execution until the printer is ready for the next label or command where LED is set Green Does NOT flash any LED until after the entire label- format has completed execution. -
Page 61: Rfid Ledtime
‘Success’ or ‘Failure’. Explicit Form !RFID LEDTIME nn Parameters Response No specific response Command Type RFID Setup/Debug Command Example To Printer: !RFID LEDTIME 100 !RFID ? From Printer: Setup/Config Parameters: Assigned Tag Type: Mark/OverRide State: OFF VOID Stamp Message: LED Flash Control:... -
Page 62: Rfid Mark
100 nnn 1’ and ending with ‘END’). Attempts to use CPL-RFID Configuration-Setup Commands within a Label-Format result are ignored without indication. Copyright © 2004, Cognitive. When the setting is ON, the printer will mark a label that fails a RT, WT, or WTLOCK command. -
Page 63: Rfid Rdaftwt
Response No specific response Command Type RFID Setup/Debug Command Example To Printer: !RFID RDAFTWT OFF NOTE: All CPL-RFID Configuration-Setup Commands are processed outside the context of a standard CPL Label-Format (i.e. CPL beginning with a header-line ‘! 0 100 nnn 1’ and ending with ‘END’). Attempts to use CPL-RFID Configuration-Setup Commands within a Label-Format result are ignored without indication. -
Page 64: Rfid Retry
!RFID RETRY Function This command sets the number of retries that the printer will perform on a RT, WT, or WTLOCK command. To enter the retry loop, the printer must fail a specific command after reading the tag identification and type. -
Page 65: Rfid Ssoncmd
Explicit Form !RFID SSONCMD ON/OFF Parameters Response No specific response Command Type RFID Setup/Debug Command Example To Printer: !RFID SSONCMD OFF !RFID ? From Printer: Setup/Config Parameters: Assigned Tag Type: LED Flash Duration: SelecTag before Cmd: ON TxPowerRF after Cmd: ON... -
Page 66: Rfid Tagtype
Explicit Form !RFID TAGTYPE ISO/TI/PHILPS Parameters PHILPS Response No specific response Command Type RFID Setup/Debug Command Example To Printer: !RFID TAGTYPE ISO !RFID ? From Printer: Setup/Config Parameters: Assigned Tag Type: Mark/OverRide State: OFF VOID Stamp Message: LED Flash Control:... -
Page 67: Rfid Timeout
!RFID TIMEOUT Function This command sets the time delay, in milliseconds, to wait before considering a command a failure. NOTE: The parameters are part of a calculation and do not translate into exact execution time differences. Explicit Form !RFID TIMEOUT bb,ss,rr,ww,ll Parameters Command Type RFID Setup/Debug Command... - Page 68 Example To Printer: !RFID 20,,,,50 !RFID ? From Printer: Setup/Config Parameters: Base Cmd Timeout: Select Tag Timeout: Read Tag Timeout: Write Tag Timeout: Lock Tag Timeout: NOTE: All CPL-RFID Configuration-Setup Commands are processed outside the context of a standard CPL Label-Format (i.e.
-
Page 69: Rfid Txafter
Explicit Form !RFID TXAFTER ON/OFF Parameters Response No specific response Command Type RFID Setup/Debug Command Example To Printer: !RFID TXAFTER OFF !RFID ? From Printer: Setup/Config Parameters: Assigned Tag Type: LED Flash Duration: SelecTag before Cmd: ON TxPowerRF after Cmd: OFF... -
Page 70: Rfid Void
!RFID VOID Function This command instructs the printer to use this specified ASCII string to stamp or print on failing RFID-Tags if and only if selected. Explicit Form !RFID VOID “ASCII-String-to-Stamp-Bad- Tags” Parameters “ASCII- String-to- Stamp-Bad- Tags” Command Type RFID Setup/Debug Command... -
Page 71: Troubleshooting
Chapter Troubleshooting The Advantage RFID Thermal Printer is a dependable printer that requires little user maintenance. When problems occur, it is important to determine if hardware or programming is the cause. Isolating Problems Programming issues can often make the problem appear hardware related. -
Page 72: Check The Label Format Header Line
If the printer will not print this label but does print labels that were prepared on another system, your system may not be compatible with the printer. The most common cause of this is improper end-of-line termination. NOTE: Hex dump mode allows you to see every character that reaches the printer. -
Page 73: Ready Light Is Red
The output voltage is printed on the power supply. Setting Up an Ethernet Printer First, connect the printer to a PC via the parallel or serial port (see parallel or serial port setup). Do NOT connect the Ethernet cable at this time. -
Page 74: Printer Drivers
Advantage BT2 driver. Serial Communication If you are using a serial port for printing on your Cognitive printer, you will need to use a null modem cable. Although it looks like a standard serial cable, the pin configuration is different. -
Page 75: Upgrade From Blazer Printer
NOTE: A darkness setting of printhead. Send this file to the printer by going to File->Print. The printer will not print anything, but the ready light will blink off and on. When you have a solid Green ready light, cycle the power on the printer. -
Page 76: Technical Support Contact Information
P R O G R A M M I N G Technical Support Contact Information Hours: 8AM-5PM Mountain Standard Time (MST). Telephone: +1.720.221.9498 Toll Free: +1.800.525.2785 ext 498 Fax: (303) 215-0385 E-Mail: support@cognitive.com Copyright © 2004, Cognitive. -
Page 77: Appendix A - Specifications
Appendix A – Specifications Printer Model Technology Direct Thermal or Thermal Transfer Width (max) 2.2” (56mm) Length (max) 40” (1016mm) @ 203dpi 160” (4064mm) @ 100dpi Speed (max) 3 ips Resolution 101 or 203 selectable Standard LBT24-2043-H11 Serial LBT24-2043-H12 Parallel... -
Page 78: Appendix B - Certified Rfid Tags
Appendix B – Certified RFID Tags Part Number 114-001-01 Roll, TT Labels, HF (13.56Mhz) RFID, 2.25” x 2.25” label centered on 2.5” liner. 100 labels, 3” core, wound in, 1” GAP, TI TagIt 114-003-01 Roll, DT Wristbands, HF (13.56Mhz) RFID, 1.1875” x 11.5” 100 bands, 1.5”... - Page 79 · 37 calibration · 37 cleaning · 36 connectors · 8 contact · i controls · 8 drivers · See printer drivers FEED · 8 hex dump · 15, 70 indicators · 8 loading print media · 13 thermal transfer ribbon · 13 maintenance ·...
- Page 80 RF VAR_CLEAR · 45 RF_BLKSZ · 53 RF_IDNUM · 52 RT · 46 WT · 47 WTLOCK · 49 RFID tag certified · 77 printing · 29 sample label · 23 RFID tag · 35 self test · 15 setup · 7 specifications ·...
Need help?
Do you have a question about the Advantage RFID Thermal Printer and is the answer not in the manual?
Questions and answers