
Related Manuals for Dru Cosmo RCH


Summary of Contents for Dru Cosmo RCH
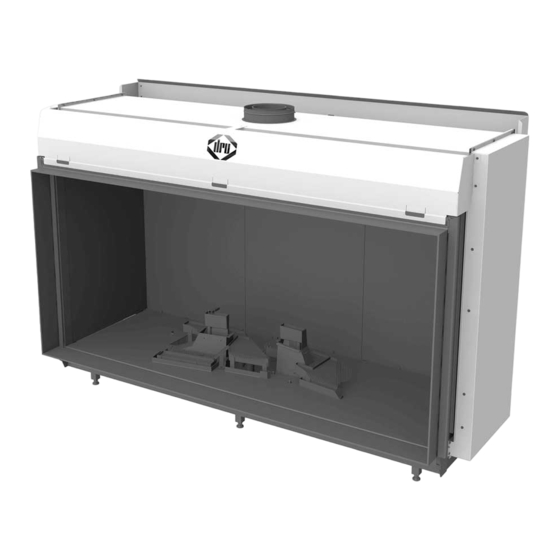
- Page 1 Cosmo RCH Cosmo Tunnel RCH G20/G25/G25.3 Natural gas Installation manual Store this document in a safe place Scan this QR-Code for DRU Video Assist.
-
Page 2: Table Of Contents
I N S T A L LA T I O N M A N U A L Contents 1. Introduction 2. CE declaration 3. SAFETY 3.1 General 3.2 Regulations 3.3 Precautions / safety instructions at installation 3.4 Principle of ignition cycle 4. -
Page 3: Introduction
This declaration loses its validity if changes are made to the appliance without written permission from DRU. The instructions in the manuals must also be observed at all times. A copy of the EU test certificate can be downloaded via www.druservice.com. -
Page 4: Safety
Igniting the appliance takes place as follows: the appliance is switched on by means of an ignition command. This can be done by means of the provided remote control, the DRU Fire App (iOS and Android) or a home automation system. -
Page 5: Installation
The appliance is now in manual mode, runs at full capacity and is now ready for operation. The second burner can be switched on and off manually by means of the remote control and/or DRU Fire App. -
Page 6: Gas Connection
With connection (C), it is possible, for example, to switch the lamps of DRU lux element or a ventilation system (Appendix 3, Fig. 36 (C)). This can be done by means of the provided remote control or DRU Fire App. The App can also be used to dim this contact. -
Page 7: Placing The Appliance
(if applicable) Not all built in DRU appliances are supplied with a control hatch. Built in appliances must be installed with the DRU control hatch. This is necessary to ensure a durable, safe and !Caution proper operation. The DRU control hatch can be ordered separately. Exceptions are: Appliances with supplied DRU guard cabinet. -
Page 8: Placing The Chimney Breast
!Tip You should preferably apply the ventilation holes (outgoing) on both sides of the chimney breast. Use the DRU ventilation elements. Check the following issues, before the chimney breast is fully closed: •... - Page 9 5.8 Concentric system 5.8.1 General The appliance is connected to a flue gas discharge / combustion air supply system delivered by DRU, hereafter referred to as the concentric system. The diameter for this connection is indicated in appendix 2, table 2. The passage to the outside can be created with a wall terminal (C11) or a roof terminal (C31).
- Page 10 My Flue Assist ist eine DRU-Webanwendung, mit der überprüft werden kann, ob ein beabsichtigtes konzentrisches System zulässig ist, und die Ratschläge zum Einstellen des Geräts gibt. Besuchen Sie die DRU Service-Website für My Flue Assist. Die Informationen aus dem Installationshandbuch sind immer führend.
- Page 11 The following requirements apply when connecting to an existing chimney: • Only allowed when used in combination with the special DRU chimney set. The installation regulation is parat of the delivery. •...
-
Page 12: Additional Instructions
5.11 Construction frame The construction frame of the Cosmo RCH can be adapted from the “4S setting” to the “3S setting” (see appendix 3, fig. 2 and 6). The 3S setting allows the bottom side of the pane to connect to the floor or the platform. -
Page 13: Glass Panes
IN S T A LLA TION M A NU A L 5.12 Glass pane The glass pane must be removed/placed by two persons. !Caution • Avoid damaging the glass panes when removing/placing them; !Caution • avoid/remove fingerprints on the glass panes, as they will burn into the glass. 5.12.1 Removing the glass pane When removing the glass pane, please observe the following steps (see appendix 3, fig. -
Page 14: Adjustment Of The Appliance
I N S T A L LA T I O N M A N U A L 5.13 Adjustment of the appliance The appliance has to be set in such a way that it works correctly in combination with the used discharge system. For that purpose, it is possible to place a restrictor slide. -
Page 15: Placing The Wood Set
IN S T A LLA TION M A NU A L 5.14 Placing the wood set The appliance is supplied with a wood set. • The figures do not always show the correct colours. !Caution • Before placing the wood set in a Cosmo Tunnel RCH, first determine what is the front of the appliance. Make sure the positions of the burners are exactly the same as indicated in figure 18 in appendix 3. -
Page 16: Control
The appliance can be operated by means of a home automation system, see section 9.6. For the installer, there is a service menu in the DRU Fire App (available for iOS and Android) in which data of the appliance can be read (see section 6.1.3). -
Page 17: Final Inspection
(if applicable) In addition to operation by means of the remote control and DRU Fire App, the appliance can also be operated via an external source. A wired home automation system can be directly connected to the receiver (Appendix 3, fig. 36 (D)). - Page 18 I N S T A L LA T I O N M A N U A L If the appliance does not ignite after three failed attempts, it will enter into a hard lock-out for 30 minutes in order !Caution to avoid a dangerous accumulation of gas.
-
Page 19: Flame Picture
• Cleaning the glass pane(s). • In case of delivery of an appliance equipped with a DRU CM system, the Installation Manual will contain additional information about this. 10. Malfunctions Appendix 1 provides an overview of malfunctions that might occur, their possible causes and remedies. - Page 20 I N S T A L LA T I O N M A N U A L...
-
Page 21: Appendix 1 Malfunctions
IN S T A LLA TION M A NU A L Appendix 1 Malfunctions Error messages Error code Problem Possible cause Remedy F01 E00 Communication loss between Communication cable Properly connect the receiver (DFGT) and controller (ESYS) does not make contact communication cable Communication cable defective Replace communication cable... - Page 22 I N S T A L LA T I ON M A N U A L Error messages Error code Problem Possible cause Remedy 24 hour check control (only F13) Reset with remote control Gas has fallen away Restore the gas supply Gas control defective Replace the gas control F15 E09...
-
Page 23: Appendix 2 Tables
IN S T A LLA TION M A NU A L Appendix 2 Tables Table 1: Parts included with the delivery Part Number Wood set Control hatch Control hatch manual Installation manual User manual Restrictor slide Back-up self-tapping screws for benefit of glass pane assembly Socket spanner 8 mm Remote control Mains cable NL and UK... - Page 24 Yes*** With distance controle option * This appliance is suitable for G25.3 with the composition according NTA 8837. ** System efficiency. ***(achieved) using home automation. **** Adjusting screw. *****Categories C12 and C32 only in combination with DRU PV-1 100/60 (PowerVent®).
- Page 25 IN S T A LLA TION M A NU A L Table 3: Line-pressure when using G31 Country mbar NL / DK / FI / NO / SE / HU / BA / GR FR / BE / IT / PT / ES / GB / IE Permissibility and conditions concentric system with wall terminal Table 4: Conditions for setting the appliance G20/G25.3...
- Page 26 I N S T A L LA T I ON M A N U A L Table 5: Determining permissibility concentric system with roof terminal G20/G25.3 Total number of meters Total no. of meters vertical and/or sloping pipe length horiz. pipe length no bends 2 bends...
-
Page 27: Appendix 3 Figures
IN S T A LLA TION M A NU A L Appendix 3 Figures 1839 1839 1988 1988 1774 1774 38C-2145 /1 38C-2146 /1 Cosmo RCH Cosmo Tunnel RCH min. 15 max. 100 min. 711 Cosmo Front RCH Tot.min. 520cm min. 710 Cosmo Tunnel RCH min. 350... - Page 28 I N S T A L LA T I O N M A N U A L 300 mm ≥ Ø40 mm ≥ 20 mm 38C-2605/2 38C-2799...
- Page 29 IN S T A LLA TION M A NU A L 1x90° 38c-744zp 0 - 6m 4x M 38C-2153 /0...
- Page 30 I N S T A L LA T I ON M A N U A L 38C-2148 /0 38C-2149 /0...
- Page 31 IN S T A LLA TION M A NU A L 38C-2150 /0 38C-2151 /0...
- Page 32 I N S T A L LA T I ON M A N U A L 38C-2152 /0 38P-0521/0 38P-0522/0 38p-0022 38p-0023...
- Page 33 IN S T A LLA TION M A NU A L 38P-0511/0...
- Page 34 I N S T A L LA T I ON M A N U A L 38P-0512 /1 38P-0513/0 38P-0514/0 38P-0515/0...
- Page 35 IN S T A LLA TION M A NU A L 38P-0516/0 38P-0517/0 38P-0518/0 38P-0519/0...
- Page 36 I N S T A L LA T I ON M A N U A L 38P-0520/0 38P-0523/0...
- Page 37 IN S T A LLA TION M A NU A L 957.645.01 38C-2124/0...
- Page 38 I N S T A L LA T I ON M A N U A L Home automation Valve 2nd burner Triac Relay Eco Glow® PowerVent® (0-10V) DRU Fire App Controller (ESYS) Ignition Receiver (DFGT) Remote control Valve main burner Ionization 38C-1871/2 PowerVent®...
- Page 39 IN S T A LLA TION M A NU A L 38C-2482/1 38C-2555/3...
- Page 40 DRU Verwarming B.V. The Netherlands Postbus 1021, NL-6920 BA Duiven Ratio 8, NL-6921 RW Duiven...
Need help?
Do you have a question about the Cosmo RCH and is the answer not in the manual?
Questions and answers