2VV DAPHNE Installation Manual
Hide thumbs
Also See for DAPHNE:
- Installation manual (21 pages) ,
- Installation, operation and handling (26 pages) ,
- Installation manual (26 pages)
Table of Contents
Advertisement
Quick Links
Advertisement
Table of Contents

Subscribe to Our Youtube Channel
Related Manuals for 2VV DAPHNE


Summary of Contents for 2VV DAPHNE
- Page 1 DAPHNE INSTALLATION...
-
Page 2: Before Starting
The assessment was conducted pursuant to harmonized European standards included in the relevant EC Declaration of Conformity. The current and full version of www.2vv.cz the EC Declaration of Conformity can be found at 2VV. Creating innovative solutions for you and your business since 1995. - Page 3 2 hours, without turning it on, so that its Please, contribute actively to the protection inner temperature can match the surroundings. of the environment and procure the regular disposal or recycling of packing materials. 2VV. Creating innovative solutions for you and your business since 1995.
-
Page 4: Main Parts
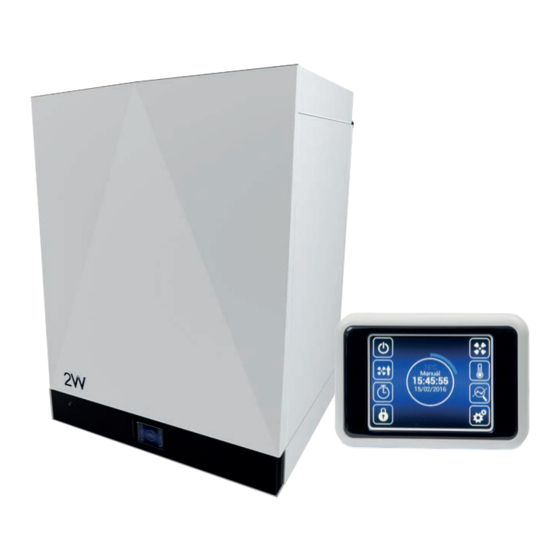
7. Fan. 8. Exchanger 9. Condensate drain 10. Filter G4 (intake), Filter G4 (exhaust) + prefilter G2 (selection). 11. Control panel 12. Regulation unit - Connecting power and accessories 2VV. Creating innovative solutions for you and your business since 1995. - Page 5 DIMENSIONS HRDA2-020 + HRDA2-030 HRDA2-050 2VV. Creating innovative solutions for you and your business since 1995.
-
Page 6: Technical Parameters
HRDA2-050... XS0C HRDA2-070... ES0C HRDA2-070... EE1C HRDA2-070... XE1C HRDA2-070... XS0C HRDA2-090... ES0C HRDA2-090... EE1C HRDA2-090... XE1C HRDA2-090... XS0C Other technical data can be found in the technical catalog - www.2vv.cz 2VV. Creating innovative solutions for you and your business since 1995. -
Page 7: Installation
(e.g. a laundry room), condensation in the external parts of the sheath may occur when combined with low exterior temperatures. If condensation occurs outside the unit, increase the ventilation in the surroundings of the unit. +40 °C -20 °C 20 °C max. 90% +40°C +5°C 2VV. Creating innovative solutions for you and your business since 1995. -
Page 8: Installing The Unit
Access relates mainly to opening the (non included) revision lid. 2VV. Creating innovative solutions for you and your business since 1995. 200 mm 200 mm - The unit is fixed using suspension holders located on both... - Page 9 Level de unit horizontally with the adjustment screws on • the back. Hang the unit on the bracket • YOU WILL NEED Water level • No. 13 wrench • 2VV. Creating innovative solutions for you and your business since 1995.
- Page 10 80 cm from the wall during in- stallation. Install the back cover on the unit. Check the locking. +/- 15mm 2VV. Creating innovative solutions for you and your business since 1995.
- Page 11 INSTALLATION HRDA2-BASE-200-300 HRDA2-BASE-500 HRDA2-BASE-700-900 2VV. Creating innovative solutions for you and your business since 1995.
- Page 12 (the original unit delivered will have the sink on the right side, per the figure above). HRDA2-090 Daphne unit is equipped with the ability to connect a sec- ond condensate drain in places where summer conditions require it. This second condensate drain must be connected...
-
Page 13: Electronic Accessories
Serial number mentation of the given accessory. TECHNICAL INFORMATION The electrical parameters can be found on the ma- • nufacturer's labels inside and on the side of the unit. 2VV. Creating innovative solutions for you and your business since 1995. -
Page 14: Changing Door Position
INSTALLATION Changing door position * When rotating the regulator it is necessary to disconnect the grounding of the regulator and reconnect it once rotation is complete 2VV. Creating innovative solutions for you and your business since 1995. - Page 15 INSTALLATION 2VV. Creating innovative solutions for you and your business since 1995.
- Page 16 CAPTEUR 0-10V SENSOR CAPTEUR 0-10V SENSOR á distance EXTERNAL EXTERNAL defrost defrost 2VV. Creating innovative solutions for you and your business since 1995. DX GENERAL ERROR DX GENERAL ERROR DX DEFROST DX DEFROST 51 52 51 52 53 54 53 54...
- Page 17 Flap 1 Flap 2 LM230 pátek 29. ledna 2021 9:13:48 - Uzavírací klapka KRTK-A | 2VV Check the following before switching on the unit for the first time: That the unit is properly closed and all the outlets are connected to the ductwork.
-
Page 18: Maintenance
• After checking or replacing filters, the fouled filter control must be restarted; see the chapter MENU FILTER TIM- ATTENTION! Failure to properly clean (change) the filters may reduce the performance of the unit and damage the fan. 2VV. Creating innovative solutions for you and your business since 1995. -
Page 19: Troubleshooting
Removing the boards from the plastic frame – pliers for precision mechanics Releasing the printed circuit – Philips screw no. 0 Plastic parts Ceiling insulation of front panels – box cutter 2VV. Creating innovative solutions for you and your business since 1995. - Page 20 In case of any requests or inquiries, contact our sales or technical department. Contact Address 2VV, s.r.o., Fáblovka 568, 533 52 Pardubice, Czech Republic Website: http://www.2vv.cz/ 2VV. Creating innovative solutions for you and your business since 1995. 2VV. Creating innovative solutions for you and your business since 1995.
Need help?
Do you have a question about the DAPHNE and is the answer not in the manual?
Questions and answers