Table of Contents
Advertisement
Quick Links
Advertisement
Table of Contents

Related Manuals for PNI Prime Pro


Summary of Contents for PNI Prime Pro
- Page 1 User Manual Prime Pro Digital Magnetic Compass...
-
Page 2: Table Of Contents
Hard-Iron-Only Calibration ............19 Accelerometer Calibration ..............19 6 OPERATION WITH PNI STUDIO ..............22 Installation ..................22 PNI Studio Header and Connecting to PNI Studio ......22 PNI Studio Footer and Saving/Applying Settings ........ 24 Configuration Tab ................25 6.4.1 General Settings ................. - Page 3 7 OPERATION WITH PNI BINARY PROTOCOL ..........35 Datagram Structure ................35 Parameter Formats ................36 7.2.1 Endianness ................. 36 7.2.2 Floating Point ................36 7.2.3 Signed Integer ................37 7.2.4 Unsigned Integer ................ 38 7.2.5 Boolean ..................38 Commands Overview ................39 Set-Up Commands ................
- Page 4 Figure 3-4: Molex-to-USB Cable Drawing, pn 14480 ..........7 Figure 4-1: Positive & Negative Roll and Pitch Definition ........ 10 Figure 4-2: Prime Pro Enclosed Mounting Orientations ........11 Figure 5-1: 12 Point Full-Range Calibration (Realistic View)........ 16 Figure 5-2: Accelerometer Calibration Starting Positions ........20 Figure 7-1: Datagram Structure ................
-
Page 5: Copyright & Warranty Information
Product is specified: (i) in PNI’s Price List in effect at time of order acceptance; or (ii) on PNI’s web site (www.pnicorp.com) at time of order acceptance, be free from defects in material and workmanship and will... -
Page 6: Introduction
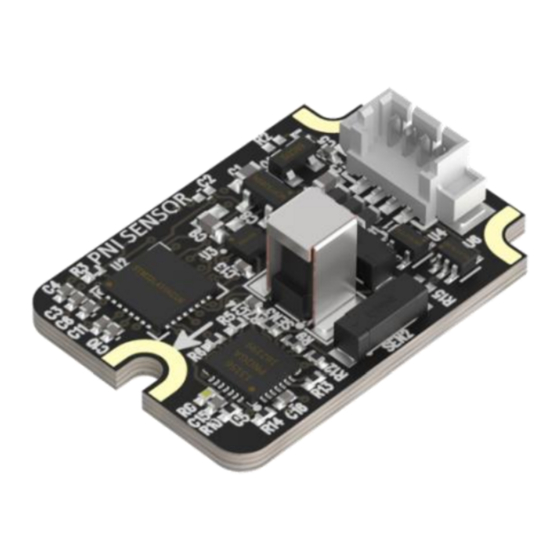
Introduction Introducing Prime Pro, a new digital magnetic compass that’s half the size and twice as robust as our standard Prime DMC. It delivers field-accurate heading, pitch and roll data, even where GPS is compromised or unavailable – with 1º of accuracy. -
Page 7: Specifications
1. Specifications are typical unless otherwise noted, and subject to change. 2. Assumes that the Prime Pro is motionless; that the local magnetic field is clean relative to user calibration; that the magnetic dip angle is <= 65° that the pitch angle is ≤... -
Page 8: Table 3-3: Electrical Requirements
= 3.3V to 5.5V with loads ≤ 8mA. CMOS-compliance is guaranteed the entire V voltage range. (2) High load currents at low V voltages may prevent device from producing TTL-compliant voltages. PNI Sensor DOC#TBD Prime Pro User Manual Preliminary September 2022 Page 4... -
Page 9: Figure 3-1: Typical Current Drawing During Application Of External Power
Value Dimensions (l x w x h) 29.3 x 21.3 x 10.1 mm Weight 2.4 gm 4-pin Molex, part number 0533980410 Connector Mating Molex connector part number 051020400 PNI Sensor DOC#TBD Prime Pro User Manual Preliminary September 2022 Page 5... -
Page 10: Table 3-7: Esd Ratings
(1) JEDEC document JEP155 states that 500-V HBM allows safe manufacturing with a standard ESD control process. (2) JEDEC document JEP157 states that 250-V CDM allows safe manufacturing with a standard ESD control process. PNI Sensor DOC#TBD Prime Pro User Manual Preliminary September 2022 Page 6... -
Page 11: Mechanical Drawings
Note: Alternatively, an unjacketed cable is available from Molex Part Numbers 218112040X, where X = 0 thorugh 3 CABLE USB TO RS232 (FTDI TTL-232R-3V3-WE) Figure 3-4: Molex-to-USB Cable Drawing, pn 14480 PNI Sensor DOC#TBD Prime Pro User Manual Preliminary September 2022 Page 7... -
Page 12: Set-Up And Evaluation
After making the electrical connections, it is a good idea to perform some simple tests to ensure the Prime Pro is working as expected. See Section 6 for how to operate the Prime Pro with PNI Studio or Section 7 for how to operate the Prime Pro using PNI’s binary protocol. -
Page 13: Operate Within The Prime Pro's Dynamic Range
However, each axis of the Prime Pro has a calibrated dynamic range of ±150 µT. If the total field exceeds this value for any axis, the Prime Pro may not perform to specification. When mounting the Prime Pro, consider the effect of any sources of magnetic fields in the host environment that, when added to Earth’s field, may take the... -
Page 14: Mechanical Mounting
These rotations are dependent on each other since the axes of rotation move with the plane. As shown in Figure 4-1, for the Prime Pro a positive pitch is when the front edge of the board is rotated upward, and a positive roll is when the right edge of the board is rotated downward. -
Page 15: Coordinate System
Mounting Orientation 4.3.3 The Prime Pro can be mounted in 16 different orientations, as shown in Figure 4-2. All reference points are based on the default orientation shown in Figure 4-1. The orientation should be programmed in the Prime Pro using the Configuration Tab in PNI Studio or using the kSetConfig command and the kMountingRef setting in the PNI Protocol, as described in Section 7.4.2. -
Page 16: User Calibration
User Calibration The magnetic sensor in the Prime Pro is calibrated at PNI’s factory in a magnetically controlled environment. However, sources of magnetic distortion positioned near the Prime Pro in the user’s system will distort Earth’s magnetic field and must be compensated for in the host system with a user calibration. - Page 17 Other Considerations Prime Pro can store up to 8 different sets of magnetic calibration coefficients, hence if the system magnetic signature will change in different known unique states, perform a user calibration in these unique states and save each of the calibration coefficients.
-
Page 18: Full-Range Calibration
Prime Pro needs to be mounted within the host system and the entire host system needs to be moved as a single unit during a user calibration. The Prime Pro allows the user to perform a calibration only in a 2D plane or with limited tilt but provides the greatest accuracy if the user can rotate through 360°... -
Page 19: Table 5-2: 12 Point Full-Range Calibration Pattern (Two Circles)
≤ -30° 240° ≥ +30° 300° ≤ -30° 300° Footnote: 1. Heading and Tilt listings are not absolute heading directions, but rather relative heading referenced to the first sample. PNI Sensor DOC#TBD Prime Pro User Manual Preliminary September 2022 Page 15... -
Page 20: Calibration
2D Calibration 5.1.2 A 2D Calibration is intended for applications with very low tilt operation, (<5°) and where calibrating the Prime Pro with greater tilt is not practical. PNI Sensor DOC#TBD Prime Pro User Manual Preliminary September 2022... -
Page 21: Limited-Tilt Calibration
It provides both hard-iron and soft-iron distortion correction. The recommended 12-point calibration pattern given below is a series of 3 circles of evenly spaced points, with as much tilt variation as expected during use. PNI Sensor DOC#TBD Prime Pro User Manual Preliminary September 2022 Page 17... -
Page 22: Table 5-5: 12 Point Limited-Tilt Calibration Pattern
> +5° 240° > +5° 300° > +5° Second Circle 0° < -5° 60° < -5° 120° < -5° 180° < -5° 240° < -5° 300° < -5° Footnote: PNI Sensor DOC#TBD Prime Pro User Manual Preliminary September 2022 Page 18... -
Page 23: Hard-Iron-Only Calibration
+30°. 5.2 Accelerometer Calibration The Prime Pro uses a MEMS accelerometer to measure attitude. This data is output as pitch and roll data. The accelerometer data is critical for establishing an accurate heading reading when the Prime Pro is tilted. -
Page 24: Figure 5-2: Accelerometer Calibration Starting Positions
Calibration can occur within the user’s system or with the module alone. It is not necessary to place the Prime Pro on a flat surface as shown, but it must be held very still during calibration, and holding it against a stable surface is a way to help ensure this. -
Page 25: Table 5-8: Accelerometer Calibration Pattern
10° to 20° 330° < -45° -10° to -20° Footnote: 1. Heading and Tilt listings are not absolute heading directions, but rather relative heading referenced to the first sample. PNI Sensor DOC#TBD Prime Pro User Manual Preliminary September 2022 Page 21... -
Page 26: Operation With Pni Studio
Now plug the Prime Pro into the USB or Serial port of your computer. Since the Prime Pro interface is TTL, in order to use the PNI Studio a USB to TTL cable as shown in Figure 3- 4 is required to interface with the PNI Studio If you are using Windows 7 or later version the computer automatically searches for and installs the driver. - Page 27 Enter an ‘API Key’ in the designated box. If connecting locally this can be any number/letter combination. For a server hosted session or one connecting with a PNI engineer, use a designated API Key provided by PNI Sensor. Enter the same ‘API Key’ in the second “pni-studio” window and hit connect.
-
Page 28: Pni Studio Footer And Saving/Applying Settings
The footer is the same regardless of which tab is selected. Note that if a field is changed on any of the PNI Studio tabs, then either <Apply> or <Save> must be selected for the change to take effect. -
Page 29: Configuration Tab
The default is “Standard”. Output Units The Prime Pro can output heading, pitch, and roll in either degrees or mils. The default is “Degrees”. (There are 6400 mils in a circle, such that 1 degree = 17.7778 mils and 1 mil = 0.05625 degree.) - Page 30 “True” is selected as the “North Reference”. Declination varies primarily with location, although it also gradually changes over time (years) for a given location. To find the declination for where the Prime Pro will be used, go to https://ngdc.noaa.gov/geomag/calculators/magcalc.shtml#declination.
-
Page 31: Acquisition Settings
Prime Pro sending one set of data and the start of sending the next sample set. If the delay is set to 0, then Prime Pro will begin sending new data as soon as the previous data set has been sent. Note that the inverse of the Sample Delay is greater than the sample rate, since the Sample Delay does not include the actual measurement acquisition time. -
Page 32: Calibration Settings
Accelerometer – The user should select this when accelerometer calibration will be performed. Accelerometer calibration is recommended every 6 to 12 months to compensate for bias drift in the accelerometer. The Prime Pro can also be returned to PNI for accelerometer calibration. - Page 33 If the minimum change and stability criteria are not met in 5 seconds as a timeout period, Prime Pro will take a sample at the end of the timeout. If the user wants to have more control over when the point will be taken, then Auto Sampling should be deselected.
-
Page 34: Performing A Calibration
Section 0. • If “Automatic Sampling” is checked the Prime Pro needs to be held steady for a short time and then a sample automatically will be taken. Once the window indicates the next number, the device’s orientation should be changed and held... -
Page 35: Test Tab
Distribution Error and Tilt Error scores and still have a rather high Mag Cal value. The most likely reason for this is that the Prime Pro is close to a source of magnetic distortion that is not fixed with respect to the device. - Page 36 The button will briefly gray out while the data is being output to the screen, then return to reading <Start>. Show 3D Model Selecting the <Show> button launches the 3D Model window, as shown below. PNI Sensor DOC#TBD Prime Pro User Manual Preliminary September 2022 Page 32...
-
Page 37: Log Data Tab
Configuration Tab. To change these, return to the Configuration Tab, make the change, then <Apply> or <Save> the change. Functional Mode The Prime Pro is designed to operate in Compass Mode. AHRS Mode is ignored. Log Data Tab PNI Studio can capture measurement data and then export it to a text file. -
Page 38: Graph Tab
The graph can be used to visually see hard and soft- iron effects within the environment measured by the Prime Pro, as well as corrected output after a user calibration has been performed. All 3 axes of data can also be displayed in 3-D via the “Display”... -
Page 39: Operation With Pni Binary Protocol
Operation with PNI Binary Protocol The Prime Pro utilizes a binary communication protocol, where the communication parameters should be configured as follows: Table 7-1: Port Configuration Parameter Value Number of Data Bits Start Bits Stop Bits Parity none 7.1 Datagram Structure... -
Page 40: Parameter Formats
Endianness 7.2.1 Prime Pro can treat 32-bit and 16-bit parameters as having big- or little-Endian formatting. For 32-bit parameters, the big-Endian byte order is ABCD EFGH, while the little-Endian byte order is DCBA HGFE. For 16-bit parameters the big-Endian byte order is ABCD, while the little-Endian byte order is DCBA. -
Page 41: Signed Integer
0=positive and 1=negative. Signed 8-Bit Integer (SInt8) UInt8-based parameters are unsigned 8-bit numbers. Bit 7 represents the sign of the value, where 0=positive and 1=negative. PNI Sensor DOC#TBD Prime Pro User Manual Preliminary September 2022 Page 37... -
Page 42: Unsigned Integer
UInt16-based parameters are unsigned 16-bit numbers. Unsigned 8-Bit Integer (UInt8) UInt8-based parameters are unsigned 8-bit numbers. Boolean 7.2.5 Boolean is a 1-byte parameter that MUST have the value 0=FALSE or 1=TRUE. PNI Sensor DOC#TBD Prime Pro User Manual Preliminary September 2022 Page 38... -
Page 43: Commands Overview
7.3 Commands Overview Table 7-2 provides a summary of the basic commands available with the Prime Pro. Table 7-2: Prime Pro Command Set Frame ID Command Description Queries the device’s type and 0x01 kGetModInfo firmware revision. 0x02 kGetModInfoResp Response to kGetModInfo... -
Page 44: Set-Up Commands
(frame ID 2 , 0X02) The response to kGetModInfo is given below. The payload contains the device type identifier followed by the firmware revision number. Payload Type Revision UInt32 UInt32 PNI Sensor DOC#TBD Prime Pro User Manual Preliminary September 2022 Page 40... -
Page 45: Module Configuration
(frame ID 6 , 0X06) This frame sets internal configurations in the Prime Pro. The first byte of the payload is the configuration ID followed by a format-specific value. These configurations can only be set one at time. To save these in non-volatile memory, the kSave command must be issued. -
Page 46: Table 7-3: Configuration Identifiers
This sets the declination angle to determine True North heading. Positive declination is easterly declination and negative is westerly declination. This is not applied unless kTrueNorth is set to TRUE. PNI Sensor DOC#TBD Prime Pro User Manual Preliminary September 2022 Page 42... -
Page 47: Table 7-4: Sample Points
(Config. ID 6 Sets the Endianness of packets. TRUE is Big-Endian. FALSE is Little-Endian. kMountingRef (Config. ID 10 This sets the reference orientation for the Prime Pro. Please refer to Figure 4-2 for additional information. kUserCalNumPoints (Config. ID 12 The user must select the number of points to take during a calibration. - Page 48 This command provides the flexibility to store up to eight (8) sets of magnetometer calibration coefficients in the Prime Pro. The default is set number 0. To store a set of coefficients, first establish the set number (number 0 to 7) using kMagCoeffSet, then perform the magnetometer calibration.
-
Page 49: Saving Settings
This flag sets whether output will be presented in Continuous or Polled Acquisition Mode. Poll Mode is TRUE and should be selected when the host system will poll the Prime Pro for each data set. Continuous Mode is FALSE and should be selected PNI Sensor... -
Page 50: Data Components
Prime Pro output data to the host system at a relatively fixed rate. Poll Mode is the default. FlushFilter: This is only relevant in Compass Mode. Setting this flag to TRUE results in the FIR filter being flushed (cleared) after every measurement. -
Page 51: Table 7-5: Component Identifiers
+180.0˚. kTemperature (Component ID 7 This value is provided by the device’s internal temperature sensor. Its value is in degrees Celsius and has an accuracy of ±3° C. PNI Sensor DOC#TBD Prime Pro User Manual Preliminary September 2022 Page 47... -
Page 52: Making A Measurement
Making a Measurement 7.5.3 kGetData (frame ID 4 If the Prime Pro is configured to operate in Polled Acquisition Mode (see kSetAcqParams), then this frame requests a single measurement data set. The frame has no payload. kStartContinuousMode (frame ID 21... -
Page 53: Continuous Data Output After Power Cycle
Continuous Data Output After Power Cycle 7.5.4 Prime Pro is configurable to continuously send out data at next power on. The following procedure shows the steps on how to enable this feature, and how to disable it. To Enable the Continuous Data Output... -
Page 54: Calibration Commands
Power Cycle Prime Pro Power off and then power on, Prime Pro will start to output the same data as the set of data before the power off. To Disable the Continuous Data Output Send the following two commands, Prime Pro will stop outputting data after next power cycle. - Page 55 10° of tilt, but accuracy will not be as good. Hard-Iron-Only Calibration Recalibrates the hard-iron offset for a prior calibration. If the local field hard-iron distortion has changed, this calibration can bring the Prime Pro back into specification. Limited-Tilt Calibration Recommended calibration method when >5°...
-
Page 56: Performing A User Calibration
0 to 32. Payload 0 is sent from Prime Pro after kStartCal is received by Prime Pro, it indicates user calibration start, and Prime Pro is ready to take samples. Payload 1 to 32 indicates each point sampled successfully. -
Page 57: Calibration Score
DistributionError and TiltError and still have a rather high MagCalScore value. The most likely reason for this is the Prime Pro is close to a source of local magnetic distortion that is not fixed with respect to the device. -
Page 58: Factory Calibration
This frame is the response to kFactoryAccelCoeff frame. The frame has no payload. kCopyCoeffSet (frame ID 43 This frame copies one set of calibration coefficients to another. Prime Pro supports 8 sets of magnetic calibration coefficients, and 8 sets of accel calibration coefficients. -
Page 59: Performance Commands
The Prime Pro can be configured to clear, or flush, the filters after each measurement, as discussed in Section 7.5.1. Flushing the filter clears all tap values, thus purging old data. -
Page 60: Table 7-6: Recommended Fir Filter Tap Values
06.4500864832660e-2 01.1484431942626e-1 01.7646051430536e-2 01.9875512449729e-2 01.2567124916369e-1 02.3794805168613e-2 01.2567124916369e-1 03.0686505921968e-2 01.1484431942626e-1 03.8014333463472e-2 09.5354386848804e-2 04.5402682509802e-2 07.1024151197772e-2 05.2436112653103e-2 04.6451949792704e-2 05.8693165018301e-2 02.5971390034516e-2 06.3781858267530e-2 01.2710056429342e-2 06.7373451424187e-2 07.9724971069144e-3 06.9231186101853e-2 06.9231186101853e-2 06.7373451424187e-2 06.3781858267530e-2 05.8693165018301e-2 05.2436112653103e-2 04.5402682509802e-2 PNI Sensor DOC#TBD Prime Pro User Manual Preliminary September 2022 Page 56... -
Page 61: Power Down/Up
RS-232 driver. However, the driver chip has a feature to keep the Rx line enabled. The Prime Pro will power up when it receives any signal on the native UART Rx line. kPowerDownDone (frame ID 28 This frame confirms the Prime Pro received a command to power down. -
Page 62: Using Multiple Coefficient Sets
(frame ID 23 This frame confirms the Prime Pro received a command to power up. (The Prime Pro will power up when it receives any signal on the native UART Rx line.) The frame has no payload. Using Multiple Coefficient Sets The ability to store and access multiple calibration coefficients sets the Prime Pro apart from our Prime or legacy TCM. -
Page 63: Table 7-7: Multiple Coefficient Command List
(UInt32) 0x07 0x13 0x00 0x06 0x07 0x00 0x0A 0x08 0x13 kAccelCoeffCopySet 0x13 0x09 0x65 0x00 0x00 0x00 0x?? value which is CRC1 CRC2 currently used in Prime Pro PNI Sensor DOC#TBD Prime Pro User Manual Preliminary September 2022 Page 59... - Page 64 • Send kSave command to save the kMagCoeffSet to flash so that it will be still available after power cycle. The kSave command is as following. 0x00 0x05 0x09 0x6E 0xDC PNI Sensor DOC#TBD Prime Pro User Manual Preliminary September 2022 Page 60...
-
Page 65: Communication Protocol Example
00 15 05 03 05 43 b3 df 5e 18 be 88 ed bd 19 3d b5 15 53 f2 14 6. Repeat steps 4 and 5 whenever data is desired. PNI Sensor DOC#TBD Prime Pro User Manual Preliminary September 2022 Page 61...
Need help?
Do you have a question about the Prime Pro and is the answer not in the manual?
Questions and answers