Advertisement
Advertisement

Subscribe to Our Youtube Channel
Related Manuals for VelectriX Ascent


Summary of Contents for VelectriX Ascent
- Page 1 VelectriX Instruction Manual • Ascent • Urban Step Through...
-
Page 2: Table Of Contents
Contents Safe Riding Recommendations Page 2 Pre-Ride Checklist Page 3 Display and Controls Pages 4-6 Battery Instructions Page 7 Battery Charging Page 8 Maintenance Page 9 Warranty Pages 10-12 Model Specification Pages 13 &14 Page 1... -
Page 3: Safe Riding Recommendations
Safe Riding Recommendations Please ensure you are familiar with and follow all traffic laws and regulations in your locality. Always wear a helmet when riding your bike. Don’t lend your bike to anyone who is unfamiliar with it. As with all bikes it is important that you stay within safe limits and speeds. -
Page 4: Pre-Ride Checklist
Pre-Ride Checklist Check your bike for any loose nuts, bolts, or fixings. Check tyre pressures on your bike are correct. Please always refer to the tyre manufactures suggested levels on the side of the tyre. Check the tyres on your bike for any visible damage, wear and tear or bald spots. -
Page 5: Display And Controls Pages
LCD Display and Controls Display Operation The LCD display is mounted on the left side of the handlebar and is controlled with 3 easy to use buttons: Power, (Up) and (Down) Power On/Off Press and hold the button down for more than 2 seconds to start the display. - Page 6 User Interface There are 3 display screens available. Screen 1 shows Battery Charge Indicator, Trip Time, Current Speed, Power Assist Level and Distance. Screen 1 also shows icons for Walk Mode, Light Operation (for bikes with lights fitted) and Power Assist Operation. To move to screen 2, hold the Power button down, when in screen 1.
- Page 7 Walk Mode Press and hold the button to engage the Walk Assist function. The icon will appear in the display and the bike will assist to 6 kph. Release the button to exit the Walk Assist mode. The walk assist feature is not a riding mode. It is designed to assist with walking the bike up an incline to a maximum of 6 kph.
-
Page 8: Battery Instructions
Battery Instructions Before riding you should check the battery charge by pressing the button on the battery top. A fully charged battery will display all 4 lights. Locking & Unlocking the Battery The bike is supplied with a set of keys, that are required to remove the battery from the bike. -
Page 9: Battery Charging
Charging the Battery The battery may be charged on or off the bike. 1. Plug the battery charger into the charging port on the battery and wall power socket. 2. Only when connected to the battery, should the charger be turned on at the wall power socket. -
Page 10: Maintenance
Maintenance Your VelectriX bike should be returned to your servicing dealer for servicing and a thorough inspection once every 9 months or 1500kms, whichever comes first. Excluding the electronics, motor, battery and wiring, your VelectriX e-bike is a normal bike, with normal components. -
Page 11: Warranty Pages
Warranty This warranty is provided by VelectriX Pty Ltd. VelectriX warrants its products, including all individual components against defects in material or workmanship as follows: Warranty Conditions The warranty period is not renewed or extended as a result of a warranty repair or replacement. - Page 12 If the battery has a capacity of at least 60% within 2 years of purchase it will be considered acceptable. VelectriX reserves the right for the battery to be returned for testing to establish the capacity before any repair or replacement is authorised.
- Page 13 Damage caused from competitive use, stunt riding or exceeding the bikes carrying capacity. How To Make a Warranty Claim If you believe your VelectriX product is faulty or defective, please: 1. Contact the authorised VelectriX reseller/dealer from where the bike was purchased and explain the issue.
-
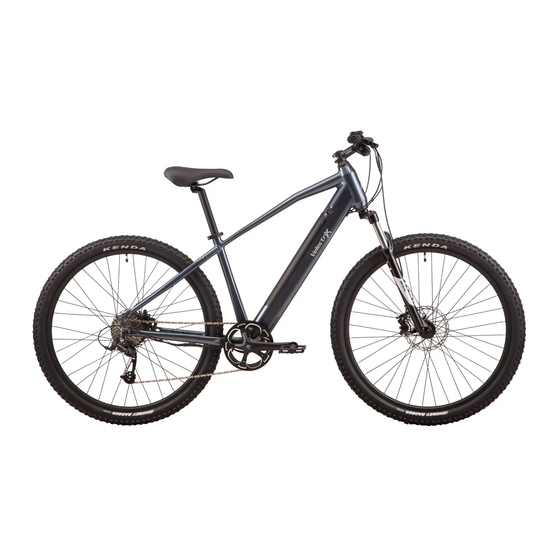
Page 14: Model Specification Pages 13 &14
Model Specification VelectriX Ascent Mens FRAME Aluminium mountain frame COLOUR Blue (YS 7634) SIZE 46cm FORK Suntour XCM 27.5" suspension forks – 100mm travel RIMS Double wall, 27.5" 13g, 36h, brass nipples TYRES Innova 27.5" x 2.25" HANDLEBARS Promax MTB 680mm 31.8mm, 6 degree back sweep, 30mm rise STEM Promax stem 28.6mm clamp, 31.8mm bar, 90mm extension... - Page 15 VelectriX Urban Step Through FRAME Aluminium step through frame COLOUR Grey (YS 7779) SIZES 38 and 44cm FORK Rigid forks RIMS Double wall, 27.5" 13g, 36h, brass nipples, with eyelets TYRES Wanda City 27.5" x 1.95" HANDLEBARS Promax 640mm 25.4mm, 45 degree back sweep, riser STEM Promax fixed 28.6mm clamp, 31.8mm bar, 108mm extension...
Need help?
Do you have a question about the Ascent and is the answer not in the manual?
Questions and answers