Table of Contents
Advertisement
Quick Links
Advertisement
Table of Contents

Related Manuals for Yeti SB120


Summary of Contents for Yeti SB120
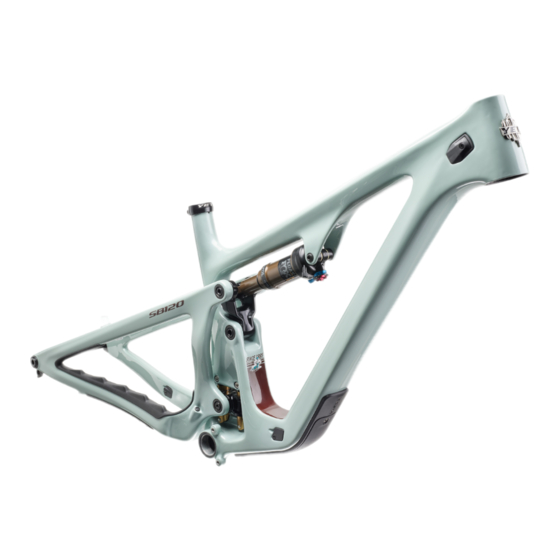
- Page 1 YETI SB120 OWNER’S MANUAL...
-
Page 2: Table Of Contents
TABLE OF CONTENTS SB120 OWNER’S MANUAL OVERVIEW FRAME FEATURES SB120 GEOMETRY FRAME STANDARDS MAINTENANCE FRAME ASSEMBLY BEARING PRESS ASSEMBLY SWITCH INFINITY BEARING ASSEMBLY SEAT POST SET-UP SWITCH INFINITY SERVICE DROPPER POST INSERTION GUIDE EXPLODED VIEW REBUILD KITS FREQUENTLY ASKED QUESTIONS... -
Page 3: Overview
Whether you are a beginner cyclist, or a seasoned pro, your Yeti bicycle will provide endless hours of two-wheeled fun. This model specific manual is designed to be used in conjunction with the general Yeti Owner’s Manual and the manuals supplied by the suspension manufacturers. If you did not receive the Yeti Owner’s Manual or the manual provided by the suspension manufacturer,... -
Page 4: Frame Features
Gone are the days of fishing your cables through your downtube hoping they pop out Efficient pedaling performance while still smooth and supportive when the going the other side. The SB120’s internally molded cable tubes allow you to put the cable gets rough. -
Page 5: Sb120 Geometry
GEOMETRY SB120 SB120 OWNER’S MANUAL 1 3 0 M M F O R K X X L S E AT T U B E L E N G T H E F F. T O P T U B E L E N G T H H E A D T U B E A N G L E ˚... -
Page 6: Frame Standards
FRAME STANDARDS SB120 OWNER’S MANUAL T R A V E L 120MM W H E E L S I Z E 29” F R A M E S I Z E XS, SM, MD, LG, XL, XXL R E A R S H O C K... -
Page 7: Maintenance
It is important to remember that service intervals can specifications for individual parts on the SB120 are listed below, as well as in the step by step vary depending on climate, trail conditions and riding frequency. Servicing your bike requires assembly instructions later in the manual. -
Page 8: Frame Assembly
Install 2X Low Profile H20 Bolts (3.25) and could lead to serious frame issues. shock eyelet. Washers (3.26) to front triangle. WARNING: Service on Yeti bicycles requires Torque: 4 Nm (or hand tight) special knowledge and tools. Yeti Cycles recommends that all service and repairs be performed by an authorized Yeti Dealer. - Page 9 OWNER’S MANUAL Lightly grease and place 2x Race Extenders Assemble Shock Extender Assembly (3.15) to SB120 Link (3.14) by placing 2X Race Extender (3.13) in the Apply grease to main pivot cavities of rear (3.5) onto the lower bearings in Link Assembly extender cavities and sliding between the link tabs.
- Page 10 SB120 OWNER’S MANUAL Install the shock into the frame by securing Install Female 8x45mm Bolt (3.18) with Washer Install Housing Clamp Cap (3.8) onto the drive- Install a Housing Clamp Cap (3.8) and Clamp front eyelet with a Guide Pin. Apply Loctite to (3.21) through front Shock Eyelet and secure...
-
Page 11: Bearing Press Assembly
BEARING PRESS ASSEMBLY SB120 OWNER’S MANUAL LINK BEARING PRESS EXTENDER BEARING PRESS Press both upper bearings into the link from the inside of the link tabs using a 15x24mm arbor. Press the drive-side bearing (orientation of extender with the threaded tab on top) with the Check that both bearings are fully seated. -
Page 12: Switch Infinity Bearing Assembly
SWITCH INFINITY V2 BEARING ASSEMBLY SB120 OWNER’S MANUAL BEARING REMOVAL BEARING INSTALL DRIVE SIDE BEARING DRIVE SIDE BEARING Remove dust caps on the outside of the bearings. Press drive side bearing into Switch Infinity body. Remove non-drive side bearing. Slide axle sleeve into drive side bearing. - Page 13 SWITCH INFINITY V1 BEARING ASSEMBLY SB120 OWNER’S MANUAL BEARING REMOVAL BEARING INSTALL DRIVE SIDE BEARING DRIVE SIDE BEARING Remove drive side bearing and axle sleeve Press non-drive side bearing into switch infinity housing (ensure extended race is facing outward from switch infinity body).
-
Page 14: Seat Post Set-Up
SEAT POST SET-UP SB120 OWNER’S MANUAL STANDARD ROUTING SET-UP With a 3mm allen wrench, remove the outer Install your seatpost housing into the drive-side The hole under the downtube protector While pushing the housing into the head tube plastic downtube protector. -
Page 15: Switch Infinity Service
SWITCH INFINITY SERVICE SB120 OWNER’S MANUAL With a 2.5mm allen wrench, remove the two With a 5mm allen wrench, remove the main pivot With a 10mm allen wrench, remove the Main Rotate your swingarm upwards to expose the clamps securing the shifter and brake housing Collet Wedge Bolt (3.9). -
Page 16: Dropper Post Insertion Guide
MAX INSERTION WIRELESS DROPPER (MM)* Please confirm both of these measurements, they are both required to ensure proper X-SMALL dropper fitment. 232.2 SMALL 242.8 If you have any questions, please contact Yeti or your local bike shop. MEDIUM 277.4 FRAME SIZE LARGE 316.8 X-LARGE 331.0... -
Page 17: Exploded View
1.1.4.6.9 EXPLODED VIEW SB120 OWNER’S MANUAL 3.29 3.29 3.34 EXTRA ITEMS SUPPLIED IN KIT 3.34 3.24 EXTRA ITEMS SUPPLIED IN KIT 3.28 3.36 3.24 3.28 3.30 3.36 3.30 3.37 3.37 3.24 3.22 3.24 3.22 3.15 3.10 3.29 3.16 3.11 3.15 3.12... - Page 18 COLLET NUT, M15 X 1.5, SHIFTER HOSE CLAMP 3.32 300060080 SRAM UNIVERSAL HANGER 300030368 CLAMP CAP, HOUSING 3.33 300060078 ASSY, YETI SEAT CLAMP, BOLT ON, 31.6 COLLET WEDGE SUB-ASSEMBLY 15MM, 3.34 300040523 COVER, HT PORT, BLIND, PA6 300030378 M4 THREADED WEDGE BOLT 3.35...
-
Page 19: Rebuild Kits
SWITCH INFINITY V2 BEARING SPACER 200020421 SHOCK EXTENDER KIT 200020436 CABLE PORT KIT 300040543 SHOCK EXTENDER, SB120, 25MM 300030177 SCREW, FH, M4 X 0.7, 25L 300020032 BEARING, 398 MAX DBL, 8 X 19 X 10/11 300040518 COVER-CABLE PORT, SINGLE, RIGHT EXIT... - Page 20 SB120 OWNER’S MANUAL 200020441 HARDWARE REBUILD KIT 200020443 AXS CONVERSION KIT 300030361 COLLET AXLE, 15MM X 58.5L, M15X1.5 300040510 FRAME PLUG, CABLE PORT 300030362 COLLET NUT, M15, 9.5 THICK, ROUND CAP 300040521 CLAMP, HT PORT SINGLE, PA6 300030364 SHOULDER SCREW, 15 X 27.35L, M15 THREAD, SS PIVOT 300030177 SCREW, FH, M4 X 0.7, 25L...
-
Page 21: Frequently Asked Questions
DOES THE SWITCH INFINITY SYSTEM REQUIRE MAINTENANCE? The short answer is the SB120 can accept up to a 2.6” tire. There is great tire clearance on the The fully sealed Switch Infinity mechanism has external grease ports to lube the bushings and SB120 but tire sizes vary widely by manufacturers, so it is hard to give a number that works for seals. - Page 22 But hey, if those changes suit your ride style then go for it. The SB120 uses a 190 x 45mm shock. The shock can also be locked out if you so desire, but we recommend running it fully open for the best compliance and traction.
-
Page 23: Lifetime Warranty
Yeti Cycles is not responsible for any damages to you or others arising from riding, transporting or other use of your bicycle. In the event that your frame breaks or malfunctions, YETI Cycles shall have no liability or obligation beyond the repair or replacement of your frame pursuant to the terms outlined in the warranty.
Need help?
Do you have a question about the SB120 and is the answer not in the manual?
Questions and answers