
Related Manuals for Hisense AX3100G


Summary of Contents for Hisense AX3100G
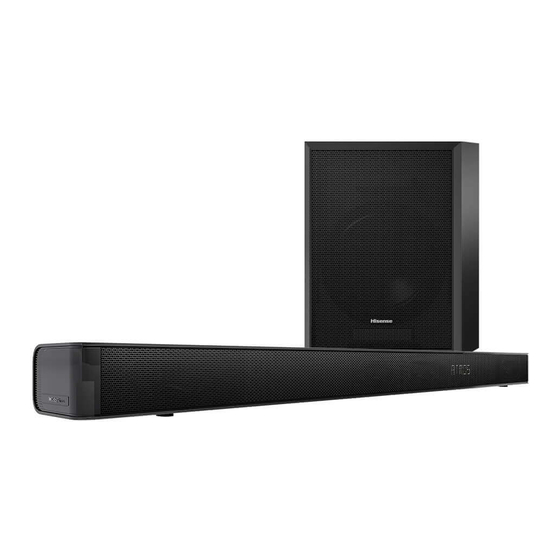
- Page 1 3.1CH Soundbar with Wireless Subwoofer Model: AX3100G 280W Max Audio Power Before using the soundbar, please read this manual thoroughly and retain it for future reference.
-
Page 2: Table Of Contents
Contents Important Safety Instructions ......................3 Safety .........................................3 Warning ........................................4 Supported Input Audio Formats ..............................6 What’s in the Box ..........................7 Identifying the Parts ........................8 Main Unit ........................................8 Wireless Subwoofer ....................................8 Remote Control ..................................... Preparations ............................10 Prepare the Remote Control ................................1 0 Replace the Remote Control Battery ............................ -
Page 3: Important Safety Instructions
1. Important Safety Instructions C AU T IO N RISK OF ELECTRIC SHOCK DO NOT OPEN AV IS 10 Protect the power cord from being walked on or pinched particularly at plugs, convenience RISQUE DE CHOC receptacles, and the point where they exit ÉLECTRIQUE NE PAS OUVRIR from the apparatus. -
Page 4: Warning
Bluetooth SIG,Inc. and any use of such • Do not attempt to clean the unit with chemical marks by Hisense is under license. Other trademarks and trade names are those of their respective owners. clean, dry or slightly damp cloth. - Page 5 Roku, the Roku logo, Roku TV, Roku TV Ready, and the Roku TV Ready logo are trademarks and/or registered trademarks of Roku, Inc. Roku TV Ready is only authorized by Roku for agreed-upon countries. This product is Roku TV Ready-supported in the United States, United Kingdom, Mexico and Canada. Countries are subject to change.
-
Page 6: Supported Input Audio Formats
1.3 Supported Input Audio Formats Format Function HDMI HDMI OPTICAL COAXIAL eARC LPCM 2ch ● ● ● ● LPCM 5.1ch ● LPCM 7.1ch ● Dolby Atmos - Dolby TrueHD ● Dolby Atmos - Dolby Digital Plus ● ● Dolby TrueHD ●... -
Page 7: What's In The Box
2. What’s in the Box Main Unit Optical Cable Wireless Subwoofer * Plug type varies by region AC Power Cord x 2 HDMI Cable For Main Unit / Wireless Subwoofer User Manual / Remote Control / Brackets (x2) /Bracket Screw (x2) Quick Start Guide AAA Batteries x 2 / Wall Anchors (x2) -
Page 8: Identifying The Parts
3. Identifying the Parts 3.1 Main Unit AC IN HDMI eARC OPTICAL COAXIAL 500mA 10 12 Display Window HDMI eARC Socket Show the current status. The port for connecting a T V. The port Remote Control Sensor supports the eARC/ARC HDMI feature, which Receive signal from the remote control. -
Page 9: Remote Control
PAIR Button 2 seconds Pairing mode 5 seconds Clear the pairing record AC IN Socket Connect to power supply. 3.3 Remote Control Switch the unit between ON and STANDBY mode. Select the play mode. (SOURCE) SURR Adjust the surround ON/OFF. (BT) Select the Bluetooth mode. -
Page 10: Preparations
4. Preparations 4.1 Prepare the Remote Control • Do not use any batteries other than those The provided Remote Control allows the unit to be operated from a distance. • Do not mix new batteries with old ones. Even if the Remote Control is operated within •... -
Page 11: Mounting The Soundbar On The Wall
4.4 Mounting the Soundbar on the Wall ote: personal injury and property damage (if you intend to install this product yourself, you must check for installations such as electrical wiring and plumbing that may be buried inside the wall). It is the installer’s responsibility to verify that the wall will safely support the total load of the unit and wall brackets. -
Page 12: Connections
5. Connections 5.1 Dolby Atmos® Dolby Atmos® gives you immersive listening HDMI eARC OPTICAL COAXIAL experience by delivering sound in three 500mA dimensional space, and all the richness, clarity, and power of Dolby sound. For more information, please visit dolby.com/technologies/dolby-atmos 5.2 DTS: X HDMI eARC DTS: X, the border sound is no longer constrained... -
Page 13: Connect To Aux Socket
5.7 Connect Power 5.5 Connect to AUX Socket Risk of product damage! • A Use a RCA to 3.5mm audio cable to connect Ensure that the power supply voltage the TV’s audio output sockets to the AUX corresponds to the voltage printed on the back socket on the unit. -
Page 14: Pair Up With The Subwoofer
5.8 Pair up with the Subwoofer Automatic pairing • The subwoofer should be within 6m (18 feet) The subwoofer and soundbar will automatically of the soundbar in an open area. pair when they are plugged into the mains sockets and turned on. •... -
Page 15: Select Modes
6.7 Adjust the Brightness Select the content with VOL +/- button on the remote control, and then press to con rm Press the DIMMER +/- button on the remote your selection and exit the settings. control to select brightness level. •... -
Page 16: Dts: X Operation
7. DTS: X Operation 7.1 DRC / Dialog Control / Neural:X Tips: / Virtual:X Features • The unit may not be able to decode all digital DTS:X® technologies provide users with virtual audio formats from the input source. In this multi-channel virtual surround e ects, creating case, the unit will mute. -
Page 17: Bluetooth Operation
Activate your Bluetooth device and select the If the device also supports Audio Video search mode. “Hisense AX3100G” will appear on your Bluetooth device list. the unit’s remote control to play music stored on the device. -
Page 18: Usb Operation
10. USB Operation Insert the USB device. Tips: • The unit can support USB devices with up to 32 GB of memory. HDMI eARC OPTICAL COAXIAL 500mA • This product may not be compatible with certain types of USB storage devices. •... -
Page 19: Setup Menu
11. Setup Menu 12. Troubleshooting To keep the warranty valid, never try to repair the During ON mode, press and hold the system yourself. If you encounter problems when button for 3 seconds to open the menu. using this unit, check the following points before Select the content with buttons. - Page 20 15 minutes. Please increase the volume level of your external device. • For more networked equipment information, see https: //hisense.fr/cat-produit/barres-de-son/ The subwoofer is idle or the indicator of subwoofer does not light up. • Please unplug power cord from the mains sockect, and plug it in again after 4 minutes to reset the subwoofer.
-
Page 21: Speci Cations
Model Name AX3100G Soundbar Power Supply AC 100-240V~ 50/60Hz Power Consumption 20 W Standby Power < 0.50 W USB port for playback 500mA USB Compatibility Hi-Speed USB (2.0) / FAT32 / FAT16 32G (max) , WAV/WMA/MP3/FLAC/ALAC Dimension (WxHxD) 920 x 60 x 90 mm / 36.2" x 2.4" x 3.5"... - Page 22 WARNING: This product can expose you to chemicals including Lead, which is WARNING: This product can expose you to known to the State of California to cause chemicals including lead, which is known to cancer. For more information go to: the State of California to cause cancer.
- Page 23 AX3100G 06045...
- Page 24 料号 12.005.0004.06045 环保要求 尺寸(mm) 展开尺寸:290x210,成型尺寸:145x210 说明书类说明: 项目名称 产品型号 HS310 材质 80g书写纸 RoHS2.0、Reach 22年海信H*S310声霸音箱项目 1、公差(mm) :0<a≦50(+0.3/-0.2) , 日期 部件名称 2022/07/12 说明书 24/p 页码P数 包装指令94/62/EC 50<a≦150(+1/-0.5) ,>150 (+1.5/-1。有特殊要求的,按标示公 包装工程师 平面工程师 姚亚明 刘梅红 单色印刷 颜色 大豆油墨印刷 差执行。 设计版本 变更提出人 变更原因 2、 要求图文清晰可辨, 内容完整, 折叠正确, 是否有可参考...
Need help?
Do you have a question about the AX3100G and is the answer not in the manual?
Questions and answers