Advertisement
G00-KPL0019A Rev. 22/07-00
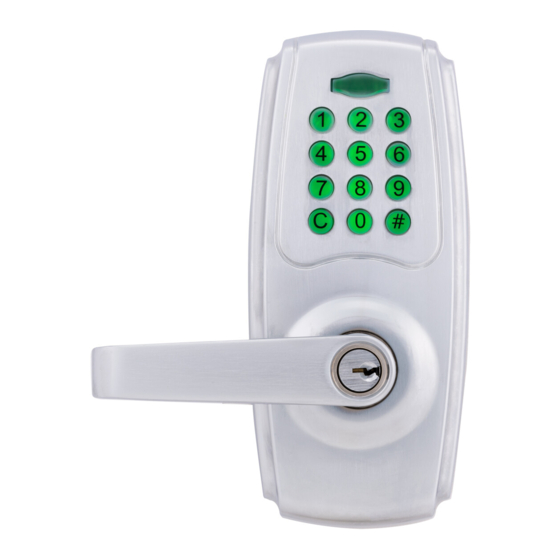
INSTALLATION INSTRUCTION
MANUAL DE INSTALACIÓN
FOR
PARA
1
CAUTION /
ADVERTENCIA :
Please use four alkaline batteries for the best performance.
Use cuatro baterías alcalinas para obtener un mejor desempeño.
A. Please change programming code before operating this lockset.
A. Cambie el código de programación antes de operar este juego de cerradura.
CARE and MAINTENANCE /
CUIDADO Y MANTENIMIENTO:
The following instructions should be followed to protect and maintain your lockset:
A. Do not use any chemical products containing alcohol, benzene, hydrochloric acid or nitric acid, and avoid using sharp or
abrasive objects to clean this lockset.
B. Periodically clean with mild soap and a soft cloth only.
Se deben seguir las siguientes instrucciones para proteger y mantener correctamente su juego de cerradura:
A. No use productos abrasivos o químicos que contengan alcohol, benceno, ácido clorhídrico o nítrico, y evite usar objetos
afilados o abrasivos para limpiar este juego de cerradura.
B. Limpie periódicamente con jabón y paño suaves.
2
Pre-installation — tools Required / Hardware Included
Instalación previa - Herramientas requeridas/Hardware incluido
Optional
Optional
Opcional
Opcional
Part
Description
Pieza
Descripción
1-1/4"(32mm) Screw /
Tornillo de 1-1/4"(32mm)
BB
5/16"(7.9mm) Screw /
Tornillo de 5/16" (7.9mm)
DD
3/4"(19mm) Screw /
Tornillo de 3/4" (19mm)
EE
Catch tool /
Herramienta de captura
T1
Part
Description
Parte
Descripción
A
Key /
Llave
B
Cylinder /
Cilindro
C
Exterior Assembly /
Ensamble exterior
D
Power Cable /
Cable de alimentación
E
Latch /
Pestillo
F
Mounting Plate /
Placa de montaje
G
Interior Assembly /
Ensamble interior
Note 1: Cylinder (B) and collar (N) are pre-installed in the exterior lever (J).
J
Note 2: Collar (N) is pre-installed on interior lever (J).
I
H
N
DD
Optional
Optional
Opcional
Opcional
Quantity
Part
Description
Cantidad
Parte
Descripción
2
H
Decorative Cover /
Cubierta decorativa
1
Battery Cover /
Cubierta de la batería
I
Lever /
Palanca
1
J
K
Strike Plate /
Cerradero
1
1
L
Dust Box /
Guardapolvo
M
Round Corner Faceplate /
Placa frontal redonda
1
N
Collar /
Collar
1
Revised exploded view & BOM
G
F
BB
C
E
See Note 1 & Note 2
EE
M
T1
D
K
L
See Note 1
3
Pre-installation (Continued) — Door Preparation
Instalación Previa (Continuación) - Preparación de la Puerta
NOTE: If your door is pre-drilled, check the hole sizes to make sure they are the proper size. If they are the proper
size, skip to the Installation section.
NOTA: Si su puerta ya está perforada, verifique el tamaño de los orificios para asegurarse de que son del tamaño
correcto. Si son del tamaño correcto, pasea la sección de instalación.
Cut out TEMPLATE (reverse page) and use to mark the door, drill holes, and chisel out the mortise.
Con la plantilla, marque la puerta y perfore lo orificios, y cincele una muesca.
NOTE: Drill from both sides of the door to prevent wood splitting.
NOTA: Perfore de ambos lados para evitar dañar la madera.
a.
1"
(25mm)
c.
Prepare the door jamb – use the strike plate as a template to drill the latch and screw holes and chisel
out the mortise. The strike plate must fit flush with the surface of the door jamb.
Prepare el portante de la puerta: usando el cerradero como plantilla, perfore los orificios de la cerradura
y el cerradero, y cincele una muesca hasta que el cerradero entre perfectamente.
Optional
Opcional
Quantity
Strike Plate
Cantidad
Cerradero
2
4
Installation
2
Instalación
4
Installing The Latch
Instalación Del Pestillo
1
Quantity
Set the latch backset
Coloque la entrada del cerrojo
Cantidad
1
1
2
1
1
Selecting the Proper Backset
1
Cómo seleccionar la distancia o "entrada" correcta
2
a.
a. Backset is the distance from the door edge to the center of the 2-1/8" (54 mm) hole on the door face.
b. The latch can be adjusted to fit either a 2-3/8" (60 mm) or a 2-3/4" (70 mm) Backset. The 2-3/8" Backset is common for residential doors.
c. To adjust the Backset, move the Cam with the square hole towards the latch bolt for the 2-3/8" (60 mm) Backset or towards the rear of
the latch for the 2-3/4" (70 mm) Backset.
a. La distancia del canto o borde de la puerta hasta el centro del agujero de 54 mm (2-1/8") en la cara de la puerta se le conoce algunas
veces como "entrada".
b. El cerrojo se puede ajustar para que quepa ya sea en una distancia o "entrada" de 60 mm (2-3/8") o de 70 mm (2-3/4"). La distancia o
"entrada" de 60 mm (2- 3/8") es común para puertas residenciales.
c. Para ajustar la distancia o "entrada", mueva la Leva con el agujero cuadrado hacia el pasador del cerrojo para la distancia o "entrada" de
60 mm (2-3/8") o hacia la parte posterior del cerrojo para la distancia o "entrada" de 70 mm (2-3/4").
Instsll Latch
Instale el Cerrojo
J
N
B
A
Latch Screws (EE)
Tornillos del cerrojo (EE)
Centerline
Línea central
2-1/8"
(54 mm)
Backset
Entrada
1"
25mm
o l e
c i o
h h
o r i fi
a t c
o f l
d e l
p t h
a d
d i d
D e
f u n
.
r o j o
P r o
c e r
d e l
Door jamb hole dimension
Dimensión del orificio del
portante
a. 1/2"
(13 mm)
b. 1-1/4"
(32 mm)
c. 1"
(25 mm)
d
c
e
b
a
Strike dimension
Dimensión del cerradero
d. 1/8"
(3 mm)
e. 2-5/16"
(58 mm)
CAUTION: Be sure the latch cam is upright before making any backset adjustment.
ADVERTENCIA: Asegúrese de que la leva del pestillo está en posición verticalantes
de ajustar la entrada.
Right /
Correcto
Bonne position
Posición del enganche
Wrong /
Equivocado
Mauvaise position
2-3/4"(70mm)
Posición incorrecta
b.
/ 4 "
2 - 3
r -
m
0 m
- o
- 7
/ 8 "
- o
2 - 3
m m
2-3/4"(70mm)
6 0
a. Insert the latch into the 1" hole in the door edge as shown. Be sure the bevelled
face of the latch bolt is towards the door jamb.
b. Insert two Latch Screws (EE) through the holes in the faceplate and tighten firmly.
a. Inserte el cerrojo en el agujero de 25.4 mm (1") en el canto o borde de la puerta
tal como se muestra. Asegúrese que la cara biselada del pasador del cerrojo se
encuentra hacia la jamba de la puerta.
b. Inserte dos Tornillos (EE) del cerrojo a través de los orificios en la placa frontal y
apriételos firmemente.
b.
2-1/8"
(54 mm)
d.
Faceplate
Placa frontal
Outline
Línea externa
Chisel 5/32" (4 mm)deep
Cincele hasta 5/32"
(4 mm) de profundidad.
Strike Plate
Cerradero
EE
Dust box
Guardapolvo
2-3/8"(60mm)
CAM
c.
LEVA
2-3/8"(60mm)
Advertisement
Table of Contents

Related Manuals for BRINKS PARA


Summary of Contents for BRINKS PARA
- Page 1 “entrada”. b. El cerrojo se puede ajustar para que quepa ya sea en una distancia o “entrada” de 60 mm (2-3/8”) o de 70 mm (2-3/4”). La distancia o “entrada” de 60 mm (2- 3/8”) es común para puertas residenciales.
- Page 2 PREPARE EXTERIOR & INTERIOR ASSEMBLIES How to determine if your door is a Right Swing or Left Swing door? While facing the door, if the door hinges are on the right side of the door, you have a Right Swing Door. Hinges Hinges If the hinges are on the left side of the door, you have a Left Swing Door.
Need help?
Do you have a question about the PARA and is the answer not in the manual?
Questions and answers