
Related Manuals for eletab GM01-1


Summary of Contents for eletab GM01-1
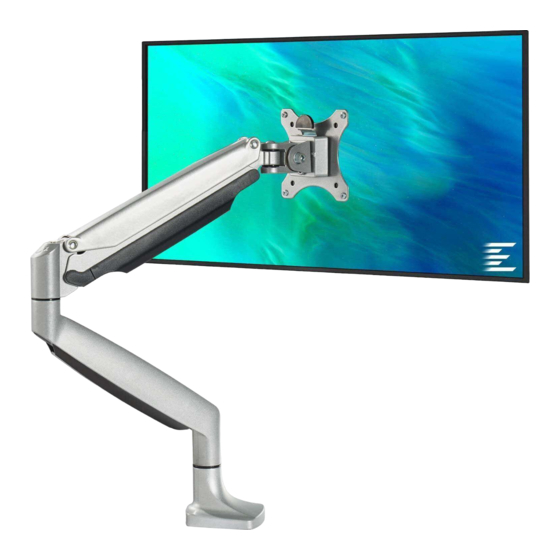
- Page 1 ELTGM01-1 2~8kg (4.4~17.6lbs) RATED www.eletabergo.com service@eletabergo.com www.facebook.com/EleTabus...
- Page 2 Read the entire instrution manual before you start installation and assembly. If you have any questions regarding any of the instructions or warnings, Please service@eletabergo.com contact at for assistance. CAUTION: Use with products heavier than the rated weights indicated may result in instability causing possible injury.
-
Page 3: Tools Required
Parts Tools required N (x1) O (x1) P (x1) Phillips 4mm Allen 5mm Allen 6mm Allen Screwdriver Wrench Wrench Wrench (not included) Components A (x1) B (x1) C (x1) D (x1) E (x1) F (x1) G (x1) Head VESA Plate Clamp Base Clamp Cable Clip... - Page 4 STEP 1 Choose a mounting option OPTION A: Clamp Installation Install clamp base support (D) onto base of monitor stand (A) with bolts (K) using provided 4mm Allen wrench (N). Apply pads (M) to bottom of base to prevent table top from being scratched.
- Page 5 Adjust the Mount to the Desktop Adjust the Mount to the Desktop Thickness 50-85mm Thickness 10-55mm Secure clamp (E) to lower two holes with Secure clamp (E) to upper two holes with bolts (K) using 4mm Allen wrench (N) for bolts (K) using 4mm Allen w rench (N) for desks with a thickness of 50-85mm.
- Page 6 STEP 1 (Continued) OPTION B: Grommet Base Installation Slide long screw (G) th rough the top of the grommet base support (H) and install on base of monitor stand with bolts (K) using 4mm Allen w rench (N). Apply pads (M) to bottom of base to prevent table top from being scratched. Position stand on desk with long screw through hole, and secure by using the support plate (I) and clamp knob (J) on under side of the mounting surface.
- Page 7 STEP 2 Head attachment process 1. Loose the screw little bit to ensure the distance between two plastic spacers is more than 4mm 2. Attach the Head(B) to monitor arm 3. tight the screw to secure ≥4mm STEP 3 Attach the monitors to the arm OPTION A:Flat Back Monitor Attach the VESA plate (B) to back of monitor and secure with screws(M-A)or(M-C) with washers(M-E).
- Page 8 OPTION B:Curved Back Monitor Attach the VESA plate (B) to back of monitor and secure with screws (M-B) or ((M-D) with washers (M-E)and washers(M-F). Avoid excessive tightening screws damage the monitor. Attach the monitors whith VESA to the arm. Use screws ( L ) to tight them.
-
Page 9: Step 4 Adjust The Tension
STEP 4 Adjust the tension Adjust the spring tension until it supports your monitor to an optimal position. The initial spring setting will be in a reasonable range, and generally you don't need to adjust the spring tension. Case 1: Monitor/Arm falls down (after install your monitor) If your monitor is too heavy and causes the monitor to sink, turn clockwise to increase spring tension till it can hold the weight of your monitor. - Page 10 Case 2 : Monitor/Arm pops up (after install your monitor) If your monitor is too light to pop up, or if you accidentally adjust the tension counterclockwise causing the upper arm to pop up, please adjust the tension clockwise to the appropriate tension! fall down At this time, we suggest not to adjust it to be too tight, other...
-
Page 11: Step 5 Cable Management
STEP 5 Cable management Just slide the cable cover up and away from the spring arm, do not need to take much effort to pull the ends of the cable cover away from the spring arm. Insert the cable and slide the cable cover down to reattach the cable cover. -
Page 12: Warranty & Service
WARRANTY SERVICE To provide the best service to you, do not forget to register your EleTab product to obtain 12 months extended warranty and lifetime after-sales service. www.eletabergo.com Service > Warranty Registration Received a confirmation email DONE Feedback Love it? Hate it? Let us know with a customer review.
Need help?
Do you have a question about the GM01-1 and is the answer not in the manual?
Questions and answers