Table of Contents
Advertisement
Quick Links
Installation manual
Dimensions and wiring diagram
Installation
1. Open the back panel with screwdriver.
3. Secure the base with the screws provided.
Setup menu
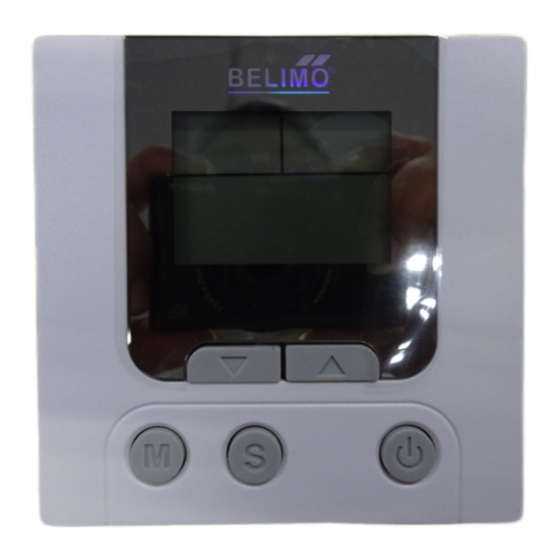
1. On/ Off
2. Setpoint
3. Mode
4. Sleep mode
5. Exit setup menu
6. Keypad lock
7. Backlight
Press "
" buttons to turn on; press "
Press "
" button to display the set point, press "
S
setpoint, the setpoint step is 0.5°C, the setpoint will be confirmed automatically after 5 seconds.
With thermostat on, press "
" to change the working mode – Cooling "
M
Press "
" button for 3 seconds till "
M
Use "
" or "
" to adjust the desired sleep time: the max. = 48 hours; thermostat will return to the
working status after 5 seconds, "
by the sleep setpoint.
When thermostat get into Sleep function, "
Press "
" and "
" for 10 seconds till to "
locked. Press "
" and "
" for 10 seconds till "
Press "
" to activiate the backlight. Avoid pressing "
S
change the setting at the same time.
EXT-T24-D201 LCD Temperature Controller
M
Modulating Control
Cooling/ Heating
2. Connect the wires per the wiring diagram.
4. Reattach the front panel.
" again to turn off.
" to reduce the setpoint, press "
" display, there is a number of count down in the center of LCD.
" is flashing to start counting down. The setpoint should be replaced
" will flash, press "
" display to activate, under this function, any keypad is
" disappear to quit the function.
", "
" or "
M
~
┴
2-10 V
V +
~
24 VAC
┴
Input
┴
R S
" to increase the
", Heating "
".
" or "
" to quit.
" to activate backlight as it will
L
TR
N
Input
Remote Sensor
1
Advertisement
Table of Contents

Related Manuals for Belimo EXT-T24-D201


Summary of Contents for Belimo EXT-T24-D201
- Page 1 EXT-T24-D201 LCD Temperature Controller Installation manual Dimensions and wiring diagram ┴ 2-10 V 24 VAC Modulating Control ┴ Cooling/ Heating Input Input ┴ Remote Sensor Installation 2. Connect the wires per the wiring diagram. 1. Open the back panel with screwdriver.
- Page 2 EXT-T24-D201 LCD Temperature Controller Parameter setting With thermostat off, press “ ” for 10 seconds to enter menu to set the parameters. It will confirm itself 20 seconds later after setting and return to Off state. Parameter table D e scrip tio n...
- Page 3 21776 13063 20764 12487 8052 5309 19783 The performance specifications above are nominal and subject to tolerances and application variables of generally acceptable industry standards. Belimo shall not be liable for damages resulting from misapplication or misuse of its products.
Need help?
Do you have a question about the EXT-T24-D201 and is the answer not in the manual?
Questions and answers