Grundfos DPK Service Instructions Manual
22 kw, 50/60 hz, 1/3
Hide thumbs
Also See for DPK:
- Instructions manual (20 pages) ,
- Safety instructions and other important information (16 pages) ,
- Instructions manual (19 pages)
Table of Contents
Advertisement
Quick Links
Advertisement
Table of Contents

Related Manuals for Grundfos DPK


Summary of Contents for Grundfos DPK
- Page 1 GRUNDFOS INSTRUCTIONS DPK 0.75 - 22 kW, 50/60 Hz, 1/3~ Service instructions...
-
Page 2: Table Of Contents
- Action to avoid the hazard. 6.3 Fitting bearings 6.4 Fitting shaft seals 1.2 Notes 6.5 Fitting impeller and pump housing The symbols and notes below may appear in Grundfos Fault finding installation and operating instructions, safety instructions and service instructions. Components and material specification 8.1 DPK.10.50.075, DPK.10.50.15 and DPK.10.80.22... -
Page 3: Identification
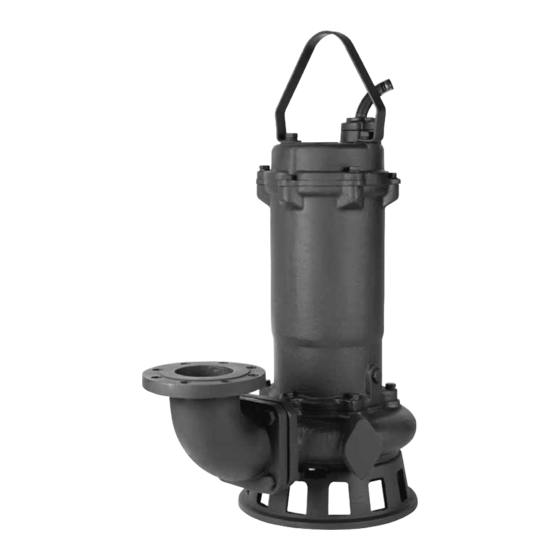
2. Identification The nameplate is fitted to the top cover of the pump. Fix the extra nameplate supplied with the pump at the installation site or keep it in the cover of this booklet. 2.1 Nameplate Type P.c. Model Hmax Qmax Tmax. -
Page 4: Type Key
2.2 Type key Code Example Drainage pump Impeller design Semi open impeller Vortex impeller Free passage Maximum solids size [mm] Pump outlet Nominal diameter of pump outlet port [mm] Code for output power, P2 P2* = Code number from type designation / 10 [kW] Equipment Standard With extra sensor**... -
Page 5: Tightening Torques
Pos. Pump type Designation Dimension Lubricant [Nm] O-rings Rocol Screw Screw DPK.V Screw 105b Socket-head screw DPK.10.XX DPK.15.XX (3.0 kW only) Screw DPK.15-20.XX DPK.V.65.80.15.2 Screw DPK.V.65.80.22.2 DPK.V. others Screw DPK.10.XX DPK.15.XX (3.0 kW only) Screw DPK.15 -20.XX 181a DPK.V.65.80.15.2 Screw DPK.V.65.80.22.2... -
Page 6: Service Tools
4. Service tools 4.1 Standard tools Pos. Description Further information Part number Multigrip pliers SV0150 10 mm SV0083 13 mm SV0055 Ring/open-end spanner 17 mm SV0056 19 mm SV0063 24 mm SV0122 Ratchet handle 96777072 17 mm SV0417 19 mm SV0419 Hexagon socket 24 mm... -
Page 7: Dismantling
Lubricate and tighten screws and nuts to correct torque. See section 3. Tightening torques. Position of oil screw on DPK Fig. 2 1. Place the pump on a plane surface with the oil screw pointing downwards. 2. Place a container under the pump. The container must be able to hold the oil of the specific pump. -
Page 8: Removing Impeller And Pump Housing
2.20 0.44 2-pole 0.88 1.84 Removing the impeller and pump housing Fig. 3 DPK.V 1. Drain oil from the oil chamber. See section 5.2 Oil change. 0.80 2. Remove the inlet strainer/ring stand (84a). 4-pole 3. Remove the inlet cover (189). -
Page 9: Removing Shaft Seals
5.4 Removing shaft seals 105c 105f 105g 105e 105c 105d Removing the shaft seal and bearings Fig. 4 1. Drain oil from the oil chamber. See section 5.2 Oil change. 2. Remove the impeller and pump housing. See section 5.3 Removing impeller and pump housing. -
Page 10: Removing Cable
5.6 Removing cable 168a 168a Cable entries Fig. 5 1. Disconnect the power supply to the motor. 2. Remove the top cover (151). Make sure that the stator will not be damaged when 3. Disconnect power and signal conductors from the top cover. dropping out of the stator housing. -
Page 11: Assembly
6. Assembly 6.2 Fitting cable 1. Fit the cable in the top cover (151). 6.1 Fitting stator 2. Fit and lubricate the O-ring (37) on the top cover (151). See section 3. Tightening torques. 3. Connect power and signal conductors to the top cover. See figs to 10. - Page 12 Wiring diagrams Wiring diagram, DOL starting Fig. 9 L1 L2 L3 S / S MCCB F / L F / L MCCB O P . T R T / P T / P S / S S / S GU 01 / GU 02 U1 V1 W1 W2 U2 V2 T / P T / P S / S S / S...
-
Page 13: Fitting Bearings
6.3 Fitting bearings 60a 60b 59 153 102 60 Fig. 11 Fitting bearings 1. Fit the upper bearing (154) on the shaft. Only press on the inner bearing ring. 2. Fit the bearing cover (59) on the shaft. 3. Fit the lower bearing (153) on the shaft. Some pump models have two lower bearings (153 and 153a). -
Page 14: Fitting Impeller And Pump Housing
6.5 Fitting impeller and pump housing Fig. 13 Impeller and pump housing assembly and impeller clearance 1. Fit and lubricate the O-ring (37 or 39) on the pump housing (50). 2. Fit the pump housing (50) and tighten the screws (184) according to torques in the table in section 3. -
Page 15: Fault Finding
7. Fault finding DANGER Electric shock Death or serious personal injury - Before starting any work on the product, make sure that the power supply has been switched off and that it cannot be accidentally switched on. For pumps with sensor, start fault finding by checking the status on the GU01 or GU02 front panel. -
Page 16: Components And Material Specification
Materials for products up to and including 15 kW products / 19 Mechanical shaft seal kW and up. Hexagon head-cap 105b SM25C A108-1025 Impeller has the material option of Hi-Cr, except for DPK 3.0 screw 105c Shaft seal retainer STS304 A276-304 1.4301... -
Page 17: Dpk.10.50.075, Dpk.10.50.15 And Dpk.10.80.22
8.1 DPK.10.50.075, DPK.10.50.15 and DPK.10.80.22... -
Page 18: Dpk.15.80.30
8.2 DPK.15.80.30 178a 105b 181a 181b 105c 168a 183a 184a 154a 188b 188a 182a... -
Page 19: Dpk.20.100.110 And Dpk.20.100.150
8.3 DPK.15.80.37, DPK.15.80.55, DPK.15.100.75, DPK.20.100.110 and DPK.20.100.150 154a 178a 181a 181b 198a 184a 183a 188b 188a 182a 105b 105c... -
Page 20: Dpk.20.150.190 And Dpk.20.150.220
8.4 DPK.20.150.190 and DPK.20.150.220 181a 181b 168a 153a 184b 190d 183b 184c 183c 182a 183a 105b 105c 150a 188b 188a... -
Page 21: Dpk.v.65.80.15.2 And Dpk
8.5 DPK.V.65.80.15.2 and DPK.V.65.80.22.2... -
Page 22: Dpk
8.6 DPK.V.80.80.37.2... -
Page 23: Dpk.v.80.80.55.2 And Dpk
8.7 DPK.V.80.80.55.2 and DPK.V.80.80.75.2... -
Page 24: Dpk.v.65.80.15.4 And Dpk
8.8 DPK.V.65.80.15.4 and DPK.V.65.80.22.4... -
Page 25: Dpk.v.80.80.37.4, Dpk.v.80.80.55.4 And Dpk
8.9 DPK.V.80.80.37.4, DPK.V.80.80.55.4 and DPK.V.80.80.75.4... - Page 27 GRUNDFOS Pumps (Hong Kong) Ltd. Turkey BOMBAS GRUNDFOS DO BRASIL Unit 1, Ground floor Norway GRUNDFOS POMPA San. ve Tic. Ltd. Sti. Av. Humberto de Alencar Castelo Branco, Siu Wai Industrial Centre GRUNDFOS Pumper A/S Gebze Organize Sanayi Bölgesi 29-33 Wing Hong Street &...
- Page 28 99605458 0319 ECM: 1258426 www.grundfos.com...
Need help?
Do you have a question about the DPK and is the answer not in the manual?
Questions and answers