Table of Contents
Advertisement
Quick Links
Instrument User Manual
510731-10EN1 (06/2008)
24262
bioMérieux, Inc.
Box 15969
Durham, North Carolina 27704-0969 / USA
Tel. (1) 800-682-2666
®
bioMérieux
SA
EC
REP
au capital de 12 029 370 €
673 620 399 RCS LYON
69280 Marcy l'Etoile / France
tél. 33 (0)4 78 87 20 00 / fax 33 (0)4 78 87 20 90
http://www.biomerieux.com
[04]
Advertisement
Table of Contents

Related Manuals for bioMerieux VITEK 2


Summary of Contents for bioMerieux VITEK 2
- Page 1 Durham, North Carolina 27704-0969 / USA Tel. (1) 800-682-2666 ® bioMérieux au capital de 12 029 370 € 673 620 399 RCS LYON 69280 Marcy l’Etoile / France tél. 33 (0)4 78 87 20 00 / fax 33 (0)4 78 87 20 90 http://www.biomerieux.com [04]...
- Page 2 (33) 0(4) 78 87 20 00 Kangnam-gu Saint Laurent, QC fax (33) 0(4) 78 87 20 90 Séoul 135-080 H4S 1P7 http://www.biomerieux.com tel. (82) 2 2188 4700 tel. (1) 514 336 7321 fax (82) 2 547 6263 Germany fax (1) 514 807 0015 bioMérieux Deutschland GmbH...
- Page 3 Norway Spain Thailand bioMérieux Norge AS bioMérieux España S.A. bioMérieux Thailand Ltd Økernveien 145 Manual Tovar, 45–47 Regent House Bldg, 16th Floor N-0513, Oslo 28034 Madrid 183 Rajdamri Road, Lumpini, tel. (47) 23 37 55 50 tel. (34) 91 358 11 42 Pathumwan fax (47) 23 37 55 51 fax (34) 91 358 06 29...
- Page 4 Liability Disclaimer bioMérieux, Inc. makes no express or implied warranty regarding this manual, its quality, performance, or appropriate use regarding any type of specific procedure. Furthermore, this manual may be modified by bioMérieux without notice and without implying any obligation or liability on the part of the company.
- Page 5 Warranty ® Seller, bioMérieux, Inc., warrants the VITEK 2 instrument (the “instrument”) to the original purchaser for a period of one (1) year after date of installation against defects in material and workmanship and defects arising from failure to conform to specifications applicable on the date of installation.
- Page 7 TANDARD YMBOLS The following table presents symbols that may appear in the instructions for use or on the instrument, package inserts, or packaging. CE-Marking of Conformity Consult Instructions for Use Use by Manufacturer Date of manufacture Contains sufficient for <n> tests Keep dry Fragile, handle with care Caution, consult accompanying documents...
- Page 8 Standard Symbols Electric shock warning Radiation warning Potential pinch-point warning Laser Temperature limitation Upper limit of temperature Lower limit of temperature In Vitro Diagnostic Medical Device Batch code Authorized Representative in the European Community Catalog number Serial Number Do not reuse Recyclable Manual Name 702357-3EN1 REV nn/nnnn...
- Page 9 Standard Symbols Separate collection for waste electrical and electronic equipment Very toxic Corrosive Sodium azide Irritant Positive control Negative control Keep away from sunlight Protect from light This way up Do not stack Humidity limitation Manual Name 702357-3EN1 REV nn/nnnn...
- Page 10 Standard Symbols Fuse Direct current Alternating current Both direct and alternating current Three-phase alternating current Earth (ground) terminal Protective conductor terminal Frame or chassis terminal Equipotentiality ON (supply) OFF (supply) ON (only for a component of the system equipment) OFF (only for a component of the system equipment) Equipment protected throughout by double insulation or reinforced insulation (Equivalent to Class II of IEC 536) Manual Name...
-
Page 11: General Warnings
ENERAL ARNINGS IMPORTANT: The user is advised to read and understand all instructions in this ® manual to be able to derive the best performance from the VITEK instrument and the Smart Carrier Station. IMPORTANT: The configuration that you have purchased is adapted to the legislation and standards of the different countries it will be sent to. - Page 12 General Warnings General Warnings BIOHAZARD WARNING This instrument may be involved with hazardous organism suspensions. This user manual does not purport to address all of the safety matters associated with the instrument’s use. It is the responsibility of the user of this instrument to establish and follow appropriate safety and health practices and to determine the applicability of regulatory limitations prior to use.
- Page 13 General Warnings WARNING This statement only applies to European countries with regard to the waste electrical and electronic equipment European directive: You can play an important role in contributing to reuse, recycling and other forms of recovery of waste electrical and electronic equipment.
-
Page 14: Laser Caution
General Warnings Laser Caution ® ® A laser caution label appears on the VITEK 2 and VITEK 2 XL at the following locations: ® ® VITEK VITEK 2 XL • on the front access door • on the left front access door •... -
Page 15: Table Of Contents
ABLE OF ONTENTS General Warnings ......................i General Warnings ..........ii Laser Caution . - Page 16 Table of Contents When to Configure ......... . . 3-2 Accessing Configuration Screens .
- Page 17 Table of Contents Pipettor ............4-12 Displacement Pump Operation.
- Page 18 Table of Contents Dilution Mode Indicator ........6-5 Status Screen Icons .
- Page 19 Table of Contents Tracking Cassettes and Cards ........6-27 Batch Loads (Smart Carrier or Cassette Only Mode) .
- Page 20 Table of Contents ® Troubleshooting the VITEK 2 Instrument ............8-1 Error Handling System ..........8-3 Error Alarms .
- Page 21 Table of Contents Appendix A: Hardware Specifications ..............A-1 ® VITEK 2 Instrument..........A-1 Dimensions .
- Page 22 Table of Contents ® VITEK 2 Instrument User Manual 510731-10EN1...
-
Page 23: List Of Tables
IST OF ABLES Table 2-1: Physical Characteristics ..................2-9 Table 2-2: Electrical Requirements ..................2-9 Table 2-3: Environmental Requirements ................2-9 Table 2-4: Bar Code Scanner Model References .............2-11 Table 3-1: SCS Configuration Options ................3-2 Table 4-1: Components Involved in the Test Card Processing Cycle .........4-5 Table 4-2: Indicator Light States ..................4-7 Table 5-1:... - Page 24 List of Tables ® VITEK 2 Instrument User Manual 510731-10EN1...
-
Page 25: List Of Figures
IST OF IGURES Figure 2-1: Smart Carrier Station ..................2-2 Figure 2-2: SCS – Cable Connections .................2-4 Figure 2-3: Initial SCS Screen ....................2-6 Figure 2-4: The Smart Carrier Station ..................2-7 Figure 2-5: The SCS Keyboard ....................2-8 Figure 2-6: SCS Firmware Update Screen .................2-10 Figure 2-7: Bar Codes for Bar Code Scanner –... - Page 26 List of Figures Figure 5-6: Option Box Screen ..................5-12 Figure 5-7: Range Value Screen ..................5-12 ® Figure 6-1: VITEK 2 Status Screen in Cassette Only Mode ..........6-3 ® Figure 6-2: VITEK 2 Status Screen in Non Standard Card Reading Mode ....... 6-4 Figure 6-3: Pipette Tips Status ....................
- Page 27 List of Figures Figure 7-15: Molded Incubator Access Cover ..............7-16 Figure 7-16: Carousel Cleaning Replace Section Now Screen ..........7-17 Figure 7-17: Orientation of the Carousel ................7-17 Figure 7-18: Removing the Button Memory Module .............7-20 Figure 7-19: Metal Contacts on Cassette ................7-20 Figure 7-20: Replacing the Button Memory Module .............7-21 Figure 7-21: Boat Cleaning Prompt ..................7-22 Figure 7-22: Positioning of Boat ...................7-24...
- Page 28 List of Figures ® xviii VITEK 2 Instrument User Manual 510731-10EN1...
- Page 29 ANUAL Introduction This chapter gives you important information about how to use this manual. bioMérieux recommends that you read this chapter first. ® IMPORTANT: Read this manual carefully before you attempt to operate the VITEK system. Chapter Contents Organization • 1-2 Printed Documentation •...
-
Page 30: How To Use This Manual
Organization How To Use This Manual Organization The manual is separated into four basic parts: • Part 1, which includes Chapter 2 Chapter 3, covers the Smart Carrier Station. Chapter 2 describes the hardware and Chapter 3 provides the procedures you use to configure this station for your laboratory workflow. ®... -
Page 31: How To Find Topics And Procedures
How To Use This Manual How to Find Topics and Procedures How to Find Topics and Procedures There are four tools to help you find a topic or procedure in the manual. • General Table of Contents. This table is located in the front of the manual and includes the entire document. -
Page 32: Names And Titles
Typographic and Usage Conventions How To Use This Manual Example: File > Quit menu command Names and Titles The names and titles of menus, dialog boxes, fields, icons and toolbar buttons are in proper case, bold. Example: Setup menu The names of windows are in proper case, but are not bold. Example: Configuration window Press The term “press”... -
Page 33: Warnings, Cautions, And Information
How To Use This Manual Typographic and Usage Conventions Warnings, Cautions, and Information This manual uses different types of symbols to alert you to important information. Symbols and their associated information are labeled in text where they occur and set off from surrounding paragraphs, as shown in the following examples. - Page 34 Typographic and Usage Conventions How To Use This Manual ® VITEK 2 Instrument User Manual 510731-10EN1...
- Page 35 MART ARRIER TATION Introduction Use this chapter to familiarize yourself with the Smart Carrier hardware. It includes an overview of each part of the unit. Chapter Contents Purpose • 2-2 Unpacking Instructions • 2-2 Unpacking Procedure • 2-3 Installation Procedure • 2-4 Preparations for Operation •...
-
Page 36: Smart Carrier Station
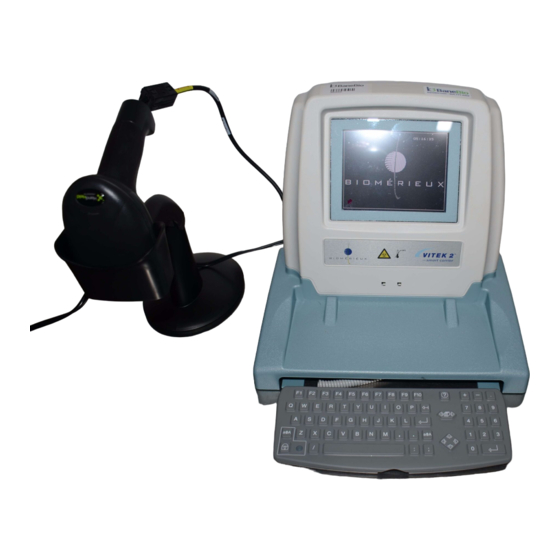
Purpose Smart Carrier Station Purpose The purpose of this chapter is to aid in the safe handling, setup, configuration and operation of the Smart Carrier Station. Unpacking Instructions Figure 2-1 shows a Smart Carrier Station (SCS). Figure 2-1: Smart Carrier Station 1 —... -
Page 37: Unpacking Procedure
Smart Carrier Station Unpacking Instructions Inspect the shipping container for external damage. If it has been damaged, inspect the SCS itself for damage. If the SCS has been damaged, file a claim with the shipper and notify bioMérieux, Inc. ® Check the packing list included with the VITEK 2 System and verify that all required items are included in the shipment. -
Page 38: Installation Procedure
Unpacking Instructions Smart Carrier Station Installation Procedure After completing the unpacking procedure, the SCS is ready to be placed in its permanent location. The SCS is intended for use on any normal, flat bench top, commonly found in a microbiology lab, away from direct sunlight. Some cables must be connected to the unit. -
Page 39: Preparations For Operation
Smart Carrier Station Preparations for Operation Preparations for Operation Place the SCS in its permanent location. WARNING Do not place the SCS in a location where it could be exposed to direct sunlight during operation. Position the instrument to meet the minimum clearance of 5 cm (2 in.) on all sides and 30.5 cm (12 in.) above the instrument to provide adequate space for placing cassettes onto the unit. -
Page 40: Smart Carrier Station Overview
Smart Carrier Station Overview Smart Carrier Station Figure 2-3: Initial SCS Screen When the SCS is ready to be used, the screen shown in Figure 2-3 will be displayed. If there is no display, switch the power OFF and restart at Step Note: If you have not yet customized your configuration settings, the Configuration screen is displayed. -
Page 41: Figure 2-4: The Smart Carrier Station
Smart Carrier Station Smart Carrier Station Overview Figure 2-4: The Smart Carrier Station 1 — SCS Base Unit. The SCS base contains the microprocessor. There are connection ports on the back of the base for the keyboard and the bar code scanner. -
Page 42: Scs Keyboard
SCS Keyboard Smart Carrier Station keyboard is smaller than a standard size keyboard, so it can be stored under the Base Unit. 5 — External Power Supply. The SCS is powered by an external DC power supply. This power supply accepts 120 VAC to 240 VAC mains power via a detachable two conductor power cord. -
Page 43: Scs Base Unit
Smart Carrier Station SCS Base Unit SCS Base Unit The base unit for the SCS contains the electronic components that make its data entry and storage functions possible. The power switch and cable connectors are located on the back panel of the base unit. The base unit is actually a small computer with its own processing unit, memory, and software program. -
Page 44: Setup Bar Codes
Setup Bar Codes Smart Carrier Station Table 2-3: Environmental Requirements (Continued) Shipment and –20 ºC to +50 ºC Storage Temperature: Humidity: 20% to 80% (Non-Condensing) Minimum –100m installation altitude: Maximum 2000m installation altitude: WARNING Do not operate the SCS in an environment above 30 °C (86 °F) Setup Bar Codes The bar code scanner is programmed at the factory. -
Page 45: Table 2-4: Bar Code Scanner Model References
Smart Carrier Station Setup Bar Codes Review the last two digits of the serial number (1, Figure 2-6) to determine which generation of SCS is in use. Press F2 to exit the Configuration screen. Refer to Table 2-4 and print the applicable bar code figure to use to program the bar code scanner. - Page 46 Setup Bar Codes Smart Carrier Station Table 2-4: Bar Code Scanner Model References (Continued) Bar Code SCS Common SCS Part Bar Code Reference Name Number(s) Reader Figure Figure 2-8 2nd Generation 530001-3 Model 3400 or G2 530001-4 (Scanner ID 27203 Number 722106) 27204 P/N 531130-1...
-
Page 47: Figure 2-7: Bar Codes For Bar Code Scanner - A
Smart Carrier Station Setup Bar Codes Factory Default Exit PGM mode PC-XT Format Enter Program Mode Enter Program Mode Good Read Delay Set Inter char delay High Code 0 (3-27) Exit PGM mode Code 2 (3-27) Figure 2-7: Bar Codes for Bar Code Scanner – A ®... -
Page 48: Figure 2-8: Bar Codes For Bar Code Scanner - B
Setup Bar Codes Smart Carrier Station Factory Default Exit PGM mode PC-AT Format Enter Program Mode Enter Program Mode Good Read Delay Set Inter char delay High Code 0 (3-27) Exit PGM mode Code 2 (3-27) Figure 2-8: Bar Codes for Bar Code Scanner – B ®... -
Page 49: Figure 2-9: Bar Codes For Bar Code Scanner - C
Smart Carrier Station Setup Bar Codes Factory Defaults IBM/XT Interface CR Suffix 1 P A P _ X T V S U F C R Intercharacter Delay 10ms (02) Good Read Medium Delay ~ 0 1 D L Y C H R 0 2 G R D D L Y 2 Figure 2-9: Bar Codes for Bar Code Scanner –... -
Page 50: Figure 2-10: Bar Codes For Bar Code Scanner - D
Setup Bar Codes Smart Carrier Station Factory Defaults (AT Interface) ~ 0 1 D E F A L T CR Suffix Intercharacter Delay 10ms ~ 0 1 V S U F C R ; D L Y C H R 0 2 . Figure 2-10: Bar Codes for Bar Code Scanner –... - Page 51 SCS C ONFIGURATION Introduction Configuration options allow you to operate the Smart Carrier Station in a number of different ways. This chapter explains not only how to set these options, but also how each option affects the data stored in the button memory of a cassette.
-
Page 52: Scs Configuration
Configuration Overview SCS Configuration Configuration Overview When to Configure Set SCS configuration options before you insert a cassette and enter information for the test cards. When first turned on, the Configuration Screen is displayed if you have not customized your settings. Note: One exception to this is the Firmware Update screen. -
Page 53: Accessing Configuration Screens
SCS Configuration SCS Main Configuration Options • Firmware Updates – Displays the current firmware version and includes options for uploading new software for the SCS. Accessing Configuration Screens Access the SCS Configuration screen by pressing F4, followed by the Previous or Next Slot key to switch to the other screens. SCS Main Configuration Options Figure 3-1: SCS Main Configuration Screen Cassette ID... -
Page 54: Setting Cassette Id
SCS Main Configuration Options SCS Configuration Setting Cassette ID Press F4 to access the Configuration screen. In the Cassette ID field, type up to three characters and press Enter. Press F2 to exit the SCS Configuration screen. Press Next or Previous Screen to access other configuration screens. Setup Technologist ID The Setup Technologist ID field allows you to enter your name at the SCS and transfers that information to the workstation. -
Page 55: Scs Workflow Configuration Options
SCS Configuration SCS Workflow Configuration Options SCS Workflow Configuration Options Figure 3-2: SCS Workflow Configuration Screen AST Dilution Mode An AST, or Antimicrobial Susceptibility Test, uses an inoculum that is specifically diluted according to the type of test card being used. These inocula can be prepared manually by the technologist, or prepared ®... -
Page 56: Erase Cassette
SCS Workflow Configuration Options SCS Configuration Erase Cassette The Cassette Erase function gives you the option of automatically erasing ® cassettes that have been processed by the VITEK 2 instrument. Setting Cassette Erase Press F4 to access the Configuration screen. Press Next or Previous Screen to access the Workflow Configuration screen. -
Page 57: Scs Utilities
SCS Configuration SCS Utilities Press F2 to exit the Workflow Configuration screen. Press Next or Previous Screen to access other configuration screens. SCS Utilities Figure 3-3: SCS Utilities Screen Language The SCS interface is programmed in limited languages. English is the default language setting. -
Page 58: Audible Feedback
SCS Utilities SCS Configuration Audible Feedback The SCS custom keyboard does not have an audible click when you press a key. This option enables an audible click from the instrument every time you press a key on the SCS keyboard. Setting Audible Feedback Press F4 to access the Configuration screen. -
Page 59: Scs Firmware Update
SCS Configuration SCS Firmware Update Press the Down Arrow key to move the cursor to the Time field. In the Hour field, enter the current hour, using a 24-hour format (for example, 9 = 2100). Press Enter to accept the new value. Enter the current minutes. - Page 60 SCS Firmware Update SCS Configuration Receive Firmware Update – This field allows you to request a complete firmware update from the workstation. Request Specific File – This field allows you to request a specific file from the workstation. If the use of this field is neccessary, the appropriate procedure will be included in the instructions that were provided with the update media.
-
Page 61: Vitek ® 2 Instrument
VITEK ® NSTRUMENT Introduction ® This chapter describes the hardware systems in the VITEK 2 instrument. External Instrument Components on page 4-2 points out the controls and connections found on the instrument’s exterior, and the doors by which you gain access to its interior. Instrument Hardware Components on page 4-5 describes the work stations and components in the instrument. -
Page 62: External Instrument Components
® External Instrument Components VITEK 2 Instrument External Instrument Components ® The following images contain a front and a left side view of the VITEK 2 and ® VITEK 2 XL instrument. Use the diagram to locate and familiarize yourself with the external controls and the access doors to the interior of the instrument. -
Page 63: Controls, Access Doors And Connections
® VITEK 2 Instrument External Instrument Components Controls, Access Doors and Connections CAUTION: All access doors should remain closed when processing cards. LASER WARNING All access doors and covers must remain closed when processing cards to avoid exposure to laser light. 1 —... -
Page 64: Connections
® ® Turning on the VITEK 2 Instrument VITEK 2 Instrument 9 — Saline Access Door. Provides access to the sterile saline bag. The door lifts from the front and stays in the open position. ® 10 — Center Front Sliding Door. VITEK 2 XL only. -
Page 65: Instrument Hardware Components
® VITEK 2 Instrument Instrument Hardware Components Instrument Hardware Components ® The VITEK 2 instrument is an integrated system, combining the tasks of sample preparation, test card inoculation, and test card incubation and reading. ® The parts and functions of the VITEK 2 instrument can best be described by following a test card through the phases of a typical processing cycle. -
Page 66: Cassettes
® Instrument Hardware Components VITEK 2 Instrument Cassettes BIOHAZARD WARNING The boat should be considered as potentially contaminated and should be handled appropriately. Qualified laboratory personnel should take the usual precautions necessary for infectious agents. The cassette is the main component of the test card transport system. It can hold up to 15 test cards with their inoculum test tubes. -
Page 67: Cassette Load And Unload Station
® VITEK 2 Instrument Instrument Hardware Components 4 — Button Memory. For systems using a Smart Carrier Station, each cassette is fitted with a special memory chip, called the button memory. When a cassette is on a Smart Carrier Station, the button memory stores the information that you enter for each test card. -
Page 68: Boats
® Instrument Hardware Components VITEK 2 Instrument Table 4-2: Indicator Light States (Continued) Light Error Condition and Resolution Status The cassette load door is locked and cannot be opened. Blinking A boat with an empty cassette has arrived at the station. The cassette load door is unlocked. -
Page 69: Bar Code Reader
® VITEK 2 Instrument Instrument Hardware Components Figure 4-5: Boat Components A boat, shown in Figure 4-5, has particular features that support its three major functions: 1— Test Card Transport. The top surface of a boat forms a specially shaped well into which a cassette is placed. -
Page 70: Button Memory Reader
® Instrument Hardware Components VITEK 2 Instrument ® Investigational Use Only (IUO) flag — This tells VITEK 2 if an experimental test card is being processed. Test Card Expiration Date — This date is transferred to the workstation, which prints it on the laboratory report. Test Card Lot Information and Sequence Number —... -
Page 71: Dispenser/Pipettor Station
® VITEK 2 Instrument Instrument Hardware Components Dispenser/Pipettor Station This station automatically prepares the organism dilution used for AST ® (Antimicrobial Susceptibility Test) cards. VITEK 2 provides a significant time savings by ensuring that mated ID and AST cards are processed from the same sample. -
Page 72: Pipettor
® Instrument Hardware Components VITEK 2 Instrument chamber but is attached to an air pump. It is fitted with a filter (4) to prevent particulate contamination. Electromechanical Components (not shown). The electromechanical components control how the system works. When an AST card is detected, a valve opens to allow saline to travel from its bag to the dispensing chamber. -
Page 73: Displacement Pump Operation
® VITEK 2 Instrument Instrument Hardware Components Note: The displacement pump is not normally visible as it is located directly behind the interface screen and keypad. Displacement Pump Operation The displacement pump is part of a larger assembly that performs the ®... -
Page 74: Sealer Station
® Instrument Hardware Components VITEK 2 Instrument Various temperature and air pressure sensors in the system monitor the ® inside of the vacuum chamber. VITEK 2 ensures proper test card fills by monitoring these parameters throughout the entire cycle and controlling the rate at which the vacuum is drawn and released. -
Page 75: Carousel
® VITEK 2 Instrument Instrument Hardware Components Carousel The Carousel, shown in Figure 4-8, has a capacity of 60 test cards. During their time in the carousel, the test cards are incubated at an average temperature of 35.5 °C. Figure 4-8: Carousel Placement As the carousel rotates, each test card moves into the reading position every 15 minutes. -
Page 76: Optics
® Instrument Hardware Components VITEK 2 Instrument Optics ® The VITEK 2 instrument performs its identification and susceptibility analyses by continually monitoring the growth and activity of organisms inside the wells of the test cards. The optics system performs this function. Transmittance Optics The transmittance optics (1, Figure... -
Page 77: Waste Collection Station
® VITEK 2 Instrument Instrument Hardware Components ® CAUTION: Do NOT re-insert ejected test cards into the VITEK instrument. WARNING Make sure that all test card processing has been completed before ejecting a test card. Waste Collection Station The card ejector removes test cards that have completed testing from the reader. -
Page 78: User Interface System
® User Interface System VITEK 2 Instrument Note: Periodically remove the waste collection tray for cleaning. See Cleaning the Test Card Collection Tray on page 7-25. User Interface System Throughout the entire processing cycle for test cards, communication ® ® between the user and the VITEK 2 instrument is essential. - Page 79 ® VITEK 2 Instrument User Interface System 2 — Help (?) Key. Press this key at any time to access the error/message queue. 3 — Previous Screen Key. Use this key to: • Exit from a screen or function to its menu. •...
- Page 80 ® User Interface System VITEK 2 Instrument ® 4-20 VITEK 2 Instrument User Manual 510731-10EN1...
-
Page 81: Configuring The Vitek ® 2 Instrument
VITEK ® ONFIGURING THE NSTRUMENT Introduction ® Configuration options allow you to operate the VITEK 2 instrument in a number of different ways. This chapter explains not only how to set these options, but how each option affects the operation of the instrument, and therefore your laboratory workflow. -
Page 82: Configuration Options
® Configuration Options Configuring the VITEK 2 Instrument Configuration Options Configuration Overview ® There are 12 configuration options in the VITEK 2 user interface. They can be divided into two groups, depending on whether or not the option affects how the instrument operates. The group that affects instrument operation is composed of the following options: Table 5-1: Configuration Options that Affect Instrument Operation Option... -
Page 83: Cassette Names
® Configuring the VITEK 2 Instrument Configuration Options Evaluate the effect that an option has on your workflow and decide how to set the option. This is especially important for the options in Table 5-1. Set the options according to the choices made in Step 2, by following the procedures in this chapter. -
Page 84: Schedule Instrument Qc Status
® Configuration Options Configuring the VITEK 2 Instrument For information on setting this option, see the procedure Defining Character Sets on page 5-9. Schedule Instrument QC Status The QC Status is a report of the current incubator temperature and the status ®... -
Page 85: Cassette Mode
® Configuring the VITEK 2 Instrument Configuration Options Recording QC Report The instrument user interface contains a function with which you can manually record a QC Status. You can set this option if you want the report recorded automatically. For example, you can have the report recorded at the same time every day. -
Page 86: Bar Code Reader
® Configuration Options Configuring the VITEK 2 Instrument Note: If the instrument is in Cassette Only mode, you can use the Cassette Setup function (Main Menu) to process individual cassettes in the dilution mode opposite to the configuration setting. BIOHAZARD WARNING ®... -
Page 87: Visual Alarm Enable
® Configuring the VITEK 2 Instrument Configuration Options The default setting for the alarm volume is at the midpoint of its range. Use this option to make the appropriate adjustments as required. The option includes a test function so that you can hear the alarm while changing it. For information on setting this option, see the procedure Setting a Range Value on page... -
Page 88: Waste Tray Warning Level
® Using the Interface Configuring the VITEK 2 Instrument For information on setting this option, see the procedure Setting a Range Value on page 5-12. Waste Tray Warning Level ® The VITEK 2 instrument displays a warning message when the Waste Collection Tray reaches full capacity. -
Page 89: Defining Character Sets
® Configuring the VITEK 2 Instrument Using the Interface ® All of the configuration options for VITEK 2 are on the Configuration menu. You access this menu using the path: Main Menu > Utilities > Configuration ® The VITEK 2 Main Menu looks like this: ®... -
Page 90: Setting Time For Qc Status
® Using the Interface Configuring the VITEK 2 Instrument Note: This screen does not appear for the Instrument Name option. Press a number key to select one of the ten cassette name positions, and then press Enter. The Character Selection screen appears: Figure 5-4: Character Selection Screen Note: This screen is similar for both the Cassette Names and Instrument Name options. -
Page 91: Using Option Boxes
® Configuring the VITEK 2 Instrument Using the Interface The following screen appears: Figure 5-5: Schedule QC Status Screen The time fields operate on a 24-hour clock. Times A, B, or C are disabled until you schedule the QC Status. Note: The Left or Right Arrow keys beneath Hours/Minutes allow you to toggle between Hours and Minutes when setting the time. -
Page 92: Setting A Range Value
® Using the Interface Configuring the VITEK 2 Instrument Press Up or Down Arrow to choose an option. A screen similar to Figure 5-6 appears. Figure 5-6: Option Box Screen To change the current setting, press the Up or Down Arrow keys. Setting a Range Value This procedure applies to the following configuration options: •... -
Page 93: Processing Vitek ® 2 Test Cards
VITEK ® ROCESSING ARDS Introduction ® This chapter contains the procedures you need to process VITEK 2 test cards. The chapter begins with three introductory sections that provide ® ® reference information about the VITEK 2 Status screen, the VITEK 2 Menu system, and the Smart Carrier Station interface. - Page 94 ® Processing VITEK 2 Test Cards Cassette Only Mode Workflow • 6-21 Cassette Preparation • 6-22 Loading a Cassette • 6-25 Entering Data for a Cassette • 6-27 Batch Loads (Smart Carrier or Cassette Only Mode) • 6-28 Selecting Batch Loading • 6-28 Starting a Batch Load •...
-
Page 95: Instrument Status Screen
® Processing VITEK 2 Test Cards Instrument Status Screen Instrument Status Screen ® You use the Status screen more often than any other screen in the VITEK user interface. Since it is so basic to the workflow, the Status screen is very easy to display and in many cases, the interface displays it automatically. -
Page 96: Non Standard Card Reading Mode
® Instrument Status Screen Processing VITEK 2 Test Cards • Messages. This status indicates that there is an error message in the error/message queue that has not been viewed. Press the Help (?) key to view the error/message queue. • Errors. This status appears after the error/message queue is accessed if the error condition has not been resolved. -
Page 97: Cassette Name Field
® Processing VITEK 2 Test Cards Instrument Status Screen The number you see in the MAX Available Slots field depends on the ® VITEK 2 instrument you have and the optical configuration of the instrument. Table 6-1: Optical Configurations Instrument/Max Available Optical Configuration ®... -
Page 98: Monitoring Pipette Tips And Saline
® Instrument Status Screen Processing VITEK 2 Test Cards ® •VITEK 2 Instrument Icon. This icon represents ® the VITEK 2 instrument. It shows when one of the access doors is open. These include the front access door on the front of the instrument, and the top access door. -
Page 99: Vitek ® 2 Menu System
® Processing VITEK 2 Test Cards Instrument Status Screen Figure 6-3: Pipette Tips Status As the disposables are used, the bar graphs begin to decrease. The graphs are marked to show levels of ¼, ½, and ¾ capacity. The number associated with the graph (156, in this example) decreases at the same time. - Page 100 ® Instrument Status Screen Processing VITEK 2 Test Cards ® VITEK 2 Instrument User Manual 510731-10EN1...
-
Page 101: Frequently Used Keys
® Processing VITEK 2 Test Cards About the Smart Carrier Station (SCS) Figure 6-5, the menu structure is shown with all of the function options added. Bold lines show the menus and pathways between them. This manual describes the pathway to a specific function by naming each menu to access, with the menus separated by arrows. - Page 102 ® About the Smart Carrier Station (SCS) Processing VITEK 2 Test Cards Type, Organism, Offline Tests, and Modifier fields can be entered without having to use the keyboard. If your laboratory uses bar codes for accession number of specimens, these can also be entered using the scanner. Cassette.
-
Page 103: Cassette Edit Screen
® Processing VITEK 2 Test Cards About the Smart Carrier Station (SCS) discrepancies in test card type or position in the cassette are reported to the user so that corrective action can be taken. Cassette Edit Screen The Cassette Edit screen provides an interface for entering test information. This screen is repeated for each cassette slot. -
Page 104: Understanding The Slot Indicator
® About the Smart Carrier Station (SCS) Processing VITEK 2 Test Cards • Modifier. Field used for organism modifiers. Six generic entries, mod1 to mod6, are preloaded. When this data reaches the workstation computer, the generic entry is converted to one of the first six corresponding entries in ®... -
Page 105: Scs Functions
® Processing VITEK 2 Test Cards About the Smart Carrier Station (SCS) SCS Functions Table 6-2 summarizes the functions that can be performed while entering data, and the use of the special function keys. Table 6-2: Summary of SCS Functions Name Function(s) How To Use It... -
Page 106: Option Boxes
® About the Smart Carrier Station (SCS) Processing VITEK 2 Test Cards Table 6-2: Summary of SCS Functions (Continued) Name Function(s) How To Use It Erase the data for a slot. 1) Press F9. A confirmation window appears. Note: This function also erases data in any successive linked slots. -
Page 107: Anc Identification Card
® Processing VITEK 2 Test Cards About the Smart Carrier Station (SCS) Offline Tests > blac blac Figure 6-9: Offline Tests Option Box ANC Identification Card Offline Test Result Screen The Offline Test Result screen allows entry of values that are specific to Anaerobic and Corynebacteria (ANC) tests. -
Page 108: Modifier
® Processing Test Cards Using the Smart Carrier Station Processing VITEK 2 Test Cards Modifier The option box for the Modifier field contains six default entries, mod 1 to mod 6. When this data reaches the workstation computer, the entry is matched to one of the first six entries in the Organism Modifier table of the ®... -
Page 109: Smart Carrier Workflow
® Processing VITEK 2 Test Cards Processing Test Cards Using the Smart Carrier Station ® • On the VITEK 2 Instrument. The most important configuration option for using the SCS is the Cassette Mode. This option must be set to Smart Carrier. -
Page 110: Correct Positioning Of Ast Cards
® Processing Test Cards Using the Smart Carrier Station Processing VITEK 2 Test Cards The SCS displays the Cassette Edit screen (see Figure 6-7) automatically whenever a cassette is firmly seated on the SCS base unit. Select the correct slot. •... -
Page 111: Loading A Cassette
® Processing VITEK 2 Test Cards Processing Test Cards Using the Smart Carrier Station • A Gram negative inoculum can be used for either one or two susceptibility tests. When diluting the inocula for two tests, the test cards must occupy the two slots immediately following the slot containing the inoculum test tube. -
Page 112: Loading A Cassette
® Processing Test Cards Using the Smart Carrier Station Processing VITEK 2 Test Cards Before you attempt to load a cassette, make sure the indicator light is on or is blinking. Loading a Cassette Open the Cassette Load Station by lifting the cassette load door up. There should be an empty boat at the station, or one with a cassette that contains waste. -
Page 113: Tracking Cassettes And Cards
® Processing VITEK 2 Test Cards Processing Test Cards in Cassette Only Mode information is provided once the test cards reach the Card Incubator and Reader Station and are read for the first time. ® Note: The VITEK 2 instrument should be attended during the first minute after a cassette is loaded and the boat moves forward to process cards. -
Page 114: Cassette Preparation
® Processing Test Cards in Cassette Only Mode Processing VITEK 2 Test Cards ® • selected the VITEK 2 test cards to process • decided whether to prepare susceptibility suspensions manually or ® automatically using VITEK Note: If you choose to prepare suspensions manually, suspension preparation ®... -
Page 115: Figure 6-12: Cassette Worksheet
® Processing VITEK 2 Test Cards Processing Test Cards in Cassette Only Mode Date: 07/26/2005 08:38:23 bioMérieux Page: WSVT2-R04.02 Cassette Report Cassette ID: ______________________ Tests: _____________ Instrument: ___________________________ Test Type Accession ID Organism Modifier Offline Tests – – – – – – – –... -
Page 116: Correct Positioning Of Susceptibility Test Cards
® Processing Test Cards in Cassette Only Mode Processing VITEK 2 Test Cards Correct Positioning of Susceptibility Test Cards If you pre-dilute the inocula for the susceptibility tests, you can place the test cards into any slots in the cassette, in any order you choose. However, when ®... -
Page 117: Loading A Cassette
® Processing VITEK 2 Test Cards Processing Test Cards in Cassette Only Mode Select one of the cassette names (1, Figure 6-13) from the list shown by pressing its corresponding number on the keypad. The selected name is highlighted. Note: If you need to add a new cassette name, refer to the section Cassette Names on page 5-3. -
Page 118: Using The Cassette Load Station
® Processing Test Cards in Cassette Only Mode Processing VITEK 2 Test Cards Table 6-8: Cassette Load Parameters (Cassette Only Mode) (Continued) Parameter What to Look For Tips and Saline The level of both disposables should be greater than or equal to the number of test cards you are loading. -
Page 119: Monitoring Test Card Processing
® Processing VITEK 2 Test Cards Processing Test Cards in Cassette Only Mode Note: The boat is shaped such that it will only accept a cassette in the proper orientation. Close the cassette load door. The Cassette icon appears on the Status screen. Monitor the instrument until the Cassette icon disappears and the boat moves forward to process cards. -
Page 120: Batch Loads (Smart Carrier Or Cassette Only Mode)
® Batch Loads (Smart Carrier or Cassette Only Mode) Processing VITEK 2 Test Cards Table 6-9: Card Identity Components (Cassette Only Mode) (Continued) Identifier Example Source Slot position (1–15) of The actual test card position in the ® the test card in the cassette as read by the VITEK 2 bar cassette. -
Page 121: Figure 6-15: Batch Load Screen
® Processing VITEK 2 Test Cards Batch Loads (Smart Carrier or Cassette Only Mode) Access the Batch Load function on the Main Menu. ® The VITEK 2 instrument checks to ensure that at least three boats are available, and that there are no test cards currently in the card transport system. -
Page 122: Unloading The Cassette And Removing Waste
® Unloading the Cassette and Removing Waste Processing VITEK 2 Test Cards Figure 6-17: Cassette Only Mode Batch Load Screen Open the door to the Load Station, place the cassette in the boat, and close the door. The instrument moves the boat away from the Load Station, moves the next boat into the station, and redisplays the screen shown in the previous step. -
Page 123: Removing Ejected Test Cards
® Processing VITEK 2 Test Cards Unloading the Cassette and Removing Waste For more information about the indicator light, see the section Using the Cassette Load Station on page 6-19 or on page 6-26. Open the cassette load door and remove the cassette from the boat. Note: The boat itself should not be removed. -
Page 124: Removing The Waste Collection Tray
® Unloading the Cassette and Removing Waste Processing VITEK 2 Test Cards Figure 6-18: The Waste Collection Station Removing the Waste Collection Tray Open the Waste Collection Station door. Note that waste test cards are held in a removable tray. Place the index finger of one hand on the sliding retainer bar (1, Figure 6-18) to prevent it from snapping back. -
Page 125: Maintaining The Vitek ® 2 Instrument
VITEK ® AINTAINING THE NSTRUMENT Introduction ® This chapter includes the procedures required to maintain the VITEK instrument. Maintenance includes monitoring and changing the disposables, cleaning the boats and the carousel, and general maintenance and cleaning. Note: The Maintenance Log provided at the end of this chapter lists recommended maintenance procedures and their frequency. - Page 126 ® Maintaining the VITEK 2 Instrument Cleaning the Drip Pan • 7-30 Replacing the Drip Pan • 7-31 Turning the Instrument On • 7-31 Cleaning the SCS • 7-32 ® VITEK 2 Instrument User Manual 510731-10EN1...
-
Page 127: Maintaining Disposables
® Maintaining the VITEK 2 Instrument Maintaining Disposables Maintaining Disposables Chapter 6 introduced the Status screen and how to incorporate it into your workflow. A specific part of that screen is devoted to the maintenance of the ® VITEK 2 disposables. ®... -
Page 128: Using The Graphs
® Maintaining Disposables Maintaining the VITEK 2 Instrument Using the Graphs The best way to use the graphs is to periodically compare the levels of the graphs to the number of ASTs you anticipate during a period. If the disposables level is lower than the anticipated work load, install an accessory kit before you begin (see following sections). -
Page 129: Figure 7-2: Location Of Saline Dispensing Chamber
® Maintaining the VITEK 2 Instrument Maintaining Disposables Open the front access door (1, Figure 7-2) to expose the Dispenser Station, then lift the saline access door (2) to expose the saline bag. Figure 7-2: Location of Saline Dispensing Chamber Pull on the filter disk (3) to remove it from its connector. -
Page 130: Figure 7-3: Cannula And Tubing Assembly
® Maintaining Disposables Maintaining the VITEK 2 Instrument Figure 7-3: Cannula and Tubing Assembly 11) Place the new bag of saline on its shelf on the top of the instrument, placing the eyelet of the bag over the post at the back of the shelf. 12) While pushing the release button (8, Figure 7-4), insert the saline... -
Page 131: Figure 7-5: Saline Fill Line
® Maintaining the VITEK 2 Instrument Maintaining Disposables Figure 7-5: Saline Fill Line 15) Release the round plate (11, Figure 7-4). 16) Close both the front access door and the saline access door to the instrument. 17) Press Done. The following message appears: Performing Dispenser Self Test The self test checks for proper installation of the saline dispenser tube. -
Page 132: Installing An Accessory Kit, Part B: Pipette Tips
® Maintaining Disposables Maintaining the VITEK 2 Instrument Installing an Accessory Kit, Part B: Pipette Tips If the card transport system is processing cassettes through the Card Transport Station, the following message appears: Card Transport System is busy. Please try later. CAUTION: Use aseptic technique when installing an accessory kit. -
Page 133: Figure 7-7: Pipette Tip Replacement
® Maintaining the VITEK 2 Instrument Maintaining Disposables Remove the pipette container from its base using a pulling motion. Discard any pipette tips that remain in the container. CAUTION: To avoid contaminating new pipette tips, do not touch the inside of the pipette container. ®... -
Page 134: Cleaning The Carousel
® Cleaning the Carousel Maintaining the VITEK 2 Instrument The following message appears: Performing Pipettor Self Test The Pipettor self test only checks the electric motors in the Pipettor Station. If the motors pass the test, no further message is displayed, and you are done with the installation. - Page 135 ® Maintaining the VITEK 2 Instrument Cleaning the Carousel ® Figure 7-8: VITEK 2 XL Carousel Cleaning Screen If cards are not processing in the selected incubator, and the carousel sections have not been removed, the following screen displays: ® Figure 7-9: VITEK 2 XL Preparing for Section Removal Screen Note: When the Continue button is pressed, you are required to remove all of the...
-
Page 136: Figure 7-10: Machined Incubator Access Cover
® Cleaning the Carousel Maintaining the VITEK 2 Instrument ® Note: There are two types of incubator access covers for the VITEK 2 instrument. Perform the first part of Step 5 if the machined incubator access cover is in use. Perform the second part of Step 5 if the molded incubator access cover is in use. -
Page 137: Figure 7-11: Molded Incubator Access Cover
® Maintaining the VITEK 2 Instrument Cleaning the Carousel Figure 7-11: Molded Incubator Access Cover When you remove the cover, the message on the screen changes to: Preparing for Section Removal When the carousel is in position, the following screen displays: Figure 7-12: Carousel Cleaning Prompt The carousel is removed in four sections. -
Page 138: Figure 7-13: Removing A Carousel Section
® Cleaning the Carousel Maintaining the VITEK 2 Instrument Figure 7-13: Removing a Carousel Section Press the Press here after completion option button to indicate removal of the carousel section. The following message displays: Current number of sections: 3 of 4 The carousel turns 90°... -
Page 139: Carousel Cleaning Methods
After the four carousel sections have been removed, the Cleaning menu displays. Access the Carousel Cleaning function using the path: VITEK 2 Main Menu > Utilities > Maintenance > Cleaning > Carousel Cleaning The following screen message displays: Preparing for Section Replacement Note: If the power has cycled, the screen below displays automatically. -
Page 140: Figure 7-14: Machined Incubator Access Cover
® Cleaning the Carousel Maintaining the VITEK 2 Instrument Remove the incubator access cover (1, Figure 7-14) from the carousel by holding the retaining pin (2) on the top of the cover to the right while pulling the cover slightly forward and to the right, out of the instrument. Figure 7-14: Machined Incubator Access Cover Remove the incubator acces cover (3, Figure... -
Page 141: Figure 7-16: Carousel Cleaning Replace Section Now Screen
® Maintaining the VITEK 2 Instrument Cleaning the Carousel When the access cover has been removed, the following message displays: Preparing for section replacement When the carousel is in position, the following screen displays: Figure 7-16: Carousel Cleaning Replace Section Now Screen Take any one of the carousel sections and orient it as shown in Figure 7-17. - Page 142 ® Cleaning the Carousel Maintaining the VITEK 2 Instrument When the section has been pushed down all the way, release the top portion, allowing it to rest against the base plate. When you perform Step 6, two pins on the back of the section should engage the two holes (4) in the base plate and secure the section.
-
Page 143: Cleaning The Cassettes
® Maintaining the VITEK 2 Instrument Cleaning the Cassettes Cleaning the Cassettes Cassettes should be cleaned monthly, or as conditions require. BIOHAZARD WARNING The cassettes should be considered as potentially contaminated and should be handled appropriately. Qualified laboratory personnel should take the usual precautions necessary for infectious agents. -
Page 144: Replacing The Button Memory Module
® Cleaning the Cassettes Maintaining the VITEK 2 Instrument Figure 7-18: Removing the Button Memory Module Clean the metal contacts (3, Figure 7-19) on the module with an alcohol wipe. Figure 7-19: Metal Contacts on Cassette Note: When cleaning multiple cassettes, it is not necessary to match a button memory module to a particular cassette. -
Page 145: Cleaning The Boats
® Maintaining the VITEK 2 Instrument Cleaning the Boats Figure 7-20: Replacing the Button Memory Module Place the other end of the module against the holding bracket (4) and push the module towards the side of the cassette. The module should snap into place. Cleaning the Boats Note: The procedures in this section should be performed monthly, or as conditions require. -
Page 146: Figure 7-21: Boat Cleaning Prompt
® Cleaning the Boats Maintaining the VITEK 2 Instrument Figure 7-21: Boat Cleaning Prompt Press Remove Boat. If there are boats in the card transport system, and it is not idle, the instrument displays the message: Card transport system is busy. Please try later. If the system is idle, the instrument moves a boat to the boat dock while displaying this message: Moving Boat to Boat Dock. -
Page 147: Cleaning The Boats
® Maintaining the VITEK 2 Instrument Cleaning the Boats Cleaning the Boats The four boats should be thoroughly cleaned and dried before they are ® replaced in the VITEK 2 instrument. The boat material is designed to withstand any of the following cleaning methods. •... -
Page 148: Cleaning The Instrument Interior
® Cleaning the Instrument Interior Maintaining the VITEK 2 Instrument • The front legs (1, Figure 7-22) of the boat are positioned in the channel of the base pan. • The boat is oriented with the arrow (2) pointing toward the back. Figure 7-22: Positioning of Boat Press the Press here after completion option button shown below after replacing the boat. -
Page 149: Shutting Down The Instrument
® Maintaining the VITEK 2 Instrument Cleaning the Instrument Interior CAUTION: There are elevated temperatures and hot surfaces inside the instrument. Shut down the instrument before starting the cleaning or any other procedures inside the instrument. Shutting Down the Instrument Note: Finish processing all cards before beginning this procedure. -
Page 150: Cleaning Optics (Normal Maintenance)
® Cleaning the Instrument Interior Maintaining the VITEK 2 Instrument The tray material is designed to withstand any of the following cleaning methods: • Automatic dishwasher with standard laboratory detergent CAUTION: Dishwasher temperatures during the washing and drying cycles must not exceed 85 °C (185 °F). Exceeding this temperature will cause damage to the cassettes. -
Page 151: Figure 7-23: Optics
® Maintaining the VITEK 2 Instrument Cleaning the Instrument Interior Figure 7-23: Optics The optics consist of multiple units that are hinged on the bottom and held in place by spring-loaded levers. Using your right hand, grasp the optics unit and place your thumb on the lever (2, Figure 7-24). -
Page 152: Cleaning The Base Pan, Vacuum Seal And Vacuum Chamber
® Cleaning the Instrument Interior Maintaining the VITEK 2 Instrument Replace the empty test card collection tray in the Waste Collection Station. 10) Close the top access door. 11) Close the Waste Collection door. Note: After cleaning the optics and returning power to the instrument, perform the Optical Diagnostic Test on page 8-26. -
Page 153: Cleaning The Drip Pan
® Maintaining the VITEK 2 Instrument Cleaning the Drip Pan Figure 7-25: Vacuum Seal Using a solution of disinfectant and warm water, wipe off any dust or dirt from the surface of the base pan. Particular attention should be paid to the area beneath the Dispenser/ Pipettor Station, where drips or spills may have occurred. -
Page 154: Removing The Drip Pan
® Cleaning the Drip Pan Maintaining the VITEK 2 Instrument ® VITEK 2 has a small container, called the drip pan, located underneath the Dispenser/Pipettor Station. The pan is designed to catch any spills that occur at this station. Note: This procedure should be performed after you clean the base pan. Cleaning the Base Pan, Vacuum Seal and Vacuum Chamber on page 7-28. -
Page 155: Replacing The Drip Pan
® Maintaining the VITEK 2 Instrument Cleaning the Drip Pan CAUTION: Dishwasher temperatures during the washing and drying cycles must not exceed 85 °C (185 °F). Exceeding this temperature will cause damage to the drip pan. Use the top rack of the dishwasher. -
Page 156: Cleaning The Scs
® Cleaning the SCS Maintaining the VITEK 2 Instrument Cleaning the SCS BIOHAZARD WARNING All organism suspensions should be considered as potentially infectious. Qualified laboratory personnel should use acceptable procedures for biohazardous material. Note: This procedure should be performed monthly, or as conditions require. The SCS base unit, keypad, display, and bar code scanner (except the clear lens) are designed to withstand any of the following cleaning solutions when applied first to a cleaning cloth and then to the SCS:... - Page 157 ® Maintaining the VITEK 2 Instrument Cleaning the SCS Clean all surfaces of the SCS base unit, keypad, display, and bar code scanner, except the clear lens of the scanner. Wipe the clear lens of the bar code scanner using a quality, lint free lens paper that has been moistened with a commercial glass cleaner.
- Page 158 ® Cleaning the SCS Maintaining the VITEK 2 Instrument ® 7-34 VITEK 2 Instrument User Manual 510731-10EN1...
- Page 159 ® Month____________Year____________ VITEK 2 Maintenance Log Day of Month: Change Saline A/R Change Pipette Tips A/R Clean Boats* Clean Carousel* Clean Cassettes* Clean Optics* Clean Waste Tray* Clean Base Pan* Clean Vacuum Seal* Clean Vacuum Chamber* Clean Drip Pan* Check Instrument QC Status Report for the Carousel Temperature** Optics Systems**...
- Page 160 ® Month____________Year____________ VITEK 2 Maintenance Log Day of Month: Change Saline A/R Change Pipette Tips A/R Clean Boats* Clean Carousel* Clean Cassettes* Clean Optics* Clean Waste Tray* Clean Base Pan* Clean Vacuum Seal* Clean Vacuum Chamber* Clean Drip Pan* Check Instrument QC Status Report for the Carousel Temp.* Optics System*...
- Page 161 ® Month____________Year____________ VITEK 2 XL Maintenance Log Day of Month: Change Saline A/R Change Pipette Tips A/R Clean Boats* Clean Carousel A & B* Clean Cassettes* Clean Optics A & B* Clean Waste Tray A & B* Clean Base Pan* Clean Vacuum Seal* Clean Vacuum Chamber* Clean Drip Pan*...
- Page 162 ® Month____________Year____________ VITEK 2 XL Maintenance Log Day of Month: Change Saline A/R Change Pipette Tips A/R Clean Boats* Clean Carousel A & B* Clean Cassettes* Clean Optics A & B* Clean Waste Tray A & B* Clean Base Pan* Clean Vacuum Seal* Clean Vacuum Chamber Clean Drip Pan*...
- Page 163 VITEK ® ROUBLESHOOTING THE NSTRUMENT Introduction This chapter helps you to resolve any problems that may occur while ® operating the VITEK 2 instrument. The first section, Error Handling System, explains how the instrument reacts to an error, and how you, the user, should respond.
- Page 164 ® Troubleshooting the VITEK 2 Instrument Diagnostic Tests • 8-19 Cleaning Optics (Cards Processing) • 8-23 Optical Diagnostic Test • 8-26 Boat Transport Positions • 8-26 Power Failures • 8-28 Displaying Version Information • 8-28 Using Error Message and Recovery Table • 8-29 Restarting the Instrument •...
-
Page 165: Error Handling System
® Troubleshooting the VITEK 2 Instrument Error Handling System Error Handling System ® The VITEK 2 instrument continually monitors itself to ensure that it is operating within specifications. To do this it uses numerous optical, mechanical, and temperature sensors, located within each subsystem. If a ®... -
Page 166: Error Alarms
® Status Screen Error Conditions Troubleshooting the VITEK 2 Instrument • Look up the error code from the message in this chapter and follow the recovery procedure. Error Alarms ® VITEK 2 has two alarms to alert you to the presence of an error condition. ®... -
Page 167: Instrument Halted Screen
® Troubleshooting the VITEK 2 Instrument Status Screen Error Conditions • Status screen with a status of Messages. Indicates there are error messages that need to be reviewed. These are minor errors that do not cause the Reader or Card Transport to halt. There are two ways you can handle a Status screen with a status of Messages. -
Page 168: Reviewing An Instrument Halted Screen
® Status Screen Error Conditions Troubleshooting the VITEK 2 Instrument 6 – 05:16. Time error occurred. Reviewing an Instrument Halted Screen Press Help (?) to view the error/message queue. Note: If there is more than one message, use the Down Arrow to review and address each message. -
Page 169: Figure 8-3: Transport Halted Screen (Vitek ® 2)
® Troubleshooting the VITEK 2 Instrument Status Screen Error Conditions ® Figure 8-3: Transport Halted Screen (VITEK ® Figure 8-4: Transport Halted Screen (VITEK 2 XL) View the Transport Halted screen to find the jammed boat (1, Figure 8-3 Figure 8-4 Note: Jammed boats are indicated by dotted line rectangles. -
Page 170: Message Status Screen
® Status Screen Error Conditions Troubleshooting the VITEK 2 Instrument indicate a Card Transport System Failure error again after the system has rebooted. Close the front access door and the cassette load/unload door. LASER WARNING All access doors and covers must remain closed when processing cards to avoid exposure to laser light. -
Page 171: Reviewing A Message Status Screen
® Troubleshooting the VITEK 2 Instrument Status Screen Error Conditions Figure 8-6: Message Queue 2 — Primary Error Code. The first line in the error/message queue gives you the Primary Error Code (in this case, Hardware Error). For examples of other Primary Error Codes, see Table 8-2. -
Page 172: Error Status Screen
® Cassette Load Processing Errors Troubleshooting the VITEK 2 Instrument • If the recovery procedure was successful, the Status screen appears with a Status of OK. • If the Instrument Halted screen reappears, record the error code number and call bioMérieux. •... -
Page 173: Workflow Considerations
® Troubleshooting the VITEK 2 Instrument Cassette Load Processing Errors • The bar code reader was unable to read one or more bar codes on the test cards. • The card has passed its expiration date. • An inconsistency was found between the information read from the button memory on the cassette and the bar codes on the test cards. -
Page 174: Figure 8-7: Bar Code Error Message
® Cassette Load Processing Errors Troubleshooting the VITEK 2 Instrument Figure 8-7: Bar Code Error Message Open the door to the Cassette Load Station and remove the cassette. The door should remain open while resolving the bar code error. BIOHAZARD WARNING The cassette should be considered as potentially contaminated and should be handled appropriately. -
Page 175: Scs And Bar Code Reader Conflict
® Troubleshooting the VITEK 2 Instrument Cassette Load Processing Errors Note: The bar code you enter may be longer than the space provided on the screen. When this occurs, the first portion of the bar code scrolls off the display and the symbol > appears. ®... -
Page 176: Inoculum Errors
® Cassette Load Processing Errors Troubleshooting the VITEK 2 Instrument Figure 8-9: Card Type Error Message Open the Cassette Load Station door, remove the cassette, and place it on the SCS. BIOHAZARD WARNING The cassette should be considered as potentially contaminated and should be handled appropriately. -
Page 177: Resolving An Inoculum Error
® Troubleshooting the VITEK 2 Instrument Cassette Load Processing Errors Note: A matching identification card is one having the same accession ID and test type (gram +/gram -) as the susceptibility card. During the bar code read, the instrument checks for one of these two conditions. -
Page 178: Card Capacity Errors
® Cassette Load Processing Errors Troubleshooting the VITEK 2 Instrument Card Capacity Errors As the bar codes on the test cards are read, the cards are counted. The count is compared to the number of empty slots currently available in the reader carousel. -
Page 179: Disposables Errors
® Troubleshooting the VITEK 2 Instrument Working Without the Bar Code Reader Disposables Errors ® When a cassette begins processing, VITEK 2 calculates the quantity of disposables that will be needed. If the calculated value exceeds the current level of a disposable: •... -
Page 180: Entering Bar Codes Manually
® Instrument Diagnostics Troubleshooting the VITEK 2 Instrument Main Menu > Utilities > Configuration The Bar Code Reader screen appears: Figure 8-12: Bar Code Reader Screen Press Down Arrow to disable the bar code reader. Entering Bar Codes Manually Access the Resolve Bar Code Errors option on the Main Menu. Using the numeric keypad, enter the bar code from the bar code label. -
Page 181: Diagnostic Tests
® Troubleshooting the VITEK 2 Instrument Instrument Diagnostics Diagnostic Tests Following are the tests found on the Diagnostics menu, and their function: Diagnostic Test Function Possible Results Temperature Reads the temperature in the reader Displays the carousel carousel. temperature in degrees Celsius. Also displays the word Low or High if the temperature is out of specification. -
Page 182: Dispenser/Pipettor Diagnostic Test
® Instrument Diagnostics Troubleshooting the VITEK 2 Instrument ® If you have a VITEK 2, the screen in Figure 8-14 displays. ® Figure 8-14: Temperature Diagnostics Screen (VITEK The screen displays the Incubator temperature and the temperature inside the instrument. Dispenser/Pipettor Diagnostic Test Note: The transport system must be idle to perform this test. -
Page 183: Dispenser/Pipettor Volumetric Test
® Troubleshooting the VITEK 2 Instrument Instrument Diagnostics • Look for repeated back and forth movement while the saline dispenser is in the upright position. The saline dispenser tube should move smoothly up and down when filling each AST tube. •... -
Page 184: Table 8-1: Dispenser/Pipettor Volumetric Test
® Instrument Diagnostics Troubleshooting the VITEK 2 Instrument • Record the weight of the tube in slot 3 in the Pipettor High Volume section. Test tube 3 — Before test (B). • Record the weight of the tube in slot 5 in the Diluter section. Test tube 5 —... -
Page 185: Cleaning Optics (Cards Processing)
® Troubleshooting the VITEK 2 Instrument Cleaning Optics (Cards Processing) Open the cassette load door, load the test cassette and close the cassette load door. Allow the cassette to process and return to the cassette load/unload door. Remove the cassette. Record the weights of the test tubes placed in test tube slots 1, 3, and 5 using Table... -
Page 186: Figure 8-15: Optics
® Cleaning Optics (Cards Processing) Troubleshooting the VITEK 2 Instrument CAUTION: Do not use commercial glass cleaner when cleaning the optics. This may result in calibration failures observed as the optics age. Clean optics using a quality, lint free lens paper that has been slightly moistened with alcohol. -
Page 187: Figure 8-16: Opening The Optics
® Troubleshooting the VITEK 2 Instrument Cleaning Optics (Cards Processing) The optics consist of multiple units that are hinged on the bottom and held in place by spring-loaded levers. Note: Do each step for all transmittance optic units at the same time. Using your right hand, grasp the optics unit and place your thumb on the lever (2, Figure... -
Page 188: Optical Diagnostic Test
® Boat Transport Positions Troubleshooting the VITEK 2 Instrument 15) Continue with the Optical Diagnostic Test, noting the conditions of the test. Optical Diagnostic Test The Optical Diagnostic Test should not be performed if ID cards are processing. However, in some cases you need to perform the optical diagnostic test in response to an optics error. -
Page 189: Figure 8-17: Boat Transport Positions
® Troubleshooting the VITEK 2 Instrument Boat Transport Positions Halted Screen on page 8-6 for further information on card transport system jams. LASER WARNING All access doors and covers must remain closed when processing cards to avoid exposure to laser light. Figure 8-17: Boat Transport Positions 1 –... -
Page 190: Power Failures
® Power Failures Troubleshooting the VITEK 2 Instrument the animated dotted lined rectangle and arrow on the Transport Halted screen. 4 – Vacuum Station. 5 – Cut/Seal Station. 6 – Card Load/Unload Station. Power Failures ® What happens in the VITEK 2 instrument if there is a power failure? The instrument is supported by a device called an Uninterruptible Power Supply (UPS). -
Page 191: Using Error Message And Recovery Table
® Troubleshooting the VITEK 2 Instrument Using Error Message and Recovery Table A screen displays similar to the one shown in Figure 8-18. Figure 8-18: Version Information Screen Using Error Message and Recovery Table Table 8-2 in this section contains all of the messages that can be displayed in the error/message queue. -
Page 192: Table 8-2: Error Message And Recovery Table
® Using Error Message and Recovery Table Troubleshooting the VITEK 2 Instrument Wait at least 10 seconds. Move the AC power switch to the ON position. Table 8-2: Error Message and Recovery Table Error Code Recovery Procedure Primary Secondary Fatal Error Call bioMérieux Call bioMérieux for assistance. - Page 193 ® Troubleshooting the VITEK 2 Instrument Using Error Message and Recovery Table Table 8-2: Error Message and Recovery Table (Continued) Error Code Recovery Procedure Primary Secondary Initialization Error Card Sealer Failure Call bioMérieux for assistance. Card Transport System Call bioMérieux for assistance. Failure Dispenser Failure Call bioMérieux for assistance.
- Page 194 ® Using Error Message and Recovery Table Troubleshooting the VITEK 2 Instrument Table 8-2: Error Message and Recovery Table (Continued) Error Code Recovery Procedure Primary Secondary Processing Error Carousel Jam 1) Open the waste collection door and top-right access door. (Cont.) 2) Remove the incubator access cover.
- Page 195 ® Troubleshooting the VITEK 2 Instrument Using Error Message and Recovery Table Table 8-2: Error Message and Recovery Table (Continued) Error Code Recovery Procedure Primary Secondary Processing Error Dispenser Failure 1) Open the front access door and check for: (Cont.) •...
- Page 196 ® Using Error Message and Recovery Table Troubleshooting the VITEK 2 Instrument Table 8-2: Error Message and Recovery Table (Continued) Error Code Recovery Procedure Primary Secondary Processing Error Load Failure 1) If the instrument has not displayed the Halt screen, go to (Cont.) Step 6 of this recovery procedure.
- Page 197 ® Troubleshooting the VITEK 2 Instrument Using Error Message and Recovery Table Table 8-2: Error Message and Recovery Table (Continued) Error Code Recovery Procedure Primary Secondary ® Processing Error SCS information has errors 1) Remove the cassette from VITEK (Cont.) at Slot 2) Put the cassette on the SCS.
- Page 198 ® Using Error Message and Recovery Table Troubleshooting the VITEK 2 Instrument Table 8-2: Error Message and Recovery Table (Continued) Error Code Recovery Procedure Primary Secondary Processing Cannot unload cards, 1) Open the Waste Collection Station door and check for jams. Warning (Cont.) waste tray is not functional 2) Empty the waste collection tray.
- Page 199 ® Troubleshooting the VITEK 2 Instrument Using Error Message and Recovery Table Table 8-2: Error Message and Recovery Table (Continued) Error Code Recovery Procedure Primary Secondary Processing Incubator Temperature Ensure that the ambient room temperature is above 20 °C. Wait Warning (Cont.) 15 minutes and recheck.
- Page 200 ® Using Error Message and Recovery Table Troubleshooting the VITEK 2 Instrument ® 8-38 VITEK 2 Instrument User Manual 510731-10EN1...
- Page 201 A: H PPENDIX ARDWARE PECIFICATIONS ® VITEK 2 Instrument Dimensions ® ® Dimension VITEK VITEK 2 XL Height 67 cm (26.3 in.) 67 cm (26.3 in.) Width 100 cm (39.4 in.) 140 cm (55.1 in.) Depth 71 cm (27.7 in.) 71 cm (27.7 in.) Mass ®...
-
Page 202: Appendix A: Hardware Specifications
® VITEK 2 Instrument Appendix A: Hardware Specifications Environment ® ® Note: The specifications below apply to both the VITEK 2 and the VITEK 2 XL. Indoor usage Do not install in direct sunlight Benchtop should be level within 2° Minimum of 5 cm (2 in) clearance on all sides for adequate ventilation;... -
Page 203: Electrical Characteristics
® Appendix A: Hardware Specifications VITEK 2 Instrument Electrical Characteristics Electrical ® ® VITEK VITEK 2 XL Characteristics Input voltage 200/240 VAC at 50/60 Hz 200/240 VAC at 50/60 Hz 100/120 VAC at 50/60 Hz 100/120 VAC at 50/60 Hz Maximum input current 4 amps @ 120 VAC or 2 amps @ 5 amps @ 120VAC or 2.8 amps @ 240... -
Page 204: General Characteristics
® VITEK 2 Instrument Appendix A: Hardware Specifications General Characteristics ® ® Note: The specifications below apply to both the VITEK 2 and the VITEK 2 XL. Cassette Capacity, cassettes: 4 cassettes maximum Capacity, cards: 15 cards per cassette Dispenser Dispensing volume: 2.33 –... -
Page 205: Glossary
LOSSARY ® ® Access Doors VITEK VITEK 2 has six doors to enable the operator to access the internal systems and stations to replenish supplies and perform maintenance and cleaning procedures: top access door, saline access door, front access door, bottom access door, cassette load (and unload) door, and waste collection access door. - Page 206 Glossary Bar Code An alphanumeric interface identifier label affixed to each ® VITEK 2 test card. The bar code contains the card’s test type, lot number, and expiration date, which is entered either by the SCS subsystem by bar code wanding, or when the test card’s bar code label is read by the bar code reader inside of the ®...
- Page 207 Glossary Dispenser/Pipettor Transfers and mixes the appropriate inoculum volume predetermined by the test card bar code (60 µL to 300µL - see Aliquot) to adjacent susceptibility tubes. The system includes a container for pipette tips, a displacement pump, and various tip mechanisms.
- Page 208 Glossary SCS Base Unit Smart Carrier Station (SCS). Sealer Station This station, a part of the Sample Preparation System, seals each test card by cutting and sealing its associated inoculum transfer tube with a hot wire. Smart Carrier Station A laptop computer-like device used to aid in setting up the test (SCS) and for entering test information.
-
Page 209: Index
NDEX Bar code scanner, SCS 2-7, 6-9, 6-16 Base pan, cleaning 7-28 Access doors 4-4 Base unit, SCS 2-9 Accession/Lab ID Field 6-18 Batch load 6-28 Accessories kit 7-4 Batch loading 6-28 7-4–7-10 installing Boat 4-8 Address, cassette 6-21, 6-27 7-21–7-23 cleaning Alarm, audible 5-6, 8-4... - Page 210 Index Cassette name status screen indicator for defining Dispenser station 4-11 on the status screen Dispenser/Pipettor Station 4-11 6-25 selecting in cassette setup function Displaying version info 8-28 Cassette setup function, using 6-24 Disposables 7-3–7-10 Cassette worksheet 6-22 7-4–7-10 changing Caution, definition of 1-5 8-17 load errors...
- Page 211 Index Keypad, instrument 4-18 Icons, status screen 6-5 ID card Language, SCS interface, setting 3-7 6-10 matching with AST Light, indicator, Cassette Loading Station 6-19 Indicator light, Cassette Loading Station 6-19 Load errors, cassette 8-10 Inoculum errors 8-14 Loading a cassette 6-19–6-20, 6-25–6-27 Instrument bar code reader Loading station.
- Page 212 Index Option boxes, SCS 6-14 configuration options, setting configuration screens Option buttons 6-9 6-17 data entry Organism ID field 6-11 6-11 data fields 6-14 option box 6-13 function keys keyboard 6-10 name 3-3–3-4 name, setting Pipette tips, changing 6-14–6-16 option boxes See also Disposables parts Pipettor station 4-12–4-13...
- Page 213 Index Status screen 6-3, 7-3 Warning icons definition of in an error condition general warnings with messages Waste collection station 4-17 System Requirements 2-9 Waste removal 6-30 Waste Tray Warning Level 5-8 Workflow Temperature 8-11 and cassette load errors 8-19 checking instrument 6-17 with an SCS...
- Page 214 Index ® Index-6 VITEK 2 Instrument User Manual 510731-10EN1...
-
Page 215: Notes
OTES ® VITEK 2 Instrument User Manual Notes-1 510731-10EN1... - Page 216 Notes ® Notes-2 VITEK 2 Instrument User Manual 510731-10EN1...
- Page 217 Notes ® VITEK 2 Instrument User Manual Notes-3 510731-10EN1...
- Page 218 Notes ® Notes-4 VITEK 2 Instrument User Manual 510731-10EN1...
Need help?
Do you have a question about the VITEK 2 and is the answer not in the manual?
Questions and answers