
Related Manuals for Riello FS5


Summary of Contents for Riello FS5
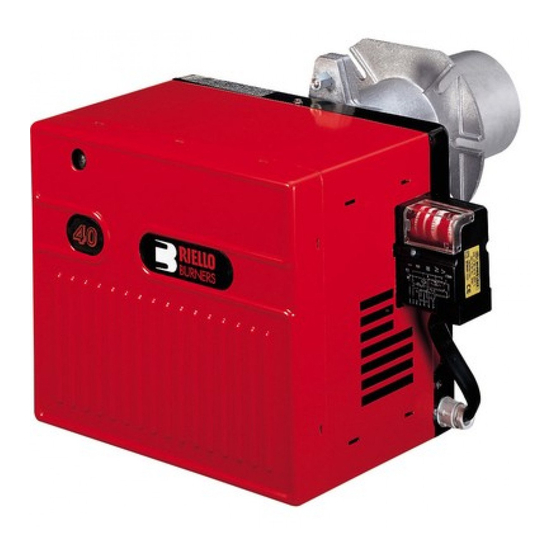
- Page 1 Installation, use and maintenance instructions Forced draught gas burner One stage operation CODE MODEL TYPE 20025106 564M 20025473 (1) - 05/2010...
-
Page 3: Technical Data
TECHNICAL DATA TYPE 564M Thermal output 23 – 58 kW – 20,000 – 50,000 kcal/h Net heat value 8 – 12 kWh/m – 7,000 – 10,340 kcal/m (Family 2) Pressure min. 10 mbar – max. 40 mbar single phase, 230 V ± 10% Electrical supply 50Hz Motor... -
Page 4: Overall Dimensions
OVERALL DIMENSIONS Flange Burner ø Length available using an extended head kit. D5066 BURNER EQUIPMENT Quantity Description Screws with nuts Insulating gasket Screws for fixing the cover Grommet Hinge BOILER FIXING Separate the combustion-head assembly from HINGE ASSEMBLY the burner body by removing nut (1) and removing group (A). -
Page 5: Firing Rate
FIRING RATE 20,000 30,000 50,000 kcal/h 40,000 Burner output D5053 TEST BOILER The firing rate has been defined according to EN 676 standard. COMMERCIAL BOILERS The burner-boiler matching is assured if the boiler is according to EN 303 and the combustion chamber dimensions are similar to those shown in the diagram EN 676. - Page 6 LINE OF GAS-SUPPLY MBC 65 DLE D7279 D5069 – Gas supply pipe – Manual cock (charged to the installer) – Gas pressure gauge (charged to the installer) – Pressure governor – Filter – Adjusting valve – Gas pressure switch M1 – Gas-supply pressure test point –...
-
Page 7: Electrical Connections
The electrical wirings must be carried out in conformity with the regulations in force in the countries of destination, and by qualified personnel. Riello S.p.A. cannot accept any responsibility for modifications or connections other than those shown in these diagrams. - Page 8 20025473...
- Page 9 20025473...
-
Page 10: Combustion Head Adjustment
COMBUSTION HEAD ADJUSTMENT In conformity with Efficiency Directive 92/42/EEC the application of the burner on the boiler, adjust- ment and testing must be carried out observing the instruction manual of the boiler, including ver- ification of the CO and CO concentration in the flue gases, their temperatures and the average temperature of the water in the boiler. -
Page 11: Air Pressure Switch
AIR PRESSURE SWITCH The air pressure switch is set after all other adjustments have been made. Begin with the switch at the lowest setting. With the burner function at the required power, turn the knob slowly in a clockwise direction until burner lockout. Then turn the knob anticlockwise to an extent that is around 20% of the adjusted value and then check that the burner starts up properly. -
Page 12: Resetting The Control Box And Using Diagnostics
RESETTING THE CONTROL BOX AND USING DIAGNOSTICS The control box features a diagnostics function through which any causes of malfunctioning are easily iden- tified (indicator: RED LED). To use this function, you must wait at least 10 seconds once it has entered the safety condition (lock-out), and then press the reset button. -
Page 13: Maintenance
The sequence of pulses issued by the control box identifies the possible types of malfunction, which are listed in the table below. SIGNAL PROBABLE CAUSE The flame does not stabilise at the end of the safety time: – faulty ionisation probe; 2 pulses –... -
Page 14: Faults / Solutions
FAULTS / SOLUTIONS Here below you can find some causes and the possible solutions for some problems that could cause a fail- ure to start or a bad working of the burner. A fault usually makes the lock-out lamp light which is situated inside the reset button of the control box (9, fig. - Page 15 Signal Problem Possible cause Recommended remedy 7 blinks The burner goes into 24 - The operation solenoid lets little gas . Increase lockout immediately through following the 25 - Ionisation probe incorrectly adjusted . Adjust appearance of the flame 26 - Insufficient ionisation (less than 5 A) . Check probe position 27 - Earth probe .
-
Page 16: Normal Operation / Flame Detection Time
NORMAL OPERATION / FLAME DETECTION TIME The control box has a further function to guarantee the correct burner operation (signal: GREEN LED perma- nently on). To use this function, wait at least ten seconds from the burner ignition and then press the control box button for a minimum of 3 seconds. -
Page 17: Warnings And Safety
WARNINGS AND SAFETY The dimension of the boiler’s combustion chamber must respond to specific values, in order to guarantee a combustion with the lowest polluting emissions rate. You are therefore advised to consult the Technical Assistance Department before choosing this type of burn- er for the combination with a boiler. - Page 20 RIELLO S.p.A. I-37045 Legnago (VR) Tel.: +39.0442.630111 http:// www.riello.it http:// www.rielloburners.com Subject to modifications...
Need help?
Do you have a question about the FS5 and is the answer not in the manual?
Questions and answers