Advertisement
Quick Links
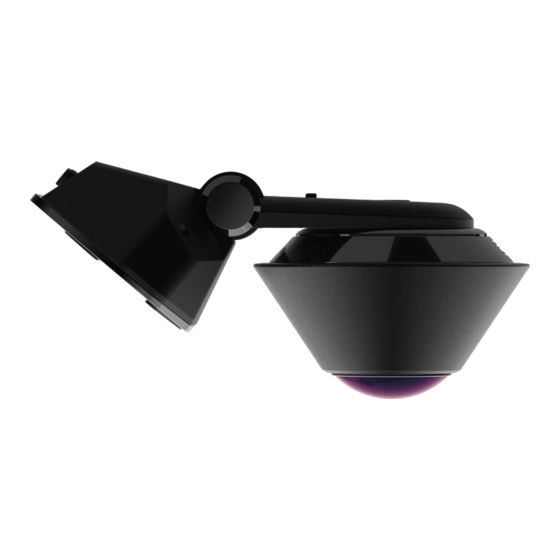
Rhino Drive360 Installation Guide
Rhino
Link: https://kb.gpsinsight.com/rhino-drive360-installation-guide/ Last Updated: November 22nd, 2021
The installation kit contains the installation guide, one Drive360 device, one mounting bracket, one power cable,
six assorted add-a-circuit fuse holders, one security bracket, two security bracket screws, two security bracket
spacers, one mini screwdriver, and one power cable security bracket.
Additional tools and supplies you will need include dashboard panel removers, a digital multimeter, a cordless
drill, self-tapping ground screw, driver bit for screw, approximately eight cable ties, a side cutter, heat gun, a
dry/clean/lint-free cloth, a pen, a dry erase/wax tip marker, 99% Alcohol wipes and a tamper seal compound.
Installation Overview
The following steps provide an overview of the installation process:
1.
Install Preparation.
2.
Mounting.
3.
Power Cable Installation.
4.
Verification and Registration.
5.
Frequently Asked Questions
1. Installation Preparation.
Note.
If applicable, all water/ice/snow should be completely removed from the windshield. If the
outside temperature is 75 degrees Fahrenheit (24 degrees Celsius) or less, turn on vehicle defrost
until the windshield is warm to the touch. Also, place the mounting bracket in defrost airflow to
warm VHB tape.
1. Record the 8-digit device serial number (S/N) onto your paperwork.
Copyright ©2022 GPS Insight
Page 1 of 10
Advertisement

Related Manuals for RHINO Drive360


Summary of Contents for RHINO Drive360
- Page 1 Rhino Link: https://kb.gpsinsight.com/rhino-drive360-installation-guide/ Last Updated: November 22nd, 2021 The installation kit contains the installation guide, one Drive360 device, one mounting bracket, one power cable, six assorted add-a-circuit fuse holders, one security bracket, two security bracket screws, two security bracket spacers, one mini screwdriver, and one power cable security bracket.
- Page 2 Rhino Drive360 Installation Guide Rhino Link: https://kb.gpsinsight.com/rhino-drive360-installation-guide/ Last Updated: November 22nd, 2021 2. Locate the vehicle fuse panel and remove any panels needed to access the panel and to route the power cable. 3. Using the vehicle owner’s manual and a multimeter, find the vehicle circuits needed for both device connections.
- Page 3 Rhino Drive360 Installation Guide Rhino Link: https://kb.gpsinsight.com/rhino-drive360-installation-guide/ Last Updated: November 22nd, 2021 4. Hold the device to windshield confirming the angle of the windshield will not affect the device from being level. Copyright ©2022 GPS Insight Page 3 of 10...
- Page 4 Rhino Drive360 Installation Guide Rhino Link: https://kb.gpsinsight.com/rhino-drive360-installation-guide/ Last Updated: November 22nd, 2021 5. If the security bracket does not have one spacer, add or remove additional spacers so only one is present. Copyright ©2022 GPS Insight Page 4 of 10...
- Page 5 Rhino Drive360 Installation Guide Rhino Link: https://kb.gpsinsight.com/rhino-drive360-installation-guide/ Last Updated: November 22nd, 2021 6. Rear View Mirror (Standard): A. Directly beneath the mirror mount, clean the windshield area with alcohol wipes. B. Wipe clean with clean dry cloth. C. Apply heat to burn off any leftover residue.
- Page 6 Rhino Drive360 Installation Guide Rhino Link: https://kb.gpsinsight.com/rhino-drive360-installation-guide/ Last Updated: November 22nd, 2021 A. Remove the VHB plastic exposing the adhesive. B. Apply heat to the tape. C. Ensuring bracket is level, press firmly to the windshield. 2. From outside the vehicle, visually inspect tape adhesion; there should be no air bubbles in the tape.
- Page 7 Rhino Drive360 Installation Guide Rhino Link: https://kb.gpsinsight.com/rhino-drive360-installation-guide/ Last Updated: November 22nd, 2021 E. Tuck wires along the headliner and secure the cable as you come down the A-Pillar. Note. If airbag is present, make sure cable is run behind the air bag and NOT over the top.
-
Page 8: Power Cable Installation
Rhino Drive360 Installation Guide Rhino Link: https://kb.gpsinsight.com/rhino-drive360-installation-guide/ Last Updated: November 22nd, 2021 3. Power Cable Installation. 1. Connect the fuse holders to the device’s Yellow and Red wires. 2. Remove the vehicle fuse identified in Step 1.3 and place the fuse into the fuse holder before plugging in, then add a circuit into the fuse panel. -
Page 9: Frequently Asked Questions
Rhino Drive360 Installation Guide Rhino Link: https://kb.gpsinsight.com/rhino-drive360-installation-guide/ Last Updated: November 22nd, 2021 5. Frequently Asked Questions. Status LED Mode LED Status Description Solid Blue Power On / Idle Solid Red Recording Blinking Blue Firmware Updating Blinking Blue and Red Error... - Page 10 Rhino Drive360 Installation Guide Rhino Link: https://kb.gpsinsight.com/rhino-drive360-installation-guide/ Last Updated: November 22nd, 2021 LED Status Description Press for eight (8) seconds Restart the Camera Copyright ©2022 GPS Insight Page 10 of 10...
Need help?
Do you have a question about the Drive360 and is the answer not in the manual?
Questions and answers