Advertisement
Quick Links
sauder.com
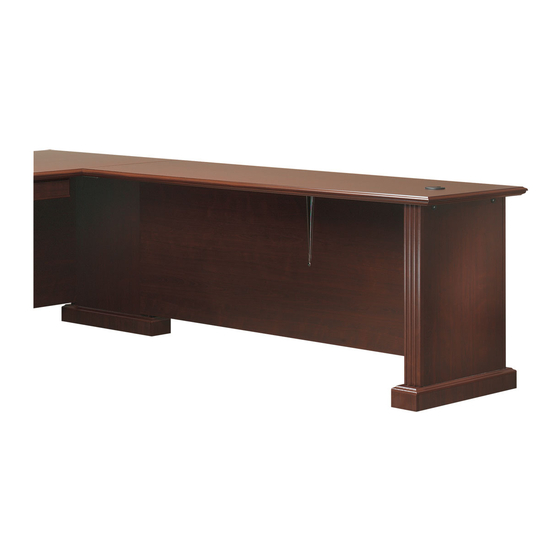
72" U-Shaped Connector Kit
Heritage Hill Collection | 109872
Need help? Visit Sauder.com to view video assembly tips or chat with a live rep.
Prefer the phone? Call 1-800-523-3987.
Share your journey!
We're in your corner.
NOTE: THIS INSTRUCTION
BOOKLET CONTAINS IMPORTANT
SAFETY INFORMATION.
PLEASE READ AND KEEP FOR
FUTURE REFERENCE.
English pg 1-30
Français pg 31-34
Español pg 35-38
Lot # 375994
08/25/15
Purchased: __________________
Be sure to give us a ring before
making any returns. 1-800-523-3987
Advertisement

Related Manuals for Sauder Heritage Hill 109872


Summary of Contents for Sauder Heritage Hill 109872
- Page 1 Heritage Hill Collection | 109872 NOTE: THIS INSTRUCTION BOOKLET CONTAINS IMPORTANT SAFETY INFORMATION. Need help? Visit Sauder.com to view video assembly tips or chat with a live rep. PLEASE READ AND KEEP FOR FUTURE REFERENCE. Prefer the phone? Call 1-800-523-3987.
-
Page 2: Table Of Contents
Table of Contents Assembly Tools Required Part Identifi cation No. 2 Phillips Screwdriver Tip Shown Actual Size Hardware Identifi cation Assembly Steps 5-30 Hammer Not actual size Français 31-34 Español 35-38 Skip the power trip. Warranty This time. Page 2 109872 www.sauder.com/services... -
Page 3: Part Identifi Cation
MODESTY PANEL (1) SHORT MOLDING (1) INNER END (1) SHELF (1) END MOLDING (2) RIGHT UPRIGHT (1) BOTTOM (1) LONG SKIRT (2) LEFT UPRIGHT (1) RIGHT MOLDING (1) SHORT SKIRT (2) E2 TOP (1) LEFT MOLDING (1) www.sauder.com/services 109872 Page 3... -
Page 4: Hardware Identifi Cation
HOLE PLUG - 3 BLACK 1-7/8" FLAT HEAD SCREW - 10 BROWN 1-1/2" FLAT HEAD SCREW - 3 BLACK 9/16" LARGE HEAD SCREW - 24 BLACK 9/16" WAFER HEAD SCREW - 2 SILVER 1-1/8" FLAT HEAD SCREW - 16 Page 4 109872 www.sauder.com/services... -
Page 5: Assembly Steps
Look for this icon. It means a Step 1 video assembly tip is available at www.sauder.com/services/tips Assemble your unit on a carpeted fl oor or on the empty carton to avoid scratching your unit or the fl oor. å NOTE: You must assemble the 109843 Executive Desk fi rst, then the 109848 Return Kit before assembling this unit å... - Page 6 IMPORTANT: Do not overtighten the SCREWS into the TOP. å SILVER 1-1/8" FLAT HEAD SCREW (14 used in this step) Do not overtighten Angled end the SCREWS (CC). When fastened, the MOLDINGS set in from the edges of the TOP. Large hole Page 6 109872 www.sauder.com/services...
- Page 7 IMPORTANT: Do not insert TWIST-LOCK® FASTENERS å into the INNER END (B) in this step. Push a SAUDER TWIST-LOCK® FASTENER (T) into each å large hole in the OUTER END (A). Repeat this step for the RIGHT UPRIGHT (C), LEFT å...
- Page 8 Step 4 Fasten the OUTER END (A) to the SHORT MOLDING (K). å ® How to use the SAUDER TWIST-LOCK FASTENER Tighten two TWIST-LOCK® FASTENERS. 1. Insert the dowel end of the FASTENER into the hole of the adjoining part.
- Page 9 Use two BLACK 9/16" LARGE HEAD SCREWS (BB). NOTE: Be sure the edges of the BRACKETS are even with å the edges of the LONG SKIRTS. BLACK 9/16" LARGE HEAD SCREW (2 used in this step) www.sauder.com/services 109872 Page 9...
- Page 10 SCREWS a few turns before tightening either of them. Next, fasten the METAL BRACKETS (U) on the LONG SKIRTS (M) to å the BOTTOM (H). Use two BLACK 9/16" LARGE HEAD SCREWS (BB) BLACK 9/16" LARGE HEAD SCREW (2 used for the METAL BRACKETS) Page 10 109872 www.sauder.com/services...
- Page 11 Fasten the SHELF (G) to the MODESTY PANEL (F). å Tighten two TWIST-LOCK® FASTENERS. S u r Notch f a c i t h I S T - L O ® F A S T E N E R www.sauder.com/services 109872 Page 11...
- Page 12 ® f a c S u r - L O I S T E R S T E N F A S BLACK 9/16" LARGE HEAD SCREW (4 used for the CORD MANAGERS) Page 12 109872 www.sauder.com/services...
- Page 13 Return Kit on the RIGHT (continue with Step 10) 109843 109872 Executive Desk U-Shape Connector Kit 109848 Return Kit Return Kit on the LEFT (continue with Step 18) 109843 Executive Desk 109872 U-Shape Connector 109848 Return Kit www.sauder.com/services 109872 Page 13...
- Page 14 NOTE: Notice the location of the two holes in the middle å of the INNER END (B). Push a SAUDER TWIST-LOCK® FASTENER (T) into the å indicated large holes shown in the INNER END (B). NOTE: Do not push TWIST-LOCK® FASTENERS into the å...
- Page 15 Fasten the INNER END (B) to the MOLDINGS (I and J). å Tighten two TWIST-LOCK® FASTENERS. S u r f a c i t h I S T - L O F A S T E N ® E R S www.sauder.com/services 109872 Page 15...
- Page 16 Fasten the INNER END (B) to the MODESTY PANEL (F). å This end of the MODESTY Use two BLACK 1-7/8" FLAT HEAD SCREWS (X). PANEL (F) will hang past the end of the TOP (E2). BLACK 1-7/8" FLAT HEAD SCREW (2 used in this step) Page 16 109872 www.sauder.com/services...
- Page 17 (2 used in this step) Do not overtighten the SCREWS (CC). S u r f a c i t h o I S T - L O F A S T E N ® E R S www.sauder.com/services 109872 Page 17...
- Page 18 NOTE: Slide the END MOLDINGS (L) down until they celebrate! With a nap. å touch the MOLDINGS (I and J). * U.S. Pat. No. 5,499,886 å Slide the END MOLDING (L) onto the notched edges. Slide the END MOLDING (L) onto the notched edges. Page 18 109872 www.sauder.com/services...
- Page 19 BLACK 1-7/8" FLAT HEAD SCREW (4 used for the BOTTOM) SUPPORT BRACKET (from the 109848 Return Kit) BLACK 9/16" LARGE HEAD SCREW (6 used from the 109848 Return Kit for the BRACKET from the Return Kit) www.sauder.com/services 109872 Page 19...
- Page 20 Inner End on the 109843 Executive Desk using three 1-1/2" FLAT HEAD SCREWS (Y) and WASHERS (V). BROWN 1-1/2" FLAT HEAD SCREW (3 used for the MODESTY PANEL) (3 used for the MODESTY PANEL) Page 20 109872 www.sauder.com/services...
- Page 21 109848 along this edge of the INNER END (B) using the 1-1/2" FLAT HEAD SCREWS and WASHERS you saved from step 1. WASHER BROWN 1-1/2" FLAT HEAD SCREW (3 of each used from the 109848 Return Kit) www.sauder.com/services 109872 Page 21...
- Page 22 NOTE: Notice the location of the two holes in the middle å of the INNER END (B). Push a SAUDER TWIST-LOCK® FASTENER (T) into the å indicated large holes shown in the INNER END (B). NOTE: Do not push TWIST-LOCK® FASTENERS into the å...
- Page 23 Fasten the INNER END (B) to the MOLDINGS (I and J). å Tighten two TWIST-LOCK® FASTENERS. i t h ® f a c S u r - L O I S T E R S T E N F A S www.sauder.com/services 109872 Page 23...
- Page 24 Fasten the INNER END (B) to the MODESTY PANEL (F). å Use two BLACK 1-7/8" FLAT HEAD SCREWS (X). This end of the MODESTY PANEL (F) will hang past the end of the TOP (E2). BLACK 1-7/8" FLAT HEAD SCREW (2 used in this step) Page 24 109872 www.sauder.com/services...
- Page 25 (2 used in this step) Do not overtighten the SCREWS (CC). i t h o ® f a c S u r - L O I S T E R S T E N F A S www.sauder.com/services 109872 Page 25...
- Page 26 NOTE: Slide the END MOLDINGS (L) down until they å leave without a bite. touch the MOLDINGS (I and J). * U.S. Pat. No. 5,499,886 å Slide the END MOLDING (L) onto the notched edges. Slide the END MOLDING (L) onto the notched edges. Page 26 109872 www.sauder.com/services...
- Page 27 BLACK 1-7/8" FLAT HEAD SCREW (4 used for the BOTTOM) SUPPORT BRACKET (from the 109848 Return Kit) BLACK 9/16" LARGE HEAD SCREW (6 used from the 109848 Return Kit for the BRACKET from the Return Kit) www.sauder.com/services 109872 Page 27...
- Page 28 Inner End on the 109843 Executive Desk using three 1-1/2" FLAT HEAD SCREWS (Y) and WASHERS (V). BROWN 1-1/2" FLAT HEAD SCREW (3 used for the MODESTY PANEL) (3 used for the MODESTY PANEL) Page 28 109872 www.sauder.com/services...
- Page 29 109848 along this edge of the INNER END (B) using the 1-1/2" FLAT HEAD SCREWS and WASHERS you saved from step 1. WASHER BROWN 1-1/2" FLAT HEAD SCREW (3 of each used from the 109848 Return Kit) www.sauder.com/services 109872 Page 29...
- Page 30 This completes assembly. Clean with your favorite furniture polish or a damp cloth. Wipe dry. å And to celebrate, why not share your success story? CAUTION: This Sauder unit has been designed for the weight limits shown in this step. Exceeding these limits could cause excessive "sagging"...
-
Page 31: Français
élément et conserver le livret pour future référence. EXTRÉMITÉ EXTERNE ..........1 PLAQUE DE CONNECTEUR .......2 Pour contacter Sauder EXTRÉMITÉ INTERNE ..........1 COUVERCLE DE PASSE-CÂBLES ....1 en ce qui concerne cet MONTANT DROIT ............1 10P PASSE-CÂBLES ............1 élément, faire référence... - Page 32 IMPORTANT : Ne pas enfoncer les FIXATIONS TWIST-LOCK® FOND (F). Utiliser quatre VIS TÊTE LARGE 14 mm NOIRES (BB). dans l'EXTRÉMITÉ INTERNE (B) à cette étape. Enfoncer une FIXATION TWIST-LOCK® SAUDER (T) dans chaque ÉTAPE 9 gros trou dans l'EXTRÉMITÉ EXTERNE (A).
- Page 33 ÉTAPE 10 (SUITE) ÉTAPE 16 Enfoncer une FIXATION TWIST-LOCK® SAUDER (T) dans les gros Avec l’ a ide d’une autre personne, positionner soigneusement le Kit trous indiqués dans l'EXTRÉMITÉ INTERNE (B). de connecteurs en forme de U 109872 à côté du Bureau ministre 109843 comme l'indique le schéma.
- Page 34 REMARQUE : Prière de lire les informations importantes sur la sécurité fi gurant sur les pages arrière du manuel d’instructions. Ceci complète l'assemblage. Nettoyer à l’ a ide d’une encaustique pour meubles ou d’un chiff on humide. Essuyer. Page 34 109872 www.sauder.com/services...
-
Page 35: Español
EXTREMO EXTERNO ..........1 PLACA DE CONECTOR .........2 et conserver le livret pour future référence. EXTREMO INTERNO ..........1 CUBIERTA DE OJAL ...........1 Pour contacter Sauder PARAL DERECHO ............1 10P OJAL ..................1 en ce qui concerne cet PARAL IZQUIERDO .............1 PATA ..................2 élément, faire référence... - Page 36 EXTREMO INTERNO (B) en este paso. Fije los PARALES (C y D) al ESTANTE (G). Utilice cuatro Empuje un SUJETADOR TWIST-LOCK® SAUDER (T) dentro de TORNILLOS NEGROS DE CABEZA PERDIDA de 48 mm (X). cada agujero grande del EXTREMO EXTERNO (A).
- Page 37 NOTA: Tenga en cuenta la ubicación de los dos agujeros en la mitad del EXTREMO INTERNO (B). PASO 16 Empuje un SUJETADOR TWIST-LOCK® SAUDER (T) dentro de los agujeros grandes indicados del EXTREMO INTERNO (B). Con la ayuda de alguien, coloque con cuidado el Kit conector en NOTA: No empuje los SUJETADORES TWIST-LOCK®...
- Page 38 NOTA: No hay agujeros ya perforados para estos tres Esto completa el ensamblaje. Limpie con su pulimento para muebles preferido o un paño húmedo. Seque con un paño. TORNILLOS. Haga una presión fi rme para iniciar la perforación para los tornillos. Page 38 109872 www.sauder.com/services...
-
Page 39: Warranty
à compter de la date d'achat la première fois et qui sont signalés à Sauder dans les limites de couverture de la contre tout défaut de matériaux ou de fabrication des composantes de mobilier Sauder. - Page 40 Dear Valued Customer: So, how did it go? Thanks so much for choosing Sauder® furniture. I hope the Set a world record for speed? purchase and assembly process was a positive experience Feeling good about yourself? and you feel good about the furniture you just built. If you Nice.
Need help?
Do you have a question about the Heritage Hill 109872 and is the answer not in the manual?
Questions and answers