Advertisement
Quick Links
sauder.com
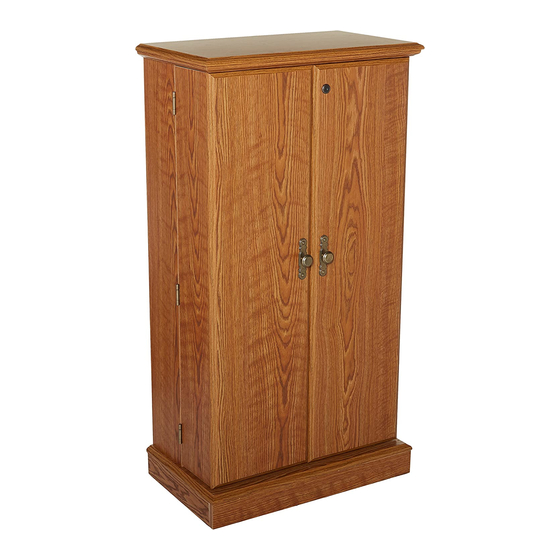
Multimedia Storage Cabinet
Orchard Hills Collection | 418651
Need help? Visit Sauder.com to view video assembly tips or chat with a live rep.
Prefer the phone? Call 1-800-523-3987.
Share your journey!
Your digital bookshelf.
NOTE: THIS INSTRUCTION
BOOKLET CONTAINS IMPORTANT
SAFETY INFORMATION.
PLEASE READ AND KEEP FOR
FUTURE REFERENCE.
English pg 1-19
Français pg 20-22
Español pg 23-25
Lot # 369819
03/17/15
Purchased: __________________
Be sure to give us a ring before
making any returns. 1-800-523-3987
Advertisement

Related Manuals for Sauder Orchard Hills 418651


Summary of Contents for Sauder Orchard Hills 418651
- Page 1 Orchard Hills Collection | 418651 NOTE: THIS INSTRUCTION BOOKLET CONTAINS IMPORTANT SAFETY INFORMATION. Need help? Visit Sauder.com to view video assembly tips or chat with a live rep. PLEASE READ AND KEEP FOR FUTURE REFERENCE. Prefer the phone? Call 1-800-523-3987.
- Page 2 LEFT UPRIGHT (1) LEFT DOOR (1) FRONT MOLDING (1) RIGHT LONG UPRIGHT (1) BACK (1) RIGHT MOLDING (1) LEFT LONG UPRIGHT (1) FIXED SHELF (4) LEFT MOLDING (1) TOP (1) PINNED SHELF (4) BOTTOM (1) LONG SHELF (1) Page 2 418651 www.sauder.com/services...
- Page 3 Now you know Part Identifi cation our ABCs. www.sauder.com/services 418651 Page 3...
- Page 4 BRACKET - 1 HINGE - 6 MAGNETIC CATCH - 1 STRIKE PLATE - 2 116K KNOB - 2 120K BACKPLATE - 2 LOCK PACK - 1 RUBBER SLEEVE - 8 NAIL - 29 METAL PIN - 34 Page 4 418651 www.sauder.com/services...
- Page 5 BLACK 1-7/8" FLAT HEAD SCREW - 8 CONNECTOR SCREW - 12 SILVER 1-1/8" FLAT HEAD SCREW - 6 BLACK 1/2" FLAT HEAD SCREW - 2 BLACK 7/8" LARGE HEAD SCREW - 2 BLACK 1-1/8" MACHINE SCREW - 2 www.sauder.com/services 418651 Page 5...
- Page 6 Look for this icon. It means a Step 1 video assembly tip is available at www.sauder.com/services/tips Assemble your unit on a carpeted fl oor or on the empty å carton to avoid scratching your unit or the fl oor. Insert a CONNECTOR SCREW (8S) into each å...
- Page 7 LONG SHELF (N). Then, insert the metal end of a CAM DOWEL (2F) into each HIDDEN CAM. Do not tighten the HIDDEN CAMS in this step. Arrow (10 used) Arrow Arrow Insert the metal end of the CAM DOWEL into the HIDDEN CAM. www.sauder.com/services 418651 Page 7...
- Page 8 Step 4 Tap two MOLDING CONNECTORS (19F) into the notches å in the MOLDINGS (Q, R, and S). Use your hammer to tap the MOLDING CONNECTORS (19F) into the notches in the MOLDINGS. Flat end Flat end Page 8 418651 www.sauder.com/services...
- Page 9 Lefty loosey. NOTE: Be sure the edges of the ANGLE BRACKETS are å even with the edges of the SKIRTS. BLACK 9/16" LARGE HEAD SCREW (9 used in this step) (9 used) Do not use these holes. www.sauder.com/services 418651 Page 9...
- Page 10 BLACK 9/16" LARGE HEAD SCREWS (1S). Fasten the SIDE SKIRTS (P) to the FRONT SKIRT (O). Use å two BLACK 9/16" LARGE SCREWS (1S). BLACK 9/16" LARGE HEAD SCREW (9 used in this step) Unfi nished edge Page 10 418651 www.sauder.com/services...
- Page 11 Tighten Risk of damage or Arrow injury. HIDDEN CAMS must be completely Arrow Maximum tightened. HIDDEN 210 degrees CAMS that are not completely tightened may loosen, and parts may separate. To Minimum completely tighten: 190 degrees www.sauder.com/services 418651 Page 11...
- Page 12 BLACK 1-7/8" FLAT HEAD SCREW (8 used in this step) F i n i s h r f a This END (A) will now be called the LEFT END. This END (A) will now be called the RIGHT END. Page 12 418651 www.sauder.com/services...
- Page 13 7/8" LARGE HEAD SCREWS (17S). BLACK 7/8" LARGE HEAD SCREW (2 used in this step) fi n i s h r f a SILVER 1-1/8" FLAT HEAD SCREW (6 used for the TOP) Unfi nished edge www.sauder.com/services 418651 Page 13...
- Page 14 Fasten the BACK (K) to your unit using the NAILS (1N). å NOTE: Be sure to tap NAILS into the holes that line up å over the LONG SHELF (N). NAIL (29 used in this step) These holes must line up over the LONG SHELF (N). Page 14 418651 www.sauder.com/services...
- Page 15 SHELVES (L and M) should be facing up. (24 used) Surface with HIDDEN CAMS Unfi nished edge These surfaces Surface with should be even with HIDDEN CAMS the plastic edges. Surface with HIDDEN CAMS Unfi nished edge www.sauder.com/services 418651 Page 15...
- Page 16 Push a LARGE RUBBER SLEEVE (58G) onto the TIE PLATE (3G). å BLACK 9/16" LARGE HEAD SCREW (1 used in this step) Maximum Arrow 210 degrees Minimum 190 degrees BLACK 1/2" FLAT HEAD SCREW (2 used for the STRIKE PLATES) Page 16 418651 www.sauder.com/services...
- Page 17 Fasten the HINGES (28H) to the UPRIGHTS (D and E) å and ENDS (A). Use twenty-four BLACK 9/16" LARGE HEAD SCREWS (1S). BLACK 9/16" LARGE HEAD SCREW (24 used in this step) For support, place packing foam and magazines here. www.sauder.com/services 418651 Page 17...
- Page 18 BLACK 1-1/8" MACHINE SCREW (2 used in this step) 5 lbs. 5 lbs. 12 lbs. 5 lbs. 116K 5 lbs. 120K 12 lbs. 5 lbs. 5 lbs. 12 lbs. 5 lbs. 5 lbs. (8 used) 20 lbs. 5 lbs. Page 18 418651 www.sauder.com/services...
- Page 19 DOOR than the other end of the CAM. SCREW WASHER Turn the KEY counter-clockwise to lock. The prongs must press LOCK into the DOOR as you tighten the NUT with an adjustable wrench. www.sauder.com/services 418651 Page 19...
- Page 20 QUANTITÉ d’ a chat de cet élément et conserver le livret EXTRÉMITÉ ..............2 EXCENTRIQUE ESCAMOTABLE ....10 pour future référence. Pour contacter Sauder MONTANT DROIT ............1 CHEVILLE D'EXCENTRIQUE ......10 en ce qui concerne cet MONTANT GAUCHE ..........1 CONNECTEUR ESCAMOTABLE ....12 élément, faire référence LONG MONTANT DROIT ........1...
- Page 21 « d’équerre ». Fixer l’ARRIÈRE (K) à l’élément en utilisant les CLOUS (1N). REMARQUE : S’ a ssurer de bien enfoncer les CLOUS dans les trous qui sont alignés au-dessus le TABLETTE LONGUE (N).. www.sauder.com/services 418651 Page 21...
- Page 22 GAUCHE (A) et le LONG MONTANT DROIT (D) au côté de l'EXTRÉMITÉ DROITE (A). Fixer les CHARNIÈRES (28H) aux MONTANTS (D et E) et aux EXTRÉMITÉS (A). Utiliser vingt-quatre VIS NOIRES TÊTE LARGE 14 mm (1S). Page 22 418651 www.sauder.com/services...
- Page 23 PLACA DE CONEXIÓN ..........1 et conserver le livret pour future référence. PARAL DERECHO ............1 17G SOPORTE DE METAL ..........1 Pour contacter Sauder PARAL IZQUIERDO .............1 27G SOPORTE ANGULAR ..........9 en ce qui concerne cet PARAL DERECHO LARGO ........1 58G MANGUITO DE GOMA GRANDE ....1 élément, faire référence...
- Page 24 DE CABEZA GRANDE de 14 mm (1S). Fije el DORSO (K) a la unidad utilizando los CLAVOS (1N). NOTA: Asegúrese de clavar ligeramente los CLAVOS dentro de los agujeros que se alinean sobre el ESTANTE LARGO (N). Page 24 418651 www.sauder.com/services...
- Page 25 IZQUIERDO (A) y el PARAL DERECHO LARGO (D) al lado del EXTREMO DERECHO (A). Fije las BISAGRAS (28H) a los PARALES (D y E) y a los EXTREMOS (A). Utilice veinticuatro TORNILLOS NEGROS DE CABEZA GRANDE de 14 mm (1S). www.sauder.com/services 418651 Page 25...
- Page 26 Además, el peso y la ubicación del tubo de imagen tienden a causar la inestabilidad de televisores y son propensos a inclinarse hacia adelante. Page 26 418651 www.sauder.com/services...
- Page 27 GARANTIE LIMITÉE DE 5 ANS 1. Sauder Woodworking Co. (Sauder®) off re une couverture de garantie limitée à l’ a cheteur 4. La présente garantie ne s’ a pplique qu’ a ux défauts garantis qui se produisent pour initial du présent produit pendant une période de cinq ans à...
- Page 28 Dear Valued Customer: So, how did it go? Thanks so much for choosing Sauder® furniture. I hope the Set a world record for speed? purchase and assembly process was a positive experience Feeling good about yourself? and you feel good about the furniture you just built. If you Nice.
Need help?
Do you have a question about the Orchard Hills 418651 and is the answer not in the manual?
Questions and answers