Table of Contents
Advertisement
Quick Links
1.
When installing your stove, particular attention
should be paid to fire protection. If this unit is not
properly installed, a house fire may result. For
your safety, follow the installation instructions and
contact local building or fire officials about restric-
tions and installation inspection requirements in
your area.
2.
Never use gasoline or similar liquids to start a fire
in this unit. Keep all such liquids well away from
stove.
3.
During operation, if any part of the stove starts to
glow, the stove is in an overfired condition. Close
the air controls completely until the glowing has
stopped. OVERFIRING VOIDS WARRANTY.
4.
Cool ashes should be disposed of carefully, using
a metal container.
5.
Do not burn wet or green wood. Store wood in dry
location.
6.
Do not burn garbage, treated wood, or wood with
salt (driftwood, etc.). Burning materials other than
wood (including charcoal) under adverse conditions
may generate carbon monoxide in the home, re-
sulting in illness or possible death.
7.
Do not permit creosote or soot to accumulate ex-
cessively in the chimney or inside the firebox.
Printed in U.S.A. Copyright 2000,
Heat-N-Glo, a division of Hearth Technologies Inc.
20802 Kensington Blvd., Lakeville, MN 55044
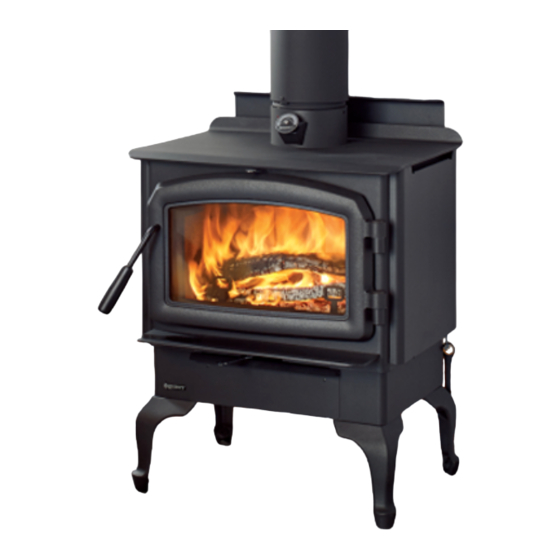
Models:
WS-150
WS-250
This manual contains instructions for:
• Installation • Operation
- PLEASE READ ALL OF THE OWNERS MANUAL AND SAFETY NOTES -
IMPORTANT SAFETY NOTES:
8. Check your chimney system thoroughly when install-
9. Do not connect this unit to a chimney flue already
10. Comply with all minimum clearances to combustibles
11. Build fire on brick firebox floor. Do not use grates,
12. HOT WHILE IN OPERATION. Keep children, pets,
13. Do not connect to any air distribution duct or system.
14. RISK OF FIRE! Do not operate with stove door open.
15. For further information refer to NFPA 211 (U.S.) or
16. WARNING: WHEN ASSEMBLING APPLIANCE, USE
17. WARNING: DO NOT OPERATE YOUR WS-150 or
Please contact your Heat-N-Glo dealer with any
questions or concerns. For the number of your
nearest Heat-N-Glo dealer, please call 952-985-6000.
1
• Maintenance
ing into an existing metal or masonry chimney. Seek
professional advice if in doubt about its condition.
serving another appliance.
as shown in this manual for this appliance.
andirons or other methods to support fuel.
clothing and furniture away. Contact can cause skin
burns.
CAN/CSA-B365 (Canada).
ONLY HEAT-N-GLO PRODUCTS MANUFACTURED
COMPONENTS. USE OF ANY OTHER COMPO-
NENTS WILL VOID YOUR WARRANTY AND COULD
PRESENT A SERIOUS SAFETY HAZARD.
WS-250 STOVE BEFORE FULLY ASSEMBLING ALL
COMPONENTS.
Installers Guide
396-980D 7/00
Advertisement
Table of Contents

Subscribe to Our Youtube Channel
Related Manuals for Heat-N-Glo WS-150


Summary of Contents for Heat-N-Glo WS-150
- Page 1 PRESENT A SERIOUS SAFETY HAZARD. may generate carbon monoxide in the home, re- sulting in illness or possible death. 17. WARNING: DO NOT OPERATE YOUR WS-150 or WS-250 STOVE BEFORE FULLY ASSEMBLING ALL Do not permit creosote or soot to accumulate ex- COMPONENTS.
- Page 2 FOR FUTURE REFERENCE ATTACH YOUR SALES RECEIPT HERE - NOTES - Serial No.: Date Purchased: Dealership Where Purchased: Dealer Phone No.:...
-
Page 3: Table Of Contents
TABLE OF CONTENTS DIMENSIONS ......................4 CLEARANCES TO COMBUSTIBLES ..............6 SAFETY LISTING ....................7 INSTALLATION MATERIALS NEEDED ..............7 VENTING SYSTEM ....................7 CHIMNEY CONNECTOR ..................8 CHIMNEY HEIGHT/DRAFT ..................8 CONNECTION TO A MASONRY CHIMNEY ............8 INSTALLATION USING MASONRY OR BRICK CHIMNEY ........11 CONNECTION TO A METAL PREFABRICATED CHIMNEY ........ -
Page 4: Dimensions
DIMENSIONS OF MODELS WS-150 AND WS-250 WITH PEDESTAL FIGURE 1. WS-150 with Pedestal FIGURE 2. WS-250 with Pedestal... - Page 5 DIMENSIONS OF MODELS WS-150 AND WS-250 WITH LEGS FIGURE 3. WS-150 with Legs FIGURE 4. WS-250 with Legs...
-
Page 6: Clearances To Combustibles
Note 2: 6" (152mm) diameter double wall air cooled (25mm) ventilated air space to reduce clearances. connector pipe with listed factory-built type HT chim- However, this is not to exceed 50% of WS-150’s (or ney or a masonry chimney. (Mobile home venting sys- WS-250’s) specified clearances. -
Page 7: Safety Listing
SAFETY LISTING detector manufacturer’s placement and installa- tion instructions, and be sure to maintain regularly. The WS-150 AND WS-250 are approved for mobile home installations with outside combustion air in the A conveniently located Class A fire extinguisher U.S. (See page 14 for further details). For residential... -
Page 8: Chimney Connector
CHIMNEY CONNECTOR measured from the top of the stove. The further your stack height or diameter varies from this configuration, The chimney connector must be 6" (152mm) diam- the probability of performance problems increases. eter with a minimum thickness of 24 gauge. Do not In addition, exterior conditions such as roof line, use aluminum or galvanized steel. - Page 9 A chimney must be the required height above the A chimney inside the house must have at least 2" roof or other obstruction for safety and proper draft (50mm) of clearance to the combustible structure. operation. The chimney must be a minimum of 3' A chimney outside the house must have at least 1"...
- Page 10 2. THIMBLE: An approved thimble must be used when the connection from the stove is made through a combustible wall to a masonry chimney. There are several Chimney Wall methods you can use for connection through a combustible wall, two of which are illustrated in this manual.
-
Page 11: Installation Using Masonry Or Brick Chimney
INSTALLATION USING MASONRY OR BRICK CHIMNEY spacer to the chimney side of the frame. Then insert the frame into the opening, toe-nailing it to the wall Minimum 3 ½" (89mm) [4" (102mm) nominal] thick studs. Install the wall band in the framing to secure solid bricks are to be used. - Page 12 FIGURE 13 FIGURE 14...
-
Page 13: Connection To A Metal Prefabricated Chimney
CONNECTION TO A METAL PREFABRICATED CHIMNEY When a metal prefabricated chim- ney is used, the manufacturer’s in- stallation instructions must be fol- lowed precisely. You must also pur- chase (from the same manufac- turer) and install the ceiling support package or wall pass-through and “T”... -
Page 14: Door Installation
DOOR INSTALLATION WARNING: Do not operate your stove before fully assembling all compo- nents. Burning your stove without a door will void your warranty, and could present a safety hazard. 1. Firmly hold door so that the hinges on the door line up with the hinges on the stove. -
Page 15: Mobile Home Installation
MOBILE HOME INSTALLATION with N.E.C. approved grounding device. AN OUTSIDE AIR KIT IS REQUIRED Refer to clearance to combustibles section (Fig- FOR MOBILE HOME INSTALLATION. ure 5) for listing to combustibles. Seal all wall/floor inlets to prevent air or moisture You must use an outside air kit (see Outside Air Kit In- penetration. -
Page 16: Outside Air Kit
OUTSIDE AIR KIT INSTALLATION FOR PEDESTAL MODELS (1) Front Cover (1) Rear Intake Cover (1 ) Rodent Screen (6) 8-32 x 1/2" screws TOOLS AND PARTS NEEDED: #2 Phillips Screw Driver, suf- ficient quantity of metalflex or rigid pipe for your connection purposes, silicone sealant. -
Page 17: Optional Blower
INSTALLATION OF OPTIONAL BLOWER Part #831-1700 The blower is shipped fully assembled and ready for installation. 1. Using three 1/4-20 bolts supplied, attach blower to lower rear of stove, as shown. 2. Plug blower cord into a grounded outlet. Do not remove ground prong from plug. Route power cord to avoid heat from the stove, or other damage. -
Page 18: Ash Removal System
ASH REMOVAL SYSTEM INSTALLATION 1. Remove ash removal system top and bottom cover plates by loosening nuts under stove. 2. Discard both plates. 3. Place protective pad or stove pallet on floor. 4. Lay body of stove on its back on protec- tive pad or pallet. -
Page 19: Operating Instructions
In order to improve the situa- which burn above the fuel with bright flames. During tion, we at Heat-N-Glo have developed cleaner burn- this stage of burning it is very important that the flames ing wood stoves that surpass the stringent require- be maintained and not allowed to go out. -
Page 20: Wood Selection And Storage
WOOD SELECTION AND STORAGE Burn only dry seasoned wood! Dry and well-sea- drying occurs through the cut ends than the sides. soned wood will not only minimize the chance of creo- This is true even with wood that has been split. Store sote formation, but will give you the most efficient heat wood under cover, such as in a shed, or covered with output. -
Page 21: Burning Guidelines
BURNING GUIDELINES OPERATING TIPS OPACITY: This is the measure of how cleanly your stove is burning. Opacity is measured in percent; Here are a few tips on operating your stove to obtain 100% opacity is when an object is totally obscured maximum efficiency with lowest emissions: by the smoke column from a chimney, and 0% opac- ity means that no smoke column can be seen. -
Page 22: Maintenance
MAINTENANCE CREOSOTE Formation and need for removal: When wood is burned slowly, it produces tar and other When closing door, make sure that logs do not pro- organic vapors which combine with expelled mois- trude against the glass. Clean glass with a non- ture to form creosote. -
Page 23: Glass Replacement
Lay new glass with fiberglass tape around it into the door frame, mak- ing sure the Heat-N-Glo logo reads correctly to the outside. Place glass frame pieces over the fiberglass tape on the edges of the glass. -
Page 24: Baffle Removal And Installation
Call a qualified chimney sweep or an authorized Heat-N-Glo dealer for details. 1. Remove all ash from the firebox, and extinguish all hot embers before disposal into a metal container. -
Page 25: Brick Installation
Heat-N-Glo’s one year warranty program. Heat-N-Glo will not be responsible for any alteration to the unit which causes sooting that results in damage to the interior or exterior of the building in which this appliance is installed.
Need help?
Do you have a question about the WS-150 and is the answer not in the manual?
Questions and answers