
Related Manuals for Birlea COMPTON BOOKCASE


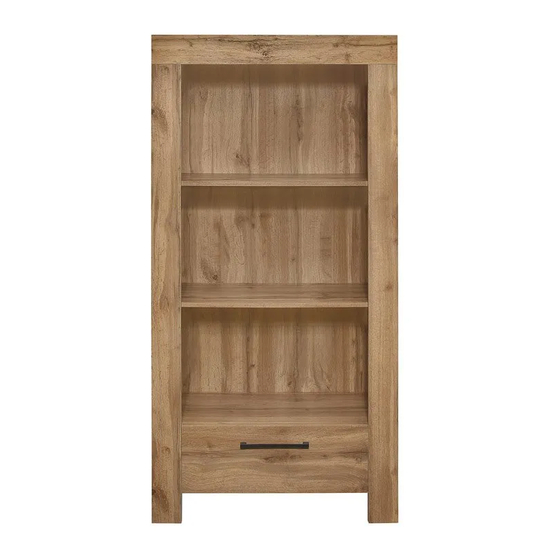
Summary of Contents for Birlea COMPTON BOOKCASE
-
Page 2: Health And Safety
ASSEMBLY INSTRUCTIONS COMPTON BOOKCASE IMPORTANT : READ THESE INSTRUCTIONS CAREFULLY BEFORE ATTEMPTING TO ASSEMBLE OR USE YOUR COMPTON BOOKCASE. PLEASE KEEP THESE INSTRUCTIONS FOR FUTURE REFERENCE. ASSEMBLY: Assembly should be carried out with this item laying flat, not standing upright. - Page 3 Vendor: S000350 Parts List Hardware List ( BOX 1 ) Part Descripion Part Description Top panel Cam lock Bottom panel Minifix screw Side panel ( Left ) Plastic cap Side panel ( Right ) M8 x 30mm Wood Dowel Middle panel Allen key M4 Top bone M3.5 x 16mm C.B Screw...
- Page 4 Vendor: S000350 Step 1: Prepare these parts for assembly using hardware parts A1, A2, B, D and L1. DO NOT use any power tools as this may damage the frame and will invalidate any claim. Page of 9...
- Page 5 Vendor: S000350 Step 2: Attach bottom panel (2) to side plate (11) and (12) using hardware F with a screwdriver (not provided). DO NOT use any power tools as this may damage the frame and will invalidate any claim. F x 4 Step 3: Attach side panel (3) and (4) to bottom panel (2), middle panel (5) and back bone (9) using hardware A1 and A2 with a screwdriver (not provided).
- Page 6 Vendor: S000350 Step 5: Insert back panel (10) along the slot. DO NOT use any power tools as this may damage the frame and will invalidate any claim. Step 6: Attach top panel (1) to side panel (3) and (4) using hardware A1 and A2 with a screwdriver (not provided). DO NOT use any power tools as this may damage the frame and will invalidate any claim.
- Page 7 Vendor: S000350 Step 8: Insert hardware H into mounting positions on side panel (3) and (4). DO NOT use any power tools as this may damage the frame and will invalidate any claim. H x 8 Step 9: Assemble shelf panel (13) between side panel (3) and (4). DO NOT use any power tools as this may damage the frame and will invalidate any claim.
- Page 8 Vendor: S000350 Step 10: Fix hardware I into top bone (6), side bone (7) and (8) with hardware D and a screwdriver (not provided). DO NOT use any power tools as this may damage the frame and will invalidate any claim. D x 4 I x 2 Step 11: Attach top bone (6), side bone (7) and (8) to top panel (1), side panel (3) and (4) using...
- Page 9 Vendor: S000350 Step 12: Assemble the drawer components using hardware A3, C, D, E, F, K and L2. In this step only show one of the drawers. DO NOT use any power tools as this may damage the frame and will invalidate any claim. Fix hardware K onto panel (14) by using hardware E.
- Page 10 Ensure the head of any screw used has a diameter greater than the mounting hole and the fixing is safe and secure before use. Birlea Furniture advise you use the hardware M ( 2 pcs ) are provided to further enhance the safety of this product.
Need help?
Do you have a question about the COMPTON BOOKCASE and is the answer not in the manual?
Questions and answers