Advertisement
Quick Links
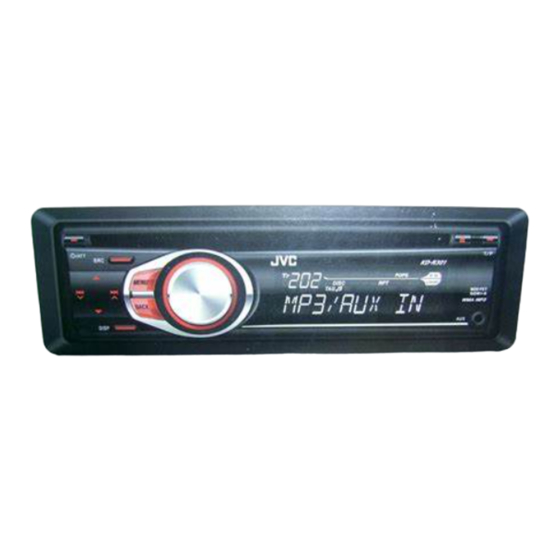
KD-RC301
CD RECEIVER: INSTRUCTIONS/INSTALLATION
CANCELING THE DISPLAY DEMONSTRATIONS
Turn on the power.
(Initial setting)
SETTING THE CLOCK
Turn on the power.
(Initial setting)
Select "CLOCK."
Select "CLOCK SET."
Adjust the hour.
Adjust the minute.
Finish the procedure.
MAINTENANCE
How to clean the connectors
Wipe the connectors with a
cotton swab or cloth moistened
with alcohol.
Connectors
Moisture condensation
Moisture may condense on the lens inside the unit. Eject
the disc and leave the unit turned on for a few hours until
the moisture has evaporated.
MORE ABOUT THIS UNIT
Basic operations
• By pressing SRC on the unit, you can also turn on the
power. If the source is ready, playback also starts.
• If you turn off the power while listening to a track,
playback will start from where it had been stopped
previously next time you turn on the power.
• If no operation is done for about 30 seconds after
pressing MENU button, the operation will be canceled.
Tuner operations
• During SSM search...
– All previously stored stations are erased and the
stations are stored anew.
– When SSM is over, the station stored in the lowest
preset number will be automatically tuned in.
Disc operations
Caution for DualDisc playback
• The Non-DVD side of a "DualDisc" does not comply with
the "Compact Disc Digital Audio" standard. Therefore,
the use of Non-DVD side of a DualDisc on this product
may not be recommended.
GET0646-001A
Select "DEMO OFF."
Finish the procedure.
To keep discs clean
Wipe in a straight line from center of disc to
edge. Do not use liquid cleaners, thinners, or
benzene.
To play new discs
Remove any rough areas from the inner and
outer edges of the disc.
General
• This unit has been designed to reproduce CDs/CD Texts,
and CD-Rs (Recordable)/CD-RWs (Rewritable) in audio
CD (CD-DA) and MP3/WMA formats.
Playing a CD-R or CD-RW
• Use only "finalized" CD-Rs or CD-RWs.
• This unit can play back multi-session discs; however,
unclosed sessions will be skipped while playing.
• Some CD-Rs or CD-RWs may not be played back on this
unit:
– Discs are dirty or scratched.
– Moisture condensation has occurred on the lens inside
the unit.
– The pickup lens inside the unit is dirty.
– The files on the CD-R/CD-RW are written using the
"Packet Write" method.
– There are improper recording conditions (missing data,
etc.) or media conditions (stained, scratched, warped,
etc.).
• CD-RWs may require a longer readout time since the
reflectance of CD-RWs is lower than that of regular CDs.
Thank you for purchasing a JVC product.
Please read all instructions carefully before operation, to ensure your complete understanding and to obtain the best
possible performance from the unit.
Installation/connection are explained at the last section of this manual (reverse page, indicated with
symbol).
[A]
PREPARATIONS
How to reset your unit
Reset the unit after installation is complete.
• Your preset adjustments will also be erased.
How to forcibly eject a disc
• Be careful not to drop the disc when it ejects.
• If this does not work, reset your unit.
For safety...
• Do not raise the volume level too much, as this will block
outside sounds, making driving dangerous.
• Stop the car before performing any complicated
operations.
Temperature inside the car...
If you have parked the car for a long time in hot or cold
weather, wait until the temperature in the car becomes
normal before operating the unit.
IMPORTANT FOR LASER PRODUCTS
1. CLASS 1 LASER PRODUCT
2. CAUTION: Do not open the top cover. There are no user serviceable parts inside the unit; leave all servicing to qualified
service personnel.
3. CAUTION: Visible and/or invisible class 1M laser radiation when open. Do not view directly with optical instruments.
4. REPRODUCTION OF LABEL: CAUTION LABEL, PLACED OUTSIDE THE UNIT.
[European Union only]
Do not use the following discs:
Single CD (8 cm disc)
Warped disc
Unusual shape
C-thru Disc (semi-transparent disc)
Playing an MP3/WMA disc
• This unit can play back MP3/WMA files with the
extension code <.mp3> or <.wma> (regardless of the
letter case—upper/lower).
• This unit can show the names of albums, artists
(performer), and tag (Version 1.0, 1.1, 2.2, 2.3, or 2.4) for
MP3 files and for WMA files
• This unit can display only one-byte characters. No other
characters can be correctly displayed.
• This unit can play back MP3/WMA files meeting the
conditions below:
– Bit rate: 8 kbps — 320 kbps
– Sampling frequency:
48 kHz, 44.1 kHz, 32 kHz (for MPEG-1)
24 kHz, 22.05 kHz, 16 kHz (for MPEG-2)
– Disc format: ISO 9660 Level 1/ Level 2, Romeo, Joliet,
Windows long file name
• The maximum number of characters for file/folder names
vary depending on the disc format used (includes 4
extension characters—<.mp3> or <.wma>).
– ISO 9660 Level 1: up to 12 characters; ISO 9660 Level
2: up to 31 characters; Romeo: up to 128 characters;
Joliet: up to 64 characters; Windows long file name: up
to 128 characters
1
0709DTSMDTJEIN
© 2009 Victor Company of Japan, Limited
Attaching the control panel
Detaching the control panel
Warning
If you need to operate the unit while driving, be sure to
look around carefully or you may be involved in a traffic
accident.
Caution on volume setting
Discs produce very little noise compared with other sources.
Lower the volume before playing a disc to avoid damaging
the speakers by the sudden increase of the output level.
Sticker and sticker residue
Stick-on label
Transparent or semi-transparent
parts on its recording area
• This unit can recognize a total of 512 files, 255 folders,
and 8 hierarchical levels.
• This unit can play back files recorded in VBR (variable bit
rate).
Files recorded in VBR have a discrepancy in the elapsed
time display, and do not show the actual elapsed time.
In particular, this difference becomes noticeable after
performing the search function.
• This unit cannot play back the following files:
– MP3 files: encoded in MP3i and MP3 PRO format; an
inappropriate format; layer 1/2.
– WMA files: encoded in lossless, professional, and voice
format; not based upon Windows Media® Audio; copy-
protected with DRM.
– Files which have data such as AIFF, ATRAC3, etc.
• The search function works but search speed is not
constant.
Title assignment
• If you try to assign titles to more than 30 station
frequencies, "NAME FULL" appears. Delete unwanted
titles before assignment.
EN
Advertisement

Related Manuals for JVC KD-RC301


Summary of Contents for JVC KD-RC301
- Page 1 Thank you for purchasing a JVC product. KD-RC301 Please read all instructions carefully before operation, to ensure your complete understanding and to obtain the best possible performance from the unit. CD RECEIVER: INSTRUCTIONS/INSTALLATION Installation/connection are explained at the last section of this manual (reverse page, indicated with symbol).
- Page 2 OPERATIONS Basic operations Control panel Remote controller—RM-RK50 • Control the volume or selection [Turn]. Installing battery • Confirm the selection [Press] . Select the source. • FM: Enter SSM preset mode [Hold] . Warning: To prevent accidents and damage • CD: Enter playback mode [Hold] . •...
- Page 3 SETTINGS Menu items Selectable settings Initial: Underlined BEEP • BEEP ON: Activates the keypress tone. Sound adjustments • BEEP OFF: Deactivates the keypress tone. AMP GAIN * • HIGH POWER: VOLUME 00 – VOLUME 50 Preset values • LOW POWER: VOLUME 00 – VOLUME 30 (Select if the maximum power of each speaker is less Indication (For) than 50 W to prevent damaging the speaker.) AM *...
- Page 4 ELECTRICAL CONNECTIONS The following illustration shows a typical installation. If you have any questions or require information regarding installation kits, consult your JVC car audio dealer or a company supplying kits. Typical connections • If you are not sure how to install this unit correctly, have it installed by a qualified technician.
Need help?
Do you have a question about the KD-RC301 and is the answer not in the manual?
Questions and answers