Table of Contents
Advertisement
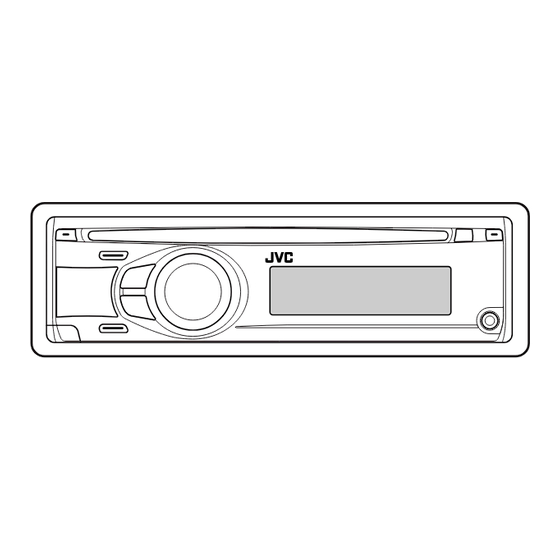
CD RECEIVER
RECEPTOR CON CD
RÉCEPTEUR CD
For canceling the display demonstration, see page 7.
Para cancelar la demostración en pantalla, consulte la página 7.
Pour annuler la démonstration des affichages, référez-vous à la page 7.
For installation and connections, refer to the separate manual.
Para la instalación y las conexiones, refiérase al manual separado.
Pour l'installation et les raccordements, se référer au manuel séparé.
INSTRUCTIONS
MANUAL DE INSTRUCCIONES
MANUEL D'INSTRUCTIONS
KD-A305/KD-R300
KD-A305/KD-R300
KD-A305/KD-R300
For customer Use:
Enter below the Model
No. and Serial No. which
are located on the top or
bottom of the cabinet. Retain
this information for future
reference.
Model No.
Serial No.
GET0570-001A
[J]
Advertisement
Chapters
Table of Contents
Troubleshooting

Related Manuals for JVC GET0570-001A


Summary of Contents for JVC GET0570-001A
- Page 1 MANUAL DE INSTRUCCIONES MANUEL D’INSTRUCTIONS KD-A305/KD-R300 KD-A305/KD-R300 KD-A305/KD-R300 For customer Use: Enter below the Model No. and Serial No. which are located on the top or bottom of the cabinet. Retain this information for future reference. Model No. Serial No. GET0570-001A...
-
Page 2: Important For Laser Products
– Connect the equipment into an outlet on a circuit different from that to which the receiver is connected. – Consult the dealer or an experienced radio/TV technician for help. Caution: Changes or modifications not approved by JVC could void the user’s authority to operate the equipment. IMPORTANT FOR LASER PRODUCTS 1. CLASS 1 LASER PRODUCT 2. -
Page 3: Table Of Contents
How to reset your unit • Your preset adjustments will also be erased (except the registered Bluetooth device, see page 10). How to forcibly eject a disc • Be careful not to drop the disc when it ejects. • If this does not work, reset your unit. Detaching the control panel Attaching the control panel Caution on volume setting:... -
Page 4: Basic Operations
Basic operations Using the control panel FM/AM HD RADIO SIRIUS/XM CD/CD-CH IPOD BT-PHONE/BT-AUDIO FM/HD RADIO FM * AM/HD RADIO AM * SIRIUS * /XM * CD * IPOD * BT-PHONE * EXT INPUT AUDIO * AUX IN * FM/HD Radio CD/CD-CH/IPOD FM/AM/HD RADIO/SIRIUS/XM CD/CD-CH... -
Page 5: Display Window
Display window Bluetooth indicator Tr (track) indicator Status of Bluetooth device (Device number, [P: 1 – 5]; signal strength, : 0 – 3]*; battery reminder, [ : 0 – 3]*) * As the number increases, the signal/battery power becomes stronger. Source display / Track number / Folder number / Time countdown indicator Playback source indicators—CH (CD changer), DISC... - Page 6 • Turns the power on if pressed briefly or attenuates the sound when the power is on. • Turns the power off if pressed and held. • Changes the tuner/HD Radio preset stations. • Changes the folder of the MP3/WMA. •...
-
Page 7: Cancel Display Demonstration/Set Clock
Preparation Cancel the display demonstration and set the clock • See also page 23. [Turn] [Press] When the power is turned off: Check the current clock time when “CLOCK DISP” is set to “CLOCK OFF,” (see page 23) When the power is turned on: Change the display information of the current source FM/AM Station name * CD/CD-CH... -
Page 8: Fm Station Automatic Presetting
Listening to the radio Select “FM” or “AM.” Search for a station to listen—Auto Search. Manual Search: Hold either one of the buttons until “M” flashes on the display, then press it repeatedly. • When receiving an FM stereo broadcast with sufficient signal strength, “ST” When an FM stereo broadcast is hard to receive •... -
Page 9: Disc Operations
Manual presetting (FM/AM) Select preset number “04.” Disc operations Stop playing and ejecting the disc Prohibiting disc ejection To cancel the prohibition, Selecting preset station Turn on the power. Insert a disc. Selecting a track/folder Continued on the next page OPERATIONS... -
Page 10: Using The Bluetooth ® Devices
Pressing (or holding) the following buttons allows you to... MP3/WMA: Select folder [Press] Select track [Hold] Reverse/fast-forward track Selecting the playback modes You can use only one of the following playback modes at a time. [Turn] [Press] Ô REPEAT RANDOM [Turn] [Press] REPEAT... -
Page 11: Connecting A Device
Registering using “OPEN” Preparation: Operate the device to turn on its Bluetooth function. Select “BT-PHONE” or “BT-AUDIO.” Select “NEW DEVICE.” Select “OPEN.” Enter a PIN (Personal Identification Number) code to the unit. • You can enter any number you like (1-digit to 16-digit number). -
Page 12: Using The Bluetooth Cellular Phone
When a text message comes in... If the cellular phone is compatible with text message (notified through JVC Bluetooth adapter) and “MSG INFO” (message info) is set to “AUTO” (see page 22), the unit rings to inform you of the message arrival. -
Page 13: Using The Bluetooth Audio Player
Enter setting menu (Device list) • Refer also to page 12 for connecting/disconnecting/ deleting a registered device. Bluetooth Information: If you wish to receive more information about Bluetooth, visit the following JVC web site: <http://www.jvc.co.jp/english/car/> (English website only) EXTERNAL DEVICES... -
Page 14: Listening To The Hd Radio ™ Broadcast
Listening to the HD Radio ™ Broadcast Before operating, connect HD Radio tuner box, KT-HD300 (separately purchased) to the CD changer jack on the rear of the unit. What is HD Radio Technology? HD Radio Technology can deliver high-quality digital sound—AM digital will have FM-like quality (in stereo) and FM digital will have CD-like quality—with static- free and clear reception. -
Page 15: Listening To The Cd Changer
Listening to the CD changer It is recommended to use a JVC MP3-compatible CD changer (separately purchased) with your unit. You can connect a CD changer to the CD changer jack on the rear of the unit. • You can only play conventional CDs (including CD Text) and MP3 discs. -
Page 16: Listening To The Satellite Radio
Before operating, connect either one of the following (separately purchased) to the CD changer jack on the rear of this unit. • JVC SIRIUS satellite radio System, SC-C1 and KS-SRA100, PnP, SC-VDOC1 and KS-SRA100, for listening to the SIRIUS Satellite radio. - Page 17 Select “SIRIUS” or “XM.” Select a category. Select a channel to listen. Storing channels in memory Tune in to a channel you want to store (see steps 1 – 3 above). Select preset number “04.” Checking the XM Satellite radio ID While selecting “XM,”...
-
Page 18: Listening To The Ipod
Listening to the iPod Before operating, connect the Interface adapter for iPod, KS-PD100 (separately purchased) to the CD changer jack on the rear of the unit. Preparation: Make sure “CH / IPOD” is selected in the “SRC SELECT” Select “IPOD.” Select a song. -
Page 19: Listening To The Other External Components
Listening to the other external components You can connect an external component to: • CD changer jack on the rear of this unit using the following adapters: – Line Input Adapter, KS-U57 (separately purchsed) – AUX Input Adapter, KS-U58 (separately purchsed) Preparation: Make sure “EXT INPUT”... -
Page 20: Selecting A Preset Sound Mode
Selecting a preset sound mode You can select a preset sound mode suitable to the music genre. • See also page 23 (“EQ”). Preset value setting for each sound mode Sound BASS mode Freq. Level USER 60 Hz ROCK 100 Hz CLASSIC 80 Hz POPS... -
Page 21: Title Assignment
Select a tone. [Turn] [Press] Adjust the sound elements of the selected tone. [Turn] [Press] Adjust the frequency. Adjust the level. Adjust the Q-slope. Range/selectable items Sound elements BASS MIDDLE TREBLE Frequency 60 Hz 500 Hz 80 Hz 1.0 kHz 100 Hz 1.5 kHz 120 Hz... -
Page 22: Bluetooth Settings
Appears only when a Bluetooth phone is connected. Appears only when a Bluetooth phone is connected and it is compatible with text message (notified through JVC Bluetooth adapter). Bluetooth Audio: Shows only “Version.” Change the setting accordingly. Setting menu (... -
Page 23: Menu Operations
Menu operations Category Menu items Selectable settings, [reference page] DEMO • DEMO ON Display demonstration • DEMO OFF CLOCK DISP * • CLOCK ON Clock display • CLOCK OFF CLOCK SET : Adjust the hour, then the minute, [7]. Clock setting [Initial: 1:00] CLOCK ADJ * •... -
Page 24: Ring Color
Category Menu items Selectable settings, [reference page] TAG DISPLAY • TAG ON Tag display • TAG OFF AREA • AREA US Tuner channel interval • AREA EU • AREA SA MONO * • MONO ON Monaural mode • MONO OFF SID * : Your SIRIUS identification number scrolls on the display 5 seconds after “SID”... -
Page 25: Low Power
Category Menu items Selectable settings, [reference page] FADER* R06 – F06 Fader BALANCE * L06 – R06 Balance LOUD • LOUD OFF Loudness • LOUD ON VOL ADJUST VOL ADJ –05 — Volume adjust VOL ADJ +05 [Initial: VOL ADJ 00] L/O MODE •... -
Page 26: Color Settings
SETTINGS : Disable “AM” in source selection. : Enable “AM” in source selection, [4]. : To use a JVC CD changer, [15], or an Apple iPod, [18]. : To connect portable audio player to the CD changer jack, [19]. : Disable “AUX IN” in source selection. -
Page 27: More About This Unit
More about this unit Basic operations Turning on the power • By pressing SRC button on the unit, you can also turn on the power. If the source is ready, playback also starts. Turning off the power • If you turn off the power while listening to a track, playback will start from where it had been stopped previously next time you turn on the power. -
Page 28: Bluetooth Operations
• CD-RWs may require a longer readout time since the reflectance of CD-RWs is lower than that of regular CDs. • Do not use the following CD-Rs or CD-RWs: – Discs with stickers, labels, or a protective seal stuck to the surface. –... -
Page 29: Satellite Radio
ERROR UNFOUND LOADING * Displays only when your cellular phone is equipped with these functions and is compatible with this unit. PLEASE WAIT RESET 8 Satellite radio iPod When you connect the iPod nano to the interface adapter, be sure to disconnect the headphones; otherwise, no sound is heard. -
Page 30: Troubleshooting
Troubleshooting What appears to be trouble is not always serious. Check the following points before calling a service center. Symptoms • Sound cannot be heard from the speakers. • The unit does not work at all. • “AUX” cannot be selected. •... - Page 31 Symptoms • Noise is generated. • A longer readout time is required (“READING” keeps flashing on the display). • Tracks do not play back in the order you have intended them to play. • The elapsed playing time is not correct. •...
- Page 32 Symptoms Remedies/Causes ANALOG DIGITAL AUTO DIGITAL ANALOG AUTO...
- Page 33 Symptoms • “CALL 1-888-539-SIRIUS TO SUBSCRIBE” scrolls on the display while listening to the SIRIUS Satellite radio. • No sound can be heard. “UPDATING” appears on the display. • “NO SIGNAL” appears on the display. • “NO ANTENNA” or “ANTENNA”appears on the display.
- Page 34 • The Bluetooth word mark and logos are owned by the Bluetooth SIG, Inc. and any use of such marks by Victor Company of Japan, Limited (JVC) is under license. Other trademarks and trade names are those of their respective owners.
-
Page 35: Maintenance
Maintenance How to clean the connectors Frequent detachment will deteriorate the connectors. To minimize this possibility, periodically wipe the connectors with a cotton swab or cloth moistened with alcohol, being careful not to damage the connectors. Connectors Moisture condensation Moisture may condense on the lens inside the unit in the following cases: •... -
Page 36: Specifications
Specifications AUDIO AMPLIFIER SECTION Power Output: 20 W RMS × 4 Channels at 4 Ω and ≤ 1% THD+N Signal-to-Noise Ratio: 80 dBA (reference: 1 W into 4 Ω) Load Impedance: Tone Control Range: Frequency Response: Line-Out Level/Impedance: Subwoofer-Out Level/Impedance: Output Impedance: Other Terminal: TUNER SECTION... -
Page 37: Cd Player Section
CD PLAYER SECTION Type: Signal Detection System: Number of Channels: Frequency Response: Dynamic Range: Signal-to-Noise Ratio: Wow and Flutter: MP3 Decoding Format: (MPEG1/2 Audio Layer 3) WMA (Windows Media® Audio) Decoding Format: GENERAL Power Requirement: Grounding System: Allowable Operating Temperature: Dimensions (W ×... - Page 38 Having TROUBLE with operation? Please reset your unit Refer to page of How to reset your unit Still having trouble?? USA ONLY Call 1-800-252-5722 http://www.jvc.com We can help you! EN, SP, FR © 2008 Victor Company of Japan, Limited 0808DTSMDTJEIN...
- Page 39 KD-A305/KD-R300 Installation/Connection Manual Manual de instalación/conexión Manuel d’installation/raccordement GET0570-002A ENGLISH WARNINGS • • • • • • • ESPAÑOL ADVERTENCIAS • • • • • • • 0808DTSMDTJEIN EN, SP, FR © 2008 Victor Company of Japan, Limited FRANÇAIS AVERTISSEMENTS •...
-
Page 40: Removing The Unit
La siguiente ilustración muestra una instalación típica. Si tiene alguna pregunta o necesita información acerca de las herramientas para instalación, consulte con su concesionario de JVC de equipos de audio para automóviles o a una compañía que suministra tales herramientas. -
Page 41: Electrical Connections
Connecting the external amplifier or subwoofer / Conexión de los amplificadores o subwoofer externos / Connexion d’amplificateurs extérieurs ou d’un caisson de grave You can connect an amplifier to upgrade your car stereo system. • Connect the remote lead (blue with white stripe) to the remote lead of the other equipment so that it can be controlled through this unit. - Page 42 CAUTION: • • To disconnect the connector Para desconectar el cable Pour déconnecter le connecteur • • PRECAUCION: • • • • PRECAUTION: • • • •...
- Page 43 CD RECEIVER KD-R404 For canceling the display demonstration, see page 7. For installation and connections, refer to the separate manual. INSTRUCTIONS GET0572-001A [UI]...
-
Page 44: Important For Laser Products
Lower the volume before playing a disc to avoid damaging the speakers by the sudden increase of the output level. Thank you for purchasing a JVC product. possible performance from the unit. For safety... • Do not raise the volume level too much, as this will block outside sounds, making driving dangerous. - Page 45 How to reset your unit • Your preset adjustments will also be erased (except the registered Bluetooth device, see page 10). How to forcibly eject a disc • Be careful not to drop the disc when it ejects. • If this does not work, reset your unit. Detaching the control panel Attaching the control panel CONTENTS...
-
Page 46: Basic Operations
Basic operations Using the control panel • FM/AM: Select preset station. • CD/CD-CH: Select folder. • IPOD: Enter the main menu/Pause playback/ Confirm selection. • BT-PHONE/BT-AUDIO: Enter/go back to previous Bluetooth menu. • Turn on the power. • Attenuate the sound (if the power is on). •... -
Page 47: Display Window
Display window Bluetooth indicator Tr (track) indicator Status of Bluetooth device (Device number, [P: 1 – 5]; signal strength, : 0 – 3]*; battery reminder, [ : 0 – 3]*) * As the number increases, the signal/battery power becomes stronger. Source display / Track number / Folder number / Time countdown indicator Playback source indicators—CH (CD changer), DISC... - Page 48 • Turns the power on if pressed briefly or attenuates the sound when the power is on. • Turns the power off if pressed and held. • Changes the preset stations. • Changes the folder of the MP3/WMA. • While playing an MP3 disc on an MP3-compatible CD changer: –...
-
Page 49: Preparation
Preparation Cancel the display demonstration and set the clock • See also page 20. [Turn] [Press] When the power is turned off: Check the current clock time when “CLOCK DISP” is set to “CLOCK OFF,” (see page 20) When the power is turned on: Change the display information of the current source Station name * FM/AM CD/CD-CH... -
Page 50: Listening To The Radio
Listening to the radio Select “FM” or “AM.” Search for a station to listen—Auto Search. Manual Search: Hold either one of the buttons until “M” flashes on the display, then press it repeatedly. • When receiving an FM stereo broadcast with sufficient signal strength, “ST” lights up on the display. -
Page 51: Disc Operations
Manual presetting (FM/AM) You can preset up to 18 stations for FM and 6 stations for AM. Ex.: Storing FM station of 92.50 MHz into preset number “04.” Select preset number “04.” Disc operations Stop playing and ejecting the disc •... -
Page 52: Selecting The Playback Modes
Pressing (or holding) the following buttons allows you to... MP3/WMA: Select folder [Press] Select track [Hold] Reverse/fast-forward track Selecting the playback modes You can use only one of the following playback modes at a time. [Turn] [Press] Ô REPEAT RANDOM [Turn] [Press] REPEAT... -
Page 53: Connecting A Device
Registering using “OPEN” Preparation: Operate the device to turn on its Bluetooth function. Select “BT-PHONE” or “BT-AUDIO.” Select “NEW DEVICE.” Select “OPEN.” Enter a PIN (Personal Identification Number) code to the unit. • You can enter any number you like (1-digit to 16-digit number). -
Page 54: Making A Call
When a text message comes in... If the cellular phone is compatible with text message (notified through JVC Bluetooth adapter) and “MSG INFO” (message info) is set to “AUTO” (see page 19), the unit rings to inform you of the message arrival. -
Page 55: Using The Bluetooth Audio Player
Enter setting menu (Device list) • Refer also to page 12 for connecting/disconnecting/ deleting a registered device. Bluetooth Information: If you wish to receive more information about Bluetooth, visit the following JVC web site: <http://www.jvc.co.jp/english/car/> (English website only) EXTERNAL DEVICES... -
Page 56: Listening To The Cd Changer
Listening to the CD changer It is recommended to use a JVC MP3-compatible CD changer (separately purchased) with your unit. You can connect a CD changer to the CD changer jack on the rear of the unit. • You can only play conventional CDs (including CD Text) and MP3 discs. -
Page 57: Listening To The Ipod
Listening to the iPod Before operating, connect the Interface adapter for iPod, KS-PD100 (separately purchased) to the CD changer jack on the rear of the unit. Preparation: Make sure “CH / IPOD” is selected in the “SRC SELECT” Select “IPOD.” Select a song. -
Page 58: Listening To The Other External Components
Listening to the other external components You can connect an external component to: • CD changer jack on the rear of this unit using the following adapters: – Line Input Adapter, KS-U57 (separately purchsed) – AUX Input Adapter, KS-U58 (separately purchsed) Preparation: Make sure “EXT INPUT”... -
Page 59: Settings
Selecting a preset sound mode You can select a preset sound mode suitable to the music genre. • See also page 20 (“EQ”). Preset value setting for each sound mode Sound BASS mode Freq. Level USER 60 Hz ROCK 100 Hz CLASSIC 80 Hz POPS... -
Page 60: Title Assignment
Select a tone. [Turn] [Press] Adjust the sound elements of the selected tone. [Turn] [Press] Adjust the frequency. Adjust the level. Adjust the Q-slope. Range/selectable items Sound elements BASS MIDDLE TREBLE Frequency 60 Hz 500 Hz 80 Hz 1.0 kHz 100 Hz 1.5 kHz 120 Hz... -
Page 61: Bluetooth Settings
Appears only when a Bluetooth phone is connected. Appears only when a Bluetooth phone is connected and it is compatible with text message (notified through JVC Bluetooth adapter). Bluetooth Audio: Shows only “Version.” Change the setting accordingly. Setting menu (... -
Page 62: Menu Operations
Menu operations Category Menu items Selectable settings, [reference page] DEMO • DEMO ON Display demonstration • DEMO OFF CLOCK DISP * • CLOCK ON Clock display • CLOCK OFF CLOCK SET : Adjust the hour, then the minute, [7]. Clock setting [Initial: 1:00] : Select a preset sound mode suitable to the music genre. - Page 63 Category Menu items Selectable settings, [reference page] MONO * • MONO ON Monaural mode • MONO OFF IF BAND • AUTO Intermediate frequency band • WIDE COLOR 01 : Select one of the preset or user color for display and button (except EQ/ –...
-
Page 64: High Power
: Disable “AM” in source selection. : Enable “AM” in source selection, [4]. : To use a JVC CD changer, [14], or an Apple iPod, [15]. : To connect portable audio player to the CD changer jack, [16]. : Disable “AUX IN” in source selection. -
Page 65: Color Settings
Color settings Creating your own color —USER Color You can create your own colors—“DAY COLOR” or “NIGHT COLOR.” DAY COLOR: Used when “DIMMER” is set to “DIMMER OFF.” NIGHT COLOR: Used when “DIMMER” is set to “DIMMER ON.” Select “COLOR” “USER.”... -
Page 66: More About This Unit
More about this unit Basic operations Turning on the power • By pressing SRC button on the unit, you can also turn on the power. If the source is ready, playback also starts. Turning off the power • If you turn off the power while listening to a track, playback will start from where it had been stopped previously next time you turn on the power. -
Page 67: Playing An Mp3/Wma Disc
• CD-RWs may require a longer readout time since the reflectance of CD-RWs is lower than that of regular CDs. • Do not use the following CD-Rs or CD-RWs: – Discs with stickers, labels, or a protective seal stuck to the surface. –... - Page 68 Notice: When operating an iPod, some operations may not be performed correctly or as intended. In this case, visit the following JVC web site: <http://www.jvc. co.jp/english/car/> (English website only) Title assignment • If you try to assign titles to more than 30 station frequencies, “NAME FULL”...
-
Page 69: Troubleshooting
Troubleshooting What appears to be trouble is not always serious. Check the following points before calling a service center. Symptoms • Sound cannot be heard from the speakers. • The unit does not work at all. • “AUX IN” cannot be selected. •... - Page 70 Symptoms • Disc cannot be played back. • Noise is generated. • A longer readout time is required (“READING” keeps flashing on the display). • Tracks do not play back in the order you have intended them to play. • The elapsed playing time is not correct. •...
- Page 71 Symptoms • The unit does not make pairing with the Bluetooth device. • Echo or noise occurs. • Phone sound quality is poor. • The sound is interrupted or skipped during playback of a Bluetooth audio device. • The connected audio device cannot be controlled.
- Page 72 • The Bluetooth word mark and logos are owned by the Bluetooth SIG, Inc. and any use of such marks by Victor Company of Japan, Limited (JVC) is under license. Other trademarks and trade names are those of their respective owners.
-
Page 73: Maintenance
Maintenance How to clean the connectors Frequent detachment will deteriorate the connectors. To minimize this possibility, periodically wipe the connectors with a cotton swab or cloth moistened with alcohol, being careful not to damage the connectors. Connectors Moisture condensation Moisture may condense on the lens inside the unit in the following cases: •... -
Page 74: Specifications
Specifications AUDIO AMPLIFIER SECTION Maximum Power Output: Continuous Power Output (RMS): Load Impedance: Tone Control Range: Frequency Response: Signal-to-Noise Ratio: Line-Out Level/Impedance: Subwoofer-Out Level/Impedance: Output Impedance: Other Terminal: TUNER SECTION Frequency Range: FM Tuner Usable Sensitivity: 50 dB Quieting Sensitivity: Alternate Channel Selectivity (400 kHz): Frequency Response: Stereo Separation:... -
Page 75: Cd Player Section
CD PLAYER SECTION Type: Signal Detection System: Number of Channels: Frequency Response: Dynamic Range: Signal-to-Noise Ratio: Wow and Flutter: MP3 Decoding Format: (MPEG1/2 Audio Layer 3) WMA (Windows Media® Audio) Decoding Format: GENERAL Power Requirement: Grounding System: Allowable Operating Temperature: Dimensions (W ×... - Page 76 Having TROUBLE with operation? Please reset your unit Refer to page of How to reset your unit © 2008 Victor Company of Japan, Limited 0808DTSMDTJEIN...
-
Page 77: Installation/Connection Manual
• Be sure to ground this unit to the car’s chassis again after installation. Notes: • Replace the fuse with one of the specified rating. If the fuse blows frequently, consult your JVC car audio dealer. • It is recommended to connect speakers with a maximum power of more than 50 W (both at the rear and at the front, with an impedance of 4 Ω... -
Page 78: Electrical Connections
When connecting the external components, refer also to the manuals supplied for the components and adapter. CAUTION: Before connecting the external components, make sure that the unit is turned off. You can connect the following JVC components to the CD changer jack. JVC component Model name CD changer (CD-CH) CH-X1500, etc. - Page 79 CD RECEIVER KD-R406/KD-R405 KD-R406/KD-R405 For canceling the display demonstration, see page 7. For installation and connections, refer to the separate manual. INSTRUCTIONS GET0571-001A [U/UH]...
-
Page 80: Important For Laser Products
Lower the volume before playing a disc to avoid damaging the speakers by the sudden increase of the output level. Thank you for purchasing a JVC product. possible performance from the unit. For safety... • Do not raise the volume level too much, as this will block outside sounds, making driving dangerous. - Page 81 How to reset your unit • Your preset adjustments will also be erased (except the registered Bluetooth device, see page 10). How to forcibly eject a disc • Be careful not to drop the disc when it ejects. • If this does not work, reset your unit. Detaching the control panel Attaching the control panel CONTENTS...
-
Page 82: Basic Operations
Basic operations Using the control panel FM/AM CD/CD-CH IPOD BT-PHONE/BT-AUDIO AM * CD * CD-CH * BT-PHONE * EXT INPUT AUX IN * CD/CD-CH/IPOD FM/AM CD/CD-CH IPOD BT-PHONE/BT-AUDIO /IPOD * BT-AUDIO * You cannot select these sources if they were disabled in the Menu (see “Menu operations”... -
Page 83: Display Window
Display window Bluetooth indicator Tr (track) indicator Status of Bluetooth device (Device number, [P: 1 – 5]; signal strength, : 0 – 3]*; battery reminder, [ : 0 – 3]*) * As the number increases, the signal/battery power becomes stronger. Source display / Track number / Folder number / Time countdown indicator Playback source indicators—CH (CD changer), DISC... - Page 84 • Turns the power on if pressed briefly or attenuates the sound when the power is on. • Turns the power off if pressed and held. • Changes the preset stations. • Changes the folder of the MP3/WMA. • While playing an MP3 disc on an MP3-compatible CD changer: –...
-
Page 85: Preparation
Preparation Cancel the display demonstration and set the clock • See also page 20. [Turn] [Press] When the power is turned off: Check the current clock time when “CLOCK DISP” is set to “CLOCK OFF,” (see page 20) When the power is turned on: Change the display information of the current source Station name * FM/AM Audio CD/CD Text: Disc title/performer *... -
Page 86: Listening To The Radio
Listening to the radio Select “FM” or “AM.” Search for a station to listen—Auto Search. Manual Search: Hold either one of the buttons until “M” flashes on the display, then press it repeatedly. • When receiving an FM stereo broadcast with sufficient signal strength, “ST” lights up on the display. -
Page 87: Disc Operations
Manual presetting (FM/AM) Select preset number “04.” Disc operations Stop playing and ejecting the disc Prohibiting disc ejection To cancel the prohibition, Selecting preset station Turn on the power. Insert a disc. Selecting a track/folder Continued on the next page OPERATIONS... -
Page 88: Using The Bluetooth ® Devices
Pressing (or holding) the following buttons allows you to... MP3/WMA: Select folder [Press] Select track [Hold] Reverse/fast-forward track Selecting the playback modes You can use only one of the following playback modes at a time. [Turn] [Press] Ô REPEAT RANDOM [Turn] [Press] REPEAT... -
Page 89: Connecting A Device
Registering using “OPEN” Preparation: Operate the device to turn on its Bluetooth function. Select “BT-PHONE” or “BT-AUDIO.” Select “NEW DEVICE.” Select “OPEN.” Enter a PIN (Personal Identification Number) code to the unit. • You can enter any number you like (1-digit to 16-digit number). -
Page 90: Using The Bluetooth Cellular Phone
When a text message comes in... If the cellular phone is compatible with text message (notified through JVC Bluetooth adapter) and “MSG INFO” (message info) is set to “AUTO” (see page 19), the unit rings to inform you of the message arrival. -
Page 91: Using The Bluetooth Audio Player
Enter setting menu (Device list) • Refer also to page 12 for connecting/disconnecting/ deleting a registered device. Bluetooth Information: If you wish to receive more information about Bluetooth, visit the following JVC web site: <http://www.jvc.co.jp/english/car/> (English website only) EXTERNAL DEVICES... -
Page 92: Listening To The Cd Changer
Listening to the CD changer It is recommended to use a JVC MP3-compatible CD changer (separately purchased) with your unit. You can connect a CD changer to the CD changer jack on the rear of the unit. • You can only play conventional CDs (including CD Text) and MP3 discs. -
Page 93: Listening To The Ipod
Listening to the iPod Before operating, connect the Interface adapter for iPod, KS-PD100 (separately purchased) to the CD changer jack on the rear of the unit. Preparation: Make sure “CH / IPOD” is selected in the “SRC SELECT” Select “IPOD.” Select a song. -
Page 94: Listening To The Other External Components
Listening to the other external components You can connect an external component to: • CD changer jack on the rear of this unit using the following adapters: – Line Input Adapter, KS-U57 (separately purchsed) – AUX Input Adapter, KS-U58 (separately purchsed) Preparation: Make sure “EXT INPUT”... -
Page 95: Settings
Selecting a preset sound mode You can select a preset sound mode suitable to the music genre. • See also page 20 (“EQ”). Preset value setting for each sound mode Sound BASS mode Freq. Level USER 60 Hz ROCK 100 Hz CLASSIC 80 Hz POPS... -
Page 96: Title Assignment
Select a tone. [Turn] [Press] Adjust the sound elements of the selected tone. [Turn] [Press] Adjust the frequency. Adjust the level. Adjust the Q-slope. Range/selectable items Sound elements BASS MIDDLE TREBLE Frequency 60 Hz 500 Hz 80 Hz 1.0 kHz 100 Hz 1.5 kHz 120 Hz... -
Page 97: Bluetooth Settings
Appears only when a Bluetooth phone is connected. Appears only when a Bluetooth phone is connected and it is compatible with text message (notified through JVC Bluetooth adapter). Bluetooth Audio: Shows only “Version.” Change the setting accordingly. Setting menu (... -
Page 98: Menu Operations
Menu operations Category Menu items Selectable settings, [reference page] DEMO • DEMO ON Display demonstration • DEMO OFF CLOCK DISP * • CLOCK ON Clock display • CLOCK OFF CLOCK SET : Adjust the hour, then the minute, [7]. Clock setting [Initial: 1:00] : Select a preset sound mode suitable to the music genre. - Page 99 Category Menu items Selectable settings, [reference page] MONO * • MONO ON Monaural mode • MONO OFF IF BAND • AUTO Intermediate frequency band • WIDE COLOR 01 : Select one of the preset or user color for display and button (except EQ/ –...
-
Page 100: High Power
: Disable “AM” in source selection. : Enable “AM” in source selection, [4]. : To use a JVC CD changer, [14], or an Apple iPod, [15]. : To connect portable audio player to the CD changer jack, [16]. : Disable “AUX IN” in source selection. -
Page 101: Color Settings
Color settings Creating your own color —USER Color You can create your own colors—“DAY COLOR” or “NIGHT COLOR.” DAY COLOR: Used when “DIMMER” is set to “DIMMER OFF.” NIGHT COLOR: Used when “DIMMER” is set to “DIMMER ON.” Select “COLOR” “USER.”... -
Page 102: More About This Unit
More about this unit Basic operations Turning on the power • By pressing SRC button on the unit, you can also turn on the power. If the source is ready, playback also starts. Turning off the power • If you turn off the power while listening to a track, playback will start from where it had been stopped previously next time you turn on the power. -
Page 103: Playing An Mp3/Wma Disc
• CD-RWs may require a longer readout time since the reflectance of CD-RWs is lower than that of regular CDs. • Do not use the following CD-Rs or CD-RWs: – Discs with stickers, labels, or a protective seal stuck to the surface. –... - Page 104 Notice: When operating an iPod, some operations may not be performed correctly or as intended. In this case, visit the following JVC web site: <http://www.jvc. co.jp/english/car/> (English website only) Title assignment • If you try to assign titles to more than 30 station frequencies, “NAME FULL”...
-
Page 105: Troubleshooting
Troubleshooting What appears to be trouble is not always serious. Check the following points before calling a service center. Symptoms • Sound cannot be heard from the speakers. • The unit does not work at all. • “AUX IN” cannot be selected. •... - Page 106 Symptoms • Disc cannot be played back. • Noise is generated. • A longer readout time is required (“READING” keeps flashing on the display). • Tracks do not play back in the order you have intended them to play. • The elapsed playing time is not correct. •...
- Page 107 Symptoms Remedies/Causes Continued on the next page REFERENCES...
- Page 108 • The Bluetooth word mark and logos are owned by the Bluetooth SIG, Inc. and any use of such marks by Victor Company of Japan, Limited (JVC) is under license. Other trademarks and trade names are those of their respective owners.
-
Page 109: Maintenance
Maintenance How to clean the connectors Frequent detachment will deteriorate the connectors. To minimize this possibility, periodically wipe the connectors with a cotton swab or cloth moistened with alcohol, being careful not to damage the connectors. Connectors Moisture condensation Moisture may condense on the lens inside the unit in the following cases: •... -
Page 110: Specifications
Specifications AUDIO AMPLIFIER SECTION Maximum Power Output: Continuous Power Output (RMS): Load Impedance: Tone Control Range: Frequency Response: Signal-to-Noise Ratio: Line-Out Level/Impedance: Subwoofer-Out Level/Impedance: Output Impedance: Other Terminal: TUNER SECTION Frequency Range: FM Tuner Usable Sensitivity: 50 dB Quieting Sensitivity: Alternate Channel Selectivity (400 kHz): Frequency Response: Stereo Separation:... -
Page 111: Cd Player Section
CD PLAYER SECTION Type: Signal Detection System: Number of Channels: Frequency Response: Dynamic Range: Signal-to-Noise Ratio: Wow and Flutter: MP3 Decoding Format: (MPEG1/2 Audio Layer 3) WMA (Windows Media® Audio) Decoding Format: GENERAL Power Requirement: Grounding System: Allowable Operating Temperature: Dimensions (W ×... - Page 112 Having TROUBLE with operation? Please reset your unit Refer to page of How to reset your unit EN, TH © 2008 Victor Company of Japan, Limited 0808DTSMDTJEIN...
-
Page 113: Installation/Connection Manual
• Be sure to ground this unit to the car’s chassis again after installation. Notes: • Replace the fuse with one of the specified rating. If the fuse blows frequently, consult your JVC car audio dealer. • It is recommended to connect speakers with a maximum power of more than 50 W (both at the rear and at the front, with an impedance of 4 Ω... - Page 114 The following illustration shows a typical installation. If you have any questions or require information regarding installation kits, consult your JVC car audio dealer or a company supplying kits. • If you are not sure how to install this unit correctly, have it installed by a qualified technician.
-
Page 115: Electrical Connections
ENGLISH ELECTRICAL CONNECTIONS Typical connections / °“√‡™◊ Ë Õ ¡µË Õ ·∫∫ª°µ Before connecting: Check the wiring in the vehicle carefully. Incorrect connection may cause serious damage to this unit. The leads of the power cord and those of the connector from the car body may be different in color. Connect the colored leads of the power cord in the order specified in the illustration below. - Page 116 When connecting the external components, refer also to the manuals supplied for the components and adapter. CAUTION: Before connecting the external components, make sure that the unit is turned off. You can connect the following JVC components to the CD changer jack. JVC component Model name CD changer (CD-CH) CH-X1500, etc.
- Page 117 • Be sure to ground this unit to the car’s chassis again after installation. Notes: • Replace the fuse with one of the specified rating. If the fuse blows frequently, consult your JVC car audio dealer. • It is recommended to connect speakers with a maximum power of more than 50 W (both at the rear and at the front, with an impedance of 4 Ω...
- Page 118 The following illustration shows a typical installation. If you have any questions or require information regarding installation kits, consult your JVC car audio dealer or a company supplying kits. • If you are not sure how to install this unit correctly, have it installed by a qualified technician.
-
Page 119: Pemecahan Masalah
ENGLISH ELECTRICAL CONNECTIONS Typical connections / Ciri khas sambungan-sambungan Before connecting: Check the wiring in the vehicle carefully. Incorrect connection may cause serious damage to this unit. The leads of the power cord and those of the connector from the car body may be different in color. Connect the colored leads of the power cord in the order specified in the illustration below. - Page 120 Set “L/O MODE” to “REAR” (See page 22 of the INSTRUCTIONS.) Setel “L/O MODE ” ke “REAR” (Lihat halaman 22 dari BUKU PETUNJUK.) JVC Amplifier Penguat JVC Set “L/O MODE” to “SUB.W” (See page 22 of the INSTRUCTIONS.) Setel “L/O MODE ” ke “SUB.W” (Lihat halaman 22 dari BUKU PETUNJUK.)
- Page 121 CD RECEIVER For canceling the display demonstration, see page 7. For installation and connections, refer to the separate manual. INSTRUCTIONS KD-R406/KD-R405 KD-R406/KD-R405 GET0571-005A [UT]...
-
Page 122: Important For Laser Products
Lower the volume before playing a disc to avoid damaging the speakers by the sudden increase of the output level. Thank you for purchasing a JVC product. possible performance from the unit. For safety... • Do not raise the volume level too much, as this will block outside sounds, making driving dangerous. - Page 123 How to reset your unit • Your preset adjustments will also be erased (except the registered Bluetooth device, see page 10). How to forcibly eject a disc • Be careful not to drop the disc when it ejects. • If this does not work, reset your unit. Detaching the control panel Attaching the control panel CONTENTS...
-
Page 124: Basic Operations
Basic operations Using the control panel FM/AM CD/CD-CH IPOD BT-PHONE/BT-AUDIO AM * CD * CD-CH * BT-PHONE * EXT INPUT AUX IN * CD/CD-CH/IPOD FM/AM CD/CD-CH IPOD BT-PHONE/BT-AUDIO /IPOD * BT-AUDIO * You cannot select these sources if they were disabled in the Menu (see “Menu operations”... -
Page 125: Display Window
Display window Bluetooth indicator Tr (track) indicator Status of Bluetooth device (Device number, [P: 1 – 5]; signal strength, : 0 – 3]*; battery reminder, [ : 0 – 3]*) * As the number increases, the signal/battery power becomes stronger. Source display / Track number / Folder number / Time countdown indicator Playback source indicators—CH (CD changer), DISC... - Page 126 • Turns the power on if pressed briefly or attenuates the sound when the power is on. • Turns the power off if pressed and held. • Changes the preset stations. • Changes the folder of the MP3/WMA. • While playing an MP3 disc on an MP3-compatible CD changer: –...
-
Page 127: Preparation
Preparation Cancel the display demonstration and set the clock • See also page 20. [Turn] [Press] When the power is turned off: Check the current clock time when “CLOCK DISP” is set to “CLOCK OFF,” (see page 20) When the power is turned on: Change the display information of the current source Station name * FM/AM Audio CD/CD Text: Disc title/performer *... -
Page 128: Listening To The Radio
Listening to the radio Select “FM” or “AM.” Search for a station to listen—Auto Search. Manual Search: Hold either one of the buttons until “M” flashes on the display, then press it repeatedly. • When receiving an FM stereo broadcast with sufficient signal strength, “ST” lights up on the display. -
Page 129: Disc Operations
Manual presetting (FM/AM) Select preset number “04.” Disc operations Stop playing and ejecting the disc Prohibiting disc ejection To cancel the prohibition, Selecting preset station Turn on the power. Insert a disc. Selecting a track/folder Continued on the next page OPERATIONS... -
Page 130: Using The Bluetooth ® Devices
Pressing (or holding) the following buttons allows you to... MP3/WMA: Select folder [Press] Select track [Hold] Reverse/fast-forward track Selecting the playback modes You can use only one of the following playback modes at a time. [Turn] [Press] Ô REPEAT RANDOM [Turn] [Press] REPEAT... -
Page 131: Connecting A Device
Registering using “OPEN” Preparation: Operate the device to turn on its Bluetooth function. Select “BT-PHONE” or “BT-AUDIO.” Select “NEW DEVICE.” Select “OPEN.” Enter a PIN (Personal Identification Number) code to the unit. • You can enter any number you like (1-digit to 16-digit number). -
Page 132: Using The Bluetooth Cellular Phone
When a text message comes in... If the cellular phone is compatible with text message (notified through JVC Bluetooth adapter) and “MSG INFO” (message info) is set to “AUTO” (see page 19), the unit rings to inform you of the message arrival. -
Page 133: Using The Bluetooth Audio Player
Enter setting menu (Device list) • Refer also to page 12 for connecting/disconnecting/ deleting a registered device. Bluetooth Information: If you wish to receive more information about Bluetooth, visit the following JVC web site: <http://www.jvc.co.jp/english/car/> (English website only) EXTERNAL DEVICES... -
Page 134: Listening To The Cd Changer
Listening to the CD changer It is recommended to use a JVC MP3-compatible CD changer (separately purchased) with your unit. You can connect a CD changer to the CD changer jack on the rear of the unit. • You can only play conventional CDs (including CD Text) and MP3 discs. -
Page 135: Listening To The Ipod
Listening to the iPod Before operating, connect the Interface adapter for iPod, KS-PD100 (separately purchased) to the CD changer jack on the rear of the unit. Preparation: Make sure “CH / IPOD” is selected in the “SRC SELECT” Select “IPOD.” Select a song. -
Page 136: Listening To The Other External Components
Listening to the other external components You can connect an external component to: • CD changer jack on the rear of this unit using the following adapters: – Line Input Adapter, KS-U57 (separately purchsed) – AUX Input Adapter, KS-U58 (separately purchsed) Preparation: Make sure “EXT INPUT”... -
Page 137: Selecting A Preset Sound Mode
Selecting a preset sound mode You can select a preset sound mode suitable to the music genre. • See also page 20 (“EQ”). Preset value setting for each sound mode Sound BASS mode Freq. Level USER 60 Hz ROCK 100 Hz CLASSIC 80 Hz POPS... -
Page 138: Title Assignment
Select a tone. [Turn] [Press] Adjust the sound elements of the selected tone. [Turn] [Press] Adjust the frequency. Adjust the level. Adjust the Q-slope. Range/selectable items Sound elements BASS MIDDLE TREBLE Frequency 60 Hz 500 Hz 80 Hz 1.0 kHz 100 Hz 1.5 kHz 120 Hz... -
Page 139: Bluetooth Settings
Appears only when a Bluetooth phone is connected. Appears only when a Bluetooth phone is connected and it is compatible with text message (notified through JVC Bluetooth adapter). Bluetooth Audio: Shows only “Version.” Change the setting accordingly. Setting menu (... -
Page 140: Menu Operations
Menu operations Category Menu items Selectable settings, [reference page] DEMO • DEMO ON Display demonstration • DEMO OFF CLOCK DISP * • CLOCK ON Clock display • CLOCK OFF CLOCK SET : Adjust the hour, then the minute, [7]. Clock setting [Initial: 1:00] : Select a preset sound mode suitable to the music genre. - Page 141 Category Menu items Selectable settings, [reference page] MONO * • MONO ON Monaural mode • MONO OFF IF BAND • AUTO Intermediate frequency band • WIDE COLOR 01 : Select one of the preset or user color for display and button (except EQ/ –...
-
Page 142: Low Power
: Disable “AM” in source selection. : Enable “AM” in source selection, [4]. : To use a JVC CD changer, [14], or an Apple iPod, [15]. : To connect portable audio player to the CD changer jack, [16]. : Disable “AUX IN” in source selection. -
Page 143: Color Settings
Color settings Creating your own color —USER Color You can create your own colors—“DAY COLOR” or “NIGHT COLOR.” DAY COLOR: Used when “DIMMER” is set to “DIMMER OFF.” NIGHT COLOR: Used when “DIMMER” is set to “DIMMER ON.” Select “COLOR” “USER.”... -
Page 144: More About This Unit
More about this unit Basic operations Turning on the power • By pressing SRC button on the unit, you can also turn on the power. If the source is ready, playback also starts. Turning off the power • If you turn off the power while listening to a track, playback will start from where it had been stopped previously next time you turn on the power. -
Page 145: Playing An Mp3/Wma Disc
• CD-RWs may require a longer readout time since the reflectance of CD-RWs is lower than that of regular CDs. • Do not use the following CD-Rs or CD-RWs: – Discs with stickers, labels, or a protective seal stuck to the surface. –... - Page 146 Notice: When operating an iPod, some operations may not be performed correctly or as intended. In this case, visit the following JVC web site: <http://www.jvc. co.jp/english/car/> (English website only) Title assignment • If you try to assign titles to more than 30 station frequencies, “NAME FULL”...
-
Page 147: Troubleshooting
Troubleshooting What appears to be trouble is not always serious. Check the following points before calling a service center. Symptoms • Sound cannot be heard from the speakers. • The unit does not work at all. • “AUX IN” cannot be selected. •... - Page 148 Symptoms • Disc cannot be played back. • Noise is generated. • A longer readout time is required (“READING” keeps flashing on the display). • Tracks do not play back in the order you have intended them to play. • The elapsed playing time is not correct. •...
- Page 149 Symptoms Remedies/Causes Continued on the next page REFERENCES...
- Page 150 • The Bluetooth word mark and logos are owned by the Bluetooth SIG, Inc. and any use of such marks by Victor Company of Japan, Limited (JVC) is under license. Other trademarks and trade names are those of their respective owners.
-
Page 151: Maintenance
Maintenance How to clean the connectors Frequent detachment will deteriorate the connectors. To minimize this possibility, periodically wipe the connectors with a cotton swab or cloth moistened with alcohol, being careful not to damage the connectors. Connectors Moisture condensation Moisture may condense on the lens inside the unit in the following cases: •... -
Page 152: Specifications
Specifications AUDIO AMPLIFIER SECTION Maximum Power Output: Continuous Power Output (RMS): Load Impedance: Tone Control Range: Frequency Response: Signal-to-Noise Ratio: Line-Out Level/Impedance: Subwoofer-Out Level/Impedance: Output Impedance: Other Terminal: TUNER SECTION Frequency Range: FM Tuner Usable Sensitivity: 50 dB Quieting Sensitivity: Alternate Channel Selectivity (400 kHz): Frequency Response: Stereo Separation:... -
Page 153: Cd Player Section
CD PLAYER SECTION Type: Signal Detection System: Number of Channels: Frequency Response: Dynamic Range: Signal-to-Noise Ratio: Wow and Flutter: MP3 Decoding Format: (MPEG1/2 Audio Layer 3) WMA (Windows Media® Audio) Decoding Format: GENERAL Power Requirement: Grounding System: Allowable Operating Temperature: Dimensions (W ×... - Page 154 Having TROUBLE with operation? Please reset your unit Refer to page of How to reset your unit EN, CT © 2008 Victor Company of Japan, Limited 0808DTSMDTJEIN...
- Page 155 KD-R406/KD-R405 Installation/Connection Manual 安裝/連接手冊 GET0571-010A [UT] ENGLISH WARNINGS • • • Ω Ω • • • • 硬盒/控制面板 墊圈( ) 鎖定螺母( 板條型把手 中文 本機僅可使用直流 壓變換器,可以在 警告 為防止短路,建議在安裝本機之前,拔開電池的負極,並把所有電路都連接好。 • 安裝完畢後務必將本機的地線重新接至車身。 注意: • 把保險絲更換為額定負荷值的保險絲。如果保險絲經常燒壞,請向 • 後置和前置揚聲器的最大輸入功率應大於 請調校“ • 為防止電源短路,請用絕緣帶包住未使用電線的端子。 • 本機使用後,散熱片會很熱。因此,在移出本機時,小心不要觸摸散熱片。 散熱片 電源和揚聲器接線注意事項:...
- Page 156 INSTALLATION (IN-DASH MOUNTING) • 若選用支撐架 防火板 儀表板 將本機安裝在少於 安裝(裝設、固定在儀表板內) 下面的圖解表示了典型的安裝程序。如果您有問題,或需要有關配套元件的資料,請向 汽車音響分銷商或配套元件供應公司詢問。 如果您不能確定如何正確地安裝本機,應請合格的技術人員來安裝。 進行所需的電路連接。 拆卸本機 在拆卸本機前,應將本機後部的固定和連接部分鬆開。 按圖所示,將兩片板條型把手插入卡槽,然 後輕穩地從兩側向外拉兩片把手,本機隨 之拉出。 以豐田牌( )汽車為例:首先取出汽車收音機,然後將本機裝入其空出的位置。 支撐架(選用的) 平頭螺絲釘( 托座 螺絲釘(選用的) 空殼 的角度。 注意 : 把本機安裝在托座上時,務必使用 您豎起本機時,小心不要損壞底部的保險絲。 不隨本機提供。 弄彎機殼的突舌,把外套機殼牢固 在儀表板內。 若不使用外套機殼安裝本機 × ) 平頭螺絲釘( 托座 長的螺絲釘。如使用過長的螺絲釘,會損壞本機。 × )...
- Page 157 ENGLISH ELECTRICAL CONNECTIONS 典型的接線方法 輸出端子(參閱圖表 ) 天線端子 白色帶有黑色條紋 白色 灰色帶有黑色條紋 左揚聲器(前置) TROUBLESHOOTING 中文 電路連接 接線前: 仔細檢查汽車內的線路。不正確的接線會導致本機嚴重損壞。 電源線的引線和車身的連接器引線在顏色上可能有所不同。 依照下圖所示之次序連接電源線的顏色導線。 將天線的電線連接起來。 最後,把配線束的插頭插在本機上。 本機後背接地端子 保險絲 接至外接裝置(參閱圖表 ) 黑色 接至金屬體或汽車底盤 黃色 接至保險絲單元內的帶電端子,保險絲單元與車裝電池相連接 (用於旁路點火開關)(恆定 紅色 接至保險絲單元內的附屬端子 藍色 接至自動天線(若有裝設)(最大 藍色帶有白色條紋 灰色 綠色帶有黑色條紋 右揚聲器(前置) 不隨本機提供。 本機未安裝時,進行工作狀況檢查之前,必須把這導線接上,否則不能開啟電源。 故障排除 保險絲燒斷。...
- Page 158 Set “L/O MODE” to “REAR” (See page 22 of the INSTRUCTIONS.) 將“L/O MODE”設定為“REAR”(參閱使用說明書的第 22 頁。) JVC Amplifier JVC 功率放大器 後置揚聲器 Set “L/O MODE” to “SUB.W” (See page 22 of the INSTRUCTIONS.) 將“L/O MODE”設定為“SUB.W”(參閱使用說明書的第 22 頁。) JVC Amplifier JVC 功率放大器 重低音揚聲器...
-
Page 159: Manual De Instrucciones
CD RECEIVER RECEPTOR CON CD For canceling the display demonstration, see page 4. Para cancelar la demostración en pantalla, consulte la página 4. For installation and connections, refer to the separate manual. Para la instalación y las conexiones, refiérase al manual separado. INSTRUCTIONS MANUAL DE INSTRUCCIONES KD-S26... - Page 160 – Connect the equipment into an outlet on a circuit different from that to which the receiver is connected. – Consult the dealer or an experienced radio/TV technician for help. Caution: Changes or modifications not approved by JVC could void the user’s authority to operate the equipment. IMPORTANT FOR LASER PRODUCTS 1. CLASS 1 LASER PRODUCT 2.
-
Page 161: How To Reset Your Unit
How to reset your unit • Your preset adjustments will also be erased (except the registered Bluetooth device, see page 10). How to forcibly eject a disc • Be careful not to drop the disc when it ejects. • If this does not work, reset your unit. Attaching the control panel Detaching the control panel Caution on volume setting:... -
Page 162: Canceling The Display Demonstration
Canceling the display demonstration Turn on the power. Setting the clock Turn on the power. Select “CLOCK.” Select “CLOCK SET.” Adjust the hour. Adjust the minute. Finish the procedure. Select “DEMO OFF.” (Initial setting) Finish the procedure. (Initial setting) -
Page 163: Basic Operations
Basic operations Using the control panel • FM/AM: Select preset station. • HD RADIO: Select channel. • SIRIUS/XM: Select category. • CD/CD-CH: Select folder. • IPOD: Enter the main menu/Pause playback/ Confirm selection. • BT-PHONE/BT-AUDIO: Enter/go back to previous Bluetooth menu. •... -
Page 164: Using The Remote Controller (Rm-Rk50)
Display window Bluetooth indicator Tr (track) indicator Status of Bluetooth device (Device number, [P: 1 – 5]; signal strength, : 0 – 3]*; battery reminder, [ : 0 – 3]*) * As the number increases, the signal/battery power becomes stronger. Source display / Track number / Folder number / Time countdown indicator Playback source indicators—CH (CD changer), DISC... - Page 165 • Turns the power on if pressed briefly or attenuates the sound when the power is on. • Turns the power off if pressed and held. • Changes the tuner/HD Radio preset stations. • Changes the folder of the MP3/WMA. •...
-
Page 166: Listening To The Radio
Listening to the radio Select “FM” or “AM.” Search for a station to listen—Auto Search. Manual Search: Hold either one of the buttons until “M” flashes on the display, then press it repeatedly. • When receiving an FM stereo broadcast with sufficient signal strength, “ST” When an FM stereo broadcast is hard to receive •... -
Page 167: Disc Operations
Manual presetting (FM/AM) You can preset up to 18 stations for FM and 6 stations for AM. Ex.: Storing FM station of 92.50 MHz into preset number “04.” Select preset number “04.” Disc operations Stop playing and ejecting the disc •... -
Page 168: Using The Bluetooth ® Devices
Pressing (or holding) the following buttons allows you to... MP3/WMA: Select folder [Press] Select track [Hold] Reverse/fast-forward track Selecting the playback modes You can use only one of the following playback modes at a time. [Turn] [Press] Ô REPEAT RANDOM [Turn] [Press] REPEAT... -
Page 169: External Devices
Registering using “OPEN” Preparation: Operate the device to turn on its Bluetooth function. Select “BT-PHONE” or “BT-AUDIO.” Select “NEW DEVICE.” Select “OPEN.” Enter a PIN (Personal Identification Number) code to the unit. • You can enter any number you like (1-digit to 16-digit number). -
Page 170: Using The Bluetooth Cellular Phone
When a text message comes in... If the cellular phone is compatible with text message (notified through JVC Bluetooth adapter) and “MSG INFO” (message info) is set to “AUTO” (see page 22), the unit rings to inform you of the message arrival. - Page 171 Enter setting menu (Device list) • Refer also to page 12 for connecting/disconnecting/ deleting a registered device. Bluetooth Information: If you wish to receive more information about Bluetooth, visit the following JVC web site: <http://www.jvc.co.jp/english/car/> (English website only) EXTERNAL DEVICES...
-
Page 172: Listening To The Hd Radio ™ Broadcast
Listening to the HD Radio ™ Broadcast Before operating, connect HD Radio tuner box, KT-HD300 (separately purchased) to the CD changer jack on the rear of the unit. What is HD Radio Technology? HD Radio Technology can deliver high-quality digital sound—AM digital will have FM-like quality (in stereo) and FM digital will have CD-like quality—with static- free and clear reception. -
Page 173: Listening To The Cd Changer
Listening to the CD changer It is recommended to use a JVC MP3-compatible CD changer (separately purchased) with your unit. You can connect a CD changer to the CD changer jack on the rear of the unit. • You can only play conventional CDs (including CD Text) and MP3 discs. -
Page 174: Listening To The Satellite Radio
Before operating, connect either one of the following (separately purchased) to the CD changer jack on the rear of this unit. • JVC SIRIUS satellite radio System, SC-C1 and KS-SRA100, PnP, SC-VDOC1 and KS-SRA100, for listening to the SIRIUS Satellite radio. -
Page 175: Storing Channels In Memory
Select “SIRIUS” or “XM.” Select a category. SIRIUS: If you select “ALL,” you can tune in to all the channels of all categories. Select a channel to listen. • Holding the button changes the channels rapidly. • While searching, invalid and unsubscribed channels are skipped. XM: If you do not select a channel within 15 seconds, category selected in step 2 Storing channels in memory You can preset up to 18 channels for both SIRIUS and... -
Page 176: Listening To The Ipod
Listening to the iPod Before operating, connect the Interface adapter for iPod, KS-PD100 (separately purchased) to the CD changer jack on the rear of the unit. Preparation: Make sure “CH / IPOD” is selected in the “SRC SELECT” Select “IPOD.” Select a song. -
Page 177: Listening To The Other External Components
Change the display information Folder name Track name Current track number with the elapsed playing time with the clock time (back to the beginning) Listening to the other external components You can connect an external component to: • CD changer jack on the rear of this unit using the following adapters: –... -
Page 178: Selecting A Preset Sound Mode
Selecting a preset sound mode You can select a preset sound mode suitable to the music genre. • See also page 23 (“EQ”). Preset value setting for each sound mode Sound BASS mode Freq. Level USER 60 Hz ROCK 100 Hz CLASSIC 80 Hz POPS... -
Page 179: Title Assignment
Select a tone. [Turn] [Press] Adjust the sound elements of the selected tone. [Turn] [Press] Adjust the frequency. Adjust the level. Adjust the Q-slope. Range/selectable items Sound elements BASS MIDDLE TREBLE Frequency 60 Hz 500 Hz 80 Hz 1.0 kHz 100 Hz 1.5 kHz 120 Hz... -
Page 180: Bluetooth Settings
Appears only when a Bluetooth phone is connected. Appears only when a Bluetooth phone is connected and it is compatible with text message (notified through JVC Bluetooth adapter). Bluetooth Audio: Shows only “Version.” Change the setting accordingly. Setting menu (... -
Page 181: Menu Operations
Menu operations Category Menu items Selectable settings, [reference page] DEMO • DEMO ON Display demonstration • DEMO OFF CLOCK DISP * • CLOCK ON Clock display • CLOCK OFF CLOCK SET : Adjust the hour, then the minute, [4]. Clock setting [Initial: 1:00] CLOCK ADJ * •... - Page 182 Category Menu items Selectable settings, [reference page] TAG DISPLAY • TAG ON Tag display • TAG OFF AREA • AREA US Tuner channel interval • AREA EU • AREA SA MONO * • MONO ON Monaural mode • MONO OFF SID * : Your SIRIUS identification number scrolls on the display 5 seconds after “SID”...
- Page 183 Category Menu items Selectable settings, [reference page] FADER* R06 – F06 Fader BALANCE * L06 – R06 Balance LOUD • LOUD OFF Loudness • LOUD ON VOL ADJUST VOL ADJ –05 — Volume adjust VOL ADJ +05 [Initial: VOL ADJ 00] L/O MODE •...
-
Page 184: Color Settings
SETTINGS : Disable “AM” in source selection. : Enable “AM” in source selection, [5]. : To use a JVC CD changer, [15], or an Apple iPod, [18]. : To connect portable audio player to the CD changer jack, [19]. : Disable “AUX IN” in source selection. -
Page 185: More About This Unit
More about this unit Basic operations Turning on the power • By pressing SRC button on the unit, you can also turn on the power. If the source is ready, playback also starts. Turning off the power • If you turn off the power while listening to a track, playback will start from where it had been stopped previously next time you turn on the power. - Page 186 • CD-RWs may require a longer readout time since the reflectance of CD-RWs is lower than that of regular CDs. • Do not use the following CD-Rs or CD-RWs: – Discs with stickers, labels, or a protective seal stuck to the surface. –...
- Page 187 Notice: When operating an iPod, some operations may not be performed correctly or as intended. In this case, visit the following JVC web site: <http://www.jvc. co.jp/english/car/> (English website only) Title assignment • If you try to assign titles to more than 30 station frequencies, “NAME FULL”...
-
Page 188: Troubleshooting
Troubleshooting What appears to be trouble is not always serious. Check the following points before calling a service center. Symptoms • Sound cannot be heard from the speakers. • The unit does not work at all. • “AUX” cannot be selected. •... - Page 189 Symptoms • Noise is generated. • A longer readout time is required (“READING” keeps flashing on the display). • Tracks do not play back in the order you have intended them to play. • The elapsed playing time is not correct. •...
- Page 190 Symptoms • The sound is interrupted or skipped during playback of a Bluetooth audio device. • The connected audio device cannot be controlled. • Sound quality changes when receiving HD Radio stations. • No sound can be heard. • “RESET 8” appears on the display. •...
- Page 191 Symptoms • “CALL 1-888-539-SIRIUS TO SUBSCRIBE” scrolls on the display while listening to the SIRIUS Satellite radio. • No sound can be heard. “UPDATING” appears on the display. • “NO SIGNAL” appears on the display. • “NO ANTENNA” or “ANTENNA”appears on the display.
- Page 192 • The Bluetooth word mark and logos are owned by the Bluetooth SIG, Inc. and any use of such marks by Victor Company of Japan, Limited (JVC) is under license. Other trademarks and trade names are those of their respective owners.
-
Page 193: Maintenance
Maintenance How to clean the connectors Frequent detachment will deteriorate the connectors. To minimize this possibility, periodically wipe the connectors with a cotton swab or cloth moistened with alcohol, being careful not to damage the connectors. Connectors Moisture condensation Moisture may condense on the lens inside the unit in the following cases: •... -
Page 194: Specifications
Specifications AUDIO AMPLIFIER SECTION Power Output: 20 W RMS × 4 Channels at 4 Ω and ≤ 1% THD+N Signal-to-Noise Ratio: 80 dBA (reference: 1 W into 4 Ω) Load Impedance: Tone Control Range: Frequency Response: Line-Out Level/Impedance: Subwoofer-Out Level/Impedance: Output Impedance: Other Terminal: TUNER SECTION... - Page 195 CD PLAYER SECTION Type: Signal Detection System: Number of Channels: Frequency Response: Dynamic Range: Signal-to-Noise Ratio: Wow and Flutter: MP3 Decoding Format: (MPEG1/2 Audio Layer 3) WMA (Windows Media® Audio) Decoding Format: GENERAL Power Requirement: Grounding System: Allowable Operating Temperature: Dimensions (W ×...
- Page 196 Having TROUBLE with operation? Please reset your unit Refer to page of How to reset your unit Still having trouble?? USA ONLY Call 1-800-252-5722 http://www.jvc.com We can help you! EN, SP © 2009 Victor Company of Japan, Limited 0709DTSMDTJEIN...
- Page 197 INSTALLATION / INSTALACION The following illustration shows a typical installation. If you have any questions or require information regarding installation kits, consult your JVC car audio dealer or a company supplying kits. / La siguiente ilustración muestra una instalación típica. Si tiene alguna pregunta o necesita información acerca de las herramientas para instalación, consulte con su concesionario de JVC de equipos de audio para automóviles o a una compañía que suministra tales herramientas.
- Page 198 / Sintonizador HD Radio ™ You can also connect the following components through the various JVC adapters or system. / También puede conectar los siguientes componentes a través de los diversos adaptadores o sistema JVC. • Connection cords may need to be purchased separately. / Puede ser necesario comprar los cables de conexión por separado.
Need help?
Do you have a question about the GET0570-001A and is the answer not in the manual?
Questions and answers