Table of Contents
Advertisement
Advertisement
Table of Contents
Troubleshooting

Related Manuals for Maytag Pet Pro


Summary of Contents for Maytag Pet Pro
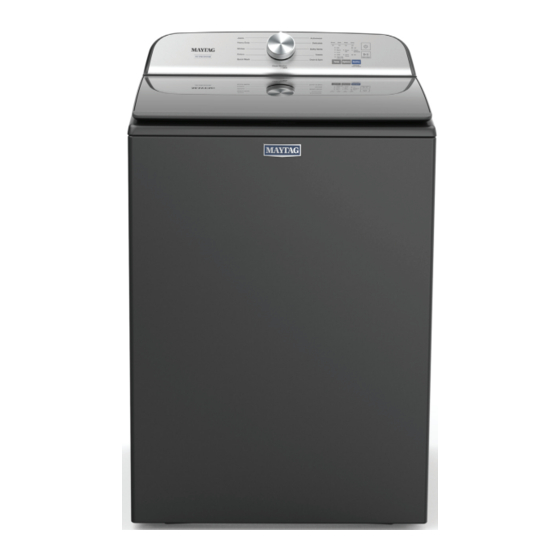
- Page 1 TECHNICAL MANUAL Maytag Pet Pro System Top Load Washer ® W11565084B...
- Page 2 This Technical Manual (Part No. W11565084B), provides the In-Home Service Professional with service information for the “Maytag Pet Pro System Top Load Washer” For specific operating information on the model being serviced, ® refer to the “Owner's Manual” and “Quick Start Guide” provided with the washer.
-
Page 3: Table Of Contents
FOR SERVICE TECHNICIAN’S USE ONLY TABLE OF CONTENTS SECTION 1: GENERAL INFORMATION ......................SAFETY ................................6 PRODUCT SPECIFICATIONS ..........................7 PRODUCT FEATURES ............................9 MODEL NUMBER NOMENCLATURE ........................10 MODEL NUMBER AND SERIAL NUMBER LABEL LOCATION ................11 TECH SHEET LOCATION ........................... 11 SECTION 2: SERVICE GUIDE ........................ - Page 4 FOR SERVICE TECHNICIAN’S USE ONLY Notes...
-
Page 5: Section 1: General Information
FOR SERVICE TECHNICIAN’S USE ONLY Section 1: General Information This section provides general safety, parts, and information for the “Maytag Pet Pro System Top Load ® Washer.” ■ Safety ■ Product Specifications ■ Product Features • Control Panel ■ Model Number Nomenclature ■... -
Page 6: Safety
FOR SERVICE TECHNICIAN’S USE ONLY Safety Your safety and the safety of others are very important. We have provided many important safety messages in this manual and on your appliance. Always read and obey all safety messages. This is the safety alert symbol. This symbol alerts you to potential hazards that can kill or hurt you and others. -
Page 7: Product Specifications
FOR SERVICE TECHNICIAN’S USE ONLY Product Product Specifications ® Maytag Pet Pro System Top Load Washer Dimensions Capacity (DOE) US (cu ft) Capacity IEC CAN (cu ft) Depth (IN, inches) Height with Lid Open (IN, inches) Maximum Height (IN, inches) - Page 8 ® † Drain & Spin, Heavy Duty, Jeans, Normal, Quick Wash, Towels, Whites Options Number of Washer Options Washer Option Selections Pet Pro, Deep Fill, Extra Rinse, Fabric Softener, Temperature Modifiers Number of Soil Levels Number of Wash/Rinse Temperatures Temperature Selections...
-
Page 9: Product Features
Press and hold the Start/Pause button for 1 second until all status lights are NOTE: Pet Pro modifier is intended for removing pet hair from clothes. Do illuminated, then release to start cycle. Press during a cycle to pause cycle not put pets into the Washer. -
Page 10: Model Number Nomenclature
FOR SERVICE TECHNICIAN’S USE ONLY Model Number Nomenclature MODEL NUMBER 6500 Brand M = Maytag ® Category HW = Horizontal (Front load) Washer VW = Vertical (Top load) Washer Capacity 6XXX = 4.7 cu ft Year M = 2022 Color... -
Page 11: Model Number And Serial Number Label Location
FOR SERVICE TECHNICIAN’S USE ONLY Model Number and Serial Number Label Location The Model Number and Serial Number Label location is as shown below: Model Number and Serial Number Label Tech Sheet Location The Tech Sheet Location is as shown below: Tech Sheet Location (Below the Console) - Page 12 FOR SERVICE TECHNICIAN’S USE ONLY Notes...
-
Page 13: Section 2: Service Guide
FOR SERVICE TECHNICIAN’S USE ONLY Section 2: Service Guide This section provides Service guide for the “Maytag ® Pro System Top Load Washer.” ■ Service Guide ■ Activating Service Mode ■ Reading Binary Code ■ UI Test ■ Automatic Test Mode ■... -
Page 14: Service Guide
FOR SERVICE TECHNICIAN’S USE ONLY SERVICE GUIDE SERVICE MODE These tests allow factory or service personnel to test and verify all Before servicing, check the following: inputs to the main control board. You may want to do a quick and Ƀ... -
Page 15: Reading Binary Codes
FOR SERVICE TECHNICIAN’S USE ONLY SERVICE MODE MENU TABLE Button Press Function Behavior Key 1 - Momentary press - Enter UI test - Press and hold for 5 seconds. - Exits Service Diagnostics Key 2 - Momentary press - Activates Automatic Test Mode - Press and hold for 3 seconds. -
Page 16: Ui Test
FOR SERVICE TECHNICIAN’S USE ONLY UI TEST AUTOMATIC TEST MODE NOTE: The Service Diagnostic mode must be activated before entering the UI NOTE: The Service Diagnostic mode must be activated before entering Automatic Test; see procedure on page test mode; see procedure on page Entry Procedure NOTE: If, at any point, the user presses the Key 6/POWER button, the washer... -
Page 17: Automatic Test Mode Chart/Component Activation
FOR SERVICE TECHNICIAN’S USE ONLY AUTOMATIC TEST MODE CHART/COMPONENT ACTIVATION Step# Action Component HMI response User enters Automatic test mode through Lid must be closed. All LEDs are OFF and machine is waiting for the Service Diagnostics by pressing START button to be pressed. releasing Key 2 used in entry sequence. -
Page 18: Software Version Display
FOR SERVICE TECHNICIAN’S USE ONLY SOFTWARE VERSION DISPLAY Advancing Through Saved Fault/Error Codes Procedure for advancing through saved fault codes: NOTE: The Software Version Display mode will time out after 5 minutes of user inactivity and return to standby mode. Press and release Key 3 used to Most recent fault code is activate service diagnostics... -
Page 19: Diagnostic Cycle Chart
FOR SERVICE TECHNICIAN’S USE ONLY DIAGNOSTIC CYCLE CHART It is recommended to take note of, then clear the Fault History before running the Diagnostic Cycle. NOTE: The basket must be empty during this test. Some loads will not be available on all models. Step Washer Function Recommended Procedure... -
Page 20: Faults And Error Codes
FOR SERVICE TECHNICIAN’S USE ONLY FAULTS AND ERROR CODES Faults marked with “‡” will stop the cycle execution. If no action is taken within 5-10 minutes, the display will turn off. All faults can be viewed in the ‘Fault History’ section of Service mode. Code Description Explanation and Recommended Procedure... - Page 21 FOR SERVICE TECHNICIAN’S USE ONLY FAULTS AND ERROR CODES Faults marked with “‡” will stop the cycle execution. If no action is taken within 5-10 minutes, the display will turn off. All faults can be viewed in the ‘Fault History’ section of Service mode. Code Description Explanation and Recommended Procedure...
- Page 22 FOR SERVICE TECHNICIAN’S USE ONLY FAULTS AND ERROR CODES Faults marked with “‡” will stop the cycle execution. If no action is taken within 5-10 minutes, the display will turn off. All faults can be viewed in the ‘Fault History’ section of Service mode. Code Description Explanation and Recommended Procedure...
-
Page 23: Section 3: Troubleshooting
FOR SERVICE TECHNICIAN’S USE ONLY Section 3: Troubleshooting This section provides Troubleshooting guide for the “Maytag Pet Pro System Top Load Washer.” ® ■ Troubleshooting Guide ■ Main Control (ACU) Board Connectors and Pinouts ■ Troubleshooting Tests ■ Component Location... -
Page 24: Troubleshooting Guide
FOR SERVICE TECHNICIAN’S USE ONLY TROUBLESHOOTING GUIDE NOTE: Always check for Faults and Error Codes first. Some tests will require accessing components. figures & Component Locations. For detailed troubleshooting procedures, refer to “Troubleshooting Tests.” Problem Possible Cause Checks & Tests Won’t Power Up No power to washer. - Page 25 FOR SERVICE TECHNICIAN’S USE ONLY TROUBLESHOOTING GUIDE NOTE: Always check for Faults and Error Codes first. Some tests will require accessing components. figures & Component Locations. For detailed troubleshooting procedures, refer to “Troubleshooting Tests.” Problem Possible Cause Checks & Tests Incorrect Water Water hose installation.
- Page 26 FOR SERVICE TECHNICIAN’S USE ONLY TROUBLESHOOTING GUIDE NOTE: Always check for Faults and Error Codes first. Some tests will require accessing components. figures & Component Locations. For detailed troubleshooting procedures, refer to “Troubleshooting Tests.” Problem Possible Cause Checks & Tests Poor Wash Performance Oversuds.
-
Page 27: Main Control (Acu) Board Connectors And Pinouts
FOR SERVICE TECHNICIAN’S USE ONLY Main Control (ACU) Board Connectors and Pinouts Fabric Softener Valve Cold water Valve Hot water Valve Bleach / Oxi Valve Faucet Switch J13 J5 Connector Figure 4 - Main Control (ACU) VALVES BULK PUMP POWER NEUTRAL NEUTRAL LINE... -
Page 28: Troubleshooting Tests
FOR SERVICE TECHNICIAN’S USE ONLY TROUBLESHOOTING TESTS 3. Check resistance of the valve coils across the following J8 connector pinouts: TEST #1: Main Control (ACU) Valve Pinout This test checks for incoming and outgoing power to and from main control. This test assumes that proper voltage is present at the outlet. - Page 29 FOR SERVICE TECHNICIAN’S USE ONLY 6. Remove connector J6 from main control. With an ohmmeter, verify 15. Replace the shifter assembly. resistance of the shifter motor across the following J6 connector a. Unplug washer or disconnect power. pinouts: b. Replace shifter assembly. Resistance should be 2 kΩ...
- Page 30 FOR SERVICE TECHNICIAN’S USE ONLY 12. Visually check the mounting bracket and electrical connections to the If both visual checks pass, follow procedure under TEST #1: Main motor and shifter. Control (ACU) to verify supply voltages. ➢ If visual check passes, go to step 13. Verify the continuity of the HMI harness.
- Page 31 FOR SERVICE TECHNICIAN’S USE ONLY ➢ If the resistance is within the range shown in the table, go to step 6. 9. With an ohmmeter, check harness for continuity between the drain pump and main control. See chart below: ➢ If the resistance is infinite or close to zero, replace the valve assembly. NOTE: Most thermistor errors are a result of the resistance being out Main Control to Drain Pump of range.
-
Page 32: Component Locations
FOR SERVICE TECHNICIAN’S USE ONLY 6. If the preceding steps did not correct the lock problem, replace the main control. a. Unplug washer or disconnect power. b. Replace the main control. c. Reassemble all parts and panels. d. Plug in washer or reconnect power. Perform Service Diagnostics to verify repair. COMPONENT LOCATIONS Fabric Softener Valve Cold water Valve... -
Page 33: Section 4: Component Access
FOR SERVICE TECHNICIAN’S USE ONLY Section 4: Component Access This section provides service parts access, removal, and replacement instructions for the “Maytag Pet Pro System Top Load Washer.” ® ■ Removing the Console ■ Removing the User Interface (UI) ■... -
Page 34: Removing The Console
FOR SERVICE TECHNICIAN’S USE ONLY Removing the Console 5. While pushing back and up on the console, slide thin plastic putty knife WARNING (or thin plastic cake knife) between the console and Top Panel. Depress the console clip by pushing straight back with the putty knife while lifting the console to separate from the Top Panel. -
Page 35: Removing The User Interface (Ui)
FOR SERVICE TECHNICIAN’S USE ONLY Removing the User Interface (UI) 4. Using a flat blade screwdriver, gently, depress the four (4) plastic WARNING mounting clips to release the UI from console. Electrical Shock Hazard Disconnect power before servicing. Replace all parts and panels before operating. Failure to do so can result in death or electrical shock. -
Page 36: Removing The Water Inlet Valve
FOR SERVICE TECHNICIAN’S USE ONLY Removing the Water Inlet Valve Removing the Main Control WARNING WARNING Electrical Shock Hazard Electrical Shock Hazard Disconnect power before servicing. Disconnect power before servicing. Replace all parts and panels before operating. Replace all parts and panels before operating. Failure to do so can result in death or electrical shock. -
Page 37: Removing The Pet Hair Filter
FOR SERVICE TECHNICIAN’S USE ONLY 5. Remove the filter from the agitator post. 6. Using a 1/4" nut driver, remove the hex-head screw securing the ACU to the Top Panel of the washer as shown in above figure. Slide ACU to the left and lift to remove. -
Page 38: Removing The Tub Ring And Basket
FOR SERVICE TECHNICIAN’S USE ONLY Removing the Tub Ring and Basket WARNING Electrical Shock Hazard Disconnect power before servicing. Replace all parts and panels before operating. Figure 2 Failure to do so can result in death or electrical shock. A. Tab on Underside of Top Panel 7. - Page 39 FOR SERVICE TECHNICIAN’S USE ONLY Removing the Tub Ring Removing the Basket 1. Using a spanner/wrench and hammer, tap wrench with hammer until nut NOTE: Due to the increase in size and depth of the tub ring, the working space becomes loose.
-
Page 40: Removing The Lid Lock
FOR SERVICE TECHNICIAN’S USE ONLY Removing the Lid Lock 8. Complete the steps from section Lifting the Top Panel. WARNING 9. Remove the Lid Lock harness from the clips on right side of Top Panel. Electrical Shock Hazard Disconnect power before servicing. Replace all parts and panels before operating. -
Page 41: Removing The Lid And Hinge
FOR SERVICE TECHNICIAN’S USE ONLY Removing the Lid and Hinge Top Load Washer Hinge Removal WARNING WARNING Electrical Shock Hazard Electrical Shock Hazard Disconnect power before servicing. Disconnect power before servicing. Replace all parts and panels before operating. Replace all parts and panels before operating. Failure to do so can result in death or electrical shock. -
Page 42: Removing The Shifter
FOR SERVICE TECHNICIAN’S USE ONLY 6. Remove the two (2) mounting screws as shown in below figure. Removing the Shifter WARNING Electrical Shock Hazard Disconnect power before servicing. Replace all parts and panels before operating. Failure to do so can result in death or electrical shock. 7. -
Page 43: Removing The Drive Belt And Motor
FOR SERVICE TECHNICIAN’S USE ONLY Removing the Drive Belt and 5. Remove the harness from the pump motor. Motor WARNING Electrical Shock Hazard 6. Remove three (3) mounting screws. Disconnect power before servicing. Replace all parts and panels before operating. Failure to do so can result in death or electrical shock. -
Page 44: Removing The Splutch
FOR SERVICE TECHNICIAN’S USE ONLY 6. Unplug the harness and remove the two (2) mounting bolts. Now you 5. Lift off the pulley. can remove the motor. A. Motor Screws 6. Complete the steps from section Removing the Shifter. B. Motor Harness (Lower) 7. -
Page 45: Removing The Gearcase
FOR SERVICE TECHNICIAN’S USE ONLY Removing the Gearcase 9. Complete the steps from section Removing the Drain Pump. WARNING 10. Remove the four (4) mounting bolts. Electrical Shock Hazard Disconnect power before servicing. Replace all parts and panels before operating. Failure to do so can result in death or electrical shock. - Page 46 FOR SERVICE TECHNICIAN’S USE ONLY 7. Unplug the harness from the capacitor. 8. Remove the four (4) mounting bolts and pull the gearcase out of the tub. NOTE: The tub and gearcase has eight (8) mounting holes. Only four are used. If they strip out during reassembly, the other holes can be used to re-mount the gearcase.
- Page 47 FOR SERVICE TECHNICIAN’S USE ONLY PRODUCT SPECIFICATIONS & WARRANTY INFORMATION SOURCES IN THE UNITED STATES: FOR PRODUCT SPECIFICATIONS AND WARRANTY INFORMATION CALL: FOR WHIRLPOOL PRODUCTS: 1-800-253-1301 FOR TECHNICAL ASSISTANCE WHILE AT THE CUSTOMER’S HOME CALL: THE TECHNICAL ASSISTANCE LINE: 1-800-832-7174 HAVE YOUR STORE NUMBER READY TO IDENTIFY YOU AS AN AUTHORIZED IN-HOME SERVICE PROFESSIONAL FOR LITERATURE ORDERS (CUSTOMER EXPERIENCE CENTER):...
- Page 48 Maytag® Pet Pro System Top Load Washer W11565084B...
Need help?
Do you have a question about the Pet Pro and is the answer not in the manual?
Questions and answers
How to get softener to didpense
To get the fabric softener to dispense in a Maytag Pet Pro washer (Model #MVW6500MBK), follow these steps:
1. Pour the liquid fabric softener into the designated dispenser compartment, not directly into the tub.
2. Make sure the washer is level and not overloaded.
3. Use the correct wash cycle that includes a rinse with fabric softener dispensing (avoid cycles that skip it).
4. Check that the dispenser is clean and not clogged.
5. Ensure the washer lid remains closed during the cycle, as opening it may cancel the dispensing.
If it still doesn't dispense, the dispenser mechanism may need service.
This answer is automatically generated
@Mr. Anderson What cycles skip fabric softener dispensing option. Brand new machine. Getting frustrated getting this option to work on cycles other than quick wash
The fabric softener light will not come on when i attempt to select it....
brand new machine only used 10 times and has worked great until today i **** unable to get fabric softener light to come on
The fabric softener light on the Maytag Pet Pro may not turn on because the fabric softener option needs to be manually activated. To enable it, press and hold the fabric softener button until the fabric softener light turns on. If the light still does not turn on, there may be an issue with the control board or button functionality.
This answer is automatically generated
How to do a pre soak??
To do a pre-soak with the Maytag Pet Pro, add the clothes and water, then leave the lid open. If the lid remains open, the water will drain automatically in about 10 minutes. If you close the lid, the washer will auto-drain in three hours. If you start a cycle after soaking, the washer will drain the pre-soak water and begin with fresh water.
This answer is automatically generated
can you use a liquid disinfectant in the bleach dispenser?
How do I do a rinse only? Towels still feel a little soapy. Can I do another rinse without doing a complete wash cycle?
Where is the drain filter located?
How to clean the top pet pro washing Machine
How to get coins out from under agitator?
How can I soak clothes without it continuing into drain and spin On the Maytag pet pro washer
Everytime I press start the machine says resetting. Why doesn't it just start.