Table of Contents

Related Manuals for Doran Scales PC400


Summary of Contents for Doran Scales PC400
- Page 1 Model PC400 Digital Portion Control Scale Instruction Manual DORAN SCALES INC. 1315 PARAMOUNT PKWY. BATAVIA, IL. 60510 1-800-262-6844 FAX: (630)879-0073 http://www.doranscales.com MANUAL REVISION: 0.0 MAN0233 1/30/04 Made in USA...
-
Page 3: Table Of Contents
Table of Contents Section 1. Unpacking and Installation................. 1 Unpacking: ..........................1 Installation: ..........................1 Electrical Connections:........................ 1 Usage: ............................1 Section 2. Scale Operations Guide ................3 Display Functions:........................3 Basic Weighing Operations:......................3 Units Select:..........................3 Battery: ............................4 Power:............................ - Page 4 Printer Modes: ........................... 16 Data Output Format:........................17 Bi-directional Communications: ....................20 Section 8. Specifications .................... 21 Section 9. Troubleshooting ..................23 General problem resolution: ...................... 23 Error Messages: ......................... 24 Error Messages (cont.): ......................25...
-
Page 5: Section 1. Unpacking And Installation
Usage: Although the Doran PC400 is built with a rugged stainless steel base, case and platter, it is intended for wipedown use only, not washdown. Clean the scale with a damp cloth & mild detergent for maximum life. -
Page 7: Section 2. Scale Operations Guide
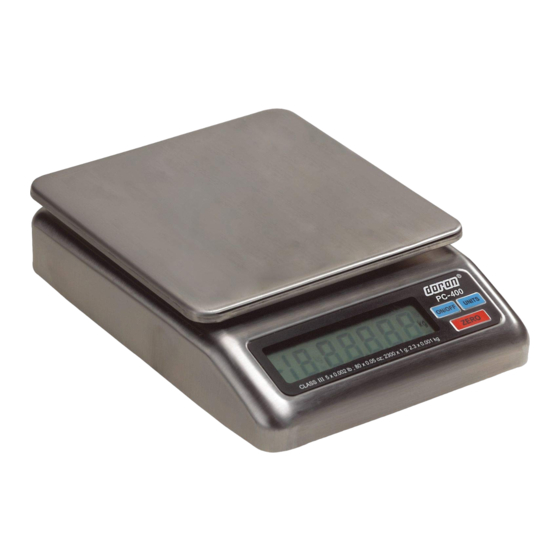
Section 2. Scale Operations Guide Fig. 1 PC400 Display Functions: The Model PC400 controls consist of ON/OFF, UNITS and ZERO buttons located next to the main LCD display. The display is used to provide weight indications and operator messages describing scale operation. -
Page 8: Battery
ON/OFF. Auto Shut-down: The PC400 has a feature called “Auto Shut-down” that turns the scale off after a preset time of no activity. This helps conserve battery life. The preset time is selectable from 1 minute to 60 minutes or it can be disabled so the scale remains on continuously. -
Page 9: Section 3. Setup And Calibration Guide
Compartment Cover 1) After applying power to the PC400, remove the platter, turn the scale over and remove the calibration bolt as shown above. Place a thin blunt object through the hole and press straight down. The scale should enter the Setup/Calibration mode, and the scale should display “div 2.5”... -
Page 10: Analog Setup
4) Place full capacity on the platter and press ZERO. Wait for the scale to count down from “7” to “0. If the scale detects motion, the count will restart. When finished the scale will return to the weigh mode. NOTE: If “SPnL”... -
Page 11: Section 4. Battery
Plug the power cord into an AC outlet (115 VAC). • The PC400 needs to be turned on to recharge the battery pack. • It will take approximately 4 hours to recharge the battery back. -
Page 12: Voltage Levels
Voltage Levels: To view the voltage of the battery, perform the following steps: • Turn on the scale and wait for a stable weight to be displayed. • Press and hold UNITS. • Press and release ON/OFF. • Release UNITS. The battery voltage is now displayed. -
Page 13: Section 5. Parameter Setup
Section 5. Parameter Setup The PC400 has 15 setup and calibration parameters which can be changed. This flexibility makes these scales versatile weighing instruments capable of meeting all common weighing needs. Entering and Exiting Setup Mode: To enter the setup menu, apply power to the PC400, remove the platter, turn the scale over and remove the calibration bolt. -
Page 14: Changing Start Up Units
Changing Start up Units: The PC400 has been designed to allow the user the opportunity to make weighments in Pounds (lb), Ounces (oz), Kilograms (kg), Grams (g) or Pounds and Ounces (lb:oz). Any of these units may be used as the “power-up”... -
Page 15: Section 6. Setup Menus Explained
Section 6. Setup Menus Explained Resoluton (divisions) Setup Menu Select Scale Capacity (lbs) # of scale displayed divisions is 2500. (default for 5lb and 10lb scales.) # of scale displayed divisions is 5000. # of scale displayed divisions is 10000. (default for 2lb scales.) Capacity Setup Menu Select Scale Capacity (lbs) -
Page 16: Auto Off Mode
Auto Off Mode Auto Off Mode The amount of time before the scale will shut off, if not in use. Off. Scale will run continually 60 minutes 30 minutes 20 minutes 10 minutes 5 minutes 4 minutes 3 minutes 2 minutes 1 minute Auto Zero Tracking Zt *... -
Page 17: Data Output
Data Output d.o. Controls when information is transmitted from the scale though the serial port C.P. Continuous data transmission. Transmits data each time the display is updated. Prints every stable weight. The same as A.1, except the weight must return to zero before the next weight is printed. -
Page 18: Startup Units
Startup Units UNITS Unit of measure that the scale displays upon power-up The scale will power-up in pounds. The scale will power-up in ounces. The scale will power-up in kilograms. The scale will power-up in grams. lb-oz The scale will power-up in pounds and ounces. -
Page 19: Section 7. Data Communications
Section 7. Data Communications Introduction to data communications: In the PC400, data is sent to a printer or computer by using “asynchronous serial data communications.” Data is broken up and sent one piece at a time to the printer or computer. In spite of this apparent simplicity, a basic understanding of serial data communications is needed when setting up the PC400. -
Page 20: Printer Modes
The number of bits sent by the PC400 is controlled by the data bits, parity and stop bit configuration. The PC400 is factory set for eight bits, no parity and one stop bit. This means that the eight bits following the start bit will be data, followed by a stop bit. -
Page 21: Data Output Format
Data Output Format: In order for the serial data sent from the PC400 to be useful, the data must be organized so that it is easy to read. To accomplish this, the PC400 arranges the displayed data with additional text to indicate the active units and to indicate the presence of motion during the reading. - Page 22 The space following the units is removed. The units are in capitol letters. “MOT.” is replaced with “M”. It is not legal-for-trade. Dual print format (2P): The dual print mode provides the PC400 with the ability to print the current scale reading followed by the equivalent value in grams.
- Page 23 “F1” Print String Definition for Each Weight Unit: Pounds STX | POL | WEIGHT| SP | LB | ST | CR | LF Ounces STX | POL | WEIGHT| SP | OZ | ST | CR | LF Kiligrams STX | POL | WEIGHT| SP | KG | ST | CR | LF Grams STX | POL | WEIGHT| SP | G | SP | ST | CR | LF Pounds-ounces...
-
Page 24: Bi-Directional Communications
“SP” Print String Definition for Each Weight Unit: Pounds FR”L1” | LF | ? | LF | POL | WEIGHT | LF | lb | LF | GS | LF | ST | LF | POL | WEIGHT2 | LF | kg | LF | P1,1 | LF Ounces FR”L1”... -
Page 25: Section 8. Specifications
Section 8. Specifications Model PC400 Resolution: 2500d, 5000d or 10000d Power Supply: Wall Transformer output: (scale input) 12VDC, 300mA Neg. (-) center Internal, rechargeable battery Display: 0.66” high LCD Displayed units: lb, oz, kg, g and lb-oz Indicator Capacities: 2, 5 and 10 lbs... -
Page 27: Section 9. Troubleshooting
Section 9. Troubleshooting General problem resolution: Problem: What to Do or Check: Weight reading will not repeat or Make sure that the scale platter is not scale does not return to zero when rubbing or touching the scale cover. Verify weight is removed. -
Page 28: Error Messages
Error Messages: Error Message: What to do or check: “Er EP” The setup parameters loaded in nonvolatile memory have become corrupted. Verify scale parameters and calibrate. “rg Er” The calibration zero is out of range. Error is displayed after a ZERO calibration attempt. -
Page 29: Error Messages (Cont.)
Error Messages (cont.): Error Message: What to do or check: “SPnL” Raw counts for the span calibration is too low. Refer to the “Analog Setup” section for raw count ranges. “SPnH” Raw counts for the span calibration is too high. Refer to the “Analog Setup”...
Need help?
Do you have a question about the PC400 and is the answer not in the manual?
Questions and answers