
Related Manuals for Doran Scales DS6150


Summary of Contents for Doran Scales DS6150
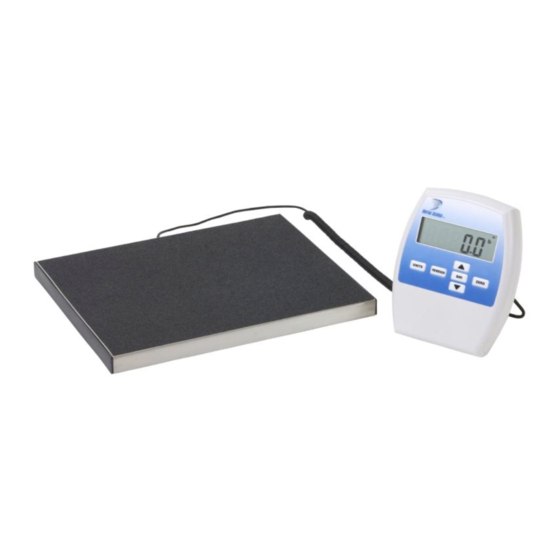
- Page 1 Model DS6150 Remote Indicator Scale Technical Manual Doran Scales, Inc. 1315 Paramount Pkwy Batavia, IL 60510 USA 1-800-264-4107 www.doranmedical.com MAN0315 Revision 0.1 2/12/2014...
-
Page 3: Table Of Contents
Section 1. Unpacking and Installation............. 1 Introduction ........................1 Unpacking ........................1 Cautions and Warnings ....................1 Care & Cleaning ......................1 Wall Mounting ......................2 Section 2. Battery Operation ..............3 Section 3. Scale Operation ..............5 Display Pushbuttons ....................5 Display Annunciators.................... -
Page 4: Section 1. Unpacking And Installation
We are dedicated to delivering a superior product that will provide many years of trouble free service. As an ISO9001 registered company, Doran Scales is dedicated to delivering products built with strict compliance to our high quality standards. If you have any questions regarding your scale, please contact Doran Scales, Inc. -
Page 5: Wall Mounting
Wall Mounting If mounting the indicator to a wall, refer to the following diagram. Place two screws 4.09” apart, 65” above the floor. The screw heads should be approximately 0.33” in diameter. -
Page 6: Section 2. Battery Operation
Section 2. Battery Operation Battery Installation The indicator can be powered by a set of six AA alkaline batteries. These batteries can perform over 25,000 weighments of typical use with the standard Automatic Shutoff Timer settings. The battery compartment is located on the backside of the indicator. Press the locking tab to release battery compartment cover. -
Page 8: Section 3. Scale Operation
Section 3. Scale Operation Fig. 3 Front Panel Display Pushbuttons The Model DS6150 controls consist of UNITS, ZERO, REWEIGH, ▲, ▼, and BMI buttons. The display is used to provide weight indications and operator messages indicating scale operation. Power On/Off Press the ZERO button to turn on the indicator. -
Page 9: Display Annunciators
can be locked or unlocked by pressing and holding UNITS for 5 seconds. An “ “ message is displayed when button is locked and “ L off “ when unlocked. Reweigh To reinitiate the weighing process, press REWEIGH. This will allow a new measurement to be taken without the patient having to leave the platform. - Page 10 Battery Indicator The battery indicator displays the remaining battery life. See the battery operation section for detailed information. NOTE: The battery Indicator will be disabled when using an external power supply. Software Number and Revision display Pressing and holding the REWEIGH button for 3 seconds will perform a display test.
-
Page 11: Weighing A Patient
Weighing a Patient 1. Turn on the indicator by pressing the ZERO button. 2. The indicator will perform a startup zero. 3. The indicator will momentarily display dashes, “-----”, followed by 0.0. 4. Patient stands on the scale platform. 5. The display will scroll dashes until the patient’s weight is captured. 6. -
Page 12: Section 4. Scale Calibration
Section 4. Scale Calibration Entering and Exiting Setup Mode To enter setup mode from the front panel, press and hold REWEIGH and ZERO together. Release both buttons when the display reads CAL n. To exit the calibration mode and save the changes, press REWEIGH or press BMI to scroll to the end of the menu. -
Page 13: Multiple Point Calibration Procedure
14. Press BMI to accept the span weight value. The display will count down to zero and return to the weigh mode. Multiple Point Calibration Procedure 1. When the setup mode is entered the display reads CAL n. 2. Press the ▲arrow button to change the display to CAL y. 3. -
Page 14: Calibration Troubleshooting
Calibration Troubleshooting If gruL or groL appears on the display, the calibration zero is out of range. Check connections between the indicator and base. Press BMI to perform the zero calibration again. If this error persists, consult the raw counts table. If ErSp appears on the display, the span calibration is out of range. -
Page 15: Section 5. Parameter Setup
Section 5. Parameter Setup The indicator has many adjustable parameters which control the scale’s operation. The parameter settings shown in bold are the default settings. Entering and Exiting Setup Mode To enter setup mode from the front panel, press and hold REWEIGH and ZERO for 5 seconds. -
Page 16: Reset All Parameters To Default Settings
Zero Calibration Point NOTE: This parameter is only visible when in the calibration mode. Press UNITS button to toggle between lb and kg units 45.00 Span Calibration Point Span calibration weight setting: 1-500.0 (lb) NOTE: This parameter is only visible after a 1-230.0 (kg) zero calibration is performed. -
Page 17: Average Aperture
Average Aperture Determines the amount of motion allowed to hold a stable weight. A slower setting will result in more accurate weights but will require a longer time to achieve a stable weight. A faster setting will achieve a stable weight faster but may be less accurate. -
Page 18: Lb Units Enable / Disable
LB Units Enable / Disable lb units Enable/Disable lb weighing units active (default) lb weighing units disabled KG Units Enable / Disable kg units Enable/Disable kg weighing units active (default) kg weighing units disabled OZ Units Enable / Disable oz units Enable/Disable (Capacities <... -
Page 19: Button Press Beep
Button Press Beep Enables/Disables indicator beep when buttons are pressed Beep enabled Beep disabled (default) Stable or Average Hold Weight Beep Enables/Disables beep when a stable or average hold weight is achieved Beep disabled. Beep enabled. (default) Battery Voltage Level Displays current battery voltage (DC) Battery Bar Indications: Empty Battery Symbol 5.1 –... -
Page 20: Section 6. Data Communications
Section 6. Data Communications RS-232 Communications Port The indicator is equipped with an RS-232 communications port. The RS-232 connection is located on the back of the indicator behind the top access cover. An optional RS-232 cable is available. Insert the phone style connector into the receptacle on the indicator housing and connect the 9-pin connector to your computer or printer. - Page 21 IQ Vitals protocol (IV) Fairbanks TeleWeigh (9600,7,ODD,2) Scale Output Command (RXD) Description Responds (TXD) Computer to Scale Scale to Computer Zero the scale (if in motion, scale will wait until Z or z stable, then zero) <weight><sp><uu><sp> Current Display Weight. Active, Stable Hold, or <cr>...
- Page 22 Doran F1 protocol (f1) (9600,8,NO,1) Scale Output Command (RXD) Responds (TXD) Description Computer to Scale Scale to Computer Zero the scale (if in motion, scale will wait until Z or z stable, then zero) <stx><pol><weight>#<uu># Current Display Weight. Active, Stable Hold, or <cr>...
- Page 23 Doran FH protocol (FH) (Continuously transmits at 3.75 per second - 2400,8,NO,2) Scale Output Command (RXD) Description Responds (TXD) Computer to Scale Scale to Computer Scale performs a Reweigh operation (same as R or r pressing the Reweigh button) Data String Key <...
-
Page 24: Section 7. Specifications
Section 7. Specifications 12” L x 15” W x 1.5” H Scale Platform Dimensions 8” L x 6.5” W x 2.3” H Indicator Dimensions Power 12VDC AC Adapter (Negative Center) Optional: 6 AA Alkaline Batteries Displayed Units lb, kg Capacity 500 x 0.2 lb or 230 x 0.1 kg Construction Painted Mild Steel Frame, Stainless Steel... -
Page 25: Section 8. Troubleshooting
Section 8. Troubleshooting General Problem Resolution Problem What to Do or Check Weight reading will not repeat or Person or object other than that being scale does not return to zero when weighed is touching the scale. weight is removed. Verify that there is nothing caught in or interfering with the platform.
Need help?
Do you have a question about the DS6150 and is the answer not in the manual?
Questions and answers