Dell XPS 410 Service Manual
Hide thumbs
Also See for XPS 410:
- Owner's manual (174 pages) ,
- Setup manual (2 pages) ,
- Service manual (64 pages)
Table of Contents
Advertisement
Quick Links
Dell™ XPS™ 410 Service Manual
Before You Begin
About Your Computer
Technical Overview
Specifications
Advanced Troubleshooting
System Setup
Removing and Installing Parts
Notes, Notices, and Cautions
NOTE:
A NOTE indicates important information that helps you make better use of your computer.
NOTICE:
CAUTION:
If you purchased a Dell™ n Series computer, any references in this document to Microsoft® Windows® operating systems are not applicable.
Information in this document is subject to change without notice.
© 2006 Dell Inc. All rights reserved.
Reproduction in any manner whatsoever without the written permission of Dell Inc. is strictly forbidden.
Trademarks used in this text: Dell, the DELL logo, and Dimension are trademarks of Dell Inc.; Core is a trademark of Intel Corporation; Intel, Pentium, and SpeedStep are registered
trademarks of Intel Corporation; Microsoft and Windows are registered trademarks of Microsoft Corporation.
Other trademarks and trade names may be used in this document to refer to either the entities claiming the marks and names or their products. Dell Inc. disclaims any
proprietary interest in trademarks and trade names other than its own.
Model DCTA
August 2006 Rev. A00
Great user manuals database on
A NOTICE indicates either potential damage to hardware or loss of data and tells you how to avoid the problem.
A CAUTION indicates a potential for property damage, personal injury, or death.
UserManuals.info
Advertisement
Table of Contents

Related Manuals for Dell XPS 410


Summary of Contents for Dell XPS 410
- Page 1 Reproduction in any manner whatsoever without the written permission of Dell Inc. is strictly forbidden. Trademarks used in this text: Dell, the DELL logo, and Dimension are trademarks of Dell Inc.; Core is a trademark of Intel Corporation; Intel, Pentium, and SpeedStep are registered trademarks of Intel Corporation;...
-
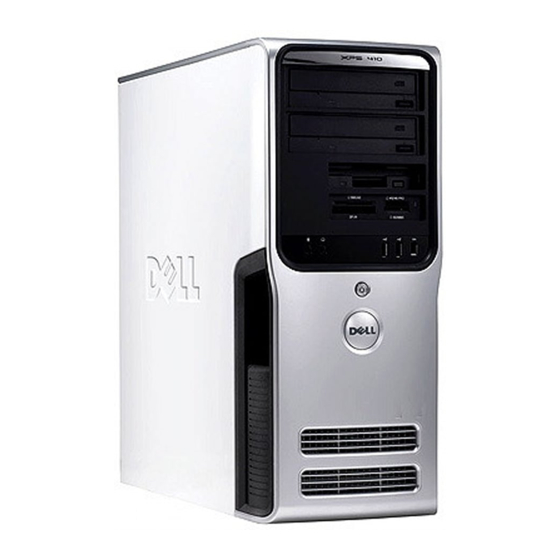
Page 2: About Your Computer
Back to Contents Page About Your Computer Dell™ XPS™ 410 Service Manual Front View of the Computer Back View of the Computer Back Panel Connectors Front View of the Computer cover release Use this latch to remove the cover (see Removing the Computer Cover). -
Page 3: Back View Of The Computer
12 Service Tag Use the Service Tag to identify your computer when you access the Dell Support website or contact support. Back View of the Computer 1 power Insert the power cable. - Page 4 adapter connector on your computer. A click indicates that the network cable has been securely attached. On computers with an additional network connector card, use the connectors on the card and on the back of the computer when setting up multiple network connections (such as a separate intra- and extranet).
-
Page 5: Advanced Troubleshooting
Back to Contents Page Advanced Troubleshooting Dell™ XPS™ 410 Service Manual Power Lights Diagnostic Lights Beep Codes Dell Diagnostics Drivers Resolving Software and Hardware Incompatibilities Power Lights CAUTION: Before you begin any of the procedures in this section, follow the safety instructions in the Product Information Guide. -
Page 6: Beep Codes
Reseating the memory modules (see Installing Memory) may fix the beep code errors in the following table. If the problem persists, see "Contacting Dell" in your Owner's Manual for instructions on obtaining technical assistance. ... - Page 7 (see Entering System C: Drive Setup). Failure The cache memory is not See "Contacting Dell" in your Owner's Manual Cache Memory operating. for instructions on obtaining technical Bad, Do Not assistance. Enable Cache An error is occurring on the See "Contacting Dell"...
-
Page 8: Dell Diagnostics Main Menu
Allows you to customize the test by changing the test settings. 4. Close the test screen to return to the Main Menu screen. To exit the Dell Diagnostics and restart the computer, close the Main Menu screen. Great user manuals database on... -
Page 9: Identifying Drivers
If an exclamation point is next to the device name, you may need to reinstall the driver or install a new driver. Reinstalling Drivers NOTICE: Refer to the Dell Support website at support.dell.com for approved drivers for Dell™ computers. If you install drivers obtained from other sources, your computer might not work correctly. Using Windows XP Device Driver Rollback If a problem occurs on your computer after you install or update a driver, use Windows XP Device Driver Rollback to replace the driver with the previously installed version. -
Page 10: Resolving Software And Hardware Incompatibilities
4. Double-click the type of device for which you are installing the driver. 5. Double-click the name of the device for which you are installing the driver. 6. Click the Driver tab and click Update Driver. 7. Click Install from a list or specific location (Advanced) and click Next. ... -
Page 11: Before You Begin
Hold a component such as a processor by its edges, not by its pins. NOTICE: Only a certified service technician should perform repairs on your computer. Damage due to servicing that is not authorized by Dell is not covered by your warranty. - Page 12 NOTICE: To disconnect a network cable, first unplug the cable from your computer and then unplug it from the network port or device. 2. Disconnect any telephone or telecommunication lines from the computer. 3. Disconnect your computer and all attached devices from their electrical outlets, and then press the power button to ground the system board. NOTICE: Before touching anything inside your computer, ground yourself by touching an unpainted metal surface, such as the metal at the back of the computer.
-
Page 13: Removing And Installing Parts
You have performed the steps in Turning Off Your Computer Before Working Inside Your Computer. You have read the safety information in your Dell™ Product Information Guide. A component can be replaced by performing the removal procedure in reverse order. You have the tools listed in Recommended Tools. -
Page 14: Inside View Of Your Computer
cover release latch computer cover hinge tabs (3) 5. Locate the three hinge tabs on the bottom edge of the computer. 6. Grip the sides of the computer cover and pivot the cover up. 7. Lift the cover away and set it aside in a secure location. Inside View of Your Computer ... -
Page 15: Memory Overview
memory module battery socket SATA Connectors SATA0, connectors (1, 2, 3, 4) (BATTERY) SATA1 front panel I/O main power SATA connectors (4) (SATA2, connector connector SATA3, SATA4, SATA5 FlexBay USB connector clear CMOS jumper password jumper (CLRPSWD) (CLRCMOS) 10 PCI Express x1 card 11 PCI Express x16 card 12 PCI Express x4 card connector connector... -
Page 16: Addressing Memory With 4-Gb Configurations
If you remove your original memory modules from the computer during a memory upgrade, keep them separate from any new modules that you may have, even if you purchased the new modules from Dell. If possible, do not pair an original memory module with a new memory module. - Page 17 memory module connectors (4) securing clip (2) 5. Align the notch on the bottom of the module with the crossbar in the connector. cutouts (2) memory module notch crossbar NOTICE: To avoid damage to the memory module, press the module straight down into the connector while you apply equal force to each end of the module.
-
Page 18: Removing Memory
Installing a PCI Express Card. Installing a PCI Card NOTE: Dell offers an optional customer kit for Audigy II and IEEE 1394 PCI add-in-cards that includes a front-mounted IEEE 1394 connector. 1. Follow the procedures in Before You Begin. - Page 19 release tab card retention mechanism card retention door 4. Push the two release tabs on the card retention door from the inside to pivot the door open; the hinged door will remain in the open position. release tabs (2) filler bracket alignment guide alignment bar...
- Page 20 fully seated card 2 not fully seated card bracket within slot bracket caught outside of slot 5 alignment bar alignment guide 9. Before you close the card retention door, ensure that: The tops of all cards and filler brackets are flush with the alignment bar. The notch in the top of the card or filler bracket fits around the alignment guide.
-
Page 21: Removing A Pci Card
b. Connect the network cable to the add-in network adapter connectors. Do not connect the network cable to the integrated connector on the back panel. 17. Install any drivers required for the card as described in the card documentation. ... - Page 22 1 card retention 2 release tabs 3 lever on chassis wall (may not be present on all door computers) 4 filler bracket 5 alignment 6 alignment bar guide 2. If present on your computer, rotate the lever on the chassis wall upward. ...
- Page 23 PCI Express x16 card slot PCI Express x16 card securing tab PCI Express x1 card PCI Express x1 card slot 7. Prepare the card for installation. See the documentation that came with the card for information on configuring the card, making internal connections, or otherwise customizing it for your computer.
-
Page 24: Removing A Pci Express Card
b. Connect the network cable to the add-in network adapter's connectors. Do not connect the network cable to the integrated connector on the back panel. 15. Install any drivers required for the card as described in the card documentation. ... -
Page 25: Removing The Drive Panel
PCI Express x16 card slot PCI Express x16 card securing tab PCI Express x1 card PCI Express x1 card slot NOTICE: Ensure that you release the securing tab to unseat the card. If the card is not removed correctly, the system board may be damaged. ... -
Page 26: Removing The Drive-Panel Insert
sliding plate sliding plate lever drive panel 3. Pull the sliding plate lever to the right and hold in place while pushing the panel from the inside. Pivot the panel to the left to release it from its side hinges. -
Page 27: Installing The Drive Panel
center drive-panel tab drive panel drive-panel insert tab drive-panel insert 1. Slide the tab on the left side of the drive-panel insert under the center drive panel tab. 2. Rotate the drive-panel insert into place and snap the drive-panel insert tab over the corresponding tab on the drive panel. ... -
Page 28: General Installation Guidelines
General Installation Guidelines Connect hard drives to the connectors labeled "SATA0" and "SATA1", starting with SATA0. Connect CD/DVD drives to the connectors labeled "SATA4" and "SATA5", starting with SATA4. Serial ATA hard drives and CD/DVD drives are connected to connectors labeled "SATA0" to "SATA5" on the system board. SATA0 SATA1 SATA2... -
Page 29: Installing A Hard Drive
3. Disconnect the power and hard drive cables from the drive. power cable hard drive cable 4. Press in on the tabs on each side of the drive and slide the drive up and out. tabs (2) hard drive ... -
Page 30: Adding A Second Hard Drive
power cable hard drive cable 9. Check all connectors to be certain that they are properly cabled and firmly seated. 10. Replace the computer cover (see Replacing the Computer Cover). NOTICE: To connect a network cable, first plug the cable in to the network wall jack and then plug the cable into the computer. ... -
Page 31: Removing A Floppy Drive
power cable hard drive cable 8. Check all connectors to be certain that they are properly cabled and firmly seated. 9. Replace the computer cover (Replacing the Computer Cover). NOTICE: To connect a network cable, first plug the cable into the network wall jack and then plug it into the computer. ... -
Page 32: Installing A Floppy Drive
9. Enter system setup (see Entering System Setup) and select the appropriate Diskette Drive option. 10. Verify that your computer works correctly by running the Dell Diagnostics (see Dell Diagnostics). Media Card Reader Great user manuals database on... -
Page 33: Removing A Media Card Reader
Removing a Media Card Reader CAUTION: Before you perform any of the procedures in this section, follow the safety instructions in the Product Information Guide. NOTICE: To prevent static damage to components inside your computer, discharge static electricity from your body before you touch any of your computer's electronic components. -
Page 34: Installing A Media Card Reader
8. Replace the drive panel (see Installing the Drive Panel). 9. Replace the computer cover (see Replacing the Computer Cover). Installing a Media Card Reader CAUTION: Before you perform any of the procedures in this section, follow the safety instructions in the Product Information Guide. NOTICE: To prevent static damage to components inside your computer, discharge static electricity from your body before you touch any of your computer's electronic components. -
Page 35: Removing A Cd/Dvd Drive
9. Route the USB cable through the cable routing clip. 10. Replace the computer cover (see Replacing the Computer Cover). CD/DVD Drive CAUTION: Before you perform any of the procedures in this section, follow the safety instructions in the Product Information Guide. ... - Page 36 See the documentation that came with the drive for instructions on installing any software required for drive operation. 10. Enter system setup (see Entering System Setup) and select the appropriate Drive option. 11. Verify that your computer works correctly by running the Dell Diagnostics (see Dell Diagnostics). Battery Great user manuals database on...
-
Page 37: Replacing The Battery
Replacing the Battery CAUTION: Before you perform any of the procedures in this section, follow the safety instructions in the Product Information Guide. NOTICE: To prevent static damage to components inside your computer, discharge static electricity from your body before you touch any of your computer's electronic components. -
Page 38: Removing The Power Supply
Removing the Power Supply 1. Follow the procedures in Before You Begin. 2. Remove the computer cover (see Removing the Computer Cover). 3. Disconnect the DC power cables from the system board and the drives. NOTE: Note the routing of the DC power cables underneath the tabs in the computer frame as you remove them from the system board and drives. -
Page 39: Removing The Processor
7. Connect your computer and devices to electrical outlets, and turn them on. Processor CAUTION: Before you begin any of the procedures in this section, follow the safety instructions in the Product Information Guide. NOTICE: To prevent static damage to components inside your computer, discharge static electricity from your body before you touch any of your computer's electronic components. -
Page 40: Installing The Processor
2 captive screw housing (2) NOTICE: If you are installing a processor upgrade kit from Dell, discard the original heat sink. If you are not installing a processor upgrade kit from Dell, reuse the original heat sink when you install your new processor. - Page 41 If you are not installing a processor upgrade kit from Dell, reuse the original heat-sink assembly when you replace the processor. If you installed a processor replacement kit from Dell, return the original heat-sink assembly and processor to Dell in the same package in which your replacement kit was sent.
-
Page 42: I/O-Panel Components
10. Replace the computer cover (see Replacing the Computer Cover). NOTICE: To connect a network cable, first plug the cable into the network port or device and then plug the cable into the computer. 11. Connect your computer and devices to electrical outlets, and turn them on. I/O Panel ... - Page 43 1 release tab 2 card retention mechanism 3 card retention door 4 heat sink captive screws (2) 5. Use a long Phillips screwdriver to loosen the two captive screws, one on each side of the heat-sink assembly. ...
-
Page 44: Installing The I/O Panel
fan release lever drive panel 10. Lift the fan release lever, then slide the fan toward the back of the computer to release the four fan tabs from the four slots in the bottom cover. 11. Remove the fan from the computer. ... -
Page 45: Removing The Processor Fan
Follow the removal procedure (Removing the I/O Panel) in reverse order, ensuring that the tabs on the top panel, bottom panel, and front panel are secure. Processor Fan CAUTION: Before you begin any of the procedures in this section, follow the safety instructions in the Product Information Guide. ... -
Page 46: Installing The Processor Fan
heat sink and fan shroud assembly captive screw housing (2) 7. Place the heat-sink assembly on its side in a safe place. 8. Disconnect the system fan cable from the system board. 9. Ensure that all cables have been removed from the routing clips on the top of the system fan assembly. fan release lever fan release lever tab processor fan... -
Page 47: Removing The Card Fan
Removing the Card Fan 1. Follow the procedures in Before You Begin. 2. Remove the computer cover (see Removing the Computer Cover). 3. Disconnect the card fan cable from the system board. 4. Remove any cables from the routing clips on the top of the card fan assembly. fan release lever fan release lever tab processor fan... -
Page 48: Installing The System Board
3. Disconnect any telephone or telecommunication lines from the computer. 4. Disconnect your computer and all attached devices from their electrical outlets, and then press the power button to ground the system board. 5. Open the computer cover (see Removing the Computer Cover). - Page 49 2. Ensure that no tools or extra parts are left inside the computer. 3. Lower the cover into place: a. Pivot the cover down. b. Press down on the right side of the cover until it closes. c. Press down on the left side of the cover until it closes. ...
-
Page 50: Specifications
Back to Contents Page Specifications Dell™ XPS™ 410 Service Manual Processor Processor type Intel® Pentium® 4 Intel® Pentium® D Intel® Core™ 2 Duo Level 2 (L2) Cache at least 2 MB on Intel Pentium D, Pentium 4, and Core processors Memory Type dual-channel 533-, 667-, and 800-MHz DDR2... - Page 51 PCI Express (x1) connector one x1 connector size 36 pins connector data width (maximum) 1 PCI Express lane PCI Express (x4) connector one x4 (x8 connector wired as x4 electrically) connector size 98 pins connector data width (maximum) 4 PCI Express lanes ...
- Page 52 orange light — A good connection exists between a 100-Mbps network and the computer. off (no light) — The computer is not detecting a physical connection to the network. Activity light (on integrated network adapter) yellow light — Blinking indicates activity on the network.
-
Page 53: System Setup Program
Entering System Setup 1. Turn on (or restart) your computer. 2. When the blue DELL™ logo is displayed, watch for the F2 prompt to appear. 3. Once the F2 prompt appears, press <F2> immediately. NOTE: The F2 prompt indicates that the keyboard has initialized. If you press <F2> before you are prompted, the keystroke will be lost. - Page 54 Lists system information such as the computer name, the BIOS version number and date, system tags, and other system-specific information. System Info NOTE: The system name listed in the BIOS may not appear exactly as the name that appears on the computer or in the computer's documentation.
-
Page 55: Boot Sequence
NOTE: Changing the acoustics setting does not alter your hard drive image. Security This option provides restricted access to the computer's system setup program in the same way that access to the system can be restricted Admin with the System Password option. Password System Displays the current status of the system's password security feature and allows a new system password to be assigned and verified. -
Page 56: Changing Boot Sequence For The Current Boot
Onboard SATA Hard Drive — The computer attempts to boot from the primary hard drive. If no operating system is on the drive, the computer attempts to boot from the next bootable device. Onboard or USB CD-ROM Drive — The computer attempts to boot from the CD drive. If no CD is in the drive, or if the CD has no operating system, the computer attempts to boot from the next bootable device. -
Page 57: Clearing Cmos Settings
2. Locate the 2-pin password jumper (CLRPSWD) on the system board (see System Board Components), and remove the jumper to clear the password. NOTE: When you receive your computer, the jumper plug is attached to pins 1 and 2. ... -
Page 58: Flashing The Bios
The BIOS may require a new flash when an update is available or when replacing the system board. 1. Turn on the computer. 2. Locate the BIOS update file for your computer at support.dell.com. 3. Click Download Now to download the file. ... -
Page 59: Technical Overview
Back to Contents Page Technical Overview Dell™ XPS™ 410 Service Manual Inside View of Your Computer System Board Components Power Supply DC Connector Pin Assignments Inside View of Your Computer CAUTION: Before you use this information in any of the procedures, follow the safety instructions in the Product Information Guide. -
Page 60: Power Supply Dc Connector Pin Assignments
memory module battery socket SATA Connectors SATA0, connectors (1, 2, 3, 4) (BATTERY) SATA1 front panel I/O main power SATA connectors (4) (SATA2, connector connector SATA3, SATA4, SATA5 FlexBay USB connector clear CMOS jumper password jumper (CLRPSWD) (CLRCMOS) 10 PCI Express x1 card 11 PCI Express x16 card 12 PCI Express x4 card connector connector... -
Page 61: Dc Power Connector P1
DC Power Connector P1 Pin Number Signal Name Color Wire Gauge +3.3 VDC Orange 18-AWG +3.3 VDC Orange 18-AWG Black 18-AWG +5 VDC 18-AWG Black 18-AWG +5 VDC 18-AWG Black 18-AWG Gray 18-AWG +5 VFP Purple 18-AWG +12 VB DC... -
Page 62: Dc Power Connector P2
DC Power Connector P2 Pin Number Signal Name 18-AWG Wire Black Black +12 VA DC Yellow +12 VA DC Yellow DC Power Connect P4 Pin Number Signal Name 18-AWG Wire Black Black +3.3 VDC Orange +5 VDC... - Page 63 Pin Number Signal Name 18-AWG Wire +5 VDC Black Black +12 A VDC Yellow DC Power Connectors P10 Pin Number Signal Name 18-AWG Wire +12 VA DC Yellow Black Black +5V DC NOTE: The P10 connector is intended for use with PCI Express graphics cards that have power requirements exceeding 75 watts. ...
Need help?
Do you have a question about the XPS 410 and is the answer not in the manual?
Questions and answers