
Related Manuals for Ferno arachnipod


Summary of Contents for Ferno arachnipod
- Page 1 Total Edge Management System Users’ Manual Version 7.0 / August 2020 Read this Manual and Retain for future reference...
-
Page 2: Ferno Customer Service
Limitation of Liability If a product is proven defective, Ferno will repair or replace it, or, at our option, refund the item’s purchase price. In no event is Ferno liable for more than the selling price of the product. The purchaser accepts these terms in lieu of all damages. -
Page 3: Table Of Contents
Lazy Leg Adaptor __________________________________________27 Equipment Bracket 2:1 Rigging _______________________________28 4 - PRINCIPLES OF EDGE MANAGEMENT ____________________________ 29 5 - STABILISING THE ARACHNIPOD ________________________________ 32 6 - INSPECTION & MAINTENANCE__________________________________ 38 Cleaning, Storage and Transportation _________________________ 38 Inspection and Maintenance _____________________________ 38-46... -
Page 4: Safety Information
Working at heights and in confined spaces can be dangerous. If you use Ferno equipment, you are responsible for learning and observing safe techniques. Ferno Australia disclaims all liability for any injury or loss arising from the use of this equipment when any of its components are damaged or weakened by wear and tear. -
Page 5: Warning
SAFETY INFORMATION 1 - SAFETY INFORMATION 1.1 Warning 1.5 Compatible Components The use of the Arachnipod is limited to combinations of WARNING approved and registered components only. Examples include: Retractable type fall arrestor with rescue winch according to EN360. Warning safety alerts indicate a potentially hazardous situation that, if not avoided, could result in injury or death. -
Page 6: About The Arachnipod
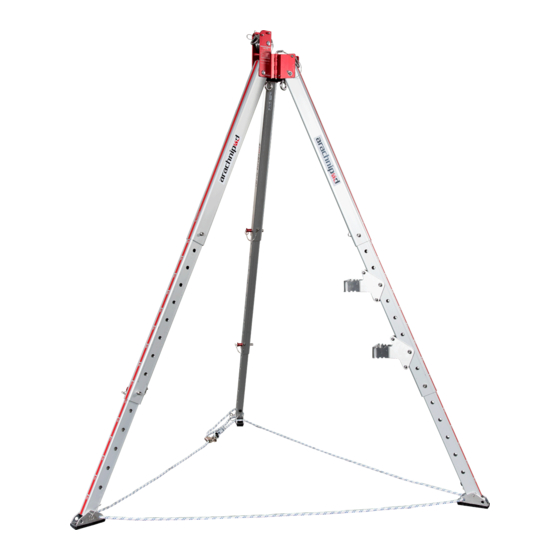
2 - ABOUT THE ARACHNIPOD 2.1 Description & Kit Contents The Arachnipod is a portable anchor device and is used for securing persons operating in situations where a fall from height may occur. The Arachnipod system adapts to most terrains to enable access to difficult locations such as confined spaces, sheer edges, steep terrain and voids. - Page 7 • 1 x Foot tether and rope grab • 1 x Foot tether with rope grab • 1 x Arachnipod standard bag • 1 x Arachnipod standard bag • 1 x Single leg bag These parts can be variously combined to build: These parts can be variously combined to build: •...
- Page 8 ADVANTAGE KIT (APOD-S*B) (APOD-ADV+) FEATURES FEATURES • The bridge system is a unique feature of the Arachnipod • Rectangular, adjustable legs with leg pins • The bridge spans larger openings • Two stainless steel swivel eye bolt anchor points •...
- Page 9 1 Lazy Leg Adaptor • Quadpod • 2 x Foot tether and rope grab • Gin / Monopole • 1 x Arachnipod standard bag • Handrail Recovery Monopole • 1 x Bridge bag to suit bridge length • Bridge System •...
-
Page 10: Basic Specifications
ABOUT THE ARACHNIPOD 2.2 Basic Specifications Basic specifications for the Arachnipod models are shown in the table below. General specifications are rounded. For more detailed specifications, refer to Detailed Specifications, page 49. Specifications Standard Tripod Advantage Tripod Quadpod Max. Inside Clearance Height 2671mm / 105”... - Page 11 ABOUT THE ARACHNIPOD Dimensions: Tripod OUTSIDE OF FEET 2508 2328 CTR OF FEET 2171 INSIDE OF FEET Ø 2533 INSIDE OF FEET SHOWN AT HIGHEST SETTING (A1) Dimensions: Quadpod Dimensions: Bridge System TOP VIEW BRIDGE (3000) 2MTR BRIDGE - 3346...
-
Page 12: Components And Accessories
Stabilisation Attachment Point ARACHNIPOD LEGS Leg Top Section All Arachnipod legs (Figure 1) are made up of three telescopic sections, a head and a foot socket for attachment of a foot. All legs Alpha-Numeric Labels are supplied with a Standard foot and feature alpha-numeric labels to aid communication during the setting up of leg heights. - Page 13 ABOUT THE ARACHNIPOD ARACHNIPOD FOOT OPTIONS The Arachnipod system offers various foot options to suit various ground surfaces and conditions. Feet are secured to the base of the lower leg with a detent pin. Leg with Standard Foot The Standard Foot (Figure 5) is ideal for flat surface applications such as concrete.
- Page 14 ABOUT THE ARACHNIPOD OPTIONAL ACCESSORIES (For product codes and comprehensive list of spare parts, refer Arachnipod Kits & Parts, page 50) Quad Plate Reverse Head A Quad Plate is used in the formation of a quadpod or A-Frame with The Reverse Head is used in the formation of an A-frame with Lazy Lazy Leg.
- Page 15 This kit is used to upgrade the functions of an Arachnipod Sold separately. tripod to a bridge system. Sold separately. Note: Kit illustrated with original Standard Foot. The next generation Standard Foot 2 (part # 90-0472) is supplied with all Arachnipod units after 24/08/2020...
- Page 16 The Bridge Ratchet Kit includes everything needed to stabilise the When a Lazy Leg is used as a compression member and extra Arachnipod bridge system. The kit includes 15m ratchet straps, length is required, the APOD-EKLL Extension Kit extends the 1200mm round slings, 2500mm snake slings and round slings length of the Lazy Leg by 1.7m / 67”.
-
Page 17: Instructions For Use
Ferno Australia. Are the pulleys in good condition and functioning correctly? When the Arachnipod is used as part of a fall arrest system, the Do any plastic parts show signs of wear or chemical damage? User must be equipped with a means of limiting the maximum... -
Page 18: General Set Up Instructions
3.3 General Set Up Instructions Assembling the Arachnipod is easiest with two or more people. Where possible, it is safest to configure the Arachnipod away from the edge before moving the unit into position with the help of several people. Once in position, secure the feet, tether and stabilise Qik Link head pin the Arachnipod. - Page 19 Spike Foot The spike tip of this reversible foot is ideal for point The Arachnipod is supplied with Standard feet which has a loading and ground penetration applications. thermoplastic elastomer tread moulded to a stainless steel foot with integrated spike.
- Page 20 • On uneven surfaces the legs can be different lengths. • Adjust the length of one or more legs so the Arachnipod’s head is level and directly over the opening or work area. Figure 27: Floor of different heights •...
-
Page 21: Configuring The Arachnipod
ESSENTIAL ARACHNIPOD CONFIGURATIONS This section covers how to assemble Arachnipod into different configurations only. It does not contain set up instructions which are provided in General Set Up, pages 18–20. 3.4 Configuring the Arachnipod Tripod assembly 120° 120° 120° A tripod provides simple access to confined space entry points such as manholes and voids. - Page 22 ESSENTIAL ARACHNIPOD CONFIGURATIONS Bridge assembly An Arachnipod Bridge (Figure 32) is used for spanning larger openings or voids where a regular tripod, A-Frame or quadpod would not be able to. These include trenches, large holes, mine and lift shafts. Bridge beams are available in lengths of 2m, 3m and 4m.
- Page 23 Raise the bridge to the desired height by extending the legs, following the procedure outlined in Step 4 General Set Up, page 19. Lash each set of leg feet together. The Bridge system must be stabilised to prevent unwanted movement and failure. Refer “Stabilising the Arachnipod” on page 32.
-
Page 24: Advanced Configurations
Insert the Gin Head into the Lazy Leg tube and lock into position with the detent pin (Figure 37). The system must be stabilised to prevent unwanted movement and failure. Refer “Stabilising the Arachnipod” on page 32. A-Frame A conventional or off-set A-Frame is used in situations where an... - Page 25 ADVANCED ARACHNIPOD CONFIGURATIONS Sideways A-Frame The sideways A-Frame (Figure 39), when formed with the Arachnipod pulley leg is ideal for situations requiring a high- directional to protrude past an edge such as cliffs, high-rise buildings and bridges. An Arachnipod Rigging Plate should be used to provide additional tie-off points for stabilising the frame.
- Page 26 ADVANCED ARACHNIPOD CONFIGURATIONS Handrail Recovery Monopole With the aid of an Arachnipod Pulley Leg, a handrail can be used to WARNING rig an artificial high directional to raise a person or rescue stretcher over an edge. The Pulley Leg enables an elementary system to be set up to retrieve a person or rescue stretcher over an edge, and through •...
-
Page 27: Lazy Leg Adaptor
LAZY LEG ADAPTOR INSTRUCTIONS Lazy Leg Adaptor Instructions A Lazy Leg Adaptor (Fig 43) is used to convert a Lazy Leg into a Standard Leg. It is supplied with a detent pin which is used to secure the Lazy Leg Adaptor Plug into position. When the Lazy Leg Adaptor is fitted, it limits the Lazy Leg’s rotation capability from 180°... -
Page 28: Equipment Bracket 2:1 Rigging
The Arachnipod would normally be used in a tripod or quadpod configuration for this type of work. Always secure the Arachnipod legs and stabilise the unit to suit the configuration and situation. Refer to “Stabilising the Arachnipod” on page 32... -
Page 29: Principles Of Edge Management
Edge Management is the assessment of the rigging tasks and equipment required to safely manoeuvre a load over an edge. A high change of direction is the key to successful edge management (Figure 48, 49) and the Arachnipod is an exceptionally versatile tool to facilitate this solution. - Page 30 (Figure 53), the rope would remain stationary because the load forces are equal and no movement would occur. If an Arachnipod is placed under this rope, the same rules would apply. However, because there is a change of direction in the rope, a resultant force now exists (Figure 54).
- Page 31 Anchor selection and anchor rigging techniques are not within the scope of this manual. Using an Arachnipod leg as an anchor The Arachnipod Equipment Bracket may be used as a rated attachment point. It is designed and tested for attachment to the middle leg section.
-
Page 32: Stabilising The Arachnipod
ESSENTIALS: STABILISING ARACHNIPOD 5 - STABILISING THE ARACHNIPOD Stabilising the Arachnipod Additional rigging may be required to stabilise the Arachnipod. The purpose is to manage sideways forces (e.g. change of direction) or other situations where the Arachnipod may become unstable. - Page 33 ESSENTIALS: STABILISING ARACHNIPOD Lazy Leg TRIPOD STABILISATION A Lazy Leg or easel leg tripod is similar to a regular tripod because it uses three legs in compression. A Lazy Leg tripod is constructed as an A-frame, utilising a Lazy leg as the third leg.
- Page 34 Figure 63 the resultant below the load is directly contributing to the stability of the bridge. A Bridge Ratchet Strap Kit, customised for convenient use with the Arachnipod, is available for stabilising the bridge system. A-FRAME STABILISATION An A-Frame makes use of two legs to form two compression members.
- Page 35 ESSENTIALS: STABILISING ARACHNIPOD SIDEWAYS A-FRAME STABILISATION (Figure 66) This configuration has two legs positioned close to parallel with the load line. The leg lengths and positions are set so the resultant is focused between the two legs but not in direct alignment with the legs.
- Page 36 Tension rigging and/or Lazy Leg is used to support the A-frame when their legs are in compression. This method is ideal when there are no anchors available for pre-loading on the low side of the A-frame. © Ferno Australia / ID: 00184-V7 / AUG 2020...
- Page 37 (Figure 69 and 70). Tilt or offset the Gin Pole by a few degrees off vertical in order to provide clearance for the main line from the Arachnipod leg. Offsetting the Gin Pole also enables the tension and pre-load...
-
Page 38: Inspection & Maintenance
Avoid exposing the Arachnipod to chemicals, oils, solvents and other aggressive or corrosive materials and agents. • Once the unit is clean and dry, store the Arachnipod in its bags and store at room temperature away from direct sunlight. •... - Page 39 Inspect the cable that attaches the leg pin to the leg. If the cable is damaged, contact service agent for repair. Arachnipod Ball Lock Leg Pin #68-0054 Labels Red labels are adhered to the outside face of each leg. The middle and lower leg have alpha and numeric markings at each hole position to allow all legs to be easily set to the same height (eg B-3).
- Page 40 Be careful not to cross-thread the bolts as the product will become unsafe, dramatically reduce the WLL and be dangerous to use. If cross threaded, the unit must be sent back to Ferno Australia. Inspect the entire head for damage, gouging, deformation and indentations.
- Page 41 180˚. Remove the Detent Pin and Stabilisation D-Shackle Attachment Point (D-shackle) from the head. If a Lazy Leg Adaptor is present, remove it. Refer to Arachnipod Operators’ Instructions regarding the Lazy Leg Adaptor application and use. Ensure the Lazy Leg Head can pivot 180˚ and that there is no binding up or stiffness in the pivot action.
- Page 42 Place the Soft Ground Shoe on to the curved part of the foot adaptor plug on the bottom of the leg, ensuring the Soft Ground Shoe moves freely and stays in place once inserted on to the leg. Arachnipod soft ground disc #34-0032 © Ferno Australia / ID: 00184-V7 / AUG 2020...
- Page 43 Ensure the welding on the component is intact and there is no cracking on the welded areas. Ensure the Foot Locating Spike feeds easily through Standard Foot hole as illustrated in Fig 12. Arachnipod Soft Ground Stake #16-1046-0 Foot Locating Spike Hold Down Stake...
- Page 44 7262 thread locking compound to the threads and re-tighten the bolt. Be careful not to cross-thread the bolts. If cross threaded, the unit must be sent back to Ferno Australia. Ensure the etching on the Equipment Bracket is readable and that no writing/information is obscured.
- Page 45 Inspect the pulleys through which the trolley guide rope runs at each end of the Bridge. Ensure that pulleys move freely and do not bind up. If the bearings need replacing, return the unit to Ferno or an authorised Ferno repair agent. Bridge Beam Trolley (Fig 86) Inspect the Bridge Beam Trolley ensuring there is no deformation, damage or rust on the trolley.
- Page 46 The cable should be replaced if there are six or more randomly broken wires in one lay, or three or more broken wires in one strand in one lay. If the cable needs replacing, return the complete winch to Ferno or a Ferno authorised repair agent.
-
Page 47: Form: Arachnipod Kit Records
INSPECTION & MAINTENANCE ARACHNIPOD KIT RECORDS Each Arachnipod Kit is assigned a Kit Number. This is one collective number recorded on Ferno Australia’s database, which references all individual serial numbers contained within the Arachnipod Kit. A kit contains more than one item with a serial number. It can range from a tripod, or a tripod plus accessories to a full Total Edge Management System (TEMS) Kit. -
Page 48: Form: Regular And Annual Inspection Record
The unit must be inspected before and after every use by the competent person/s using the equipment. • Additionally, the Arachnipod must be inspected by a competent, instructed, accredited person at least once a year to ensure the unit is fully functional. Details of this annual inspection should be recorded using the Inspection Record Form below. -
Page 49: Detailed Specification & Parts
Arachnipod exceeds this load range in all configurations. The typical weight of a rescue load ranges from 200kg to 280kg (440lb to 265lb) depending upon a number of factors. The Arachnipod offers many configurations that match or exceed the 280kg load with only a few exceptions. -
Page 50: Kits And Parts
TEMS* Kit APOD-TEMS • Full Accessory Kit * Total Edge Management System Arachnipod Expansion Kits Expansion Kits are pre-assembled components, each designed to expand the capabilities of your current Arachnipod PART NUMBER ARACHNIPOD PART NAME INCLUSIONS APOD-AKIT Arachnipod Full Accessory Kit... - Page 51 68-0035 68-0036 SS Detent Pin - 3/8 inch dia x 3 inch 90-0472 Standard Foot with Tread 51-0058 Arachnipod Red Leg Labels - set of 3 Spike Foot with Tip 90-0120 Arachnipod Label - Reflective Silver 51-0059 22-1004 Spike Foot Tip only...
-
Page 52: Declaration Of Conformity
FERNO AUSTRALIA PTY LTD 11 JOHNSTONE ROAD BRENDALE QLD 4500 AUSTRALIA Declares under his sole responsibility, that the PPE described hereafter: Equipment: APOD – Ferno Arachnipod in versions Tripod, Quadpod and Quadpod with Bridge Model Numbers: APOD-STD Arachnipod Standard Tripod APOD-ADV... - Page 54 © Ferno Australia / ID: 00184-V7 / AUG 2020...
Need help?
Do you have a question about the arachnipod and is the answer not in the manual?
Questions and answers