Table of Contents
Advertisement
Available languages
Available languages
Quick Links
Operating Instructions
MaxLite LED Slim Flood Fixtures (15W-140W)
®
General Safety Information
• To reduce the risk of death, personal injury or property damage from
fire, electric shock, falling parts, cuts/abrasions, and other hazards
read all warnings and instructions included with and on the fixture
box and all fixture labels.
• Before installing, servicing, or performing routine maintenance upon
this equipment, follow these general precautions.
• Commercial installation, service and maintenance of luminaires
should be performed by a qualified licensed electrician.
• For Residential installation: If you are unsure about the installation or
maintenance of the luminaires, consult a qualified licensed electrician
and check your local electrical code.
• DO NOT INSTALL DAMAGED PRODUCT!
• This fixture is intended to be connected to a properly installed and
grounded UL listed junction box.
WARNING:
• Risk of Fire - Supply conductors (power wires) connecting the fixture
must be rated min. 75°C Supply Conductors. If uncertain consult an electrician.
• Risk of fire or electric shock. installation requires knowledge of
luminaires electrical systems.
• Risk of Fire/Electric Shock - If not qualified, do not attempt installation. Contact a qualified electrician.
• Do not use in high humidity conditions.
• Keep away from flammable and explosive environment.
• Don't cover the fixture with insulation liner or similar material.
• Don't install where fixture is loose or only partially supported.
• Don't impact or exert pressure on the fixture surface face or rear, as damage may occur.
CAUTION:
• For your safety read and understand instructions completely before starting installation.
• To prevent wiring damage or abrasion, do not expose wiring to edges of sheet metal or other sharp
objects.
• Before attempting installation, check your local electrical code, as it
sets the wiring standards for your locality.
NOTES:
• If luminaire (fixture) is to be switched from a wall switch, make sure black power supply wire is
connected to the switch. DO NOT connect the white supply wire to the switch.
• Make certain no bare wires are exposed outside the wire nut connectors.
• Do not make or alter any open holes in an enclosure of wiring or electrical components during
kit installation.
Model:
MSF Series
© Copyright 2022. MaxLite, Inc. All Rights Reserved.
12 York Ave, West Caldwell, NJ 07006 Tel: 800-555-5629 Fax: 973-244-7333 Email: info@maxlite.com
MSF Series
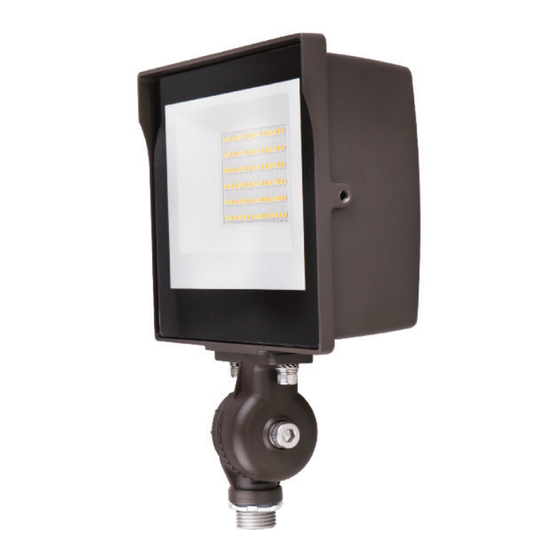
Picture is for illustration purposes only.
Your model may vary.
Page: 1
REV: 03/15/22
Advertisement
Table of Contents

Related Manuals for MaxLite MSF Series


Summary of Contents for MaxLite MSF Series
- Page 1 • Do not make or alter any open holes in an enclosure of wiring or electrical components during kit installation. Model: MSF Series © Copyright 2022. MaxLite, Inc. All Rights Reserved. Page: 1 12 York Ave, West Caldwell, NJ 07006 Tel: 800-555-5629 Fax: 973-244-7333 Email: info@maxlite.com REV: 03/15/22...
-
Page 2: General Wiring Diagram
4.) Connect the purple fixture wire to the (V+) DIM wire. 5.) Connect the pink fixture wire to the (V-) DIM wire. © Copyright 2022. MaxLite, Inc. All Rights Reserved. Page: 2 12 York Ave, West Caldwell, NJ 07006 Tel: 800-555-5629 Fax: 973-244-7333 Email: info@maxlite.com REV: 03/15/22... - Page 3 4.) Insert the ½” threaded nipple into the mounting surface (pole, junction box, etc.). Ensure that it is secure by either screwing it into the mounting surface or with the supplied nut (Fig. 3). © Copyright 2022. MaxLite, Inc. All Rights Reserved. Page: 3 12 York Ave, West Caldwell, NJ 07006 Tel: 800-555-5629 Fax: 973-244-7333 Email: info@maxlite.com REV: 03/15/22...
- Page 4 7.) Connect the AC input wires coming from the mounting bracket to the power supply wires (Fig. 9). Pink © Copyright 2022. MaxLite, Inc. All Rights Reserved. Page: 4 12 York Ave, West Caldwell, NJ 07006 Tel: 800-555-5629 Fax: 973-244-7333 Email: info@maxlite.com REV: 03/15/22...
- Page 5 3.) Replace the KO plugs, ensure they are tight to prevent any ingress water. The clear plastic plug should be used on the hole with the photocell controller (Fig. 14). © Copyright 2022. MaxLite, Inc. All Rights Reserved. Page: 5 12 York Ave, West Caldwell, NJ 07006 Tel: 800-555-5629 Fax: 973-244-7333 Email: info@maxlite.com REV: 03/15/22...
-
Page 6: Warranty Information
MaxLite or its authorized distributor/dealer (the “Warranty Period”), as follows: If a Product fails to operate during the Warranty Period as a result of defects in materials or workmanship, MaxLite will, at its option, repair it, replace it with the same or like Product. -
Page 7: Consignes Générales De Sécurité
• Ne pas réaliser ou modifier de trous dans une enceinte de câblage ou de composants électriques pendant l’installation de ce kit. Modèle: Série MSF © Droits d’auteur 2022. MaxLite, Inc. Tous droits réservés. Page: 1 12 York Ave, West Caldwell, NJ 07006 Tél: 800-555-5629 Fax: 973-244-7333 Email: info@maxlite.com RÉV: 03/15/22... - Page 8 4.) Connectez le fil violet du luminaire au fil VAR (V+). 5.) Connectez le fil rose du luminaire au fil VAR (V-). © Droits d’auteur 2022. MaxLite, Inc. Tous droits réservés. Page: 2 12 York Ave, West Caldwell, NJ 07006 Tél: 800-555-5629 Fax: 973-244-7333 Email: info@maxlite.com RÉV: 03/15/22...
- Page 9 Assurez-vous qu’il est fixé en le serrant sur la surface de montage ou en utilisant l’écrou fourni (Fig. 3). poteau © Droits d’auteur 2022. MaxLite, Inc. Tous droits réservés. Page: 3 12 York Ave, West Caldwell, NJ 07006 Tél: 800-555-5629 Fax: 973-244-7333 Email: info@maxlite.com RÉV: 03/15/22...
- Page 10 Luminaires et lampions Support articulé 1/2 Noir/Marron: ACL Violet: VAR+ Vert/Jaune Rose: VAR- Blanc/Bleu: ACN © Droits d’auteur 2022. MaxLite, Inc. Tous droits réservés. Page: 4 12 York Ave, West Caldwell, NJ 07006 Tél: 800-555-5629 Fax: 973-244-7333 Email: info@maxlite.com RÉV: 03/15/22...
- Page 11 Le bouchon en plastique transparent sera utilisé pour l’orifice du contrôleur de la photocellule (Fig. 14). © Droits d’auteur 2022. MaxLite, Inc. Tous droits réservés. Page: 5 12 York Ave, West Caldwell, NJ 07006 Tél: 800-555-5629 Fax: 973-244-7333 Email: info@maxlite.com RÉV: 03/15/22...
-
Page 12: Informations De Garantie
MaxLite Inc. garantit ses produits pour une période minimale de CINQ (5) ans à partir de la date d’installation ou 90 jours après la date de l’achat de MaxLite ou son distributeur / revendeur autorisé (la « Période de Garantie »), comme suit: Si un Produit ne fonctionne pas correctement pendant la Période de Garantie suite à...
Need help?
Do you have a question about the MSF Series and is the answer not in the manual?
Questions and answers