
Related Manuals for Sunrise Medical STERLING ELITE2 Mini


Summary of Contents for Sunrise Medical STERLING ELITE2 Mini
- Page 1 Mobility Scooter 000691026.UK Instructions for Use ELITE Mini ELITE ELITE Plus Elite Mini XS Plus Rev.B...
- Page 2 Scooter Components We at SUNRISE MEDICAL have been awarded the ISO-13485 certificate, which affirms the quality of our products at every stage, from R & D to production. These products meet the requirements in accordance with EC regulations. Options or accessories shown are available at extra cost.
-
Page 3: Table Of Contents
Contents 1.0 User information ........... 4 6.0 Control Panel ............23 1.1 This user manual ��������������������������������������������������������������4 6.1 Definitions ����������������������������������������������������������������������24 1.2 For further information ����������������������������������������������������4 6.1.1 On/Off Key Switch ���������������������������������������������������27 1.3 Symbols used in this manual ��������������������������������������������5 6.1.2 Control Lever (Wig wag Control) ����������������������������27 6.2 Braking ... -
Page 4: User Information
1.0 User information Thank you for choosing a Sunrise Medical scooter. Sunrise Medical’s high- quality mobility products are designed to enhance independence and make your everyday life easier. As a part of our ongoing product improvement initiative, Sunrise Medical reserves the right to change specifications and design without notice. -
Page 5: Symbols Used In This Manual
Member State in which the user and/or patient is established. B4Me special adaptations Sunrise Medical strongly recommends that in order to ensure that your B4Me product operates, and performs as intended by the manufacturer; all the user information supplied with your B4Me product is read and understood, before the product is first used. -
Page 6: Safety
Mini Serial Label (next page) Fig. 2.4 Fig. 2.6.2 Location of Serial Number Label - Elite Mini UDI Label (next page) Sunrise Medical GmbH 2020-10-01 Kahlbachring 2-4 Fig. 2.6.3 Location of Serial Number Label - Elite XS & Elite Plus - UDI... -
Page 7: Safety: Moving Parts
• Wheels • Seat rotation lever • Seat forward/backward positioning lever • (maybe the) Tiller height adjustment on Elite Plus 2.4 Safety: Electromagnetic radiation Sunrise Medical GmbH 2020-10-01 Kahlbachring 2-4 D-69254 Malsch/Germany SCOOTER / SKOTER / ROLLER 242210201001 Type: Elite2 Mini... -
Page 8: Safety: Choking Hazard
2.6 Safety: Choking hazard 2.8 Safety: Lifting the scooter WARNING! DANGER! • Do not lift this scooter, seat or batteries by any parts that are This mobility aid uses small parts which under certain removable, doing so may result in damage to the scooter or circumstances may present a choking hazard to young injury to the user. -
Page 9: Intended Use Of The Scooter
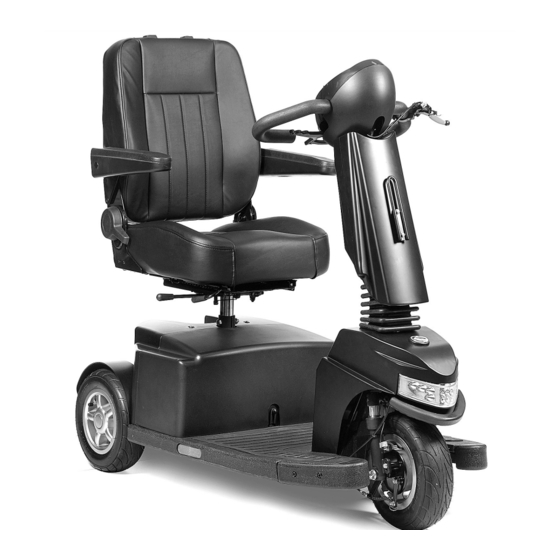
3.0 Intended use of the scooter Fig. 3.1 General description This Sterling Elite scooter range is designed for comfort, safety and durability. Due to its modular design, simplicity and wide range of adjustments, the Sterling Elite scooter range is a perfect choice for easy service, refurbishment and recycle requirements. -
Page 10: Area Of Application: The User Environment
3.2 Area of application: The user environment WARNING! Class B Scooter’s are usually large in size, not necessarily • If you are under the influence of medicines that can have an intended for indoor use but capable of travelling longer effect on your ability to drive, you are not permitted to drive distances and negotiating outdoor obstacles. -
Page 11: Setting Up The Scooter
4.0 Setting up the scooter Fig. 4.1 Sunrise Medical scooters can be adjusted according to specific needs of the user. Pre-settings are carried out once, the first time the scooter is going to be used. They must be executed by a qualified specialist, unless explicitly stated otherwise. -
Page 12: Back Angle (Executed By The User)
4.5 Back angle (executed by the user) (Fig. 4.5) Fig. 4.5 1. Adjust by turning (A). WARNING! Take care when adjusting the back angle as it could be possible to fall backwards and harm the user or the scooter. • When adjusting the back angle, be careful not to get your fingers caught. -
Page 13: Lap Strap / Seating Positioning Belt
4.10 Lap strap / seating positioning belt Fig. 4.9 DANGER! / WARNING! • This product is only to be used to position a single person in a scooter. Mounting a lap strap / seating positioning belt The lap belt is fitted to the scooter as shown in the fitting photographs, (Fig.4.9 - 4.10). - Page 14 • For your comfort, the Lap Belt must be correctly fitted to the scooter. If you are unsure about the fitting or operation of this option, please contact your approved Sunrise Medical dealer. • Generally, the lap strap should be fixed so that the straps sit at an angle of approximately 45°...
-
Page 15: Anti Tips
4.11 Anti Tips (Fig. 4.14): Fig. 4.14 WARNING! • Ensure the anti tips are fitted before using the scooter. • Ensure that anti tips are not damaged or worn before using your scooter. • Attendants must be aware of the location of the anti tips to prevent feet being trapped underneath causing injury. -
Page 16: Raised Foot Platform
4.12.4 Raised Foot Platform Fig. 4.18 This is to facilitate the correct knee / leg angle to obtain maximum comfort for users with shorter lower leg lengths. WARNING! Be aware of the extra height from the ground and take care when getting on and off the scooter. -
Page 17: Using The Scooter
5.0 Using the scooter Checking batteries • Before using your vehicle for the very first time, please charge your batteries for a period of 24 hours. DANGER! • Are the batteries sufficiently charged? The green lights on • Be aware that you may need to adjust the controller settings the battery indicator must be on. -
Page 18: Making A Transfer
5.2 Making a transfer Fig. 5.1 DANGER! / WARNING! To prevent a fall: 1. Ensure that the key is turned off during transfers to avoid unintentional movement. If you fail to do so, you may touch the controller and cause your scooter to move when you do not expect it. -
Page 19: Driving The Scooter
5.3 Driving the scooter Adverse conditions: Please be aware that when driving your scooter in adverse WARNING! conditions, e.g. on wet grass, mud, ice, snow or other slippery surfaces, you may experience a reduction in the grip and • The user of the scooter is at all times completely responsible traction of your scooter. -
Page 20: Curves
5.4 Curves 5.6 Driving on a slope (Fig 5.5) Steering the scooter is easy and logical. Just be sure to Your scooter has been designed and tested to allow its use on remember to get wide clearance when turning so that the rear slopes or gradients of at least 6°. -
Page 21: Obstacles & Kerbs
5.7 Obstacles & kerbs: Gradients: ascents: WARNING! DANGER! • When going uphill, keep the scooter moving. • Never descend a kerb backwards. • If you have stopped on a hill, you should start slowly. • Do not attempt to climb or descend a series of steps or use •... -
Page 22: Pushing The Scooter
5.8 Pushing the scooter 5.9 Using Near Water The scooter can be moved by pushing. In order to do so, the Take extra care when using your scooter near open water. motors must be disengaged using a freewheel lever. This Canal tow paths, beaches, quay sides and river banks can be feature was developed for the attendants of scooter users and hazardous. -
Page 23: Control Panel
6.0 Control Panel Fig. 6.1 A. LCD display B. Directional arrow C. Battery level gauge D. Speed control E. Lights F. Indicators G. Hazard lights KM/H H. Horn I. Control levers J. Mode button B. Directional arrow Fig. 6.2 C. Battery level gauge D. -
Page 24: Definitions
6.1 Definitions A. LCD Display The backlit LCD display can display: • Speed in Kilometres per hour (km/h) or Miles per hour (m/h). • Total distance in Kilometres (km) or Miles (m), KM/H • Trip distance – reset by holding down MODE button, 7.1.7, (Fig.7.1). •... - Page 25 After this, the setting will revert to the standard 50% setting. NOTE: Further adjustment of the standard indoor setting is possible. Contact your Sunrise Medical dealer or supplier to do this. M. Indicator Icons The triangular shaped icon will pulse in time with the indicators and hazard lights.
- Page 26 Fig. 6.3 MODE OPERATION DISPLAY To enter Clock Set Press and hold the The current time display Mode round button below the flashes. clock display for more than 10 seconds. Choosing the 12 or 24 Press and release the 12:hr Flashes Hour Clock Mode right-hand indicator button to switch...
-
Page 27: On/Off Key Switch
6.1.1 On/Off Key Switch Fig. 6.4 To turn ON, insert the key vertically and turn 90 degree clockwise. To turn OFF, turn the key back to vertical position and remove, (Fig.6.4). 6.1.1 ON/OFF WARNING! KEY SWITCH Do not use the on/off key switch to stop the scooter unless there is an emergency. - Page 28 NOTE: The audible reversing alarm is turned off by default but it can be activated by your Sunrise Medical dealer or supplier. It is not recommended to deactivate this feature if it is a statutory requirement of your country/state.
-
Page 29: Braking
6.2 Braking Fig. 6.9 To stop the Scooter simply release the Wig-Wag or side control lever, whilst keeping your hands on the handlebar. Two types of braking will automatically operate in sequence: • Automatic regenerative braking, which slows the Scooter to a standstill. -
Page 30: Throttle Select Switch
6.3 Throttle select switch Fig. 6.11 This switch is used to select between the foot control and any handlebar control. NOTE: A latching, (push On-push Off), type switch is used for this function, (Fig.6.11). WARNING! When the scooter is turned off, the control that was selected at the time of switching off will still be selected when the scooter is turned back on again. -
Page 31: Batteries, Charging And Range
If in any doubt, contact your local Sunrise Medical authority disposal point. authorised dealer. • Return the batteries back to Sunrise Medical or directly to • Avoid contact with acid on damaged sealed type batteries or the battery manufacturer for recycling, when they no longer wet batteries. -
Page 32: Charging Batteries
If a different care plan is followed, this may result in lower than expected performance from your mobility vehicle. • Only use an approved Sunrise Medical charger compatible with the vehicle to be charged. • Charge your batteries every night, regardless of the amount of use your mobility device has had during the day. - Page 33 Connecting the battery charger Battery Charger Procedure for connecting the charger and charging The external charger has been designed to charge two 12V • Switch off the Scooter (see 6.1.1) AGM batteries connected in series (= 24 V). • Connect the battery charger round output plug to the charging socket (see Fig.
-
Page 34: The Range Of Your Vehicle
Sunrise Medical measure the range of their vehicles in a 1. Remove the seat (Fig 7.2 - 7.3) consistent and uniform manner, but variances still occur due to 2. - Page 35 Fig. 7.2 Fig. 7.3 Fig. 7.4 Fig. 7.5 Fig. 7.6 Fig. 7.7 Elite Mini XS Plus Rev.B...
-
Page 36: Transport
8.0 Transport 8.3 Other Transport requirements: The scooter may be transported by road, rail, sea or air as 8.1 Transportation in vehicles: luggage. This scooter is not suitable to use as a seat in a vehicle. Before you travel, please contact the appropriate carrier or travel operator. -
Page 37: Maintenance & Cleaning
Sunrise Medical Service Centre. • Push the wig-wag or control lever slowly forwards until you The contact details of your local Sunrise medical service centre hear the parking brake operate. can be found on the inside front cover of this booklet. -
Page 38: Tyre Maintenance And Pressures
The maximum tyre pressures are listed in Section 12.0, if in • A complete inspection, safety check and service should be doubt check the markings on the side of the scooter tyre for made by a Sunrise Medical authorised dealer at least once guidance. per year. -
Page 39: Wheel Removal
WARNING! • It is not usually practical to try to repair a puncture at the site of the occurrence. Sunrise Medical suggest that you call for help to remove the scooter either directly to an approved service agent, or to a safe place for collection by the approved agent at a later time. -
Page 40: 9�3�2 Elite 2 Plus 3-Wheel Front Wheel Removal
9.3.2 Elite Plus 3-Wheel Front Wheel Removal 9.3.3 Elite XS RS Rear Wheel Removal • Elevate the front wheel by placing a jack under the relevant • Use a flat bladed screwdriver to carefully lever off the hub jack points, (Fig. 9.1). cover, (Fig. -
Page 41: 9�3�4 Elite 2 Plus Rear Wheel Removal
9.3.4 Elite Plus Rear Wheel Removal Fig. 9.26 Fig. 9.27 • Use a flat bladed screwdriver to carefully lever off the hub cover (Fig. 9.26). • With the wheel still on the ground: use a 6.0mm Allen key to loosen the 4 rim studs, but do not release the studs more than two turns (Fig. - Page 42 Maintenance and Inspection Schedule Check battery level indicator and charge if necessary. Check the control levers on the tiller are not bent or damaged. Ensure all removable parts are securely fastened. Check lap strap for wear and make sure the buckle is operational. Check the Parking brake clicks on and off.
-
Page 43: Lighting Maintenance
CAUTION! • Always follow the instructions carefully. • Only use Sunrise Medical authorized spare parts. • Be advised that all lighting circuits are electronically Cleaning controls: & Controller protected. In the event of a short-circuit current will be Should the control of your scooter become soiled or dirty, it limited to a safe level. -
Page 44: Troubleshooting
10.2 Elite XS Display (Fig. 10.1) Always consult your Sunrise Medical authorised dealer when a Always consult your Sunrise Medical authorised dealer when a diagnostic fault has appeared on your scooter display. diagnostic fault has appeared on your scooter display. -
Page 45: Fault Codes And Possible Causes
10.3 Fault Codes and Possible Causes Fig. 10.4 Elite Plus Elite An excessive voltage has been applied to the Power Module. Check the battery connections. Check the correct battery charger is being used and that it is functioning properly. The parking brake has a bad connection. Check all connections between Motor, Brake and Power Module. -
Page 46: Disposal
11.0 Disposal The symbols below mean that in accordance with local laws and regulations your product should be disposed of separately from household waste. When this product reaches the end of its life, take it to the local collection point designated by local authorities. The separate collection and recycling of your product at the time of disposal will help conserve natural resources and ensure that it is recycled in a manner that protects the environment. -
Page 47: Specification Sheets (En 12184 & Iso 7176-15)
12.0 Specification Sheets (EN 12184 & ISO 7176-15) This product complies with the regulations and guidelines for medical aids and carries a CE symbol. The product meets the requirements and standards below. These are checked by independent institutions. EN ISO 10993-5:2009 Biological evaluation of medical devices - Part 5: Tests for in vitro cytotoxicity (ISO 10993-5:2009) Standard Definition / description... - Page 48 Model Sterling Elite Mini Max. user weight 136kg 300lb EN12184 class: Imperial system Description Metric system values Comments values & alternative ISO 7176-15 MIN. MAX. MIN. MAX. Total length standard configuration, without 1270mm 1341mm 50.0” 52.8” basket and with basket Total width 610mm 24.0”...
- Page 49 Model Sterling Elite Max. user weight 175kg 385.8lb EN12184 class: Metric system Imperial system Description Comments values values & alternative ISO 7176-15 MIN. MAX. MIN. MAX. COMMENTS Total length 1390mm 54.7” standard configuration Total width 670mm 26.4” Total weight 132 kg 291lb standard configuration with batteries Transport weight of the heaviest part...
- Page 50 Model Sterling Elite Plus Max. user weight 175kg 385.8lb EN12184 class: Metric system Imperial system Description Comments values values & alternative ISO 7176-15 MIN. MAX. MIN. MAX. COMMENTS Total length 1390mm 54.7” standard configuration Total width 650mm 25.6” Total weight 140 kg 308.6lb standard configuration with batteries...
-
Page 51: Warranty
* Means the Sunrise Medical facility from which the product was purchased. Additional Notes For Australia Only: For goods provided by Sunrise medical Pty Ltd in Australia, our goods come with a guarantee by Sunrise Medical that cannot be excluded under Australian Consumer Law. -
Page 52: Name Plate
14.0 Name Plate Type: Product Name/SKU Number. Rated slope with anti-tip tubes fitted, depends on scooter setting, posture and physical capabilities of the user. Maximum user weight. XXX kg Maximum axle loading. Maximum total weight. CE Mark. Maximum speed. User’s Guide. Indicates electrical / electronic equipment must be disposed of in accordance with the WEEE directive. - Page 53 Elite Mini XS Plus Rev.B...
- Page 54 Elite Mini XS Plus Rev.B...
- Page 55 Elite Mini XS Plus Rev.B...
- Page 56 F: +31 (0)30 – 60 55 880 Sunrise Medical Aps E: info@sunrisemedical�nl Mårkærvej 5-9 www�SunriseMedical�nl 2630 Taastrup Denmark Sunrise Medical HCM B�V� +45 70 22 43 49 Vossenbeemd 104 info@sunrisemedical�dk 5705 CL Helmond Sunrisemedical�dk The Netherlands T: +31 (0)492 593 888 Sunrise Medical Australia E: customerservice@sunrisemedical�nl...
Need help?
Do you have a question about the STERLING ELITE2 Mini and is the answer not in the manual?
Questions and answers