
Related Manuals for Topcon ALADDIN HW3.0


Summary of Contents for Topcon ALADDIN HW3.0
- Page 1 ALADDIN - User manual Rev. 19 EN of 10/07/2019 ALADDIN HW3.0 User manual Rev. 19 EN - 2019...
- Page 2 ALADDIN HW3.0 Product cod. 1240212 SW v.: 1.9.x Distributor Manufacturer Topcon Europe Medical B.V. Essebaan 11 VISIA imaging S.r.l. 2908 LJ Capelle a/d IJssel Via Martiri della Libertà 95/e Niederlande 52027 San Giovanni Valdarno (AR) www.topcon.eu...
-
Page 3: Table Of Contents
ALADDIN - User manual Rev. 19 EN of 10/07/2019 Contents INTENDED USE ............................7 Intended users ........................... 7 Places of use ............................7 Contraindications ..........................7 Description of functionalities ......................7 Essential Performance ........................8 Interaction with the patient ......................8 PRECAUTIONS ............................ - Page 4 ALADDIN - User manual Rev. 19 EN of 10/07/2019 10.2 Power on procedure ........................30 OPERATING INSTRUCTIONS ........................31 11.1 User Login/Logout ........................... 31 11.1.1 User Logout..........................32 11.1.2 Auto LogOFF/ Screen Saver ..................... 32 11.1.3 Technician Support staff Login ....................32 11.2 Overview ............................
- Page 5 ALADDIN - User manual Rev. 19 EN of 10/07/2019 11.16.2 New Exam Action ......................... 89 11.16.3 Data Review ......................... 90 11.16.4 RX/AL Trend Option ......................95 MEASUREMENTS ............................ 99 12.1 Topographic map (KER) ........................99 12.1.1 Keratometry ........................... 100 12.1.2 Keratorefractive indices ......................
- Page 6 ALADDIN - User manual Rev. 19 EN of 10/07/2019 13.5.6 DICOM ........................... 136 13.6 Admin ............................138 13.6.1 Report ............................ 139 13.6.2 Remote Assistance......................... 139 13.6.3 Updating the integrated software ..................140 13.6.4 Backup & Restore ........................145 13.6.5 Shut down ..........................149 13.7 Privacy &...
-
Page 7: Intended Use
For patients who are candidates for intraocular lens (IOL) implantation, ALADDIN HW3.0 also aids in the calculation of the appropriate IOL power and type to be implanted. ALADDIN HW3.0 is intended for use by physicians and eye-care professionals and may only be used under the supervision of a physician. -
Page 8: Essential Performance
Post refractive IOL calculation: Calculating intraocular lenses for patients who have undergone refractive surgery to correct myopia or hypermetropia. The ALADDIN HW3.0 has an onboard PC with a dedicated software providing all the functionalities described above. Please refer to the literature references listed in 19. Appendix: bibliography. -
Page 9: Precautions
ALADDIN - User manual Rev. 19 EN of 10/07/2019 2 PRECAUTIONS This electronic instrument is a precision tool and it is intended to be used in professional healthcare environment including hospitals, physician’s offices, surgical centers and limited care facilities, where equipment and systems are administered by healthcare professionals. -
Page 10: Electromagnetic Compatibility
ALADDIN - User manual Rev. 19 EN of 10/07/2019 2.1 Electromagnetic compatibility 2.1.1 EM Emission The ALADDIN HW3.0 device fulfills requirements of IEC 60601-1-2 4th Edition: Emission limit Standard Compliance Conducted and radiated RF CISPR 11 Class B Harmonic distortion... - Page 11 Recommended separation distances between portable and mobile RF communication equipment and the device The ALADDIN HW3.0 device is intended for use in an electromagnetic environment in which radiated RF disturbances are controlled. The customer or the user of device can help prevent electromagnetic interference by keeping a minimum distance between portable and mobile RF communication equipment (transmitters) and the device as recommended below, according to the maximum output power of the communication equipment.
-
Page 12: Symbols
ALADDIN - User manual Rev. 19 EN of 10/07/2019 3 SYMBOLS Symbols IEC publications Description CLASS I DEVICE ACCORDING TO EN 60601-1 IEC 60417-5840 APPLIED PART TYPE B PRODUCT COMPLIANT WITH DIRECTIVE 93/42/EC EN ISO 19980 CORNEAL TOPOGRAPHY ACCORDING TO ISO 19980:2005 Type A IEC 60417-5032 ALTERNATE CURRENT... -
Page 13: Sample Labelling On The Device
ALADDIN - User manual Rev. 19 EN of 10/07/2019 KEEP DRY EN ISO 15223-1 Indicates a medical device that needs to be protected from moisture. HANDLE WITH CARE THIS WAY UP ISO 780 Indicates correct upright position of the transport package. -
Page 14: Safety Instructions
Rev. 19 EN of 10/07/2019 4 SAFETY INSTRUCTIONS 4.1 General ALADDIN HW3.0 should be used only for its intended purposes as detailed in this manual. It must be installed by qualified personnel. The device must be used in the environmental conditions as specified in this document. -
Page 15: Electrical Safety
When ALADDIN HW3.0 is installed in rooms for medical use, the PC and the connected printer must be powered by means of an IEC 60601-1 compliant insulating transformer. If ALADDIN HW3.0 is installed in rooms for medical use without a computer, it is not necessary to use an insulating transformer. ... -
Page 16: Transport And Packaging
Be careful not to get the device wet and clean it only as indicated to prevent damaging it. Never use solvents or other abrasive agents. The device comes with a dust cover to be used to protect it. Cover ALADDIN HW3.0 if it is not going to be used for a long period of time. -
Page 17: Checking The Measurements
ALADDIN - User manual Rev. 19 EN of 10/07/2019 Before turning on the device, remove the cover. Never put the cover on when the device is on. 4.7 Checking the measurements The calibration must be checked when the device has been transported from one place to another and when it has suffered an impact or thermal shocks. -
Page 18: Privacy & Cybersecurity
ALADDIN - User manual Rev. 19 EN of 10/07/2019 4.8 Privacy & Cybersecurity When performing the installation of a new unit the user MUST set his own credentials to prevent unauthorized physical access to the device. To set up the access login to the instrument operation and on-board data refer to section 13.7. - Page 19 ALADDIN - User manual Rev. 19 EN of 10/07/2019 The processor is/are the person/s designed by the practise, clinic or hospital to operate the device and use the results. Device characteristics to support Data Protection Data Protection The device provides by default encryption of data stored, to avoid unauthorized access to Personal Data. The device provides by default technical measures to provide integrity, availability and resilience of subject data by means of encryption, data integrity checksum and redundancy.
-
Page 20: Privacy & Security Options
ALADDIN - User manual Rev. 19 EN of 10/07/2019 Privacy and Data Protection during assistance/support services The device provides functionalities to assure Data Protection also during assistance/support services, to avoid disclosure of Personal Data to unauthorized personnel and assure data integrity and availability. Refer to section 13.7 for specific options. -
Page 21: Product Warranty And Reliability
ALADDIN - User manual Rev. 19 EN of 10/07/2019 5 PRODUCT WARRANTY AND RELIABILITY The product warranty is valid only if all the instructions detailed in this document are followed. The product warranty is forfeited in the event of loss or damage due to improper or incorrect use of the device. -
Page 22: Legal Provisions
ALADDIN - User manual Rev. 19 EN of 10/07/2019 6 LEGAL PROVISIONS 93/42/EEC – 2007/47/EC: Class IIA medical device IEC 60601-1: Class I type B continuous operation IEC 60601-1-2: ISO 15004-2: Group 2 UNI EN ISO 19980 Type A ETL Standards: ... -
Page 23: Main Components
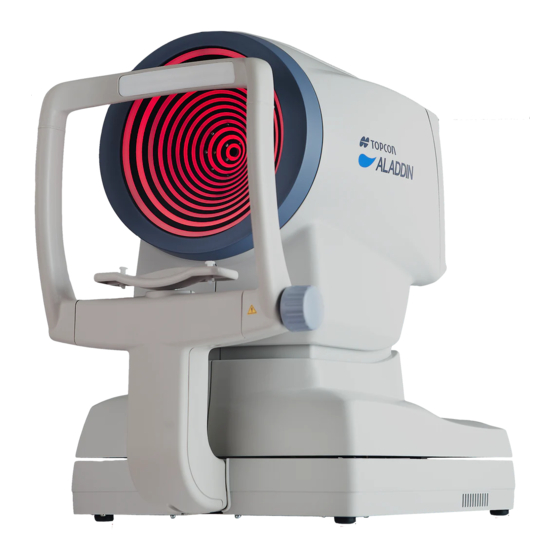
ALADDIN - User manual Rev. 19 EN of 10/07/2019 7 MAIN COMPONENTS Figure 1 Patient’s side Figure 2 User’s side NB: The parts in contact with the patient (applied parts) are the forehead rest in Teflon and the chin rest in acrylonitrile butadiene styrene resin (ABS) -
Page 24: Installation /Uninstallation Of The System
Rev. 19 EN of 10/07/2019 8 INSTALLATION /UNINSTALLATION OF THE SYSTEM ALADDIN HW3.0 is packed for shipping in a double cardboard box on a dedicated pallet with specially shaped cardboard parts inside to guarantee instrument safety during shipment. Keep the original packaging for future use. The system must always be moved/shipped in its original packaging, which is specifically designed for damage protection. - Page 25 Power cable “Topcon” ALADDIN HW3.0 dust cover ALADDIN HW3.0 user manual Open the internal box and remove the specially shaped cardboard that holds the instrument. The instrument can now be taken out of the package. The steps are illustrated in Figure 6.
-
Page 26: Uninstalling The System
ALADDIN - User manual Rev. 19 EN of 10/07/2019 Figure 6 Be careful when taking ALADDIN HW 3.0 out of the box gripping it by the chin rest arch and the base beside the joystick. Remove the Nylon cover. Place the instrument on a flat surface. Completely unscrew the two locking screws and the semi-lock (Figure 2). - Page 27 ALADDIN - User manual Rev. 19 EN of 10/07/2019...
- Page 28 ALADDIN - User manual Rev. 19 EN of 10/07/2019 Figure 8 Put the accessories in the dedicated spaces. Position the wood panel with the shock absorbers in the lower part. Close the external box with strong packing tape or use extensible film and packing straps.
-
Page 29: Standard Accessories And Equipments
ALADDIN - User manual Rev. 19 EN of 10/07/2019 9 STANDARD ACCESSORIES AND EQUIPMENTS Calibration checking device The calibration checking device shows the serial number of the instrument with which it is associated. To properly check calibration, the calibrator provided with the instrument must always be used. -
Page 30: Setting Up The Instrument
ALADDIN - User manual Rev. 19 EN of 10/07/2019 10 SETTING UP THE INSTRUMENT 10.1 Connection modes Before connect device to external devices or IT Network, please read paragraph 4.4. Figure 9 10.2 Power on procedure Make sure the power cord provided is connected to the mains. Press the stand-by button (see Figure 9 ) and wait for the system loading until the screen showed in Figure 16 appears. -
Page 31: Operating Instructions
Rev. 19 EN of 10/07/2019 11 OPERATING INSTRUCTIONS ALADDIN HW3.0 is designed to work in stand-alone mode. For this reason, all the software functions are automatically loaded when the device is turned on, enabling the user to control the device and guiding him... -
Page 32: User Logout
ALADDIN - User manual Rev. 19 EN of 10/07/2019 Type the user password as configured to access the operations and data of the device. If the password is forgotten or access problems are encountered please contact assistance. It is possible to get remote support by pressing on the button “Remote Assistance” if the device is connected to internet. -
Page 33: Overview
ALADDIN - User manual Rev. 19 EN of 10/07/2019 11.2 Overview Every working environment has the same screen layout. In Figure 10 a sample of the acquisition screen is shown. The active working area is enlightened Main menu in orange. Settings Print Right eye data... - Page 34 ALADDIN - User manual Rev. 19 EN of 10/07/2019 To check the calibration, turn on the device, and when asked to check the calibration, press START. The test patient is automatically created. Figure 11 The next screen explains how to check calibration Figure 12 Set the calibration tool supplied with the device in the special holes in the chin rest and press until the tool is blocked on the device.
- Page 35 ALADDIN - User manual Rev. 19 EN of 10/07/2019 CORRECT alignment WRONG alignment Figure 13 Now check and several times acquire the calibration checking device using the complete acquisition (K-AL- ANT). For details on this acquisition mode, see chapter 11.5. If the calibration is ok, the “Valid”...
- Page 36 ALADDIN - User manual Rev. 19 EN of 10/07/2019 Figure 14 Figure 15...
-
Page 37: Patient Entry/Selection
ALADDIN - User manual Rev. 19 EN of 10/07/2019 11.4 Patient entry/selection When the instrument is turned on, the software displays the following screen. Before start examination, it is required to create a new patient or select a previously saved one from database. Figure 16 Figure 16 shows the section for creating a new patient, entering Last Name, Name and Birth Date as required fields (Gender and ID are optional). - Page 38 ALADDIN - User manual Rev. 19 EN of 10/07/2019 Entering special characters A special character can be entered simply by touching and holding for a few seconds the corresponding letter as shown in Figure 17: Figure 17 Selecting crystalline and vitreous body type Once the patient identity record has been created, it is possible to select the type of cristallyne and vitreous body for each patient’s eye, by pressing the “Acquisition”...
- Page 39 The measured axial eye length depends on the measuring mode selected. Depending on the measuring mode selected, ALADDIN HW3.0 corrects the measurement with a constant defined as follows. ALADDIN HW3.0 device takes into consideration two conditions of the eye that can alter the measurement of axial length:...
- Page 40 ALADDIN - User manual Rev. 19 EN of 10/07/2019 For more details on the acquisition environment see the dedicated section. The vitreous body nature is expressed, if different from natural, in the acquisition view as well as in the output reports, as shown in the following figures.
-
Page 41: Selecting Or Modifying A Patient
ALADDIN - User manual Rev. 19 EN of 10/07/2019 11.4.2 Selecting or modifying a patient On the input screen, click on the "List" tab to access all the patients included in the local database (see Figure 19). Figure 19 On this screen you can select a previously created patient and the examinations associated with him/her. The list can be viewed by patient ID or by Last Name (and name) selecting the corresponding radio button. - Page 42 ALADDIN - User manual Rev. 19 EN of 10/07/2019 Insert the Post-Op (after surgery) refraction data Through this function the user can update the data related to a single exam of the chosen patient. This means that if the patient has already undergone surgery, the new refractive status can be recorded as a main factor to personalize constants of the implanted IOL.
-
Page 43: Selecting A Patient From Server
IMAGEnet i-base (Figure 21). In the same way, ALADDIN HW3.0 can be activated to search patients from DICOM services (refer to DICOM configuration section): ... - Page 44 ALADDIN - User manual Rev. 19 EN of 10/07/2019 Figure 22 Figure 23...
- Page 45 Start an exam from the Waiting Room If DICOM Modality Worklist service is configured, ALADDIN HW3.0 is able to search for pending patient’s examinations in the waiting room. Pressing on the “Waiting Room…” button (Figure 22) shows a list of the pending worklists for the current day.
-
Page 46: Acquisition: General Instructions
ALADDIN - User manual Rev. 19 EN of 10/07/2019 11.5 Acquisition: general instructions 11.5.1 Positioning the patient To obtain correct measurements it is necessary an adequate positioning of the patient relative to the device. A steady head position and the correct device-to-patient distance are obtained by resting the patient’s head well against the chin rest and forehead band. -
Page 47: Description Of The Acquisition Screen
ALADDIN - User manual Rev. 19 EN of 10/07/2019 11.5.2 Description of the Acquisition screen Figure 27 Figure 27 shows the acquisition screen from where all the operations to acquire the required measurements are performed. The acquisition window has the following commands: ... - Page 48 ALADDIN - User manual Rev. 19 EN of 10/07/2019 Description of results For each Biometry and Keratometry result a dedicated section is present. In each section the total result is shown together with the standard deviation between the single results (if more than one) and eventual warning or error signs (described in the following section).
- Page 49 ALADDIN - User manual Rev. 19 EN of 10/07/2019 Error cause Identification Missing ring reflection on the eye Placido Image, on the upper Closed eyelid hemisphere of the cornea Movement Interlace pattern shown in acquired image BrokenTear film Missing ring reflection on the eye on Placido Image Bad focus Defocus of ring reflection on acquired image High standard deviation on repetition...
-
Page 50: Biometry: Acquisition Procedure
ALADDIN - User manual Rev. 19 EN of 10/07/2019 11.6 Biometry: acquisition procedure There are two acquisition mode: MODE BUTTON DESCRIPTION Perform the AL (Axial Length), CCT-ACD-LT sequence (Central FULL BIOMETRY Corneal Thickness, Anterior Chamber Depth and Lens Thickness) ACQUISITION and KER (Keratometry) acquisitions in a full sequence measurement. - Page 51 ALADDIN - User manual Rev. 19 EN of 10/07/2019 Focusing ideal conditions are achieved by following the 4 indicators at the corners of the viewport, which explain the needed movement in the “forward/backward” direction. The red arrows indicate to move the instrument forwards towards the patient's eye. The centering condition is displayed in red color The blue arrows indicate to move the instrument backwards away from the patient.
-
Page 52: Full Biometry Acquisition (K-Al-Cct-Acd-Lt)
ALADDIN - User manual Rev. 19 EN of 10/07/2019 11.7 Full biometry acquisition (K-AL-CCT-ACD-LT) Figure 30 This is a special mode which successively performs all the measurements described in detail in the following paragraphs, specifically: Keratometry Axial Length Anterior Chamber Depth, Central Corneal Thickness and Lens Thickness Identification of Mesopic and Photopic pupil Below the acquisition steps: 1. -
Page 53: Acquisition Of Axial Length Measurements (Al)
To ensure that the measured values obtained with the ALADDIN HW3.0 are compatible with those obtained through acoustic axial length measurement, the system automatically adjusts for the distance difference between the inner limiting membrane and the pigmented epithelium. -
Page 54: Acquisition Of The Anterior Segment Sections (Cct-Acd-Lt)
ALADDIN HW3.0 allows the user to acquire the corneal topography of the eye. The “Corneal Map” is obtained from the reflection of 24 rings of the Placido disk at a distance of 80 millimeters from the patient's eye. The position of the device, in relation to the patient’s eye thus found, serves as a starting point for fine... - Page 55 ALADDIN - User manual Rev. 19 EN of 10/07/2019 Figure 35 In this mode, the topographic map of the cornea is acquired. Knowing the distance of the corneal apex, with a precision of microns, at the time of acquisition of the topographical image, the software applies to each of the 256 zero crossing, identified for each of the 24 RINGS, a correction factor given by the ratio between correct mean value and mean radius of the ring.
-
Page 56: Pupillometry
ALADDIN - User manual Rev. 19 EN of 10/07/2019 11.11 Pupillometry Figure 36 By selecting this mode, the acquisition environment shown in Figure 36 appears on the screen. In order to acquire the pupillometry, first of all you need to center the blue rectangle, which is overlaid in the image on the reflection of the four LEDs, as shown in Figure 37. - Page 57 ALADDIN - User manual Rev. 19 EN of 10/07/2019 Acquisition in photopic controlled light conditions Figure 37 Acquisition in mesopic controlled light conditions Figure 38...
-
Page 58: Report Printing
ALADDIN - User manual Rev. 19 EN of 10/07/2019 11.12 Report printing After every measurement, you can print the corresponding report or print all the measurements made in the current exam. In the top-right corner of the screen, press on the button. -
Page 59: Available Printers
ALADDIN - User manual Rev. 19 EN of 10/07/2019 Figure 40 11.12.1 Available Printers The printing form is showing a list of available printers. The available printers are the one installed on the Operating System. Refer to “Appendix: Installing an external printer” or ask to your technical support in order to have the desired printer installed. -
Page 60: Custom Reports
ALADDIN - User manual Rev. 19 EN of 10/07/2019 11.12.2 Custom Reports If the unit has been provided with Customized Reports they will be available to be selected for printing or exporting in the Printing form. In order to obtain custom reports contact you technical assistance. -
Page 61: Data Exportation
ALADDIN - User manual Rev. 19 EN of 10/07/2019 11.13 Data Exportation After every measurement, you can export the corresponding reports or xml date made in the current exam. In the top-right corner of the screen, press on the button. The popup of Figure 41 is show where you can select one or more destinations for exportation. - Page 62 ALADDIN - User manual Rev. 19 EN of 10/07/2019 If Storage Commitment is configured you will receive the confirmation message in case of successful or unsuccessful transfer. IMAGEnet 6/IMAGEnet i-base, the selected reports and data are sent to IMAGEnet i-base or IMAGEnet 6 if activated and configured from the settings.
-
Page 63: Iol Calculation
Rev. 19 EN of 10/07/2019 11.14 IOL calculation ALADDIN HW3.0 also includes a section for calculation of the intraocular lenses (IOL Calculation). In order to perform the intraocular lens power calculation, the available power interval, the increments and the calculation constants must be provided for each type of formula and lens. These, however, do not depend solely on the type of lens and the calculation formula, but are also closely linked to the measuring technology and the surgical techniques used. -
Page 64: Data
ALADDIN - User manual Rev. 19 EN of 10/07/2019 Figure 43 11.14.1 Data In this section there is a summary of the measurements performed with the instrument. The screen displayed for the “Data” tab is as shown in Figure 42. As you can see, it has two sections: Biometry: detailing the data on the ocular biometry Keratometry: detailing the patient's keratometric data From the “Source”... - Page 65 ALADDIN - User manual Rev. 19 EN of 10/07/2019 Figure 44 In Figure 44 (Manual Keratometry tab), you can enter values both in Diopters or Millimeters. The values will be automatically recognized according to a specific range. This range goes from 6.75mm to 9.64mm, (from 35Diopters to 50Diopters).
-
Page 66: Spherical Iol Calculation
ALADDIN - User manual Rev. 19 EN of 10/07/2019 11.14.2 Spherical IOL calculation The section where you process the data collected for the calculation of the best intraocular lens is divided into three main parts: The IOL Calculation section is fundamental in calculating the total spherical power that will compensate the removal of the crystalline in cataract surgery. - Page 67 ALADDIN - User manual Rev. 19 EN of 10/07/2019 In “Target” field the target refractive value for the Post-Op must be inserted. The “Measurements” field summarizes the measurement data. From the drop-down menu, select the IOL manufacturer and model, as well as the preferred formula with which to calculate the best lens.
-
Page 68: Toric Iol Calculation
ALADDIN - User manual Rev. 19 EN of 10/07/2019 11.14.3 Toric IOL calculation Toric IOL calculation is divided into two main steps. The first one consists on the calculation of the Spherical Equivalent Power; in the second one you can select the toric IOL that produce the best correction. Figure 46 Figure 46 shows the first-step interface that has quite the same structure as the normal IOL calculation. - Page 69 ALADDIN - User manual Rev. 19 EN of 10/07/2019 Figure 47 “Measures” and “Surgical Pre Op Data” frames summarize the values used in the first-step calculation. “Expected Post Op Cornea” frame gives information about the post surgery patient eye Keratometry, taking into account the aforementioned SIA and IL.
- Page 70 ALADDIN - User manual Rev. 19 EN of 10/07/2019 Figure 48 This simulation shows the impact of a wrong axis placement that can occur during surgery and how it affects the residual sphere and cylinder refraction of the patient. The simulator starts at the correct axis placement and displays in the left bottom table a series of misalignment angles close to the ideal one.
-
Page 71: Post Refractive Iol Calculation
ALADDIN - User manual Rev. 19 EN of 10/07/2019 11.14.4 Post Refractive IOL calculation In this section, you can calculate intraocular lenses also for patients who have undergone refractive surgery to correct myopia or hyperopia by using the Camellin-Calossi formula and the Shammas no-history formula (Figure 50). - Page 72 ALADDIN - User manual Rev. 19 EN of 10/07/2019 3. Lasik 4. Lasek 5. LK 6. PTK 7. Unknown In case of Radial Keratotomy, Photo Refractive Keratectomy, Lasik and Lasek you need to insert in the “Refractive Change” frame the correct ametropia type and the correction factor obtained by the operation (“SIRC”).
-
Page 73: Barrett Calculator
ALADDIN - User manual Rev. 19 EN of 10/07/2019 Figure 52 The final result of the Post-Op calculation is shown in Figure 52 with the suggested lenses highlighted in yellow in each table. 11.14.5 Barrett Calculator Barrett Calculator is an optional module: ask your distributor for details. The Barrett Calculator integrates the Barrett IOL Calculator v1.05. - Page 74 ALADDIN - User manual Rev. 19 EN of 10/07/2019 Figure 53 Universal Formula II (Barrett) Barrett Universal II Formula v1.05, for all yes regardless of axial length. In the “Surgeon” field, you can choose which surgeon will perform the IOL implant and any customization of the constants or presetting of the preferred lenses will be applied on this basis.
- Page 75 ALADDIN - User manual Rev. 19 EN of 10/07/2019 In “Target” field the target refractive value for the Post-Op must be inserted. The “Measurements” field summarizes the measurement data. From the drop-down menu, select the IOL manufacturer and model with which to calculate the best lens. Once this data has been entered, the most appropriate lens can be chosen at the discretion of the surgeon.
- Page 76 ALADDIN - User manual Rev. 19 EN of 10/07/2019 After having selected the toric IOL model, a values table from which the Spherical Equivalent Power is obtained. Once you choose a lens, pressing “Next” at the bottom right, you enter in the second-step of toric IOL calculation (Figure 55).
- Page 77 ALADDIN - User manual Rev. 19 EN of 10/07/2019 True K (Barrett) Barrett True K Formula v1.05, for eyes with prior myopic or hyperopic LASIK/PRK/RK. Figure 56 In “Target” field the target refractive value for the cataract Post-OP must be inserted. The “Measurements”...
- Page 78 ALADDIN - User manual Rev. 19 EN of 10/07/2019 From the drop-down menu, select the IOL manufacturer and model with which to calculate the best lens. Once this data has been entered, the most appropriate lens can be chosen at the discretion of the surgeon. The latter is highlighted in orange.
- Page 79 ALADDIN - User manual Rev. 19 EN of 10/07/2019 Myopic Lasik Hyperopic Lasik Radial Keratotomy Insert the measured Refraction (Pre-Lasik Ref., in diopters) before the Refractive Surgery and the measured Refraction (Post-Lasik Ref., in diopters) after the Refractive Surgery, accordingly the selected correction type. Pre-Lasik Ref.
- Page 80 ALADDIN - User manual Rev. 19 EN of 10/07/2019 value is shown in the central row and (if available) the ones that under-correct above the central row, the ones that overcorrect below. At the right side, you can find an image that illustrates the ideal position of the IOL once the implant is in place and the incision location angle.
- Page 81 ALADDIN - User manual Rev. 19 EN of 10/07/2019 In the section “PRE-OP KERATOMETRY” you can insert the Keratometry data that was measured before the first cataract surgery. In the section “IMPLANTED IOL DATA” you can insert information about the IOL implanted in the first cataract surgery: ...
- Page 82 ALADDIN - User manual Rev. 19 EN of 10/07/2019 Cylinder: is the cylinder value of the implanted IOL which can be inserted manually or selected from the Toricity list if available Axis: is the axis of placement of the implanted toric IOL In the section “POST-OP REFRACTION”...
-
Page 83: Olsen Calculator
ALADDIN - User manual Rev. 19 EN of 10/07/2019 The recommended TORIC IOL and Axis alignment for the targeted refractive outcome is displayed. The axis that provides the minimum astigmatism for the existing IOL is calculated as well as the rotation in degrees from the current axis of the existing implanted IOL. - Page 84 ALADDIN - User manual Rev. 19 EN of 10/07/2019 In the “Surgeon” field, you can choose which surgeon will perform the IOL implant and any customization of the constants or presetting of the preferred lenses will be applied on this basis. In “Target”...
- Page 85 ALADDIN - User manual Rev. 19 EN of 10/07/2019 The first-step interface has quite the same structure as the spherical IOL calcualtion. The available toric lenses you can select come from a list of models whose calculation constants and optical parameters have been validated.
- Page 86 ALADDIN - User manual Rev. 19 EN of 10/07/2019 As a result, the “Toric Calculator” frame, immediately below, details the best toric lens computed automatically by the system for the manufacturer and model selected previously in the first-step. From “Available Toric Lenses” table you can choose also a different cylinder value for the lens, based on the Residual Astigmatism you want to achieve (under-correction/overcorrection).
-
Page 87: Data Saving
ALADDIN - User manual Rev. 19 EN of 10/07/2019 11.15 Data saving After performing some acquisitions and eventual IOL calculations, in order to save the data from the examination, click on the “Main” button. As shown in Figure 59, the software will ask the user to confirm the action. -
Page 88: Rx/Al Trend Function
ALADDIN - User manual Rev. 19 EN of 10/07/2019 11.16 RX/AL Trend Function If enabled from the settings (see section 13.6) the RX/AL Trend Function can be accessed from the patient list view. The RX/AL Trend function allows to review the progression of biometry value of the selected patient over time, based on the data present in the local archive with the possibility to add further data manually. -
Page 89: New Exam Action
ALADDIN - User manual Rev. 19 EN of 10/07/2019 The windows provides also access to the RX/AL Trend function specific options. Other options such as Cylinder notation or Display unit depend on the general settings of the Aladdin application. 11.16.2 New Exam Action You can enter the current refraction measurement data before performing the biometry acquisitions. -
Page 90: Data Review
ALADDIN - User manual Rev. 19 EN of 10/07/2019 1. Measure Subjective/Objective Refraction externally 2. Input Refraction Data in the form 3. Perform Topography and Biometry acquisition on Aladdin 11.16.3 Data Review The data present in the Data Review section is provided by examinations directly performed with Aladdin and stored onboard together with manual data eventually imported or added. - Page 91 ALADDIN - User manual Rev. 19 EN of 10/07/2019...
- Page 92 ALADDIN - User manual Rev. 19 EN of 10/07/2019 RX/AL: Refraction & Axial Length trend: Combined trend view with Refraction error S.E. and Axial Length. RX: Refraction trend: Refraction S.E. absolute value (at reference Vertex Distance) trend and yearly variation (on 3,6,12 months basis). AL: Axial Length trend: Absolute Value trend and yearly variation (on 3,6,12 months basis).
- Page 93 ALADDIN - User manual Rev. 19 EN of 10/07/2019 Other Trends: For other biometry values the absolute value trend and the yearly variation are shown (if the data is available): ACD, Anterior Chamber Depth LT, Lens Thickness VCD, Vitreous Chamber Depth ...
- Page 94 ALADDIN - User manual Rev. 19 EN of 10/07/2019 DATA Raw data table review and management (edit, delete). Import Button: Import data from template sheet for the current patient only. Add Button: Add data manually by filling the form. ROW Buttons Edit Button: Edit data of the selected row, shows edit form with current values Delete Button: Delete the selected row...
-
Page 95: Rx/Al Trend Option
ALADDIN - User manual Rev. 19 EN of 10/07/2019 REPORT & SCREENSHOT REPORT: Create Report with: o Refraction and Axial Length trend o Data table o Notes SCREENSHOT: create a report page with the current view Available output destinations: o Printer (as in the main printing form of the Aladdin application) o USB drive export o Network Shared folder 11.16.4... - Page 96 ALADDIN - User manual Rev. 19 EN of 10/07/2019 Age, patient age at the date of examination data If the Age option is selected for the Time Axis, the Fixed age range can be enabled/disabled and configured. If the fixed age range is enabled at the least the age range defined by the two related values will be visualized in the time axis.
- Page 97 ALADDIN - User manual Rev. 19 EN of 10/07/2019 Patient identification Eye examination data identification Biometry data Refraction Data Note belonging to the examination date REQUIRED DATA (for each row) Patient ID: patients already present in the Aladdin archive will be matched by this field ...
- Page 98 ALADDIN - User manual Rev. 19 EN of 10/07/2019 o Vertex Distance in mm relative to refraction measurement o Refraction measurement in preferred notation (positive cylinder notation or negative cylinder notation) o Rx type: Subjective or Objective o Eye status: condition at the moment of refraction measurement ...
-
Page 99: Measurements
ALADDIN - User manual Rev. 19 EN of 10/07/2019 12 MEASUREMENTS All measurements performed during the examination can be reviewed in detail in the "Measurements" section. There are four types of measurement. KER: Keratometry o ZER: Zernike Analysis AL: Axial length ANT: Anterior Segment sections: CCT,ACD,LT PUP: Pupillometry to which various environments correspond, described in detail in the following sections. -
Page 100: Keratometry
ALADDIN - User manual Rev. 19 EN of 10/07/2019 The Scale buttons allow to switch between Absolute and Normalized (adjustable) scale color steps. When Normalized is pressed the button is replaced with controls that allows to adjust the color step for the current topography map. -
Page 101: Keratoconus
ALADDIN - User manual Rev. 19 EN of 10/07/2019 Curvature Irregularity: Irregularity of curvature calculated on the standard deviation of the instantaneous readings for a 4.5mm diameter cornea area Asymmetry + SAI: Asymmetry between the most curved hemisphere and the flattest one calculated for 4.5mm diameter cornea area and an SAI (Surface Asymmetry Index) that represents the surface asymmetry index of the 4.5mm diameter cornea area. -
Page 102: Pupil
ALADDIN - User manual Rev. 19 EN of 10/07/2019 12.1.4 Pupil Press the “P” button to open the pupil's indices: Figure 63 KC: KC represents the central keratometry in diopters Avg Pupil Power: Average pupil power for a pupil of 4.5 mm and 3.0 mm ... -
Page 103: Profile
ALADDIN - User manual Rev. 19 EN of 10/07/2019 12.1.5 Profile Press the "Profile" button to view the curvature profile along the most curved meridian and the flattest meridian (red and blue). The difference is displayed in green (Figure 64). By pressing the arrow buttons, you can vary the flattest and the most curved meridians. -
Page 104: Zernike
ALADDIN - User manual Rev. 19 EN of 10/07/2019 12.2 Zernike The Zernike module provides a comprehensive view of the wave front aberrations generated by the front surface of the cornea. The results of the Zernike axis are illustrated by means of numerical indices and graphic representations (Figure 65). - Page 105 ALADDIN - User manual Rev. 19 EN of 10/07/2019 Spot Diagram: represents the spatial distribution of the wave front over the retina. Visus/Visus Low Contrast: represent the patient's real vision at high and low contrast. Figure 66 The data displayed refers only to the component induced by the anterior surface of the cornea, not by the eye's entire optical system.
- Page 106 ALADDIN - User manual Rev. 19 EN of 10/07/2019 Figure 67 It is possible to switch between ETDRS and Landolt C Visus simulation view.
-
Page 107: Axial Lenght (Al)
ALADDIN - User manual Rev. 19 EN of 10/07/2019 12.3 Axial Lenght (AL) Figure 68 Figure shows an axial length measurement. In this screen you can select and display the interferometric graph for each measurement and from the left and right columns the measurements performed for the right eye and left eye, respectively. The measurements highlighted in yellow are the ones used to calculate the average axial length and are acceptable with respect to signal/noise. -
Page 108: Anterior Segment Sections (Ant, Cct-Acd-Lt)
ALADDIN - User manual Rev. 19 EN of 10/07/2019 12.4 Anterior Segment Sections (ANT, CCT-ACD-LT) Figure 69 Figure 69 gives an example of ANT (Anterior Segment Section) measurements. In this screen you can select and display the interferometric graph for each measurement and from the left and right columns the measurements performed for the right eye and left eye, respectively. -
Page 109: Pupillometry (Pup)
ALADDIN - User manual Rev. 19 EN of 10/07/2019 12.5 Pupillometry (PUP) The pupillometry module allows displaying and analyzing the dynamic and static pupillometry (pupil images acquired in controlled light conditions). Normally, if the pupillometry is acquired, the software goes into dynamic mode (Figure 70). Figure 70 Click on “OD”... -
Page 110: Graphs
ALADDIN - User manual Rev. 19 EN of 10/07/2019 Average: Value of the maximum and minimum pupil diameter measured in all the images acquired during the sequence Pupil Center: Cartesian coordinates of the average pupil center and its standard deviation ... - Page 111 ALADDIN - User manual Rev. 19 EN of 10/07/2019 Decentration Figure 71 The green concentric circles identify the decentration of the pupil center with respect to the fixation point. The red dots, on the other hand, represent the coordinate variations during acquisition of the dynamic pupillometry.
- Page 112 ALADDIN - User manual Rev. 19 EN of 10/07/2019 Latency Figure 72 The graph shows the time in seconds on the abscissa and the pupil diameter in mm on the ordinate, in a scale standardized on the maximum and minimum value recorded. Next the progression of the pupil’s diameter over time is represented.
- Page 113 ALADDIN - User manual Rev. 19 EN of 10/07/2019 Statistics Figure 73 The graph represents the static value of the percentile of the sample for each acquisition in controlled light conditions. As indicated in the key on the right-hand side and by the values detailed on the left, the red line represents the average value of the sample, the blue frame the value interval between the 25% and 75% percentiles, the green line the value interval between the 10% and 90% percentiles, and the red circle the values outside this interval.
-
Page 114: White To White (Wtw)
ALADDIN - User manual Rev. 19 EN of 10/07/2019 12.6 White To White (WTW) The White to White section allows you to view the value of the corneal diameter calculated from limbus. Figure 74 Clicking on the Open button in the Edit menu, the user can manually reposition positional indicators in order to refine the diameter measurements. - Page 115 ALADDIN - User manual Rev. 19 EN of 10/07/2019 Next to the image, obtained by automatic white to white calculation, you can see: Corneal diameter; Decentration: deviation from the center of the iris with respect to the fixation point. By changing the indicators position also values of corneal diameter and offset of the visual axis x and y are updated.
-
Page 116: Settings
ALADDIN - User manual Rev. 19 EN of 10/07/2019 13 SETTINGS To access the “Settings” section, press the button. Figure 76 The settings screen is divided into the following categories. General Measurements Surgeons Connectivity Admin From each settings environment you can close and return to the previous activity by selecting the "Close"... -
Page 117: Measurements
ALADDIN - User manual Rev. 19 EN of 10/07/2019 Date: Choose the desired date format and press on the “Set” button. You can also set the current system date and time by clicking on the “Edit” button. Pointing Devices: Toggles the mouse cursor (on or off). OD/OS Notation: Toggles between two different notations, OD/OS will show the Latin notation to indicate which eye is being acquired. -
Page 118: Acquisition
ALADDIN - User manual Rev. 19 EN of 10/07/2019 Select a scale type: Absolute Normalized Select a scale color map (see paragraph 13.2.5 for details): Classic ISO 2005 Cylinder Notation Select the type of cylinder notation: ... -
Page 119: Map Option
ISO 2005 color scale, by going to Measures section of the settings. The color scale option selected affects any topographic map drawing in the ALADDIN HW3.0 application and in the printed reports (also the custom ones). The Classic and ISO absolute color scale are shown in the following figure for the same topography map. -
Page 120: Surgeons
ALADDIN - User manual Rev. 19 EN of 10/07/2019 Classic Absolute scale 2005 Classic Normalized (adjustable) scale 2005 13.3 Surgeons The “Surgeons” panel allows you to create different user profiles. Figure 78... -
Page 121: Iol
ALADDIN - User manual Rev. 19 EN of 10/07/2019 Select the surgeon in the left column to display the data. Press the “Edit” button to modify the data entered. Press the “Add” button to add a new surgeon. Once you have entered/modified the data, press the “Back” or “Save” buttons, respectively, to cancel or save the data. -
Page 122: Preset
ALADDIN - User manual Rev. 19 EN of 10/07/2019 13.4.2 Preset Figure 80 Preset environment (Figure 80) is composed of 5 main sections, where each surgeon can set: Under “IOL” the preset for the IOL Calculation (included the Barrett Universall II spherical section of Barrett module) Under “Toric”... - Page 123 ALADDIN - User manual Rev. 19 EN of 10/07/2019 Figure 81 Toric preset uses a different set of lenses (with only toric ones) and requires some additional settings with respect to “IOL” and “Post Refractive IOL” sections. In particular, you can specify the “Surgical Induced Astigmatism (SIA)” induced by the surgeon and the “Incision Location”...
-
Page 124: Iol List
ALADDIN - User manual Rev. 19 EN of 10/07/2019 In the “Olsen Sph. IOL” and “Olsen Toric IOL” preset the formula is locked to Olsen formula. Figure 82 13.4.3 IOL list In this section (Figure 83) you can manage IOL spherical and torical lenses list. You can change the available manufacturers and models by adding, deleting or editing them. - Page 125 ALADDIN - User manual Rev. 19 EN of 10/07/2019 Figure 83 List of functions for IOL manufacturer column: Add: add a new manufacturer not present in the current list o Insert the manufacturer name o Insert the model name o Insert the kind of formula and constant o Insert the value of the constant, “Hoffer Q pACD”...
- Page 126 ALADDIN - User manual Rev. 19 EN of 10/07/2019 List of functions for IOL model column: Add: add a new IOL model to the current manufacturer: o Insert the model name o Insert the kind of formula and constant o Insert the value of the constant, “Haigis A0” in the case below (other constants will automatically be converted).
- Page 127 With the “Ulib” button you can import .zip files of ULIB (User Group for Laser Interference Biometry) format. Download the file and copy it to the root (main card) of an empty FAT32-formatted USB pen 1. Insert the USB pen in the ALADDIN HW3.0 device. 2. Click on the “Ulib” button on the “IOL list” panel.
- Page 128 ALADDIN - User manual Rev. 19 EN of 10/07/2019 To edit or insert the advanced IOL parameters for an existing (or newly created) IOL model select the desired IOL model and press the edit button Optic Material and Refractive index: the user can select the optic material that correspond to the selected IOL model to get the Refractive index field value filled automatically.
- Page 129 ALADDIN - User manual Rev. 19 EN of 10/07/2019 A Const: optimized A Const value used for SRK/T formula on the selected IOL model. Can be inserted to get the IOL ACD Const (Olsen) automatically calculated from this value if a directly optimized value for IOL ACD Const (Olsen) is not available.
- Page 130 ALADDIN - User manual Rev. 19 EN of 10/07/2019 Add: add a new manufacturer not present in the current list o Insert the manufacturer name o Insert the model name o Insert the kind of formula and constant o Insert the value of the constant, “Hoffer Q pACD” in the case below (other constants will automatically be converted) o Define the “Sphere Power Range”, inserting the minimum, the maximum and the step of the spherical power of the lens...
- Page 131 ALADDIN - User manual Rev. 19 EN of 10/07/2019 Figure 89 Edit: edit the name of the current manufacturer in the list Delete: delete a manufacturer. Please note that this function will also delete every IOL associated to the current manufacturer. List of functions for IOL model column: Add: add a new IOL model to the current manufacturer, with the same procedure described in the “Add Toric Manufacturer”...
-
Page 132: Connectivity
That resource will then become selectable as a destination in the report’s print form. In order for ALADDIN HW3.0 to be able to connect to the remote network folder, you must configure ALADDIN HW3.0 setting the correct access credentials for the remote resource. -
Page 133: Xml Export
By clicking on the Configure button (Figure 94) the user is presented with a list of IP Addresses of the machines running IMAGEnet i-base software that are reachable from ALADDIN HW3.0. Once selected the proper IP( Figure 92), ALADDIN HW3.0 is ready to exchange data with IMAGEnet i-base machine. -
Page 134: Imagenet 6 Server Software
IMAGEnet 6 Server is activated by clicking on the Enabled Option and by providing the IP address of the external server we want to connect to. Once we have selected the proper IP, ALADDIN HW3.0 is ready to exchange data with the IMAGEnet 6 Server machine (Figure 93). -
Page 135: Export To External Software Settings
ALADDIN - User manual Rev. 19 EN of 10/07/2019 13.5.5 Export to External Software settings In this panel it is possible to control two main aspects of the device behaviour in relation to the exportation function. “Perform Exportation when Saving”, allows to be prompted automatically the exportation form once saving a new or existing exam. -
Page 136: Dicom
In order to get exam data to exported to PhacoOptics® software, running on an external PC, it is necessary to configure a network path and access credentials for the target of exportation. Refer to PhacoOptics® manuals on how to get the data exported from ALADDIN HW3.0 inside the application. 13.5.6 DICOM The DICOM panel of Connectivity section allows to set the needed parameters for the connections to the available DICOM services. - Page 137 In order to configure properly the full DICOM workflow it could be necessary to perform some operations or configurations on the server’s side. In order to do this contact the System Administrator. The DICOM module of ALADDIN HW3.0 is describe in detail in its DICOM Conformance Statement. Visit http://www.topconmedical.com/conformance.cfm...
-
Page 138: Admin
ALADDIN - User manual Rev. 19 EN of 10/07/2019 13.6 Admin Figure 94 This is the instrument's administration panel (Figure 94). It provides certain information on the system: serial number (S/N) and software version (S/V). The “Check” button starts the calibration check procedure ... -
Page 139: Report
B, both eyes N, no eye related 13.6.2 Remote Assistance In case you need remote Assistance the ALADDIN HW3.0 application integrates Teamviewer QS (Quick Support) pre-installed. There is NO NEED to disable the Write Filter protection ... -
Page 140: Updating The Integrated Software
To turn off manually the Remote Assistance you can close the Teamviewer window or press “Remote Ass. OFF” If you get one of the following windows please check your internet connection to ALADDIN HW3.0 or contact your IT staff. 13.6.3 Updating the integrated software In this section is described the software upgrade procedure from one version to the following version. - Page 141 ALADDIN - User manual Rev. 19 EN of 10/07/2019 Figure 95 4. Click on the settings icon (Figure 96). Figure 96 5. Click on the “Admin” tab (Figure 97).
- Page 142 ALADDIN - User manual Rev. 19 EN of 10/07/2019 Figure 97 6. Insert the USB stick with the “Aladdin upgrade” files in one of the USB ports (Figure 98). Figure 98 7. Click on the “Upgrade” button (Figure 99).
- Page 143 ALADDIN - User manual Rev. 19 EN of 10/07/2019 Figure 99 8. Click on “Ok” to reboot the system and start the upgrade (Figure 100). Figure 100 9. After the upgrade you will see the message of Figure 101 on the screen.
- Page 144 11. After restart, the software updates the system; this operations could take some minutes please don’t restart machine during this procedure (Figure 102). Figure 102 12. If you see the message of Figure 103, please switch off your ALADDIN HW3.0 and turn it on again. Your ALADDIN HW3.0 should now work fine. Figure 103...
-
Page 145: Backup & Restore
ALADDIN - User manual Rev. 19 EN of 10/07/2019 13. Your ALADDIN HW3.0 is upgraded. Please check in the settings, “Admin” tab if the S/V is now the new one (Figure 104). Figure 104 13.6.4 Backup & Restore It’s recommended to perform a backup to have a safety copy of every patient stored data. Depending on the expected size of the entire archive, we suggest to use an external USB drive or have available enough space on a designed network shared folder. - Page 146 ALADDIN - User manual Rev. 19 EN of 10/07/2019 Backup Procedure To perform the backup connect the desired USB external storage device or switch to Network Folder option. 1. Select the desired destination: USB, select the desired partition from the list of the available ...
- Page 147 ALADDIN - User manual Rev. 19 EN of 10/07/2019 2. Press “Backup” button, wait for the procedure to complete. Press “OK” to confirm the operation or “No” to do not perform the backup. Do not turn off the device or unplug the power supply and ethernet cable while performing this operation.
- Page 148 ALADDIN - User manual Rev. 19 EN of 10/07/2019 Restore Procedure The machine calibration backup CANNOT be restored to a different machine from the original one. If attempting to restore a different machine backup to the current machine the calibration restore is skipped.
-
Page 149: Shut Down
ALADDIN - User manual Rev. 19 EN of 10/07/2019 4. In sequence, it is prompted to confirm if restoring or not each kind of backup content. Press “OK” if you want to restore the content or press “No” to skip the restore of the mentioned content. -
Page 150: Privacy & Security Settings
ALADDIN - User manual Rev. 19 EN of 10/07/2019 13.7 Privacy & Security Settings If the password login is kept enabled and a password has been already defined it is necessary to input the defined login password to operate the device. 13.7.1 Password protected Login The options allows to protect with password the access to the Aladdin on-board application operations and data. -
Page 151: Screen Saver / Auto Log Off
ALADDIN - User manual Rev. 19 EN of 10/07/2019 13.7.2 Screen Saver / Auto Log OFF The option allows to set automatic locking of the Aladdin on-board after a configurable timeout. By default the option is enabled with timeout set to 15 minutes. When no interaction with the device is performed during the timeout the screen saver will be displayed. -
Page 152: Anonymize Filenames Of Exported Reports And Exam Packages
ALADDIN - User manual Rev. 19 EN of 10/07/2019 If for assistance reasons the exam data is exported the patient details will be replaced with indications of the source device, only the patient ID will be maintained. 13.7.4 Anonymize filenames of exported reports and exam packages If the option is selected the report output filename convention will be forced to be the alternative one, refer to section 13.6.1 for further details. - Page 153 ALADDIN - User manual Rev. 19 EN of 10/07/2019 Technician Mode In technician Mode the patients details are not accessible and delete/edit actions are not available. When exporting exam packages in this mode the patient details are automatically anonymized.
-
Page 154: Changing The Fuses
ALADDIN - User manual Rev. 19 EN of 10/07/2019 14 CHANGING THE FUSES Step 1 Open the fuse box cover using a screwdriver Step 2 Take out the fuse box (use a screwdriver to release it) Step 3 Remove the blown fuse from its seat and replace it with an identical one, as indicated in the table... -
Page 155: Technical Specifications
ALADDIN - User manual Rev. 19 EN of 10/07/2019 15 TECHNICAL SPECIFICATIONS No modification of this equipment is allowed NOTE: the manufacturer shall provide, upon request, circuit diagrams. the list of components, descriptions, calibration instructions or other information that will assist the technical assistance personnel in the repair of parts of the device specified by the manufacturer as repairable by the technical support staff. - Page 156 Exposure to the device light when using it at maximum intensity will infringe the safety indication after a 60-minutes use. ALADDIN HW3.0 has a series of LEDs of various types and powers installed. All the characteristics are detailed in the Technical Specifications section in this manual.
- Page 157 ALADDIN - User manual Rev. 19 EN of 10/07/2019 ON-BOARD PC SPECIFICATIONS Operating system WINDOWS 10 64bit Processor Intel® Celeron® Hard disk At least 500GB SATA + mSATA SSD 32GB External connections LAN integrated, 2x USB...
-
Page 158: Performance Tests
BRIEF SUMMARY OF PERFORMANCE TESTS AND RESULTS A prospective, single site clinical study comparing the performance of the ALADDIN HW3.0 with LENSTAR LS 900 was conducted in 66 eyes (1 eye for each enrolled subject). This study evaluated the agreement and... - Page 159 The results of the study demonstrate that the Axial Length (AL), Cylinder Axis (AX), Anterior Chamber Depth (ACD), Lens Thickness (LT), Central Corneal Thickness (CCT), White-to-white distance (WTW) and Keratometry (K1_D and K2_D) measurements of the ALADDIN HW3.0 are substantially equivalent to those of the predicate device.
- Page 160 Spearman mean and standard deviation were provided for each endpoint. Analysis described in previous point 1 and 2 was provided for ALADDIN HW3.0 and LENSTAR LS 900 separately. Details about REML analysis: model terms will be estimated by using sum of squares.
-
Page 161: Declaration Of Conformity
52027 San Giovanni Valdarno (AR) – ITALY Name of device/Nome del dispositivo: BIOMETER and CORNEAL ANALYSER integrated Marca/Brand: TOPCON Model/Modello: ALADDIN I, the undersigned, hereby declare that the aforementioned devices comply with Directive 93/42/EEC (implemented in Italy by Legislative Decree no. 46/97) and subsequent amendments and additions (Directive 2007/47/EC –... -
Page 162: Appendix A: Installing An External Printer
ALADDIN - User manual Rev. 19 EN of 10/07/2019 18 APPENDIX A: INSTALLING AN EXTERNAL PRINTER 18.1 Getting drivers and transferring them to ALADDIN It is recommended to download the latest drivers for the printer and this should be done through an external PC. -
Page 163: Installing A Local Printer (Usb)
ALADDIN - User manual Rev. 19 EN of 10/07/2019 4. Close the Aladdin application: SettingsAdmin Close App Press OK 5. You will have access to the Desktop of the machine. 6. Connect the USB pen with the downloaded drivers to Aladdin. Figure 108 18.3 Installing a local printer (USB) The following instructions are for a Windows 10 system. - Page 164 ALADDIN - User manual Rev. 19 EN of 10/07/2019 Select the Add Printer function. Figure 110 The Add Printer Wizard will appear. The printer could be automatically detected. If yes follow the steps, if not press on “The printer that I want isn’t listed”. Figure 111 Select “Add a local printer or network printer with manual settings”.
- Page 165 ALADDIN - User manual Rev. 19 EN of 10/07/2019 You now need to identify the make and model of the printer. Click on the Have Disk... button. Figure 113 Click the Browse button and select the folder where you extracted the drivers (.inf file) for this printer. Once you've done that, click OK.
-
Page 166: Installing A Network Printer (Lan)
ALADDIN - User manual Rev. 19 EN of 10/07/2019 18.4 Installing a network printer (LAN) Do not change the Ethernet settings of “Local Area Connection 2” or “Reserved” adapter. If specific configuration for LAN network is needed it the settings can be modified accordingly on “Local Area Connection”... -
Page 167: Re-Enabling The Write Filter
ALADDIN - User manual Rev. 19 EN of 10/07/2019 Figure 118 From here on, follow the steps for automatic driver selection or select manually the drivers as described for “Installing a local printer (USB)”. 18.5 Re-Enabling the Write Filter 1. Open the Aladdin application. 2. -
Page 168: Appendix B: Bibliography
ALADDIN - User manual Rev. 19 EN of 10/07/2019 19 APPENDIX B: BIBLIOGRAPHY Please refer to the following literature references on the formulae (in case of specific questions please contact Visia Imaging): • Haigis: http://www.augenklinik.uni-wuerzburg.de/uslab/ioltxt/haid.htm • HofferQ: HOFFER KJ: The Hoffer Q formula: A comparison of theoretic and regression formulas. J Cataract Refract Surg, 19:700-712, 1993;... - Page 169 ALADDIN - User manual Rev. 19 EN of 10/07/2019 • HAIGIS W, LEGE B, MILLER N, SCHNEIDER B: Comparison of immersion ultrasound biometry and partial coherence interferometry for IOL calculation according to Haigis, Graefes Arch Clin Exp Ophthalmology (2000) 238:765-773 •...
- Page 170 Rev. 19 EN of 10/07/2019 ALADDIN HW3.0 Please specify the following when contacting your local supplier regarding questions about this product: Product name: Aladdin HW3.0 Software version and Serial Number: as written in Settings > Admin section ...
Need help?
Do you have a question about the ALADDIN HW3.0 and is the answer not in the manual?
Questions and answers