Advertisement
Quick Links
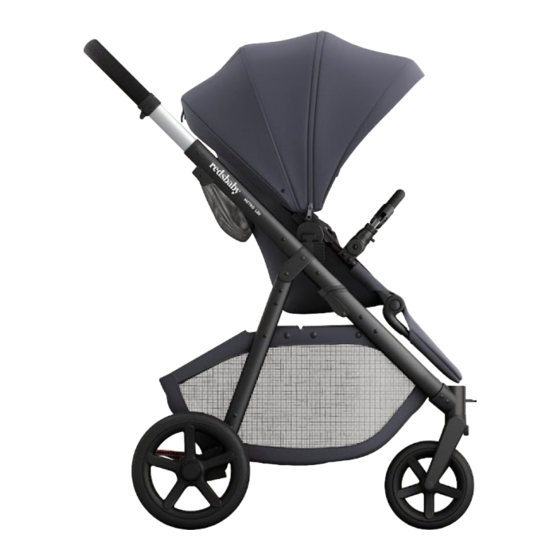
features into our most popular stroller; A lightweight
6.8kg frame, breathable UPF50+ extension canopy
and compact fold with seat attached, topped off
with a supersized basket that stores more than
you need. It's everything you've been waiting for.
EFFORTLESS
ADVENTURES
METRO Lite Stroller
Product Guide
The METRO Lite packs the best
LIGHTWEIGHT
& COMPACT
METRO LITE STROLLER PRODUCT GUIDE
1
Advertisement

Related Manuals for Redsbaby METRO Lite


Summary of Contents for Redsbaby METRO Lite
- Page 1 The METRO Lite packs the best features into our most popular stroller; A lightweight 6.8kg frame, breathable UPF50+ extension canopy and compact fold with seat attached, topped off with a supersized basket that stores more than you need. It's everything you've been waiting for.
- Page 2 For your journey ® REDSBABY.COM.AU...
- Page 3 Our products are designed in Australia for our unique lifestyle. They are as functional as they are beautiful, serving our core purpose to enrich your family journey. CELEBRATING HEAD-TURNING HOMEGROWN STYLE METRO LITE STROLLER PRODUCT GUIDE...
- Page 4 General instructions Product care Cleaning instructions Safety standards /10/ Warnings and safety precautions /10/ Features and components /16/ Assembly instructions /18/ Frame /18/ Basket /18/ Brake component /18/ Rear wheels /19/ Front wheels /19/ Canopy and bumper bar /20/ REDSBABY.COM.AU...
- Page 5 Using the 5-point safety harness /26/ Reclining the seat /28/ Reversing the seat /29/ Adjusting the footrest /30/ Using the tether strap /30/ Newborn Support /31/ Warranty information /32/ For future /34/ ® Company information /35/ METRO LITE STROLLER PRODUCT GUIDE...
- Page 6 Scan to Watch How-to and assembly videos available at redsbaby.com.au REDSBABY.COM.AU...
- Page 7 Your METRO Lite frame is compatible with the METRO Lite seat. Do not use your METRO Lite frame with any other model of pram/stroller or seat. Your METRO Lite is compatible with Britax, Maxi-Cosi, Joie and Nuna car capsules when used with Redsbaby Capsule Adaptors (sold separately).
-
Page 8: Product Care
Do not leave your METRO Lite in sunlight for prolonged periods, as fabrics may fade. • Store your METRO Lite in a dry, well-ventilated and safe place. • Do not use your METRO Lite if screws are loose or missing or if any component is damaged. REDSBABY.COM.AU... -
Page 9: Cleaning Instructions
• Do not place any fabric or other component of your METRO Lite in the dryer. Allow all parts to dry thoroughly before storing. PLASTIC AND • Sponge clean with warm water and a mild detergent METAL PARTS then air dry. -
Page 10: Safety Standards
METRO Lite is correctly folded, assembled, and the locks are engaged for safe usage. After unpacking, immediately discard packaging materials, as these can become a choking hazard. Always use the safety features that come with your METRO Lite, such as the tether strap, brakes and harness. REDSBABY.COM.AU... - Page 11 • Do not leave children unattended. • Secure the child in the harness at all times. • Do not carry extra children or bags on the Redsbaby METRO Lite. • • Make sure children are clear of any moving parts if...
- Page 12 • We recommend you do not use the Redsbaby METRO Lite on stairs, as this may damage the frame and lead to breakage. • Do not use or leave the Redsbaby METRO Lite near open fire or exposed flames. • Brakes must always be applied when the Redsbaby METRO Lite is not moving.
- Page 13 Redsbaby METRO Lite. • Ensure you follow the regular maintenance and care instructions included in this manual. Pay special attention to maintenance and care of the brakes. METRO LITE STROLLER PRODUCT GUIDE...
- Page 14 • Do not hang bags on the Redsbaby METRO Lite handles, as this can cause it to become unstable. • Do not lift or carry the Redsbaby METRO Lite when a child is in it. • Do not lift or carry the Redsbaby METRO Lite when fully assembled.
- Page 15 • Maximum weight for a child in the upper seat is 20kg (44.1 lbs). • Maximum weight for items in the basket is 10kg (22 lbs). • Maximum weight for items in the back pocket is 1kg (2.2 lbs). METRO LITE STROLLER PRODUCT GUIDE...
- Page 16 Features and components REAR WHEELS HANDLEBAR HANDLEBAR LATCHES CANOPY SEAT RECLINE LEVER BUMPER BAR FRAME FOLD LATCHES FOLD LOCK SEAT UNIT FRAME BASKET FOOTREST BRAKE FRONT WHEELS REDSBABY.COM.AU...
- Page 17 METRO LITE STROLLER PRODUCT GUIDE...
- Page 18 3. Secure all basket press studs and hooks to the frame. Brake component The brake is red in colour and is permanently assembled on your pram frame. The brake is located at the bottom right-hand side of the frame. REDSBABY.COM.AU...
- Page 19 2. To remove the rear wheels press the button in the middle of the wheel and pull outwards. Front wheels Insert wheels into the chassis front wheel housing. A firm click indicates the wheels are secured. METRO LITE STROLLER PRODUCT GUIDE...
- Page 20 2. Align the bumper bar pins with the openings on the seat frame and secure them. 3. Gently push the seat frame's connectors downwards into the chassis seat connectors until you feel and hear a firm click. REDSBABY.COM.AU...
- Page 21 Using your METRO Lite METRO LITE STROLLER PRODUCT GUIDE METRO LITE STROLLER PRODUCT GUIDE...
-
Page 22: Unfolding And Folding
Unfolding and folding To unfold 1. Release the frame lock on the left-hand side of the frame. 2. Gently lift the handlebar until the frame locks into place. A firm click indicates the frame is unfolded. REDSBABY.COM.AU... - Page 23 4. While holding the frame fold latches upwards, fold the frame downwards towards your feet until the frame lock engages. Lifting and carrying safely • Always lift and carry the frame using two hands. • Ensure the fold lock is engaged. METRO LITE STROLLER PRODUCT GUIDE...
- Page 24 Engaging and releasing the brake The brake is red and located next to the right rear wheel of the METRO Lite. To engage Press downwards on the brake. A firm click indicates the brake is engaged. To release Press your foot forwards on the top surface of the brake or flick upwards from underneath the brake until it disengages.
- Page 25 To unlock Press the buttons again to release. Adjusting the handlebar 1. Pull both handlebar latches located under either side of the handlebar upwards. 2. Adjust to the desired height. METRO LITE STROLLER PRODUCT GUIDE...
-
Page 26: Using The 5-Point Safety Harness
Click backwards to secure. To unlock Press the button in the middle of the buckle to release all straps at once. Note: Padding has been provided for the shoulder straps and crotch strap. REDSBABY.COM.AU... - Page 27 2. Adjust the shoulder straps (A1) and (A2), waist straps (B1) and (B2) and crotch strap (D) to the desired fit. Note: Position the shoulder straps just above your child’s shoulder. METRO LITE STROLLER PRODUCT GUIDE...
- Page 28 Reclining the seat To recline Lift the seat hand recline lever upwards and move the seat into the desired position. REDSBABY.COM.AU...
-
Page 29: Reversing The Seat
Reversing the seat To reverse 1. Remove the seat unit by pushing the connectors located on both sides of the seat unit and lifting the seat upwards. 2. Position the seat forward or rearward facing. METRO LITE STROLLER PRODUCT GUIDE... -
Page 30: Adjusting The Footrest
Note: The footrest will move freely in the upwards direction. It will not lock into place. This allows the seat to fold into the frame without resistance. Using the tether strap Attach the tether strap to your wrist at all times when using the METRO Lite. REDSBABY.COM.AU... - Page 31 Accessories Newborn Support Use your METRO Lite Stroller from birth without the need for a bassinet. Made from breathable materials, it creates a comfortable lie-flat solution and provides the support that new babies require. HEAD SUPPORT LINER WEDGE *Newborn Support is sold separately and can be purchased at www.redsbaby.com.au...
- Page 32 Register your product online at redsbaby.com.au within 60 days of delivery to receive an additional 12 month warranty. Our goods come with guarantees that cannot be excluded under the Australian Consumer Law.
- Page 33 CLAIM VALIDITY Immediately cease use of the product once you become aware of a fault or defect. Contact Redsbaby to report the issue. You must make a claim within the claims period for it to be valid. WARRANTY EXPENSES Redsbaby will provide repairs and replacements free of charge for claims made within the claims period.
- Page 34 We strive to use resources and make decisions that safeguard our planet for future generations. Our products are made to last for years to come and wherever possible, use sustainable materials and packaging to minimise our impact on our beautiful planet. REDSBABY.COM.AU...
- Page 35 'REDSBABY', 'FOR YOUR JOURNEY' and 'FOR FUTURE' are registered trademarks of Redsbaby Pty Ltd ACN 625 563 519 729 Elizabeth Street Zetland 2017 NSW Australia 02 7201 5891 METRO LITE STROLLER PRODUCT GUIDE...
- Page 36 REDSBABY.COM.AU @REDSBABYAUS...
Need help?
Do you have a question about the METRO Lite and is the answer not in the manual?
Questions and answers