Table of Contents
Advertisement
Advertisement
Table of Contents

Related Manuals for Redsbaby Metro Stroller


Summary of Contents for Redsbaby Metro Stroller
- Page 1 Redsbaby Metro Stroller ® Instruction Manual...
-
Page 2: Table Of Contents
Folding and unfolding Engaging and releasing the brake Locking the front swivel wheels Adjusting the handle Using the 5-point safety harness Reversing and reclining the seat Using the tether strap Lifting and carrying your Redsbaby Metro safely Adjusting the footrest Product Care... -
Page 3: General Instructions
Please read thoroughly before commencing assembly and use of your Redsbaby Metro. Incorrect assembly and use can be dangerous and result in serious injury or even death. There may be slight variations in the design of your product to that shown... -
Page 4: Warranty Information
Warranty information 12 Month Warranty The Redsbaby Metro and its accessories come with a 12 Month Warranty to cover against faults in materials and workmanship when your products are used under normal conditions, according to our user manuals and technical specifications. - Page 5 How To Make A Warranty Claim Send an email to info@redsbaby.com.au to notify us of your warranty claim. To validate your warranty claim we will require you to include in your email: - a description of the warranty defect including photographs;...
-
Page 6: Warnings And Safety Precautions
• Secure the child in the harness at all times. • Do not carry extra children or bags on the Redsbaby Metro. • Make sure children are clear of any moving parts if you adjust the Redsbaby Metro, otherwise they may be injured. - Page 7 Pay special attention to maintenance and care of the brakes. • The Redsbaby Metro must only be used for one (1) child. • Do not hang bags on the Redsbaby Metro handles, as this can cause it to become unstable.
-
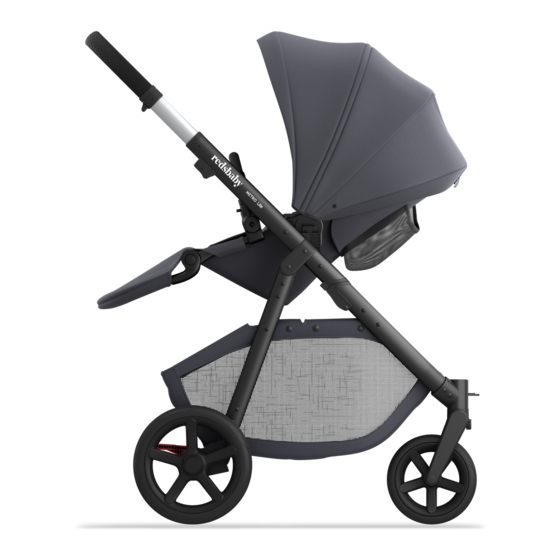
Page 8: Features And Components
Features and components 1. Adjustable handle 6. Fold lock 11. Front swivel wheels 2. Canopy 7. Seat unit 12. Basket 3. Frame fold latches 8. Circular frame 13. Rear wheels 4. Bumper bar 9. Adjustable foot rest 5. Frame 10. Brake... -
Page 9: Assembly Instructions
Assembly instructions Frame To release the frame from the folded position: 1. Place frame on the ground and position yourself behind the handle bar. 2. Release the automatic frame lock located on the left hand side of the frame. -
Page 10: Brake Component
3. Holding the frame on both sides, gently lift the frame continuing until the frame locks into place. When the frame has been fully opened, you will hear and feel a firm ‘click’. Brake component The brake will come permanently assembled on your pram frame and is located at the bottom of the frame in the right hand side and is red in colour. -
Page 11: Rear Wheels
Rear wheels Fit the rear wheels by pressing the button in the middle of the wheel and clicking them into the rear wheel housing located at the back of the pram frame. You will hear and feel a firm ‘click’ when the wheels are locked in place. IMPORTANT: Ensure you check that the wheels are clicked in correctly by tugging them outwards. -
Page 12: Front Swivel Wheels
You will hear and feel a firm ‘click’ when the wheels are locked in place. Assembling the seat and bumper 1. The seat fabrics will come assembled on your Redsbaby Metro circle frame. 2. Attach the bumper by aligning the ends of the bumper with the two openings on the circular frame. -
Page 13: Basket
4. To place the seat on the frame, push down gently until you feel and hear a firm ‘click’. Basket 1. The basket will come assembled on your Redsbaby Metro. To remove, release all press studs. -
Page 14: Using Your Redsbaby Metro
Using your Redsbaby Metro Folding and unfolding the Redsbaby Metro frame To release the frame from the folded position: 1. Release the frame fold lock on the left hand side of the frame. 2. Holding the frame on either side, gently lift the top half of the frame and place on the ground. - Page 15 3. Gently fold the frame downwards (once the frame fold locks have been pulled back) until the frame fold latch automatically engages. Tip: You can also fold the Redsbaby Metro with the seat connected in the fully upright and forward-facing position.
-
Page 16: Engaging And Releasing The Brake
Engaging and releasing the brake The brake is located next to the right rear wheel of the Redsbaby Metro. The brake is identified by its red colour. 1. To engage the brake, press downwards and backwards on the brake until you feel and hear a ‘click’. -
Page 17: Adjusting The Handle
Adjusting the handle Simultaneously pull the levers located underneath the handle on the left and right hand side upwards and move the handle to the desired height. Using the 5 Point Safety Harness IMPORTANT: For the safety of your child the 5-point safety harness must be properly fitted and adjusted. - Page 18 Note: The shoulder heights can be adjusted according to your child’s height by feeding the shoulder straps through the seat back. The shoulder straps should sit just above the shoulders of your child. 4. Adjust the shoulder strap (A1) and (A2), waist straps (B1) and (B2) and crotch strap (D) to the desired fit.
-
Page 19: Reversing And Reclining The Seat
Reversing and reclining the seat IMPORTANT: Do not reverse or recline the seat when a child is in the seat. 1. To recline, lift the lever located at the top of the seat back and move the seat into the desired position. 2. -
Page 20: Using The Tether Strap
Using the tether strap Attach the tether strap to your wrist at all times when using the Redsbaby Metro. Lifting and carrying the Redsbaby Metro safely IMPORTANT: Do not lift or carry the Redsbaby Metro when a child is in it. -
Page 21: Product Care
• Store the Redsbaby Metro in a dry, well-ventilated and safe place. • Do not use your Redsbaby Metro if any screws are loose or missing or if any component is damaged. - Page 22 YOUR REDSBABY Metro ‘Redsbaby’ is a registered Trademark of Redsbaby Pty Ltd. ABN 31 167 364 178. ©Copyright 2013-2016 Redsbaby...
Need help?
Do you have a question about the Metro Stroller and is the answer not in the manual?
Questions and answers