Table of Contents
Advertisement
Advertisement
Table of Contents

Related Manuals for Redsbaby JIVE2 PRAM


Summary of Contents for Redsbaby JIVE2 PRAM
- Page 1 JIVE PRAM INSTRUCTION MANUAL...
-
Page 2: Table Of Contents
Folding and unfolding Engaging and releasing the brake Locking the front wheels Adjusting the handle Using the 5-point safety harness Reversing and reclining the seat Using the tether strap Lifting and carrying your Redsbaby JIVE safely Adjusting the footrest Product Care... -
Page 3: General Instructions
Your Redsbaby JIVE chassis can be used with Maxi-Cosi, Britax, Joie and Nuna car capsules (sold separately) using our Redsbaby JIVE/METRO Maxi-Cosi or Britax adaptors which are sold separately. Do not use your Redsbaby JIVE chassis with any other car seat. This vehicle does not replace a cot or a bed. -
Page 4: Warranty Information
Warranty information 24 Month Warranty The Redsbaby JIVE and its accessories come with a 24 Month Warranty to cover against faults in materials and workmanship when your products are used under normal conditions, according to our user manuals and technical specifications. - Page 5 - when the product has not been used for normal use and in accordance with the manufacturer’s instructions. For more information on our 24 Month Warranty, please read our Terms and Conditions at www.redsbaby.com.au. Please ensure you follow the assembly instructions, which can be found in this instruction manual.
- Page 6 For smaller warranty claims we may be able to send you a replacement part free of charge (e.g. bumper bar, frame lock, adaptors) which will allow you to get back out and about quicker. In these instances, Redsbaby will cover the cost of shipping spare parts domestically within Australia.
- Page 7 Once our repairer has received the product they will inspect and confirm the reported defect. We will then contact you with further information surrounding the repair such as the estimated turn around time. If you have any questions, you can contact us at info@redsbaby.com.au.
-
Page 8: Warnings And Safety Precautions
• Never leave your child unattended. • Secure the child in the harness at all times. • Do not carry extra children or bags on the Redsbaby JIVE • Make sure children are clear of any moving parts if you adjust the Redsbaby JIVE , otherwise they may be injured. - Page 9 • The harness can form loops which may cause a strangulation hazard. Never leave a harness connected when not fitted to a child in the Redsbaby JIVE • Use the tether strap to stop the Redsbaby JIVE rolling away.
- Page 10 20kg (44.1lbs). Ensure you securely connect the JIVE/METRO Buggyboard to the tubing that runs between the rear wheels of your Redsbaby JIVE • The rearward-facing position of the seat is only intended for a child up to 2 years, or until the child’s feet extend over the edge of the leg rest.
- Page 11 • Do not hang bags on the Redsbaby JIVE² handles, as this can cause it to become unstable. • Do not lift or carry the Redsbaby JIVE² when a child is in it. • Do not lift or carry the Redsbaby JIVE² when fully assembled.
- Page 12 MAXIMUM WEIGHT LIMITS: • Maximum weight for a child in the bassinet is 9kg (19.8 lbs). • Maximum weight for a child in the upper seat is 20kg (44.1 lbs). • Maximum weight for a child in the lower toddler seat is 17kg (37.5 lbs).
-
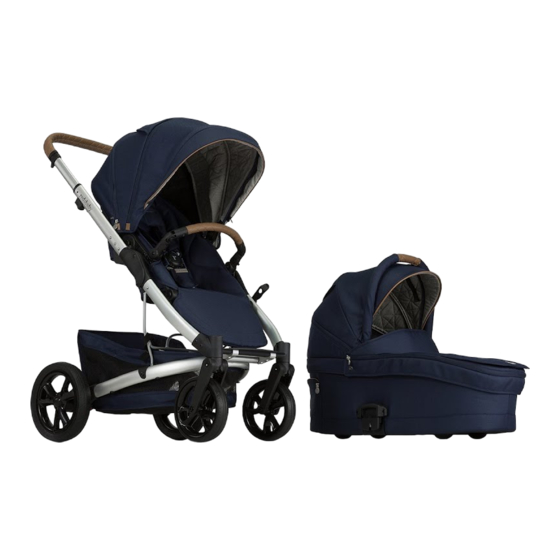
Page 13: Features And Components
Features and components 1. Adjustable handle 6. Fold lock 11. Front swivel wheels 2. Extension canopy 7. Seat unit 12. Basket 3. Frame fold latches 8. Circular frame 13. Rear wheels 4. Bumper bar 9. Adjustable foot rest 5. Frame 10. -
Page 14: Assembly Instructions
Assembly instructions FRAME To release the frame from the folded position: 1. Place frame on the ground and position yourself behind the brake. 2. Release the automatic frame lock located on the left hand side of the frame. -
Page 15: Brake Component
3. Holding the frame on both sides, gently lift the frame upwards, continuing until the frame locks into place. When the frame has been fully opened, you will hear and feel a firm ‘click’. BRAKE COMPONENT The brake will come permanently assembled on your pram frame and is located at the bottom of the frame in the right hand side and is red in colour. -
Page 16: Rear Wheels
REAR WHEELS Fit the rear wheels by pressing the center button on the wheel, and inserting them into the rear wheel housing located at the back of the pram frame. Once inserted, release the center button of the wheel to secure in place. -
Page 17: Front Swivel Wheels
You will hear and feel a firm ‘click’ when the wheels are locked in place. ASSEMBLING THE SEAT AND BUMPER 1. The seat fabrics will come assembled on your Redsbaby JIVE circle frame. -
Page 18: Basket
4. To place the seat on the frame, push down gently until you feel and hear a firm ‘click’. BASKET 1. The basket will come assembled on your Redsbaby JIVE . To remove, release all press studs and clips. -
Page 19: Using Your Redsbaby Jive 2
Using your Redsbaby JIVE TO RELEASE THE FRAME FROM THE FOLDED POSITION: 1. Release the frame fold lock on the left hand side of the frame. 2. Holding the frame on both sides, gently lift the frame upwards, continuing until the frame locks into place. When the frame has been fully opened, you will hear and feel a firm ‘click’. - Page 20 3. Gently fold the frame forwards and downwards until the frame fold lock engages. TIP: You can also fold the Redsbaby JIVE with the seat connected in the fully upright and forward-facing position. SAFE LIFTING AND CARRYING OF THE REDSBABY JIVE...
-
Page 21: Engaging And Releasing The Brake
ENGAGING AND RELEASING THE BRAKE The brake is located next to the right rear wheel of the Redsbaby JIVE The brake is identified by its red colour. 1. To engage the brake, press downwards and backwards on the brake until you feel and hear a ‘click’. -
Page 22: Locking The Front Wheels
LOCKING THE FRONT SWIVEL WHEELS 1. Press downwards on the buttons located on top for the front wheel housing until you hear and feel a ‘click’. 2. Push the Redsbaby JIVE forwards until you hear a second click in both front wheels. -
Page 23: Using The 5-Point Safety Harness
USING THE 5-POINT SAFETY HARNESS IMPORTANT: For the safety of your child the 5-point safety harness must be properly fitted and adjusted. 1. Clip shoulder and waist straps into center buckle securely. Note: The shoulder heights can be adjusted according to your child’s height by feeding the shoulder straps through the seat back. - Page 24 2. Adjust the shoulder strap (A1) and (A2), waist straps (B1) and (B2) and crotch strap (D) to the desired fit. 3. To unlock the 5-point safety harness, simply press the button in the middle of the centre buckle (C) to release all straps at once. Note: Padding has been provided for the shoulder straps (A1) and (A2) and crotch strap (D) for the comfort...
-
Page 25: Reversing And Reclining The Seat
REVERSING AND RECLINING THE SEAT IMPORTANT: Do not reverse the seat when a child is in the seat. 1. To recline, lift the lever located at the top of the seat back and move the seat into the desired position. IMPORTANT: The lever MUST be fully released (pulled upwards) before trying to lower or raise the seat. -
Page 26: Using The Tether Strap
The seat unit can be fitted either rear or forward facing. USING THE TETHER STRAP Attach the tether strap to your wrist at all times when using the Redsbaby JIVE LIFTING AND CARRYING THE REDSBABY JIVE... -
Page 27: Adjusting The Footrest
• Do not store your Redsbaby JIVE in your car for prolonged periods of time, especially when it is hot as this may lead to warping some... - Page 28 Then air dry. • For more instructions, follow the care labels on each fabric item. IMPORTANT: Do not place any fabric or other component of your Redsbaby JIVE the dryer. Allow all parts to dry thoroughly before storing.
- Page 29 ‘REDSBABY’ is a registered Trademark of Redsbaby Pty Ltd. ABN 31167364178. © Redsbaby Pty Ltd 2017.
Need help?
Do you have a question about the JIVE2 PRAM and is the answer not in the manual?
Questions and answers