Page 2
All rights are reserved in this document and this statement. Any reproduction, excerption, backup, modification, transmission, translation or commercial use of this document or any portion of this document, in any form or by any means, without the prior written consent of Ruijie Networks is prohibited.
Intended Audience This document is intended for: Network engineers Technical support and service engineers Network administrators Technical Support Official website of Ruijie Reyee: https://www.ruijienetworks.com/products/reyee Technical Support Website: https://ruijienetworks.com/support Case Portal: https://caseportal.ruijienetworks.com Community: https://community.ruijienetworks.com ...
Page 4
Specification An alert that contains a description of product or version support. Note This manual is used to guide users to understand the product, install the product, and complete the configuration. The example of the port type may be different from the actual situation. Proceed with the configuration according to the port type supported by the product.
Contents Preface ..............................I 1 Overview ............................1 1.1 Introduction ..........................1 1.2 Specifications of Ruijie RG-NBR-E Series Routers ..............1 1.2.1 Ruijie RG-NBR6120-E Router ..................1 1.2.2 Ruijie RG-NBR6205-E Router ..................4 1.2.3 Ruijie RG-NBR6210-E Router ..................7 1.2.4 Ruijie RG-NBR6215-E Router ..................10 1.3 Specifications of the Hard Disk Module ...................
Page 6
Mode ..........................66 3.8.3 The Branch Router Accesses the HQ Router on the LAN in Dialup Mode ....74 3.9 Integrating the NBR Device with Ruijie Cloud ................. 81 3.9.1 Synchronizing Voucher/Account Login to a Router ............. 82 3.9.2 Synchronizing Voucher/Account Login to a Router ............. 86 3.9.3 Synchronizing Voucher/Account Login to the NBR Device .........
Page 7
3.12 Firewall ..........................100 3.12.1 Attack Defense Configuration .................. 101 3.12.2 Security Zone Configuration ..................108 3.12.3 Defense Zone Monitoring ..................121 3.12.4 IP Resource Configuration ..................123 3.12.5 Service Resource Configuration ................126 4 Upgrade and Maintenance ......................129 4.1 Logging In ..........................
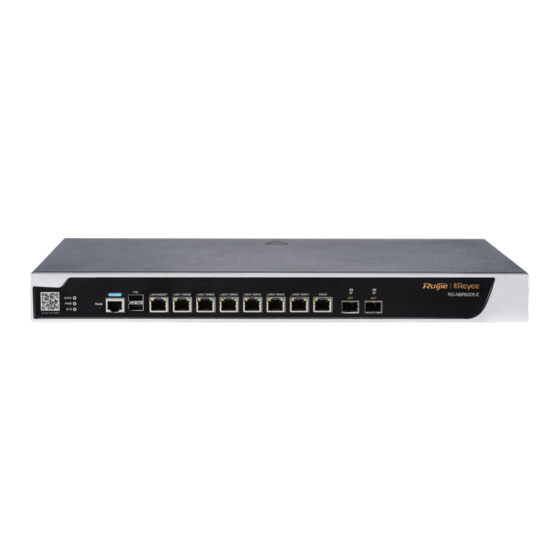
VPN total-division interconnection, and intelligent routing, and support connection to Ruijie cloud platform (MACC free cloud platform) for remote cloud O&M and central management, which can well meet the integrated network needs of scenarios such as office, hotel, restaurant, entertainment, and scenic spot.
Page 9
If it is off, the power module is faulty or not powered on. Figure 1-2 Back Panel of Ruijie RG-NBR6210-E Router Table 1-2 Description of the Back Panel of Ruijie RG-NBR6210-E Router Button/Port Description Connects to the grounding system of the installation site through the Grounding screw grounding wire to provide grounding protection.
Page 10
Cookbook Overview 2. Specifications of Ruijie RG-NBR6210-E Router Table 1-3 Specifications of Ruijie RG-NBR6210-E Router Item Description Model RG-NBR6120-E DDR3 SDRAM: 512 MB Storage eMMC: 4 GB BOOTROM: 2 MB I/O setup Five 10/100/1000M self-adaptive fast Ethernet ports: support automatic recognition of network cables and crossover cables.
Ruijie RG-NBR6205-E Router 1. Appearance of Ruijie RG-NBR6205-E Router Figure 1-3 Front Panel of Ruijie RG-NBR6205-E Router Table 1-4 Description of the Front Panel of Ruijie RG-NBR6205-E Router Indicator/Port Description SATA hard disk indicator: SATA If it is steady green, the SATA hard disk is in place.
Page 12
If it is steady red, the system is in abnormal state. Figure 1-4 Back Panel of Ruijie RG-NBR6205-E Router Table 1-5 Description of the Back Panel of Ruijie RG-NBR6205-E Router Indicator/Port Description Retainer holder Holds the power cord retainer to secure the power cord.
Page 13
Cookbook Overview 2. Specifications of Ruijie RG-NBR6205-E Router Table 1-6 Specifications of Ruijie RG-NBR6205-E Router Item Description Model RG-NBR6205-E Storage DDR4 SDRAM: 2 GB BOOTROM: 8 MB eMMC: 8 GB SATA: 1 TB (optional) I/O setup Eight 10/100/1000M self-adaptive fast Ethernet ports: support automatic recognition of network cables and cross-over cables.
Ruijie RG-NBR6210-E Router 1. Appearance of Ruijie RG-NBR6210-E Router Figure 1-5 Front Panel of Ruijie RG-NBR6210-E Router Table 1-7 Description of the Front Panel of Ruijie RG-NBR6210-E Router Indicator/Port Description SATA hard disk indicator: SATA If it is steady green, the SATA hard disk is in place.
Page 15
If it is steady red, the system is in abnormal state. Figure 1-6 Back Panel of Ruijie RG-NBR6210-E Router Table 1-8 Description of the Back Panel of Ruijie RG-NBR6210-E Router Indicator/Port Description Retainer holder Holds the power cord retainer to secure the power cord.
Page 16
Cookbook Overview Indicator/Port Description Hard disk expansion Fits the hard disk module. The supported hard disk module model is card slot RG-NBR-HDD-1T. 2. Specifications of Ruijie RG-NBR6210-E Router Table 1-9 Specifications of Ruijie RG-NBR6210-E Router Item Description Model RG-NBR6210-E Storage...
Ruijie RG-NBR6215-E Router 1. Appearance of Ruijie RG-NBR6215-E Router Figure 1-7 Front Panel of Ruijie RG-NBR6215-E Router Table 1-10 Description of the Front Panel of Ruijie RG-NBR6215-E Router Indicator/Port Description SATA hard disk indicator: SATA If it is steady green, the SATA hard disk is in place.
Page 18
Cookbook Overview Indicator/Port Description Two USB ports They are USB2.0 ports that connect to USB-compliant peripheral devices, such as USB flash drives. If it is steady orange, the port is connected at a rate of 1000 Mbit/s. LAN1 If it is off, the port is connected at a rate of 10 Mbit/s or 100 Mbit/s. If it is steady green, the port is connected at a rate of 10 Mbit/s, 100 WAN6 Mbit/s, or 1000 Mbit/s.
Page 19
Cookbook Overview Figure 1-8 Back Panel of Ruijie RG-NBR6215-E Router Table 1-11 Description of the Back Panel of Ruijie RG-NBR6215-E Router Indicator/Port Description Retainer holder Holds the power cord retainer to secure the power cord. Power port Connects to an AC power cord.
Page 20
Cookbook Overview Item Description I/O setup Eight 10/100/1000M self-adaptive fast Ethernet ports that support automatic recognition of network cables and cross-over cables: ○ By default, LAN0 (GE 0/0), LAN1/WAN6 (GE 0/1), LAN2/WAN5 (GE 0/2), LAN3/WAN4 (GE 0/3), LAN4/WAN3 (GE 0/4) and LAN5/WAN2 (GE 0/5) are LAN ports, while WAN0 and LAN6/WAN1 (GE 0/6) are WAN ports.
Cookbook Overview To power off the device equipped with the hard disk module, turn off the power button. Do not remove the power cord until the PWR LED turns off; otherwise, the hardware disk will be damaged. The SFP+ port does not support the direct connection between two RG-EG3200 series or RG-NBR6200- E series devices through the SFP module or fiber cables.
Use the uninterruptible power supply (UPS) to avoid power failures and other interferences. 2.1.2 Requirements on the Installation Environment Ruijie RG-NBR-E series Routers are for indoor use only. To ensure normal operation and prolong their service life, the installation site must meet the following requirements. 1. Temperature/Humidity Requirements The Ruijie RG-NBR-E series Routers will be damaged when being exposed to an environment that does not meet temperature/humidity requirements for a long time.
Page 23
This affects the service life and easily result in communication failures. Table 1-15 lists the dust content and particle size requirements in the equipment room. Table 2-2 Equipment Room Dust Content and Particle Size Requirements of Ruijie RG-NBR-E Series Routers Dust...
Page 24
Cookbook Getting Started Table 2-3 Upper Limits of Noxious Gases of Ruijie RG-NBR-E Series Routers Average (mg/m Maximum (mg/m Sulfur dioxide Sulfured hydrogen 0.006 0.03 Nitrogen dioxide 0.04 0.15 Ammonia 0.05 0.15 Chlorine 0.01 Note The average value is measured by week. The maximum value is the extreme value within a week, which does not exceed 30 minutes per day.
Cookbook Getting Started Ensure that sufficient room has been reserved for the air intake and air vent of Router to facilitate cooling of the router chassis. Install the Router in the 19-inch standard cabinet. Alternatively, install it on a clean and flat surface. In heated areas, the air conditioning system should be properly installed.
RG-NBR-E series Routers can be mounted on a cabinet or a workbench. 1. Mounting into a cabinet Ruijie RG-NBR-E series Routers are designed based on the dimension of a standard cabinet. You can install the router with the enclosed fixing accessories.
2.2.5 Installing the Power Cord The requirements of Ruijie RG-NBR-E series Routers on AC power supply are 100–240 V and 50/60 Hz. The Router uses 3-conductor power cords. You are advised to use a single-phase 3-conductor outlet or a multifunction microcomputer outlet with the neutral connector. The neutral point of the power supply should be securely grounded in the building.
Cookbook Configuration 2.2.6 Checking After the Installation After completing the mechanical installation of THE Router, perform the following checks before powering on the router: If the router is installed in a cabinet, check whether the angle bar is steady. If the router is installed on the workbench, check whether sufficient room is reserved around the router to ensure cooling and check whether the workbench is steady.
Page 29
Cookbook Configuration Customize the interface weight to ensure that traffic goes through different egresses according to the weight. Procedure (1) Choose Network > Interface > Basic Settings and configure WAN0. (2) Choose Network > Interface > Basic Settings and configure WAN1. (3) Choose Network >...
Page 30
Cookbook Configuration Configure the interface weight.
Page 31
Cookbook Configuration Verify the configuration.
Cookbook Configuration DHCP Configuration 3.2.1 Configuring DHCP Through the Web Page (1) Choose Network > Interface > Basic Settings and configure an interface’s IP address. (2) Choose Network > DHCP > Settings and perform the following configurations. Enable DHCP.
Page 33
Cookbook Configuration (3) Click Add DHCP to add a DHCP pool. (4) Configure the DHCP pool, including the subnet, router, lease, and DNS server addresses. (5) Click Excluded Address Range and configure the excluded IP address range in the DHCP pool.
Ruijie#configure terminal Ruijie(config)#service dhcp //Enable DHCP. Ruijie(config)#ip dhcp excluded-address 192.168.1.1 192.168.1.10 //Retain 192.168.1.1-192.168.1.10. Ruijie(config)#ip dhcp pool Test //Creat a DHCP pool named Test. // Set lease time, ’0 1 0’ means 0 day, 1 hour, 0 minute. The default lease...
Cookbook Configuration DNS Configuration 3.3.1 Working Principle If DNS proxy is enabled, the NBR LAN port will intercept DNS traffic. Replace destination DNS server IP address with others which have been configured in WAN port, and then send the message to that new DNS server to associate the client to the new DNS server.
Page 36
Cookbook Configuration Check the WAN ports connected to the DNS server, and configure the DNS server address of the corresponding line. Click Save. Check DNS proxy statistics. (3) Check the DNS Whitelist tab and set the configuration items. The DNS Whitelist function is used to set special resources (including IP addresses and DNS servers) that are not affected by the DNS proxy function.
Cookbook Configuration Behavior Policies 3.4.1 Basic Settings 1. Enabling of All Audit Functions Application Scenario 1. The Router serves as an egress and can access the Internet by using a static IP address. The LAN user router is configured on the LAN port of the router to provide Internet access. 2.
Page 38
Cookbook Configuration Verification View audit records of services in behavior reports. 2. User Blacklist Application Scenario 1. The router serves as an egress and can access the Internet by using a static IP address. The LAN user router is configured on the LAN port of the router to provide Internet access. 2.
Page 39
Cookbook Configuration (2) Choose Behavior > Behavior Policy > Basic Settings, and click User Blacklist. Click Add Blacklisted User. Note If the IP address of a blacklisted user is added to the audit-exempt user list, all applications of the user are limited by no policy.
Page 40
Cookbook Configuration 2. The WAN bandwidth is 10 Mbit/s, the WAN port IP address is 192.168.33.56/24, the WAN router address is 192.168.33.1, and the LAN is in the 192.168.1.0/24 network segment. 3. All LAN users are prohibited from accessing www.baidu.com. Prerequisites 1.
Page 41
Cookbook Configuration The URL categories displayed after you click Select are default website classifications. You can also click Enter a URL to enter a URL. Keyword matching is also supported. You only need to enter the keyword of the primary domain name to be blacklisted even if there are secondary domain names or multi-level directories.
Page 42
Cookbook Configuration 1. The router serves as an egress and can access the Internet by using a static IP address. The LAN user router is configured on the LAN port of the NBR router to provide basic Internet access. 2. The WAN bandwidth is 10 Mbit/s, the WAN port address is 192.168.33.56/24, the WAN router address is 192.168.33.1, and the LAN is in the 192.168.1.0/24 network segment.
Page 43
Cookbook Configuration The URL categories displayed after selecting Select are default ones of the device. Alternatively, you can click Enter a URL to enter a URL. Flexible Whitelist: After Flexible Whitelist is selected, some pictures not belonging to a whitelisted website can be displayed when the whitelisted website is accessed.
Page 44
Cookbook Configuration The following figure shows the website displayed when Flexible Whitelist is not selected. Accessing other websites is prohibited. 5. Audit-Exempt URL Application Scenario 1. The router serves as an egress and can access the Internet by using a static IP address. The LAN user router is configured on the LAN port of the NBR router to provide basic Internet access.
Page 45
Cookbook Configuration Note If you select Shield Invalid/Virus Websites in wizard-based setup or enable website access in default audit in Behavior Policy, the system automatically delivers one audit-exempt website policy to exempt the websites of the unknown category and system upgrade category from audit, to prevent junk data audit. The website audit exemption policy has a high priority.
Cookbook Configuration Verification LAN users can access www.google.com successfully and there is no audit record in the behavior audit report. An audit record is generated after you delete www.google.com from audit-exempt websites and access the website again. 3.4.2 Advanced Settings 1.
Page 47
Cookbook Configuration (2) Configure a website access policy during policy creation. (3) If the policy does not take effect after the configuration is complete, check whether the user objects, application time, and selected applications are correct in policy configuration. Procedure (1) Choose Behavior >...
Page 48
Cookbook Configuration (4) Click Add Behavior Policy. Enter the name of a policy.
Page 49
Cookbook Configuration Configure a behavior control policy. Select the online shopping website defined previously.
Page 50
Cookbook Configuration Select Deny and Audit from the Action drop-down list box. Associate users.
Page 51
Cookbook Configuration Click Finish to generate the policy. Note In the external authentication server environment, select external server users as user objects. (5) View the configured policy on Advanced Settings. Note A policy configured later takes effect. This is because policies are matched from top down. Verification...
Page 52
Cookbook Configuration When a user accesses www.taobao.com, a message is displayed, indicating that the user is prohibited from accessing this website and needs to contact the website administrator. If a policy does not take effect, click ? to view the cause. 2.
Page 53
Cookbook Configuration Method 2: Add websites to a blacklist on Basic Settings. (1) Choose Behavior > Behavior Policy > Basic Settings and select HTTPS Audit in Enable Audit to enable HTTPS website audit. (2) Choose Behavior > Behavior Policy > Basic Settings, click Website Blacklist/Whitelist, and select Blacklist Mode.
Page 54
Cookbook Configuration (3) Click Select, click the text box, and select websites to be blocked. (4) Click Enter a URL and enter the website to be blocked in the text box.
Page 55
Cookbook Configuration Method 3: Add websites to a whitelist on Basic Settings. (1) Choose Behavior > Behavior Policy > Basic Settings and select HTTPS Audit in Enable Audit to enable HTTPS website audit. (2) Choose Behavior > Behavior Policy > Basic Settings, click Website Blacklist/Whitelist, and click Whitelist Mode.
Page 56
Cookbook Configuration (3) Click Select, click the text box, and select websites that are allowed. (4) Click Enter a URL and enter an allowed website in the text box.
Page 57
Cookbook Configuration Method 4: Configure the HTTPS website blocking/allowing and audit/audit exemption functions on Advanced Settings. (1) Choose Behavior > Behavior Policy > Basic Settings and select HTTPS Audit in Enable Audit to enable HTTPS website audit. (2) Choose Behavior > Behavior Policy > Advanced Settings and click Add Behavior Policy to create a behavior policy.
Page 58
Cookbook Configuration (4) Click Behavior Policy to add a behavior control policy. (5) Click User to apply the policy group to users or a user group.
Cookbook Configuration (4) Confirm whether the policy is configured correctly. (5) Use Speedtest tool to verify the rate limit setting Port Mapping Application Scenario A server is deployed on the LAN and HTTP, FTP or other services are enabled. The server address is a private address.
Page 62
Cookbook Configuration For example, the server address is 192.168.1.20 and HTTP is enabled. The server address is a private address, so WAN users cannot directly access the HTTP service provided by the server. You can map the server address and server ports to a public network address on the router so that WAN users can access the HTTP service provided by the server.
Page 63
Cookbook Configuration (4) Commands generated on the CLI: interface GigabitEthernet 0/1 ip nat outside ip address 192.168.33.57 255.255.255.0 reverse-path-----RPL nexthop 192.168.33.1 Verification (1) Click Start and choose Remote Desktop Connection. The Remote Desktop Connection dialog box is displayed. Enter the IP address of the WAN port. (5) Click Connect.
Cookbook Configuration DMZ Host Mapping Application Scenario A server is configured on the LAN and multiples services are enabled. The server address is a private IP address. WAN users cannot access services provided by the server by using the server address. If port mapping is enabled, numerous ports will be involved because many services are enabled.
Cookbook Configuration ip nat inside source static 192.168.1.150 192.168.33.56 permit-inside Verification (1) Click Start and choose Remote Desktop Connection. The Remote Desktop Connection dialog box is displayed. Enter the IP address of the WAN port. (3) Click Connect. The server login page is displayed. IPsec VPN 3.8.1 A Branch Router Accesses the HQ Router Using a Static IP Address in Dialup...
Page 66
Configure router B in the branch as the IPsec client. Keep consistent parameter settings at both ends: ○ Authentication mode: pre-shared key, with the key set to ruijie ○ IKE algorithm: 3DES-MD5, DH2 ○ IPsec negotiation scheme: ESP (3DES-MD5) Procedure (1) Configure router B in the branch.
Page 67
Cookbook Configuration (2) Configure IPsec for router B in the branch. Choose Network > VPN and click Configure. Select Branch and click Next. Configure basic branch information.
Page 68
Cookbook Configuration Note Only interfaces configured with the nexthop x.x.x.x command are displayed in the interface list (after the wizard-based setup is completed on the web page, this command is configured on the WAN interface of the CLI by default). The dialler interface can be configured on the web page: IKE algorithm: 3DES-MD5 and DH2 IPsec negotiation scheme: ESP (3DES-MD5)
Page 69
Cookbook Configuration Select Branch and click Next. Select IPsec and click Next.
Page 70
Cookbook Configuration Configure IPsec VPN and click Next.
Page 71
Cookbook Configuration The IPsec VPN configuration is complete. Verification Choose Network > VPN and click the Topo tab to view the configuration. Configuration of the HQ router:...
Page 72
Cookbook Configuration Configuration of the branch router: Check whether the routers in the HQ and branch can access each other. Note When the Internet access service is configured through wizard-based setup on the web of the router, IPsec VPN can be configured only after the next-hop address is configured on the interface configuration page in wizard-based setup.
Configure router A in the HQ as the IPsec server. Configure router B in the branch as the IPsec client. Keep consistent parameter settings at both ends: ○ Authentication mode: pre-shared key, with the key set to ruijie ○ IKE algorithm: 3DES-MD5 and DH2 ○...
Page 74
Cookbook Configuration Choose Network > VPN and click Configure. Select Branch and click Next. Configure basic IPsec information and click Next.
Page 76
Cookbook Configuration On the CLI, change the public IP address of the HQ router to a dynamic domain name. branch(config)#no crypto isakmp key 0 ruijie address 192.168.2.1 branch(config)#crypto isakmp key 0 ruijie hostnameruijie.xicp.net branch(config)#crypto map Gi0/6 20 ipsec-isakmp branch(config-crypto-map)#no set peer 192.168.2.1 branch(config-crypto-map)#set peer ruijie.xicp.net...
Page 77
Cookbook Configuration Choose Network > VPN and click Configure. Select Headquarter and click Next. Select Branch and click Next.
Page 78
Cookbook Configuration Select IPsec and click Next. Configure IPsec basic information and click Next.
Page 80
Cookbook Configuration Verification Choose Network > VPN and click the Topo tab to view the configuration. Configuration of the HQ router: Configuration of the branch router:...
Cookbook Configuration Check whether the HQ router and branch router can access each other. Note On the web page, IPsec supports only peer IP addresses and does not support domain names. IPsec using domain names needs to be configured on the CLI. ...
Page 82
Configure router B in the branch as the IPsec client. Keep consistent parameter settings at both ends: ○ Authentication mode: pre-shared key, with the key set to ruijie ○ IKE algorithm: 3DES-MD5 and DH2 ○ IPsec negotiation scheme: ESP (3DES-MD5) ...
Page 83
Cookbook Configuration Configure an IPsec policy, set the public IP address of the HQ router to the IP address obtained after NAT, and click Next.
Page 84
Cookbook Configuration Click Finish. (3) Configure router A in the HQ. Configure IPsec on the LAN router. Choose Network > VPN and click Configure. Select Headquarter and click Next.
Page 85
Cookbook Configuration Select Branch and click Next. Select IPsec and click Next.
Page 86
Cookbook Configuration Configure IPsec basic information and click Next.
Page 87
Cookbook Configuration Click Finish. (4) IPsec uses UDP ports 500 and 4500. Map UDP ports 500 and 4500 on the egress of the HQ to UDP ports 500 and 4500 of the LAN router respectively. Map UDP port 500. ip nat inside source static udp 10.0.0.1 500 1.1.1.1 500...
Check whether the HQ router and branch router can access each other. Integrating the NBR Device with Ruijie Cloud Application Scenario By integrating Ruijie Cloud and the router, the portal template, voucher, account, one-click and SMS authentication method can be synchronized to the router, which can enhance local authentication performance.
Synchronizing Voucher/Account Login to a Router Procedure (1) Connect the router to Ruijie Cloud, and create a voucher and an account on Ruijie Cloud. (2) Access Ruijie Cloud, choose Configuration > Authentication > Captive Portal, select the group and add...
Page 90
Cookbook Configuration (3) Click Synchronize to synchronize the captive portal from Ruijie Cloud to the router.
Page 91
Cookbook Configuration Log in to the router, choose User > Local Auth, and enable Auth integration with Cloud.
Page 92
Cookbook Configuration Log in to the router and choose User > User. Users synchronized from Ruijie Cloud (voucher and account) will be displayed. Log in to the router, choose User > Local Auth > Auth Policy > Add Policy, and set the portal template and IP range.
Cookbook Configuration (7) Verification Connect to the network with the account login. This account status is activated on Ruijie Cloud after login. 3.9.2 Synchronizing Voucher/Account Login to a Router Procedure Connect the router to Ruijie Cloud.
Page 94
Cookbook Configuration (2) Access Ruijie Cloud, choose Configuration > Authentication > Captive Portal, select the group and add the captive portal template, and set Login Option to One-click. Click Synchronize to synchronize the captive portal from Ruijie Cloud to the router.
Page 96
Cookbook Configuration Log in to the router, click User > Local Auth, and enable Auth integration with Cloud Log in to the router, choose User > Local Auth > Auth Policy > Add Policy, and set the portal template and IP range.
3.9.3 Synchronizing Voucher/Account Login to the NBR Device Procedure (1) Connect the router to Ruijie Cloud, and add/delete the voucher/account, which should be synchronized to the router. (2) Enable or disable seamless authentication on the router. There are three seamless authentication options, which are Disable, Seamless MAC bypass and Browser-...
Cookbook Configuration (3) Verification After a user goes online for the first time, it will connect to the network automatically next time without authentication. 3.10 Local Web Authentication Application Scenario LAN users access the Internet through the NBR router. ...
Page 99
Cookbook Configuration NBR device Gi0/0 Prerequisites Perform wizard-based setup to ensure that LAN users can successfully access the WAN. Select the internal Web authentication server function in the real-name Internet access policy. Note If advertisement push is enabled, the entered advertisement address cannot contain the character "?". ...
Page 100
Cookbook Configuration (2) Add a user to be authenticated: Click a user group in the user organization on the left, add a user (IP range) to the user group, and configure the username and password, as shown in the following figure. (3) A user added successfully is displayed in the user list, as shown in the following figure.
Page 101
Configuration (4) The user configuration method on the CLI is as follows: #Add a user named ruijie under the root directory, set the password to 111, and configure only web authentication for the account. Ruijie(config)# subscriber static name "ruijie" parent "/" password 111 Ruijie(config)# subscriber allow "ruijie"...
Cookbook Configuration 3.11 AD Domain Integration Application Scenario A server running Active Directory Domain Service (AD DS) is called a domain controller. It authenticates and authorizes all users and computers in a Windows domain network. That is, it assigns and enforces security policies for all computers and installing or updating software.
Page 103
Cookbook Configuration Procedure (1) Choose User > Local Auth > Auth Server and add an AD domain server on the router. (2) Edit the LDAP server. In this case, the Search API is: OU=WirelessUser,DC=taclab,DC=local. (3) Check the connectivity between the router and LDAP server.
Page 104
Cookbook Configuration (4) Synchronize the account to the router. (5) Configure an authentication policy on the router.
Page 105
Cookbook Configuration (6) Verification Connect a device to the network. The authentication page will be displayed. A user can log in with the AD account.
Cookbook Configuration 3.12 Firewall The firewall feature can detect multiple types of network-layer attacks and take measures based on the configured policy to protect the internal network from malicious attacks, thereby ensuring the normal operation of the internal network. Note ...
Cookbook Configuration 3.12.1 Attack Defense Configuration The router is usually deployed on the intranet egress. Both normal service traffic and malicious attack traffic pass through the router. You can enable the attack defense function and configure corresponding policies to detect and block the attack traffic passing through the router, ensuring the safety of the internal network. Attack defense configuration supports the protocol policy, zone policy, and global defense policy, which are prioritized in a decreasing order.
Page 109
Cookbook Configuration (3) After global defense policy learning is completed, click Apply learning results. Adjust the threshold based on the network conditions and learning results. (4) Click OK after the configuration is completed.
Page 110
Cookbook Configuration 3. Protocol Policy Protocol policies can defend against attacks for vulnerabilities of the protocol operating mechanism. The device will filter protocol packets with attack characteristics if the corresponding protocol is enabled. Procedure (1) Choose Firewall > Attack Defense Config > Protocol Policy. (2) Click to enable the defense policy as required to make the specified policy take effect.
Page 111
Cookbook Configuration (4) Select policy configuration mode as required and click Finish. (5) If you select Auto Learning for the policy configuration mode, follow the procedure to configure the policy. If you select Manual Config, you can skip the procedure. Click Apply learning results after leaning to enter the Apply learning results page.
Page 112
Cookbook Configuration Configure the threshold based on the learning results and the actual conditions of the defense zone. Note As the traffic monitoring function consumes some of device performance. You are advised to disable the traffic monitoring function after the defense zone policy works smoothly to ensure that the device can achieve the maximum service processing capacity.
Page 113
Cookbook Configuration Note As the traffic monitoring function consumes some of device performance. You are advised to disable the traffic monitoring function after the defense zone policy works smoothly to ensure that the device can achieve the maximum service processing capacity. (7) (Optional) For a trusted source IP address, you can add it to the whitelist to bypass the detection of the device and the traffic of this source IP will not be affected.
Page 114
Cookbook Configuration (8) (Optional) For an untrusted source IP address, you can add it to the blacklist. The traffic to or from the blacklisted client will be blocked by the device. Click Config of the blacklist to access the Configure Blacklist page, enter the client IP address, and click Add.
Cookbook Configuration (9) (Optional) Click Config of the attack log to enable logging and printing of the specified type of policy. Select the log types as required, and click OK. 3.12.2 Security Zone Configuration A security zone is a logical concept that the objects in a security zone have same security requirements, security access control, and border control policies.
Page 116
Cookbook Configuration The security zones of the same priority cannot access each other. If the zone policy and the global policy are configured, the device will process the packets based on the access control rule of the zone policy and the global policy. Otherwise, the device will process the packets based on the default access policy.
Page 117
Cookbook Configuration IP-based Security Zone After the IP addresses are grouped into a security zone, when a packet reaches the device, the device will identify the source IP address and the destination IP address of the packet, match the IP address with the ACLs associated with the security zone to determine the source security zone and the designation security zone which the packet belongs to, and then forward or block the packet according to the policy between the security zones or the default access control rule.
Page 118
Cookbook Configuration (3) Select IP Address and click OK. (4) Click Add to access the Create IP-based Security Zone page. (5) Enter the parameters of the IP-based security zone and click OK.
Page 119
Cookbook Configuration Parameter Description Security Zone Name The unique identifier of the security zone. Description The description of the security zone Indicate the client IP range of the security zone. You can enter a single IP address Protected Client (example: 1.1.1.1), a subnet or mask length (example: 1.1.1.0/24), a subnet or mask (example: 1.1.1.0/255.255.255.0) or any.
Page 120
Cookbook Configuration Parameter Description Allow Intra-zone Select whether the IP addresses in the security zone are allowed for intra-zone Communication communication. 3. Global Policy Configuration The global access policy is used to control whether to allow the intra-zone communication, whether to allow the communication between security zones of the same priority, whether to generate a log when connections are established and canceled after the security zone policy is matched, and whether to generate a log when the packet is discarded due to the violation of the security zone access policy.
Page 121
Cookbook Configuration (1) Choose Firewall > Security Zone Config > Zone Policy Config. (2) Click Add to access the Add Policy page. (3) Configure the policy parameters according to the following information and click OK. Configuration Item Parameter Control the access between the designated source security zone and the Source Security Zone destination security zone.
Page 122
Cookbook Configuration Configuration Item Parameter Access control for the packets to the designated destination IP address. Click IP Dest IP Resource Configuration to add a new IP address object. For details, see 1.4 IP Resource Configuration. Access control for the packets from the selected service type. Click Service Resource Configuration to add a new service object.
Page 123
Cookbook Configuration Configuration Item Parameter Control the access between the designated source security zone and the Source Security Zone destination security zone. Control the access between the designated source security zone and the Dest Security Zone destination security zone. Description The description of the zone policy.
Page 124
Cookbook Configuration Configuration Item Parameter Access control for the packets from the designated source IP address. You can enter a single IP address (example: 1.1.1.1), a subnet or mask length Source IP Range (example: 1.1.1.0/24), a subnet or mask (example: 1.1.1.0/255.255.255.0) or any.
Page 125
Cookbook Configuration Click Add ACL to access the Add ACL page. Select the ACL type, enter the ACL name or the ACL number and click OK.
Page 126
Cookbook Configuration Select the created ACL and click Add ACE to access the Add ACE page. Configure the ACE according to the following information and click OK.
Page 127
Cookbook Configuration Configuration Item Parameter Access Control Access control for the packets matching the ACE. Indicate the time period in which the ACE takes effect. Click the drop-down list Time Period box to select a time period. Access control for the packets from or to the designated IP address. You can enter a single IP address (example: 1.1.1.1), a subnet or mask (example: IP Address 1.1.1.0/255.255.255.0) or a wildcard (example: 1.1.1.0/0.0.0.255).
Cookbook Configuration Click Finish. 3.12.3 Defense Zone Monitoring 1. Zone Running Status The function is used to display the basic information and traffic statistics of each defense zone. Prerequisite...
Page 129
Cookbook Configuration The defense zone policy is configured. For details, see 1.1.4 Zone Policy. Procedure (1) Choose Firewall > Defense Zone Status > Zone Running Status. (2) Select a defense zone, and its basic information, running status and traffic statistics will be displayed on the right of the page.
Cookbook Configuration Prerequisite Global defense is configured. For details, see 1.1.2 Global Defense. Procedure (1) Choose Firewall > Defense Zone Status > View Firewall Traffic. (2) Click Global Defense Statistics to view defense traffic statistics. (3) Click Statistics of Overall Discarded Packets to view the statistics of the discarded packets based on the defense policy.
Page 131
Cookbook Configuration (4) Click OK. 2. IP Range IP range indicates a range of multiple IP addresses, such as 1.1.1.1 to 1.1.1.10. The administrator can configure a proper name for an IP range to identify the device with the IP address within the range quickly. Procedure (1) Choose Firewall >...
Page 132
Cookbook Configuration 3. Subnet IP Address For example, 1.1.1.0/255.255.255.0 is a subnet IP address. The administrator can configure a proper name for a subnet IP address to identify the subnet quickly. Procedure (1) Choose Firewall > IP Resource > Subnet IP. (2) Click Add.
Cookbook Configuration (3) Enter the name and description, select the members of the IP group as required, and click Add. (4) Click OK. 3.12.5 Service Resource Configuration The service resource is represented by protocol types and features. Protocol features are used to match the upper layer protocols carried in the packets, such as the source port and the destination port of TCP and UDP, the ICMP message type or message authentication code.
Page 134
Cookbook Configuration (3) Enter the name and description. Select the protocol, configure the parameters of the protocol and click OK. Note The parameters may vary with the protocols. The parameters displayed on the webpage prevails. 2. Service Group Configuration A service group is a collection of multiple services. You can add the custom or predefined services with the same defense requirements to a group for convenient management.
Page 135
Cookbook Configuration (4) Click OK. 3. Predefined Service The function is used to display predefined services. Procedure (1) Choose Firewall > Service Resource > Predefined Service. (2) (Optional) Select a query item or enter a keyword and click Search to search for the service information you need.
Cookbook Upgrade and Maintenance Upgrade and Maintenance Logging In 4.1.1 Logging In Through the Web Management System The web management system provides a visualized graphical management interface, which is friendly, easy to use, and can achieve efficient configuration and management. Configuration Environment Requirements The client (PC or mobile terminal) used for logging in to the web management system must meet the following environmental requirements:...
Page 137
Cookbook Upgrade and Maintenance Item Default Setting User name/Password admin/admin Figure 4-1 Topology through LAN access Procedure (1) Connect the LAN0 (Gi0/0) port of the router to the management PC using an Ethernet cable. (2) Configure an IP address in the same network segment as the router's LAN0 (Gi0/0) interface IP so that the management PC can access the router.
Page 138
Cookbook Upgrade and Maintenance Note If the IP address of LAN0 (Gi0/0) port is modified, the URL for web access will be changed to http://X.X.X.X or https://X.X.X.X:4430, where X.X.X.X is the new IP address. If the web access port of the device is modified to a port other than port 80, the URL for web access must be added with a port number.
Page 139
Cookbook Upgrade and Maintenance (4) After entering the user name and password, click Log In to enter the homepage of the web management system. The default user name and password are admin. Note If you forget your user name or password, handle this problem by referring to Configuring a Password.
Cookbook Upgrade and Maintenance 4.1.2 Logging In Through the Console Port Application Scenario To enter the CLI for configuration management, you can connect the console port (configuration port) of the router using a console cable, and enter the CLI using software such as HyperTerminal or SecureCRT. The RG- NBR-E series router allows management through the console port by default.
Page 141
Cookbook Upgrade and Maintenance Figure 4-4 Console port on the device Console cable ○ Type 1: One end of the cable is a 9-pin COM port, and the other end is an RJ45 connector. ○ Type 2: One end of the cable is an RJ45 connector, and the other end is a USB connector.
Page 142
Cookbook Upgrade and Maintenance Install SecureCRT or other terminal emulators on the management PC. Procedure Figure 4-5 Cable connection diagram (1) Connect the COM port of the management PC and the console port of the router with a console cable. (2) Check the identified COM port on the management PC.
Cookbook Upgrade and Maintenance (4) Enter the device CLI page. Press Enter and enter the user name and password (admin/admin by default) as prompted. If you have changed the user name and password and forget the new user name and password, recover the user name and password by referring to Configuring a Password.
Page 144
Cookbook Upgrade and Maintenance Check Telnet and SSH access restrictions. To ensure security, WAN users are not allowed to log in to the router through Telnet by default. For a WAN user to log in to the router, you can uncheck "WAN User" and click Save to save the change. ...
Page 145
Cookbook Upgrade and Maintenance Ensure the connectivity from the management PC to the router’s interface, that is, the management PC can ping the IP address of the router’s interface: Connect the management PC and the LAN0/MGMT (Gi0/0) port of the router with a network cable. Configure an IP address for the management PC, which must be in the same network segment as the IP address of the router’s interface.
Cookbook Upgrade and Maintenance hold down the key (with Windows logo) and press (1) On the management PC, on the keyboard to open the run dialog box. Enter cmd and click OK to enter the command prompt of the management PC. (2) Enter the telnet IP address of the router’s interface command and press Enter.
Page 147
Cookbook Upgrade and Maintenance (1) Open the web management system login page. (2) Click Forgot password?. (3) Follow the prompts on the page to restore factory settings of the router. Then log in to the web management system with the default user name and password and restore the configurations. The default username and password are admin.
You can upgrade the device through local upgrade if the network is abnormal and the system cannot automatically obtain the latest version, or when the upgrade rollback is performed. Prerequisites Download the latest upgrade file from the official website of Ruijie Networks to a local PC. Procedure (1) Log in to the web management system.
Page 149
Cookbook Upgrade and Maintenance (4) Click Upgrade to start upgrading. Do not perform any operation during upgrade. After the message indicating successful upgrade is displayed, click OK. Follow-up Procedure Check the software version and other information on the Home > Dashboard page to check whether the upgrade is successful.
Cookbook Upgrade and Maintenance (3) If the system detects a new software version, you are asked to upgrade the version. Click Upgrade to complete the upgrade. Backing Up the Configuration and Resetting the NBR Device 4.4.1 Exporting Configuration Files You can export the current configurations of the router to a local PC for backup.
Cookbook Upgrade and Maintenance (3) Click Export Config. (4) Select the path for storing configuration files and click Save. 4.4.2 Importing Configuration Files You can restore the system to the specified configuration state by importing the backup configuration files into the router.
Page 152
Cookbook Upgrade and Maintenance (1) Log in to the web management system. (2) Choose Advanced > System > Backup. (3) Click Choose File and select the backup configuration files to be restored from local PC. (4) Click Import to start importing. Do not close or refresh the web page until the import is complete.
Cookbook Upgrade and Maintenance (5) The imported configurations will take effect after the router is restarted. After the import is completed, you are asked whether to restart the router now. Click OK to restart the router. Restoring Factory Settings Restoring factory settings will result in deleting all the current configurations of the router. Caution If you restore factory settings, the existing configurations will be deleted.
Cookbook Upgrade and Maintenance (3) Click Reset. Follow-up Procedure The router will restart automatically. After the restart, all configurations of the router will be restored to the factory settings. 4.5.2 One-Click Reset Through Reset Button During device maintenance in the equipment room, you can restore the router to factory settings through the Reset button on the router.
Page 155
Cookbook Upgrade and Maintenance Figure 4-7 Reset Hole Follow-up Procedure The router will restart automatically. After the restart, all configurations of the router will be restored to the factory settings.
Need help?
Do you have a question about the Reyee RG-NBR-E Series and is the answer not in the manual?
Questions and answers