Advertisement
1 General
All cabinets are fabricated from 16 gauge steel. The cabinet consists of two basic components: a backbox and a locking door. The backbox and door
are sold separately.
The key-locked door is provided with a pin-type hinge, two keys, and the necessary hardware to mount the door to the backbox. The backbox has been
engineered to provide ease-of-entry for the installer. Knockouts are positioned at numerous points to let the installer bring conduit into the enclosure
easily. Doors can be mounted on the left or right-hand side. The same hinge works in both configurations, so that this choice can be made in the field.
The door opens 120°.
Cabinets are available in five sizes: A, B, C, D, and E. The outside dimensions are noted on each enclosure diagram. "A" size accommodates one chas-
sis and two 26 AH batteries. "B" size accommodates two chassis and two 26 AH batteries. "C" size accommodates three chassis and two 26 AH bat-
teries. "D" size accommodates four chassis and two 26 AH batteries. "E" size accommodates five chassis and two 26 AH batteries. A trim ring option
is available for semi-flush mounting.
2 Before You Begin
3 Door Assembly Instructions
Hinges can be either left or right hand mounted. Doors are shipped for left hand mounting. For right hand mounting, remove cladding (trim on door
edges) by removing the #8 keps nuts on the inside of the door frame. Pull cladding outward and down to remove. This will expose the hole for the key-
lock. Rotate the cladding to opposite sides and reinstall.
1.
Install the hinge brackets into the top, middle (if applicable), and bottom positions of the side of the backbox to be hinged. Secure the brackets to
the studs in the backbox with the #8 hex nuts provided.
2.
Insert the top door hinge into the top hinge bracket and secure by sliding a hinge pin down from the top.
3.
Secure the middle (if applicable) and bottom hinges with hinge pins.
4.
Install the lock tab on the opposite side of the hinges. Insert lock tab into backbox over the PEM studs on the inside. Secure with two #8 hex nuts.
5.
Install the snap-in lock mechanism by pressing it into the hole on the front of the door, clicking it into place.
The option of mounting doors in either a left/right hand configuration will aid in installation and
service when two control panels are mounted in a confined area or side by side (as shown). In this
manner the doors can be opened "barn door" style, permitting an open work space.
IMPORTANT: Attach the hinges to the backbox before any equipment is installed. With chassis
installed, space is limited.
NOTE: When the door is left-hand mounted, the dress panel cannot be opened when the
door is at less than a 90° angle to the cabinet. If you are using the left-hand mounting option,
be sure that the door can open at least 120°. This is especially important if the cabinet is to be
mounted in a closed area, such as a closet or utility room. When wiring annunciators or option
cards on the dress panel, make sure to also allow extra wire so the dress panel can open
fully.
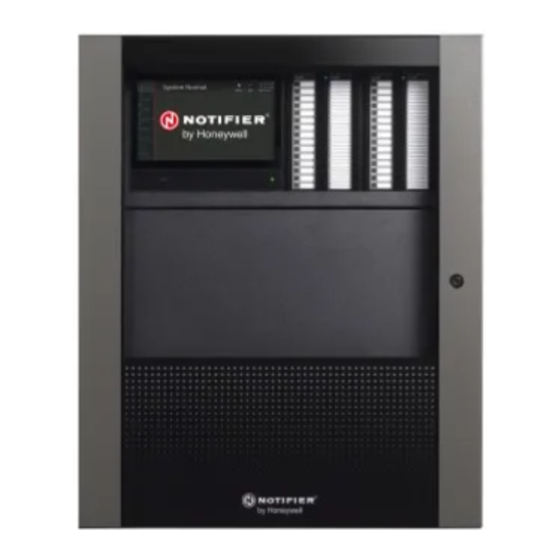
CAB-5 Series Cabinets
Product Installation Document
PN LS10244-000GE-E:A 10/13/2021 ECN: 16475
hinge pin
hinge bracket secured
by two #8 keps nuts
lock tab secured by two
#8 keps nuts inside backbox
lock tab
Advertisement
Table of Contents

Subscribe to Our Youtube Channel
Related Manuals for Notifier CAB-5


Summary of Contents for Notifier CAB-5
- Page 1 CAB-5 Series Cabinets Product Installation Document PN LS10244-000GE-E:A 10/13/2021 ECN: 16475 1 General All cabinets are fabricated from 16 gauge steel. The cabinet consists of two basic components: a backbox and a locking door. The backbox and door are sold separately.
- Page 2 CAUTION: LOCK INSTALLATION THE LOCK MUST BE INSTALLED IN THE LOCKED POSITION WITH THE KEY REMOVED. THE INSTALLATION PICTURE BELOW SHOWS THE PROPER LOCK POSITION FOR A LEFT-HAND MOUNTED CABINET DOOR. Open The lock mechanism as viewed in a left-hinged mounting application. The lock would be placed in the right side of the door.
- Page 3 “C” Size (Backbox holds three rows of equipment plus batteries) “D” Size (Backbox holds four rows of equipment plus batteries) CAB-3/CAB-4 Series Cabinets Product Installation Document — P/N LS10244-000GE-E:A 10/13/2021...
- Page 4 “E” Size (Backbox holds five rows of equipment plus batteries 24.00” (61.0cm) 21.43” (54.4cm) 15.50” (39.4cm) 8.37” (21.3cm) 2.44” (6.2cm) 2.00” 2.00” (5.1cm) (5.1cm) 0.87” (2.2cm) Knockouts: Inner: 0.875”(2.223) Outer: 1.125” (2.858) 2.60” (6.6cm) Knockouts on top of cabinets 5 Backbox Mounting Mark and pre-drill holes for the top two keyhole mounting bolts.
- Page 5 0.250” after installation (0.635cm) 0.500” (1.27cm) 0.500” (1.27cm) Keyhole dimensions NOTE: Use the CHS-ADP in conjunction with the appropriate chassis when installing older equipment in the CAB-5 Enclosure. CAB-3/CAB-4 Series Cabinets Product Installation Document — P/N LS10244-000GE-E:A 10/13/2021...
Need help?
Do you have a question about the CAB-5 and is the answer not in the manual?
Questions and answers