Advertisement
Advertisement
Table of Contents

Related Manuals for Whadda WPI322


Summary of Contents for Whadda WPI322
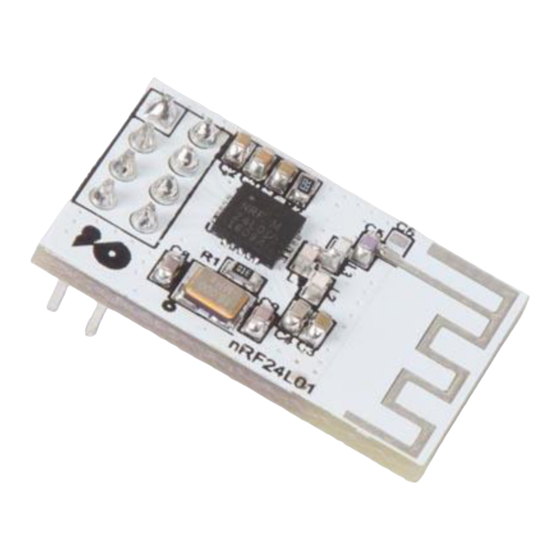
- Page 1 USER MANUAL 2.4 GHz NRF24L01 wireless transceiver module WPI322 whadda.com...
-
Page 2: Safety Instructions
If in doubt, contact your local waste disposal authorities. Thank you for choosing Whadda! Please read the manual thoroughly before bringing this device into service. If the device was damaged in transit, do not install or use it and contact your dealer. -
Page 3: Product Overview
RED Declaration of Conformity Hereby, Velleman Group nv declares that the radio equipment type WPI322 is in compliance with Directive 2014/53/EU. The full text of the EU declaration of conformity is available at the following internet address: www.velleman.eu. - Page 4 Example Connection ® You will need two Arduino boards and at least two RF modules, one to transmit and the board’s ® ® other to receive. If you use a standard Arduino board, you should use the Arduino 3.3 V pin (VDD3V3) to provide power (the nRF24L01 module has 1.9-3.6 V power voltage level).
- Page 5 Example This is an example of how to use the RF24 library to control an LED wirelessly from another Arduino® using two NRF24L01 modules. Start by wiring up two Arduino®s with the NF24L01 according to the provided schematic. Connect on one Arduino® a button to digital pin 2. Connect on the other Arduino®...
- Page 6 // Topology // Single radio pipe address for the 2 nodes to communicate. const uint64_t pipe = 0xE8E8F0F0E1LL; // Role management // Set up role. This sketch uses the same software for all the nodes in this // system. Doing so greatly simplifies testing. The hardware itself specifies // which node it is.
- Page 7 // Print preamble Serial.begin(115200); // Begin serial communication for debugging printf_begin(); printf("\n\rRF24/examples/led_remote/\n\r"); printf("ROLE: %s\n\r",role_friendly_name[role]); // Setup and configure rf radio radio.begin(); // Open pipes to other nodes for communication // This simple sketch opens a single pipes for these two nodes to communicate // back and forth.
- Page 8 digitalWrite(button_pin,HIGH); // Turn LED ON until we start getting button responses pinMode(led_pin,OUTPUT); led_state = HIGH; digitalWrite(led_pin,led_state); // Loop void loop(void) // Remote role. If the state of any button has changed, send the whole state of // all buttons. if ( role == role_remote ) // Get the current state of buttons, and // Test if the current state is different from the last state we sent bool different = false;...
- Page 9 // LED role. Receive the state of all buttons, and reflect that in the LEDs if ( role == role_led ) // if there is data ready if ( radio.available() ) // Dump the payloads until we've gotten everything while (radio.available()) // Fetch the payload, 1 byte, and put result in button_state variable ( &button_state indicates address of button_state variable) radio.read( &button_state, 1 );...
- Page 10 Modifications and typographical errors reserved - © Velleman Group nv. WPI322_v01 Velleman Group nv, Legen Heirweg 33 - 9890 Gavere...
Need help?
Do you have a question about the WPI322 and is the answer not in the manual?
Questions and answers