
Related Manuals for highmore Tron HM-GD010-001


Summary of Contents for highmore Tron HM-GD010-001
- Page 1 Tron Motorized Height Adjustable Gaming Desk User Manual Product Ref-HM-GD010-001 Imported By: Forward Industries, 33401. U.S.A Issue 1 - 09/09/21...
-
Page 2: Important Safety Instruc�Ons
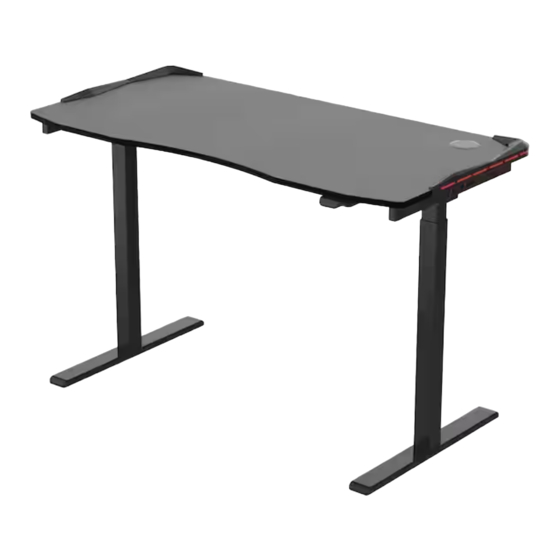
110lbs. Power Supply: AC adapter, 100-240V~ 50/60Hz Service Environment: 32-104°F Speed: 25mm(1inch)/s Input: 100-240V~ 50-60HZ Product Dimensions: 47.5"X23.7"X(28.7"-47.6") Ba�ery Type for Remote: AAA Ba�ery Important Safety Instruc�ons When using an electrical furnishing, basic precau�ons should always be followed, including the following: Read all instruc�ons before using (this furnishing). -
Page 3: Servicing Of Double-Insulated Products
11. We recommend you keep the original package of the equipment if necessary in case of the future use in transporta�on. 12. Do not use outdoors. 13. Unplug from outlet before pu�ng on or taking off parts. 14. Use this furnishing only for its intended use as described in these instruc�ons. Do not use a�achments not recommended by the manufacturer. - Page 4 Tabletop Qty 1 (47.2*23.6*2.2") Leg Qty 2 Foot Qty 2 Controller Qty 1 (25.8*2.0*2.0") (23.2*2.4*0.8") (5.0*2.2*1.2") Headphone hook Qty 1 Switch Cord Qty 1 Power Cable Qty 1 (4.4*1.2*2.2") (19.7") (122") Remote Control Qty 1 USB Cable Qty 1 Stand Qty 1 (4.3*2.0*0.6") (84.6*0.6*7.5") (6.6*4.8*3.5")
- Page 5 (0.2*0.2*3.15”) (0.16*0.16*2.44”) 3M Cable Clip Qty 4 Allen key Qty 1 M6 Screw Qty 4 (M6*0.47") (0.69*2.56”) M6 Screw Qty 8 (M6*0.63") St4.2 Screw Qty 2 (St4.2*0.63")
- Page 6 STEP 1 Assemble controller to the underside of , using the screws provided with the controller. Screws come with controller Front Back 5x5 Qty 1 SHOWN UPSIDE DOWN...
- Page 7 STEP 2 Assemble legs as described. Front Back Important Screws Pre-assembled Insert Insert the hexagon Shape rod in the Once inserted, rotate the leg to engage the fixing end of the leg into the hexagon screws as shown. shape hole in the motor housing. Fully �ghten all four screws Fit two more screws 4x4 Qty 1...
- Page 8 STEP 3 Assemble feet using fixings legs Front Back 4x4 Qty 1 M6 Screw Qty 8 SHOWN UPSIDE DOWN...
- Page 9 STEP 4 Connect switch cord to power adaptor. Connect power cable to power adaptor. Connect switch cord to the DC port on controller SHOWN UPSIDE DOWN STEP 5 Connect the motor cable to the M1 port on controller Motor cable Motor cable Use the 3M Cable Clip...
- Page 10 STEP 6 Assemble headphone hook to the underside of table top using screws Back 5x5 Qty 1 Front SHOWN UPSIDE DOWN St4.2 Screw Qty 2 STEP 7 With help, carefully turn the desk upright. Warning the desk is heavy, li� with care. Assemble stand shown.
- Page 11 STEP 8 Assembly is complete...
-
Page 12: Remote Control Instructions
Height Adjustment/Controls Key bu�on Down bu�on Up bu�on Up and DOWN Func�on Press the “▲”or “▼” bu�on to raise or lower the desk top. Reset Func�on (1) Hold the “▼”bu�on for more than 5 seconds to enter reset mode when at the lowest posi�on. The reset is not completed un�l the li�ing system reaches the bo�om, then rebounds to stop. -
Page 13: Troubleshooting
Troubleshooting The following �ps will help you detected and eliminate the comman faults and errors. If the fault you met is not listed below, please contact our a�er sales team. Only the manufacturer can inves�gate or resolve faults or errors not listed below.
Need help?
Do you have a question about the Tron HM-GD010-001 and is the answer not in the manual?
Questions and answers