Advertisement
This receiver supports Cebek issuers TL-5 / TL-6, TL-11/TL-12, TL-13/TL-14 and TL-15/TL-16.
Supports setting security code from 13,122 different combinations.
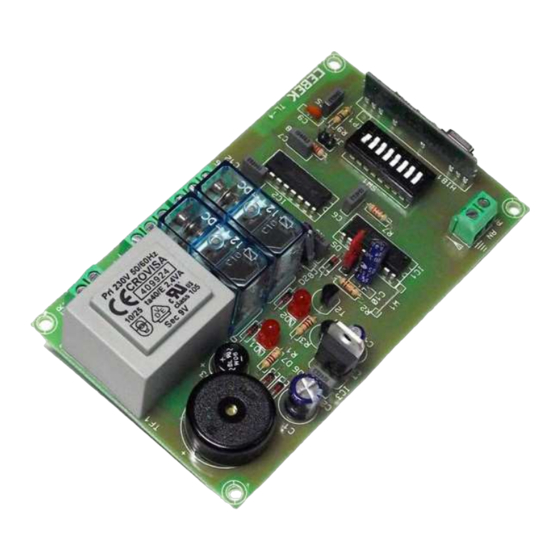
Includes micro code selection, antenna output, LED indicator and output terminals.
POWER. From 230 V. C. A. Using a suitable socket and a network cable, connect it to the input terminal of 230 V. Install a fuse and a switch that are
necessary for the protection and safety, as reflected in the CE standard.
OPERATION. First, is the security code setting. All remotes Cebek approved work at frequency 433.92 MHz therefore incorporate battery micro-switches,
INT-0, which allow you to configure custom security code for each command. Have up to 13,122 different combinations to code your remote.
In the drawing corresponding to the micro-switches battery INT-0, check the availability of 8 switches, each of which could be placed in three different
positions, - / 0 /. Change comes standard provision modifying switches. Note that for there to be communication with the receiver, you must set this to
the same code that is used in the transmitter
After setting the sender and the receiver with the desired code, activate the power. Then press the transmitter button while you hold the output will remain
connected, when you release it, the output is disconnected.
Il prend en charge les émetteurs Cebek TL-5 / TL-6, TL-11/TL-12, TL-13/TL-14 et TL-15/TL-16.
Prise en charge de la mise code de sécurité à partir de 13,122 combinaisons différentes.
Comprend sélection de micro-code, la sortie de l'antenne, voyant lumineux et des bornes de sortie.
ALIMENTATION. De 230 V. C. A. En utilisant une prise de courant appropriée et un câble réseau, branchez-le à la borne d'entrée de 230 V. Installez un
fusible et un interrupteur qui sont nécessaires à la protection et à la sécurité, comme en témoigne la norme CE.
FONCTIONNEMENT. intégrer des micro-interrupteurs de batterie, RC-0, qui vous permettent de configurer le code de sécurité personnalisé pour chaque
commande. Avoir jusqu'à 13 122 combinaisons différentes de coder votre télécommande.
Dans le dessin correspondant à la batterie micro-interrupteurs INT-0, vérifier la disponibilité de 8 commutateurs, chacun pouvant être placé dans trois
positions différentes, - / 0 /. Le changement vient disposition standard modification commutateurs. Notez que pour qu'il y ait communication avec le
récepteur, vous devez définir ce sur le même code qui est utilisé dans l'émetteur
Après avoir réglé l'émetteur et le récepteur avec le code désiré, activez le pouvoir. Ensuite, appuyez sur le bouton de la télécommande pendant que vous
maintenez la sortie restera connecté, lorsque vous la relâchez, la sortie est déconnectée.
Este receptor es compatible con los emisores Cebek TL-5 /TL-6, TL-11/TL-12, TL-13/TL-14 y TL-15/TL-16.
Admite la configuración del código de seguridad entre 13.122 combinaciones distintas.
Incorpora microrruptores de selección de código, salida de antena, LED indicador de salida y bornes de conexión.
ALIMENTACION . De 230 V. C.A. Utilizando un enchufe adecuado y un cable de red, conéctelo al borne de Entrada de 230 V.
Instale un fusible y un interruptor que son necesarios para la protección y seguridad, tal y como refleja en la norma CE.
FUNCIONAMIENTO. Primero, es la configuración del código de seguridad. Todos los telemandos Cebek trabajan en la frecuencia homologada de
433.92 MHz. Por ello, incorporan una batería de micro-switches, INT-0, que permiten configurar un código de seguridad personalizado para cada mando.
Dispondrá de hasta 13.122 combinaciones distintas para codificar su telemando .
En el dibujo correspondiente a la batería de micro-switches INT-0, comprobará la disponibilidad de 8 switches, cada uno de los cuales podrá situar en
tres posiciones distintas, -/0/ . Cambie la disposición que viene de fábrica modificando los switches . Tenga en cuenta que para que exista la
comunicación con el receptor, deberá configurar a este con el mismo código que haya utilizado en el emisor
Una vez configurado al emisor y al receptor con el código deseado, accione la alimentación . A continuación presione el botón del emisor, mientras lo
mantenga apretado la salida permanecerá conectada, cuando lo suelte, la salida se desconectará.
Antenna Installation. Requires an antenna to emit with maximum power and efficiency. Must be installed before operating the remote, we
recommend the antenna C-0509 and C-0510.
Output Configuration. Addition to control by its corresponding transmitter, TL-6, a remote control receiver channel supports the use of TL5,
TL-11, TL-12, TL-13, TL-14, TL-15 and TL-16.
To control the TL-4 by the TL-5, TL-11, TL-13 and can choose from the two output which is connected to the emitter pressure sufficient if the closure
remove "JP" jumper JP-1 and with it close the JP2 jumper. Choosing a jumper or another can control the corresponding output.
If left unconnected either jumpers, JP1 or JP2, the two outputs are activated at the same time by pressing on the issuer.
REMOTE RECEIVER
RÉCEPTEUR DE TÉLÉCOMMANDE
TELEMANDO RECEPTOR
www.cebek.com
-
sat@cebek.com
TL-4
TECHNICAL CHARACTERISTICS
Supply voltage. ............................ 230 V. AC
minimum consumption. ................ 2W.
Maximal consumption. ................. 3W.
Working frequency . .................... 433.92 Mhz.
Max. by Output. ........................... 3 A.
Measures. ....................................120 x 72 x 28 mm.
weight ......................................... 190 gr.
Din rail.......................................... C-7569
Advertisement
Table of Contents

Related Manuals for CEBEK TL-4


Summary of Contents for CEBEK TL-4
- Page 1 TL-11, TL-12, TL-13, TL-14, TL-15 and TL-16. To control the TL-4 by the TL-5, TL-11, TL-13 and can choose from the two output which is connected to the emitter pressure sufficient if the closure remove "JP" jumper JP-1 and with it close the JP2 jumper. Choosing a jumper or another can control the corresponding output.
- Page 2 TL5, TL-11, TL-12, TL-13, TL-14, TL-15 et TL-16. Pour contrôler le TL-4 par la BA-5, TL-11, TL-13, et le choix entre les deux sorties, qui est relié à la pression de l'émetteur suffit que la fermeture supprimer "JP" cavalier JP-1 et avec elle, fermer le cavalier JP2. Le choix d'un cavalier ou d'une autre peut contrôler la sortie correspondante.
Need help?
Do you have a question about the TL-4 and is the answer not in the manual?
Questions and answers